Posted on

8 Important Tips to Protect and Maintain a Wood Deck

A wood deck is the perfect outdoor extension to your home. When the weather is mild, you can go outdoors to enjoy the sunshine and fresh air.

#1) Remove Leaves and Debris

First and foremost, you should get into the habit of removing leaves, pine straw, tree branches and other fallen debris from your wood deck. Allowing debris such as this to accumulate can cause discoloration while also promoting mold and mildew. Using either a push broom or a leaf flower, try to get into the habit of cleaning your wood deck on a regular basis.

#2) Use a Grease Catcher

When grilling on your wood deck, use a grease catcher to collect the grease. Not all grilled foods produce grease. If you cook vegetables, fish or even chicken, you’ll probably have little-to-no grease. Red meat, on the other hand, produces a fair amount of grease, which can cause stubborn stains when dripped onto a wood deck. Using a grease catcher with your grill, however, will protect your wood deck from such stains.
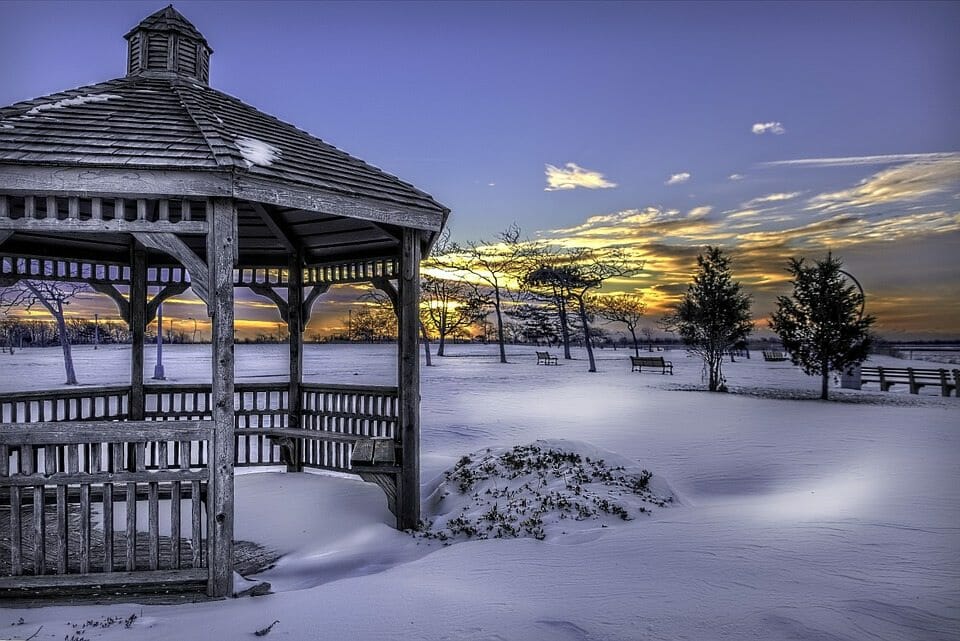
#3) Shovel Snow

If you live in a region that’s prone to snow, be sure to shovel it off your deck. There are several problems associated with a snow-covered deck: it saturates the wood with moisture, contains dirt and debris that may stain the deck, and it prevents you from fully using or otherwise enjoying your deck. Shoveling show isn’t particularly fun, but it’s a necessary step in maintaining a wood deck if you live in a region that’s prone to snow. So, after the winter storm has passed, take a few minutes to shovel the snow off your deck.

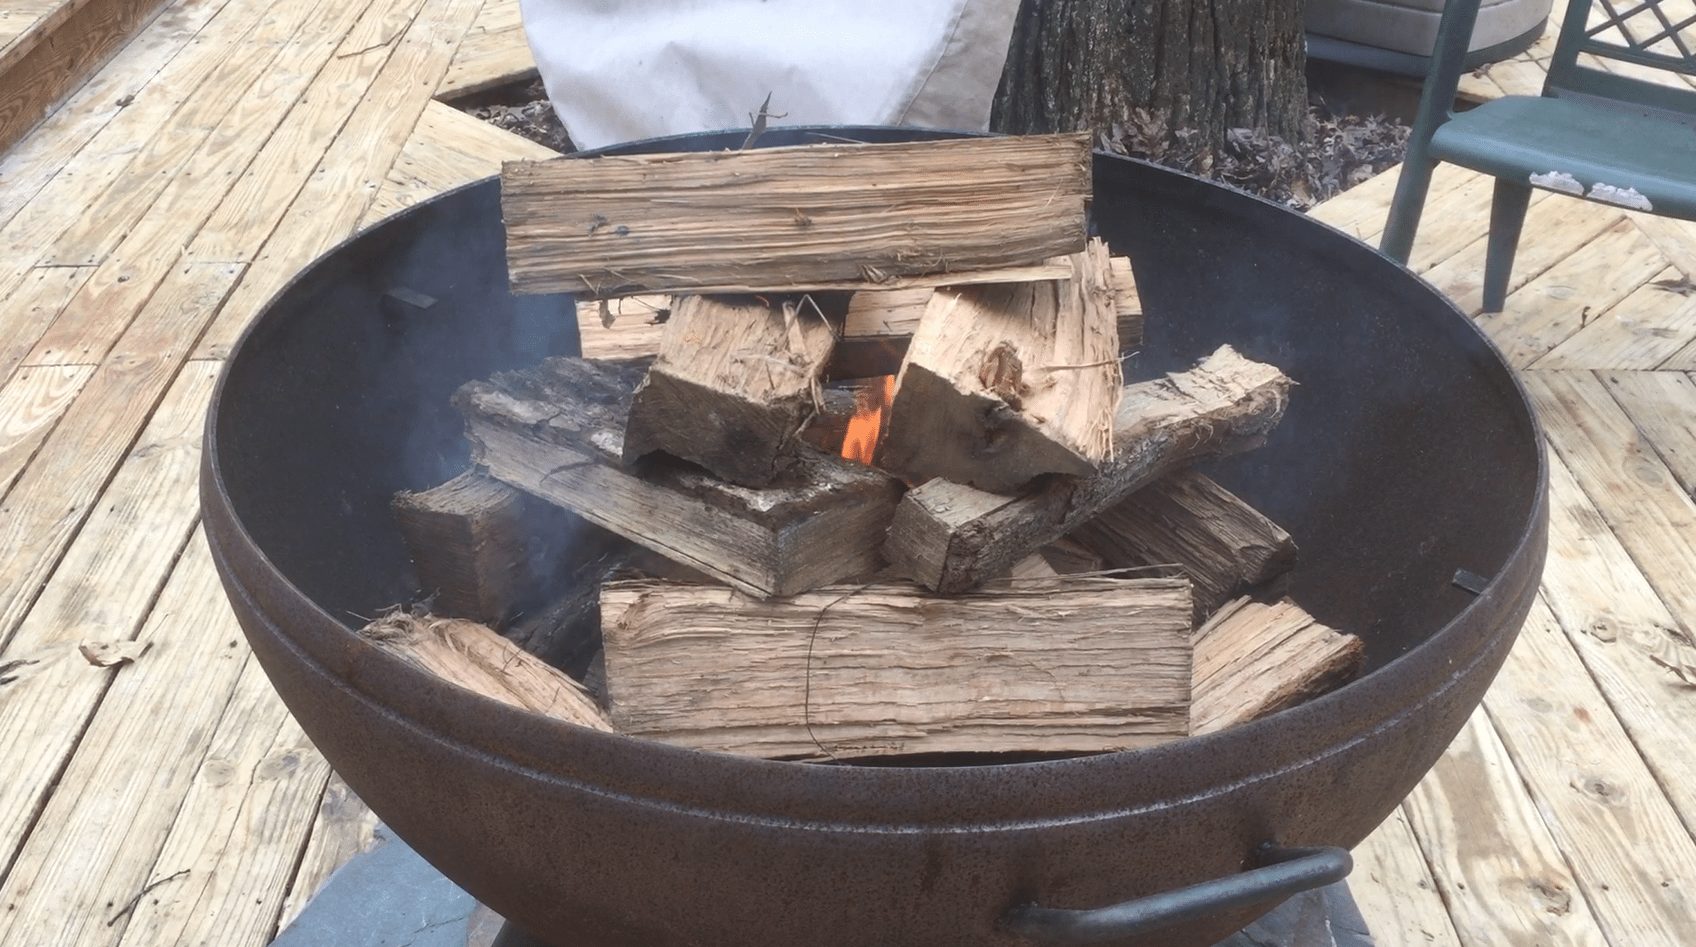
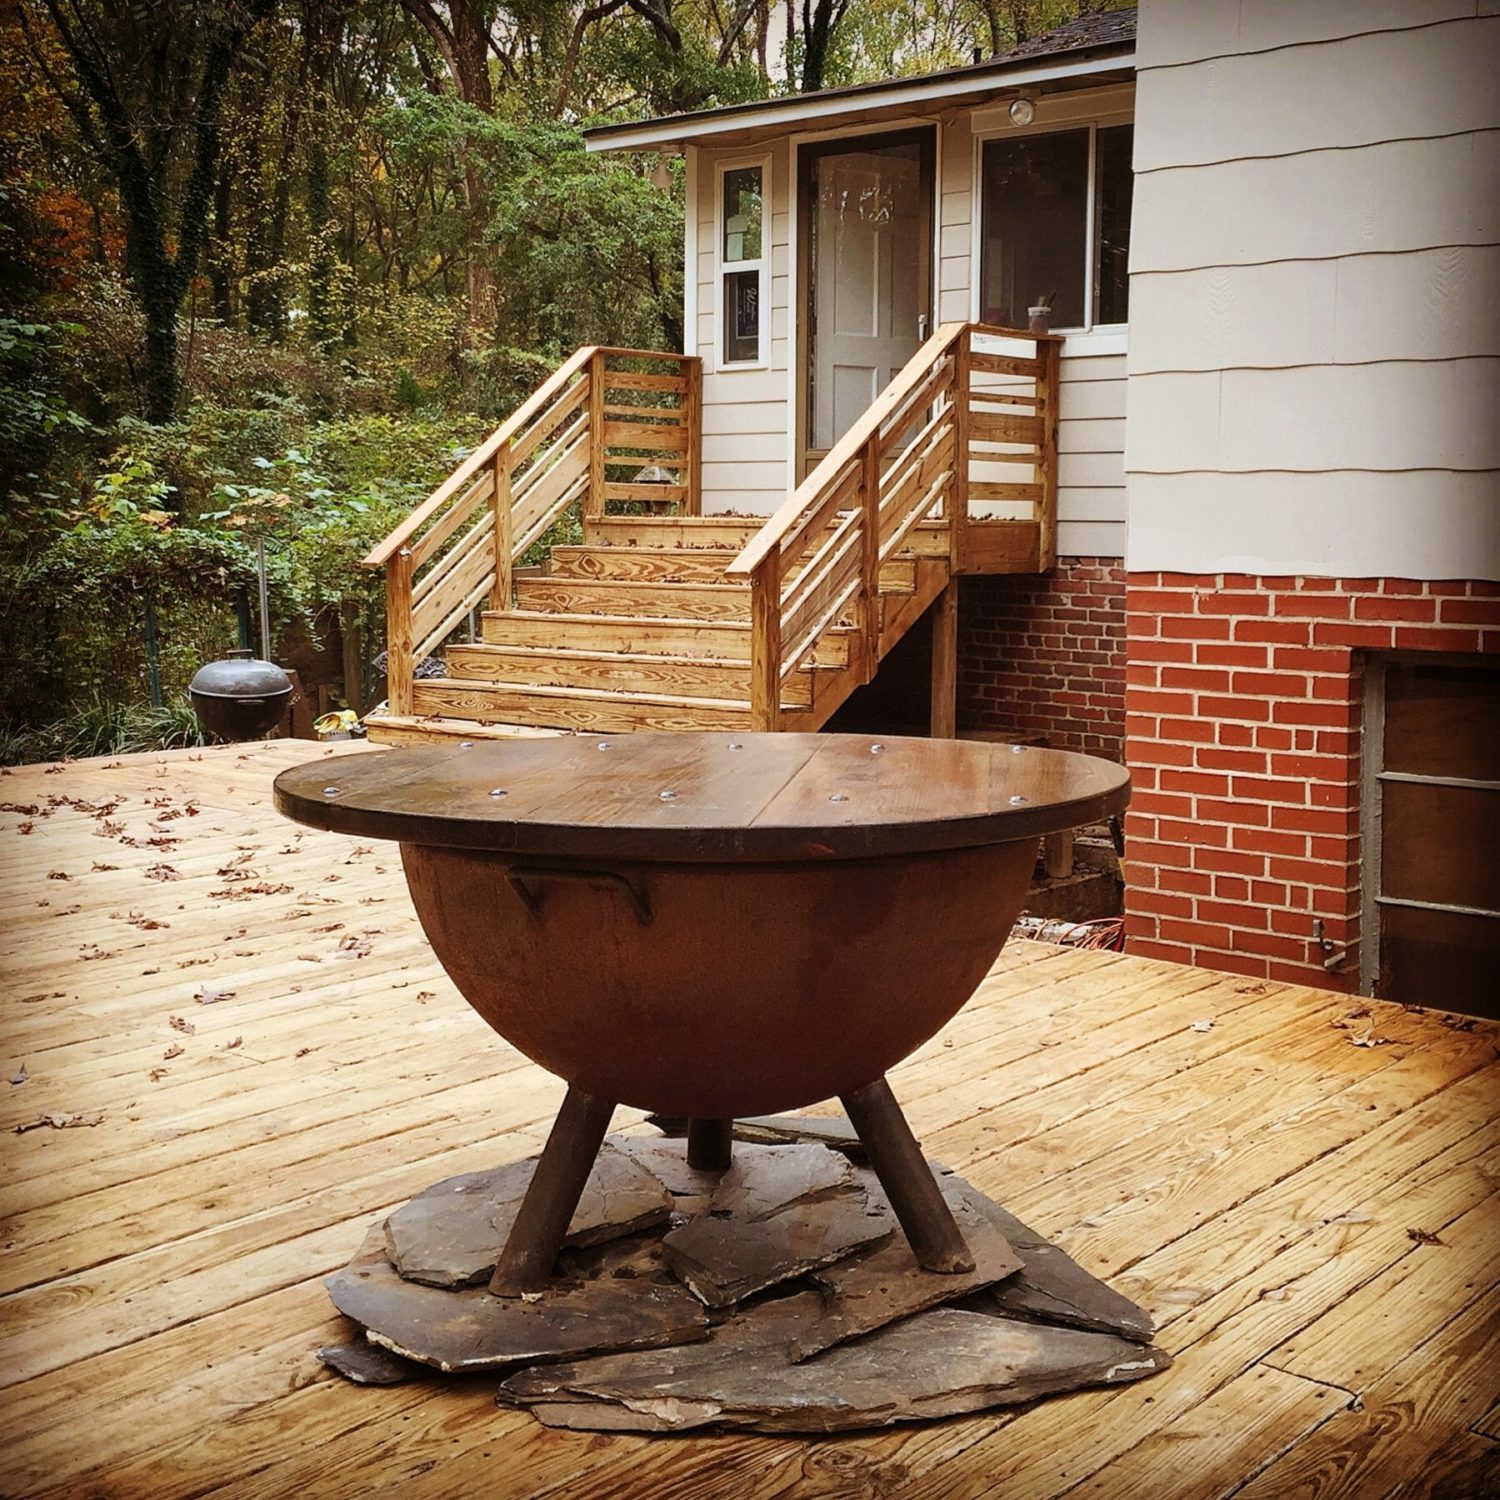
#4) Place Fire Pit on Top of Fireproof Material

Assuming you have a fire pit on your wood deck, you should place some type of fireproof material between it and your deck. Normally, a fire pit shouldn’t cause a wood deck to ignite. It can, however, scorch the bottom if placed directly on it. There are several solutions to protect your wood deck from such damage. You can create a fireproof area on which to place your fire pit using brick pavers, or you can buy a special “fire pit pad.” Either way, you need some type of material or substrate underneath your fire pit to protect your deck.

#5) Inspect for Rotten Planks

When was the last time that you inspected your wood deck for rotten planks? Regardless of species or variety, all types of natural wood are susceptible to rot. Wood contains thousands of small pores that constantly absorb or release moisture. When your wood deck is exposed to moisture — even small amounts of airborne moisture (humidity) — it may cause it to rot. The good news is that a few rotten planks can easily be replaced without demolishing and rebuilding your entire deck. To do so, however, you’ll need to inspect your wood deck regularly; otherwise, rotten planks may go unnoticed.

#6) Pressure Wash

You can only do so much when using a garden hose to clean a wood deck, which is why it’s a good idea to pull out the pressure washer on occasion. With your pressure washer set to 600 to 800 psi, you can revitalize the appearance of your wood deck. The pressurized water will easily remove stubborn dirt, mold, mildew and grime.

Even if you don’t own a pressure washer, you can still rent one from your local home improvement store. Home Depot and Lowes both rent out pressure washers for about $35 bucks per day, which is a small price to pay considering the convenience and cleaning power it offers. Just remember to wear the appropriate safety goggles, and to keep the nozzle at least six inches away from the surface of your deck at all times.

#7) Seal Your Deck

Perhaps the most important tip to protect a wood deck is to seal it. Sealing your deck prevents the intrusion of moisture, which as stated above, can lead to rotten planks. Furthermore, some wood sealers are designed with special UV-protectant ingredients, adding another level of protection for your deck. In addition to protecting against water, these sealers also protect against the sun ultraviolet (UV) light.

There are dozens of different wood sealers available for sale, so choose the one that’s best suited for your deck. You can also check out this article by Lowes for step-by-step instructions on how to seal a wood deck.

#8) Avoid Trapping Dirt and Moisture

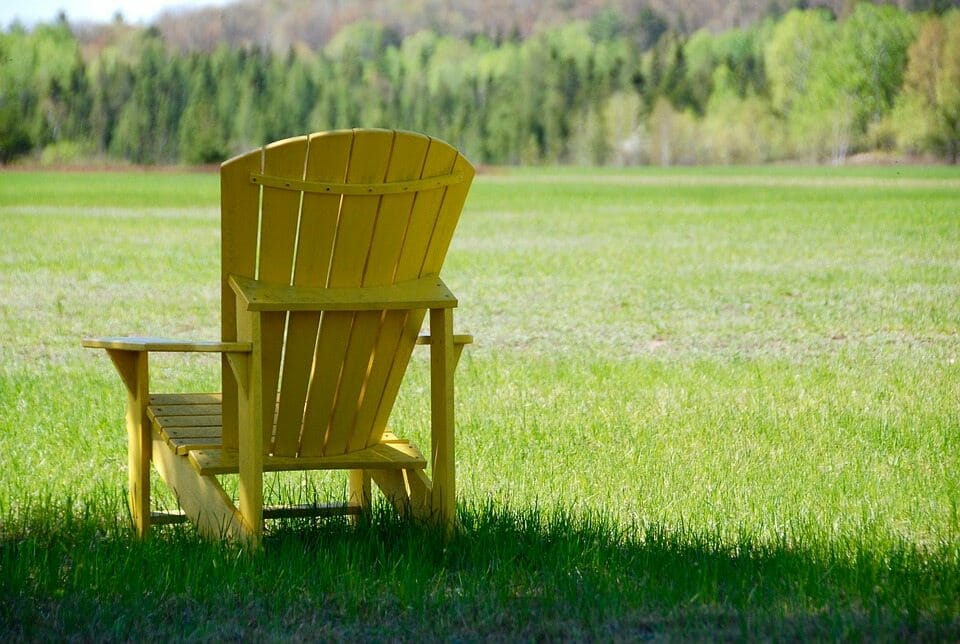
Finally, use caution to avoid accidentally trapping dirt and moisture in your dirt. If you have furniture on your deck, for instance, move and clean underneath it regularly. If a table or flower pot is left in the same place for months on end, it will probably accumulate moisture underneath. And too much moisture can damage your deck by promoting rot and mildew.

Following these tips will help to protect and preserve your wood deck.

Posted on

What is an Adirondack Chair? Get the Facts

The Adirondack chair consistently ranks as one of the most popular types of outdoor chairs. Also known as a Muskoka chair in Canada, it offers the perfect blend of style and comfort, with an emphasis on the latter. But what exactly is an Adirondack chair, and what should you look for when buying one?

The History of the Adirondack Chair

The Adirondack chair receives its namesake from the Adirondack Mountains. Located in northeast New York with a peak elevation of 5,344 feet, the Adirondack Mountains have been a popular tourist destination for over a century. Within the mountain’s ecosystem are swamps, marshes, bogs and rolling hills of glacier-carved rocks. Statistics show that roughly 60% of the Adirondack Mountains are covered with hardwood forest, making it a prime habitat for birds like the great blue heron, gray jays, boreal chickadees, crossbills and more.

Some people assume the Adirondack chair is a relatively new invention, but this isn’t the case. The Adirondack chair has origins dating back to 1903, during which amateur American inventor and amateur woodworker Thomas Lee created the first prototype. According to various reports, Lee was vacationing with his family in the Adirondack Mountains in 1903 when he encountered a problem: a lack of seating. With some family members being forced to stand, Lee sought to find a solution, which led him to designing his own chair.

Lee soon discovered, however, that traditional chairs didn’t fare well on the mountainous terrain of the Adirondacks. Because the land was sloped instead of flat and even, chairs were either tilted forwards or tilted backwards, resulting in discomfort and poor balance. Until now, there wasn’t a solution for the uneven terrain. So, Lee began to design his own chair with a focus on making it comfortable and balanced when placed on uneven terrain.

After countless hours of hard work, Lee developed a chair with an angled seat and angled back (see image above). Both the seat and back sloped back to accommodate the uneven terrain of the Adirondack mountains. With a 25 to 35-degree back slope, the chair could be placed on an uneven terrain to create a more balanced and stable seating area. This later became known as the Adirondack chair.

You might be surprised to learn, however, that Lee didn’t receive full credit for his work. After creating the first prototype, Lee took the chair to a carpenter in upstate New York named Harry Bunnell. Lee asked Bunnell to recreated the chair for him. But Bunnell went behind Lee’s back to file a patent for the chair, calling it the Westport Chair. Bunnell even received a patent for the Westport Chair, which Lee didn’t contest. But while Bunnell ultimately won a patent for the chair’s design, most people today recognize the mountainous chair as being the Adirondack chair.

Adirondack Chair Benefits

With its unique design, the Adirondack chair offers several noteworthy benefits. First and foremost, it’s important to remember that the Adirondack chair was specifically made for uneven terrain. So, if you’re looking to invest in new seating for an outdoor living space on a sloped hill, there’s no better choice than the Adirondack chair. With its sloped seat and back, it offers a superior level of comfort and stability.

Regardless of whether it’s placed on a flat or sloped surface, however, the Adirondack chair is arguably one of the most comfortable outdoor seating options on the market. Today, most Adirondack chairs feature an adjustable back, and some even have adjustable armrests. Therefore, you can easily adjust the Adirondack chair for optimal comfort on a flat surface as well.

Another benefit of the Adirondack chair is its ability to minimize stress on the back. The American Chiropractic Association (ACA) reports that nearly eight in 10 Americans will experience back pain at some point during their life. With its angled design, however, the Adirondack chair eases pressure on the spine while subsequently reducing the risk of pain back and other related problems.

Choosing an Adirondack Chair

When choosing an Adirondack chair for your patio or outdoor living space, there are several things to consider. First and foremost, check to see what material it is made of. Lee’s original design was made of natural hardwood sources from the surrounding Adirondack Mountains. Today, however, you can find Adirondack chairs made of a variety of materials, including beech, ash, oak, maple, teak and plastic. Hardwood materials typically offer the highest level of quality, though they also come at a premium price.

You should also consider the color of the Adirondack chair and whether or not it matches the outdoor decor where it will be used. Ideally, the color should match or otherwise flow cohesively with the rest of your decor.

Of course, the Adirondack chair is just one of many seating options to consider. But with its unique angled design, it’s the perfect choice for sloped landscapes.

If you have any questions regarding how an S&S Fire Pit can enhance your outdoor living space; We can help.  https://ssfirepits.com/contact/

Posted on

5 Ways to Prepare Your Patio for Spring

cafe-436082_960_720And just like that winter was gone — well, almost at least. The official start of spring is just one month away, which means more and more homeowners will be going outdoors to enjoy their patios. To fully enjoy this extension of your home, however, you’ll need to prepare it for spring.

Clean Your Patio

First and foremost, you’ll want to clean your patio, sweeping away any pine straw, leaves or other debris. Not only is this an eye-sore, but yard debris can leave permanent stains on wooden patio decks. After removing the debris, wash it with a deck cleaning solution to achieve an even cleaner appearance. With a clean patio, you can begin decorating and preparing it for use this spring.

Bring Out the Fire Pit

The upcoming spring season offers the perfect opportunity for homeowners to host outdoor parties. Whether it’s cool weather with a few close friends or a full-blown party, a few grilled burgers, beverages, and activities, a fire pit will make your patio a little more enjoyable for these and other outdoor social gatherings.

Arrange Seating and Furniture

It’s difficult to enjoy a patio without seating and furniture. But not all furniture is suitable for use on a patio, which is why it’s important to choose the right type. Stick with furniture that’s waterproof and able to withstand the spring showers. Cushions for chairs and other seating should also be made of a waterproof material. Or if you choose a non-waterproof material for your seat cushions, be sure to bring inside at the end of the day.

Planters

The early spring season offers the perfect opportunity for homeowners to decorate their patios with planters. Even if you have little-to-no gardening experience, you still pick up some low-maintenance plants from your local nursery or home improvement store, using them to enhance your patio decor. A few colorful planters will transform an otherwise generic patio into a vibrant outdoor living area.

Lighting

Consider the lighting on your patio and how it impacts both the mood and function of the environment. Depending on which side your patio is facing, it may receive sunlight during the day, in which case additional lighting isn’t needed. But even if the sun illimuminates your patio during the day, you’ll still need an additional light source during the evenings and nights. Tiki torches, string lights, post lights, LED rope lights and wall sconces are all excellent lighting options to consider.

If you have any questions regarding how an S&S Fire Pit can enhance your outdoor living space; We can help.  https://ssfirepits.com/contact/

Posted on

Common Ways to Build a Campfire

Screenshot (8)Campfires have been around since the early days of mankind. A recent analysis of antelope bones discovered in South African caves suggests that humans have build controlled fires some 1.6 million years ago. While we now have tools like lighters and matches to ignite campfires, we still build them for the same purposes: warmth, cooking, light, and social enjoyment. There are several ways to build a campfire, however, which we’re going to explore today.

Tipi

One of the most common types of campfires is the tipi, which lives up to its namesake by featuring the shape of a tipi. To build a tipi campfire, you’ll need to arrange some of small kindling vertically around the center. If the kindling isn’t staying up on its own, you can lash some sticks together for additional support. Next, place the larger kindling above the small kindling, using caution not to collapse the arrangement.

Tipi campfires such as this are great for producing warmth. When you add more firewood to it, heat from the bottom rises to the top; thus, igniting the newly added firewood. The only real downside is that firewood in a tipi can become unstable as it burns, resulting in the tipi falling over.

Lean-to

An alternative to the tipi campfire is a lean-to. This type of campfire follows a similar approach as the tipi, using the same large and small kindling arranged vertically. However, it differs in the sense that a thick piece of kindling is staked into the ground diagonally so it overhands the pile of kindling.

A variation of the lean-to consists of a large piece of firewood placed on the ground next to the tinder. The kindling is then placed next to this firewood, with one end propped up and the other end sitting on the ground. This allows the kindling to lean over the tinder; thus, serving as a windbreak.

Log Cabin

A third type of campfire and in my opinion the best is the log cabin. To create a log cabin campfire, gather and place a pile of tinder in the center and stack kindling around it. When placing the kindling, lay the first two sticks parallel to each other on opposite-facing sides. The next two sticks of kindling should be placed horizontally on top of the first pair. You can then repeat the process by adding more kindling, also placed horizontally on top of the previous pair.

The primarily benefits of a log cabin campfire is its structural stability and air flow. It’s the most structurally sound, reducing the risk of collapse and you get a nice bed of coals once the cabin is burned down.

If you have any questions regarding how an S&S Fire Pit can enhance your outdoor living space; We can help.  https://ssfirepits.com/contact/

Posted on

Pros and Cons of Artificial Grass for Your Lawn

grass-534873_960_720With roots dating back to the 1960s, artificial grass (also known as artificial turf) has been a viable alternative to traditional grass. It’s made of synthetic fibers that mimic the look and feel of natural grass. Back then, however, it was used primarily in athletic fields. It wasn’t until the 1990s when artificial grass become a popular choice in residential lawns. But if you’re thinking of installing it in your lawn, you should weight all of the pros and cons.

Pro: Pesticide-Free

Unlike natural grass, artificial grass isn’t susceptible to pests. The synthetic fibers are naturally pest-resistant, meaning you don’t have to worry about applying and reapplying pesticide to your lawn.

Con: High Installation Cost

While the exact cost of installation varies, homeowners can expect to pay more for artificial grass than natural grass. With natural grass, you can simply spread a combination of seed and fertilizer, allowing Mother Nature to do the rest. Artificial grass costs a bit more to install, as homeowners must pay for the turf itself, as well as labor.

Pro: Resistant to Erosion

Artificial grass is also resistant to erosion, more so than natural grass. Heavy storms and subsequent rain runoff can wash away natural grass, eroding the soil and changing the landscape. This typically doesn’t happen with artificial grass, however. The synthetic material is strong, durable and resistant to erosion caused by runoff.

Con: It’s Hot

If you play on your lawn with your children, you should think twice before investing in artificial grass. According to a study conducted by Brigham Young University, the surface temperature on artificial grass is roughly 37 degrees higher than the temperature of the surrounding air. This is because the synthetic materials from which artificial grass is made holds heat; thus, it’s warmer than natural grass.

Pro: Saves Water

Conventional wisdom should tell you that artificial lawns saves water. Unlike their natural counterpart, artificial grass does not need regular watering. When a heat wave blankets your area next summer, you can rest assured knowing that your lawn is safe, with or without water.

Pro: Doesn’t Require Mowing

This alone is reason enough for many homeowners to choose artificial grass for their lawns. Synthetic grass doesn’t grow, and as such, you don’t have to mow it. Once installed, it stays the same height throughout the year.

If you have any questions regarding how an S&S Fire Pit can enhance your outdoor living space; We can help.  https://ssfirepits.com/contact/

Posted on

How to Prevent a Wooden Deck from Freezing

snow-616319_960_720Winter is in the air, with homeowners from the east coast to west experiencing sub-freezing temperatures. When the mercury drops below 32 degrees Fahrenheit, though, water turns to ice — and this ice can prove downright dangerous when it forms on your patio and deck. So, how do you prevent your deck from freezing?

Keep it Clean

Cleaning a wooden deck isn’t going to necessarily prevent it from freezing, but it can certainly help by discouraging mold and mildew, which can make your deck more slippery if left unchecked. Mold and mildew need organic matter to thrive. So things like dust, pine straw, leaves and other organic debris provide ideal breeding grounds. You can discourage mold and mildew from forming on your wooden deck, however, by cleaning it on a regular basis.

Apply Deck-Cleaning Product

Even after removing the debris from your wooden deck, you should still apply a proper deck-cleaning product. Available at most home improvement stores, these products contain special chemicals to further eliminate microbial growth without harming the deck’s wooden structure. Some homeowner prefer to make their own deck-cleaning solution — and that’s okay. Just remember to avoid using products ammonia AND bleach, as this creates a dangerous and toxic chemical when mixed together.

Apply Water-Repellent Stain

After applying deck-cleaning product and allowing it to set, you should apply a water-repellent stain. These stains are specifically designs to repel water, and without water settling on your deck, it shouldn’t freeze. While steps for applying a water-repellent stain vary depending on the product, most require brushing or rolling the stain onto the wooden boards, preferably on a day with minimal sunlight (sunlight causes the product to evaporate and oxidize more quickly. Wait at least 48 hours for the stain to settle, at which point your wooden deck should be protected from moisture and ice.

Non-Slip Strips

If you live in a region that receives particularly cold winters, you may want to install some self-adhesive non-slip strips to your deck. This isn’t going to prevent it from freezing. Rather, it improves traction while preventing slip-and-fall accidents. You can buy them for less than $10 bucks, which is a small price to pay for the added safety they offer. Place them in high-traffic areas such as steps and in front of doors.

If you have any questions regarding how an S&S Fire Pit can enhance your outdoor living space; We can help.  https://ssfirepits.com/contact/

Posted on

6 Tips to Enhance Your Outdoor Living Space

fireplace-1156675_960_720Outdoor living has become one of the hottest home design trends. But if you want to enjoy your outdoor living space to its full potential, you should make it fun and entertaining.

Create a Focal Point

Going back to the basics of home decor 101, all gathering spaces should include a central focal point — and outdoor living spaces are no exceptions. While the TV or fireplace is often used as a focal point indoors, you may not have the option of using either of these in your outdoor living space. An alternative focal point that works just as well, however, is a fire pit.

Make it BIG

Space is paramount when designing a functional and entertaining outdoor living space. If the space is crowded with little-to-no space for guests to move around, you won’t be able to enjoy this area. Many experts recommend following the “less is more” rule when designing outdoor living spaces, meaning you should include just a few pieces of furniture here.

Maintain Clean Furniture

When was the last time that you actually cleaned your outdoor furniture? Being that it’s outdoors, many homeowners are guilty of rarely, if ever, cleaning their outdoor furniture. So when guests come over, they are forced to sit on dirty and damp seat cushions.  Keep your outdoor furniture clean and free of debris to prevent this from happening.

Maintain the Lawn

Don’t underestimate the importance of maintaining a well-manicured lawn. It’s difficult to enjoy an outdoor living space when there’s overgrown weeds and tall grass blanketing the lawn. Giving your lawn a little attention will go a long ways in enhancing your outdoor living space.

Provide an Area for Drinks and Food

You should also include an area where guests can place their drinks and food. Outdoor tables with built-in umbrellas work well, although you can also choose smaller side tables. Some chairs also feature drink holders.

Use Waterproof Furniture

Not all furniture is suitable for use outdoors. Even if the area is covered, moisture vapor in the air can damage furniture made with cotton and similar organic fabrics. This is why you should stick waterproof furniture that’s designed specifically for the outdoors. Furniture made with synthetic materials like polyester are typically better suited for the harsh outdoor environments, making them ideal for this purpose.

If you have any questions regarding how an S&S Fire Pit can enhance your outdoor living space; We can help.  https://ssfirepits.com/contact/

Posted on

How to De-Clutter Your Outdoor Living Space

garden-1680802_960_720Does your outdoor living space feel cluttered and confined? It’s difficult to fully enjoy this extension of your home when it’s cluttered. If this sounds familiar, read the following tips to improve your outdoor living space.

Put Away the Tools

Don’t make the mistake of leaving your tools out. Not only will this clutter your outdoor living space, but it may also cause them to rust. After using your tools, store them in a covered area such as a garage or shed. Sure, it takes a little more time, but you’ll reap the benefits of longer-lasting tools and a cleaner, less-cluttered outdoor living space.

Keep a Trash Can Nearby

Another helpful tip to de-clutter your outdoor living space is to keep a trash can nearby. You’ll probably come across a fair amount of trash and debris when doing yard work. With a conveniently located trash can nearby, you can dispose of these items more easily.

Hide the Garden Hose

A garden hose is essential if you plan on watering flowers, cleaning off your sidewalk, or even washing your car. But let’s face it, a 20+ foot garden hose coiled up in your yard is pretty tacky and doesn’t exactly help your home’s outdoor decor. Rather than hauling off to the storage shed after each use, though, you should consider hiding it using one of the following solutions:

  • Placing the garden hose inside a rustic tin bucket.
  • Installing a holder on the side of your house.
  • Hiding it inside of a large fake rock (some are made specifically for garden hoses).
  • Concealing it under furniture.

Remove Overhanging Branches

Overhanging and encroaching branches can also lead to clutter. This is why it’s a good idea to get into the habit of trimming overhanging branches on a regular basis. If a nearby tree is slowly growing its branches onto your outdoor living space, trim them back so it doesn’t hurt the decor and/or function of the space.

Organize Your Fire Pit Accessories

Assuming you have a fire pit (and you should), try to keep all of its related accessories together. Maybe you have a stack of firewood, grate brush and heat-resistant pad, in which case you should store them together. Fire pit accessories such as these can be placed inside of a large deck box, or you can simply use an aluminum container.

If you have any questions regarding how an S&S Fire Pit can enhance your outdoor living space; We can help.  https://ssfirepits.com/contact/

Posted on

5 Ways to Make Your Outdoor Living Space More Welcoming

5229590641_bf9fa00e5e_zIt takes more than just a few plastic chairs and a table to create an attractive outdoor living space. If you want to truly enjoy your home’s outdoor area, you should design it with inviting elements. Only then will it set the tone for a pleasing environment. Here are a few quick and easy ways to make your home’s outdoor living space more welcoming.

Add Potted Plants

One of the easiest ways to make your outdoor living space more welcoming is to add potted plants and flowers. Even if you have limited experience as a “green thumb,” you shouldn’t have any problem growing three or four small plants in potted containers. For an added touch of style, top the containers off with small pebbles covering the dirt. This adds a unique and stylish look, while also helping the water evenly disperse.

Define the Walkways

Allowing weeds to encroach upon your sidewalk doesn’t exactly provide a welcoming and inviting atmosphere. This is why homeowners should maintain clear, obstruction-free walkways leading to their outdoor living space. While weed-killing sprays and products sold at home improvement stores can eliminate stubborn weeds, but another solution is to create your own weed killer using vinegar, table salt and a liquid dish soap. Spray this solution around your sidewalk and other walkways to kill weeds and prevent unwanted growth.

Paint the Trim

Try painting the trim around your doors and windows to enhance the look of your outdoor living space. Assuming you have other furniture here, you can even use a similar color to achieve a cohesive theme.

Outdoor Rug

Rugs aren’t used strictly indoors; they can also be used outdoors. If you want to make your outdoor living space look more welcoming, place a decorative outdoor rug here. Just remember to choose a rug that’s made of a durable synthetic material. Traditional 100% wool rugs won’t hold up in the outdoor elements.

Add a Fire Pit

There’s a reason why fire pits consistently rank as one of the most popular additions to outdoor living spaces: they offer both functional and aesthetic benefits. Adding a fire pit to your outdoor living space will create a natural focal point while making the area look more inviting. It also provides functional benefits, allowing you to grill steaks, roast marshmallows, and comfortably enjoy the otherwise cold fall and winter evenings.

Photo credit: Stockicide

If you have any questions regarding how an S&S Fire Pit can enhance your outdoor living space; We can help.  https://ssfirepits.com/contact/

Posted on

Choosing Outdoor Furniture for Your Patio

outside-254716_960_720No patio is complete without comfortable and aesthetically pleasing furniture. The right furniture will enhance your patio, allowing you and your family to enjoy this extension of your home just a little more.

Wicker Furniture

Wicker is always an excellent choice of outdoor furniture for the patio. Made from all-natural twigs (e.g. rattan, reed or bamboo) that are woven together, it offers a truly one-of-a-kind look that’s not found elsewhere. When used with a cushioned padding, wicker furniture is ultra comfortable.

Another benefit of wicker furniture is its weight. Being that it’s made of twigs instead of heavy metal, it weighs significantly less than other types of outdoor furniture. As such, you can easily move it from one end of your patio or landscape to the other, without requiring a second set of hands.

Plastic Furniture

Another option for patio furniture is plastic. It’s typically the cheapest, making it a great choice for budget-conscious homeowners. You can buy a full set of plastic patio furniture for well under $100 bucks.

Plastic furniture is completely waterproof, meaning you don’t have to worry about it developing rust or mold. You can leave it uncovered for months outdoors without damage.

Hardwood Furniture

Of course, hardwood is a third type of outdoor furniture that’s suitable for the patio. Certain types of finishes and coating can protect hardwood furniture from moisture damage, but it’s generally still not “waterproof.” So if you’re going to invest in hardwood furniture, it’s generally best to keep it covered.

Here are some things to consider when choosing outdoor furniture for your patio:

  • How many chairs/seating do I need? If you plan on hosting parties, you should buy enough patio furniture to accommodate all of your guests.
  • What color scheme do I want? Unless you’re going for an eclectic look, you should stick with a general color scheme on your patio.
  • How will the furniture affect the appearance of my home? Your choice of outdoor furniture can and will affect the appearance of your home. Choose furniture that compliments and flows cohesively with your home’s exterior.
  • Is the furniture resistant to water? Again, you generally want outdoor furniture to have at least some water-resistant properties.
  • What’s my budget? As with most home improvement projects, you should set a budget for your outdoor patio furniture.

If you have any questions regarding how an S&S Fire Pit can enhance your outdoor living space; We can help.  https://ssfirepits.com/contact/