At S&S Fire Pits, we craft outdoor fireplaces that embody the perfect blend of quality, design, and longevity. Our journey is rooted in a passion for creating products that stand the test of time, and we’re committed to sharing the intricacies of our craft with you.
Our fire pits are more than just a gathering place; they’re a testament to our dedication to excellence. From the initial design phase to the final product, every step is taken with precision and care to ensure that our fire pits withstand decades of use while maintaining their structural integrity and aesthetic appeal.
As we take you through the comprehensive journey of S&S Fire Pits, you’ll gain insights into our proprietary welding techniques, material selection processes, and the craftsmanship that sets us apart. Our commitment to quality extends beyond our products to our customer service, warranty coverage, and ongoing support, making us a trusted name in the industry.
The S&S Fire Pits Legacy: Craftsmanship Rooted in Tradition

Our journey at S&S Fire Pits began with a simple yet profound commitment to craftsmanship. This dedication has been the driving force behind our evolution from humble beginnings to industry leaders. With a history that reflects our passion for quality and precision, we’ve established a legacy that resonates with our customers.
From Humble Beginnings to Industry Leaders
S&S Fire Pits started with a vision to create outdoor fire features that would stand the test of time. Our founders, driven by a passion for metalwork and a commitment to excellence, laid the groundwork for what would become a hallmark of quality in the industry. Through the years, we’ve grown, innovated, and adapted, but our core mission has remained unchanged.
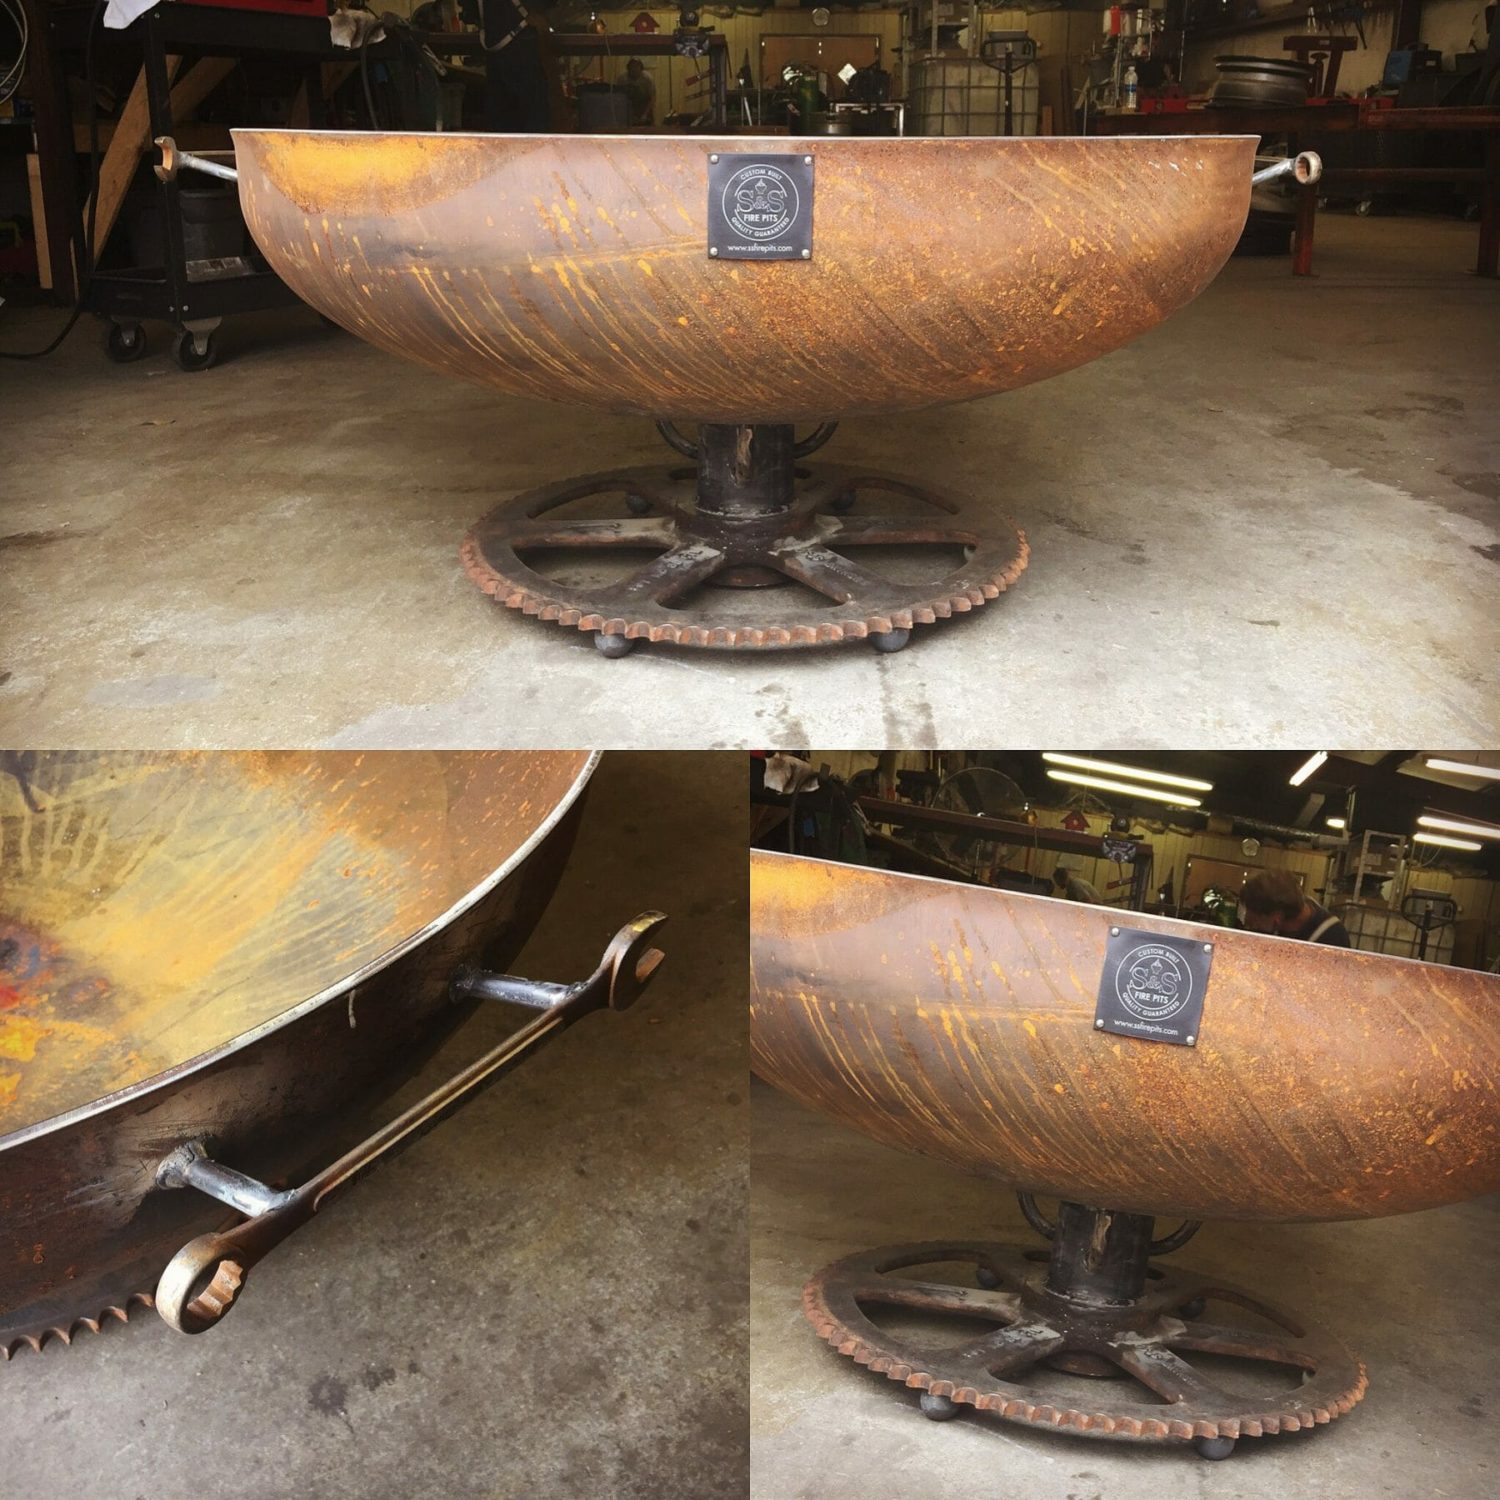
Our team consists of certified welders and metalworkers with decades of combined experience in precision fabrication techniques. Each craftsperson undergoes extensive training in our proprietary methods before being entrusted with creating components for our fire pits. This rigorous training ensures that every piece meets our high standards.
The Founding Philosophy: Quality Over Quantity
At the heart of S&S Fire Pits is a founding philosophy that prioritizes quality over quantity. We believe that every fire pit we produce is not just a product, but a testament to our dedication to craftsmanship. This philosophy guides every decision we make, from material selection to the final inspection.
We maintain a master-apprentice system that ensures traditional skills are passed down while incorporating modern innovations. Our craftsmen take personal pride in their work, often signing the interior of each fire pit as a mark of accountability and craftsmanship.
Meet the Craftsmen Behind Every Fire Pit
The artisans behind S&S Fire Pits are the backbone of our operation. With many of our team members having been with us for over a decade, they’ve developed specialized expertise that contributes to our distinctive quality. We regularly invest in continuing education for our craftspeople, keeping them at the forefront of metalworking techniques and safety standards.
The low turnover among our production team ensures consistency in quality and allows for the development of deep expertise in specific aspects of fire pit construction. This stability is a key factor in our ability to deliver exceptional products time and again.
The Story Behind the Weld: How S&S Fire Pits Are Built to Outlast Trends
S&S Fire Pits are built to outlast trends, thanks to our rigorous manufacturing process that prioritizes quality and durability. Our commitment to excellence is evident in every stage of production, from material selection to final product testing.

The Art and Science of Superior Welding Techniques
The welding process is a critical component of our manufacturing process. Our skilled craftsmen use state-of-the-art equipment to ensure strong, durable welds that can withstand the elements.
We employ a variety of welding techniques, including MIG and TIG welding, depending on the specific requirements of each fire pit model. This allows us to achieve the perfect balance between form and function.
Our welding process is not just about joining metal; it’s an art form that requires precision, patience, and attention to detail. Every weld is inspected to ensure it meets our high standards.
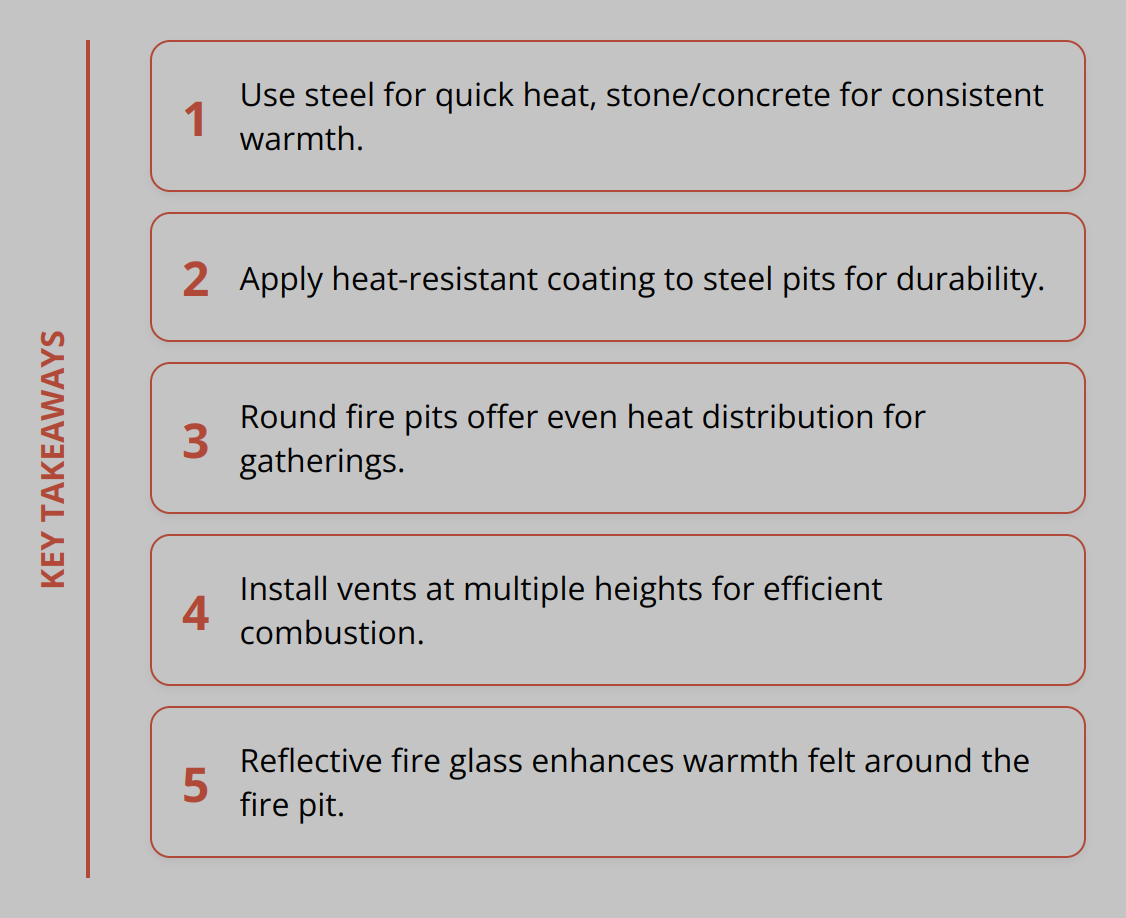
Material Selection: Why We Choose Only Premium Metals
The quality of our fire pits begins with the materials we choose. We select only premium metals that are designed to withstand the rigors of outdoor use.
Our metals are sourced from reputable suppliers and are chosen for their durability, corrosion resistance, and aesthetic appeal. We use a combination of steel and other alloys to create fire pits that are both functional and visually appealing.
We understand that the right materials are crucial to the longevity and performance of our fire pits. That’s why we are meticulous in our material selection process, ensuring that every component meets our stringent quality standards.
The Rigorous Quality Control Process
At S&S Fire Pits, we are committed to delivering products of the highest quality. Our quality control process is designed to ensure that every fire pit meets our exceptional standards.
Our quality control process includes 27 distinct checkpoints, from raw material inspection through final product testing. Each fire pit undergoes a comprehensive inspection by three different team members before receiving approval for shipment.
- Our quality control process includes 27 distinct checkpoints from raw material inspection through final product testing.
- Each fire pit undergoes a comprehensive inspection by three different team members before receiving approval for shipment.
- We maintain detailed documentation of every unit produced, creating a reference record that allows us to track materials and processes for each fire pit.
- Our testing procedures include thermal cycling, where fire pits are repeatedly heated and cooled to simulate years of use in compressed timeframes.
- We randomly select units for destructive testing to verify that our production standards consistently exceed our engineering specifications.
- Our quality control team operates independently from production, ensuring objective assessment without pressure to meet production quotas.
- We regularly benchmark our products against competitors to ensure we’re maintaining our position as the quality leader in the industry.
Anatomy of an S&S Fire Pit: Design Elements That Define Excellence
The anatomy of an S&S Fire Pit reveals a deep commitment to quality and design excellence. Every element, from the material selection to the final product, is crafted to provide a superior outdoor heating experience.

The Perfect Balance of Form and Function
At S&S Fire Pits, we understand that a fire pit is not just a source of warmth but also a visual centerpiece for any outdoor space. Our designs aim to strike the perfect balance between aesthetics and functionality.
We incorporate reinforced stress points and strategic gusseting in areas that experience the greatest thermal and physical stresses, ensuring that our fire pits are both beautiful and durable.
The design process involves careful consideration of various factors, including the shape, size, and material of the fire pit, to ensure that it complements any outdoor decor while providing efficient heat distribution.
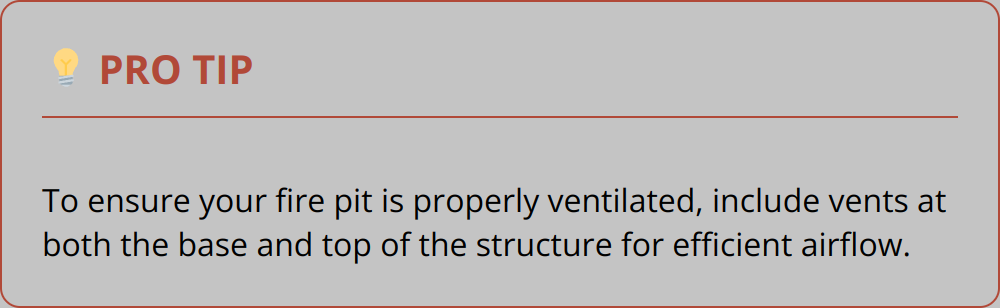
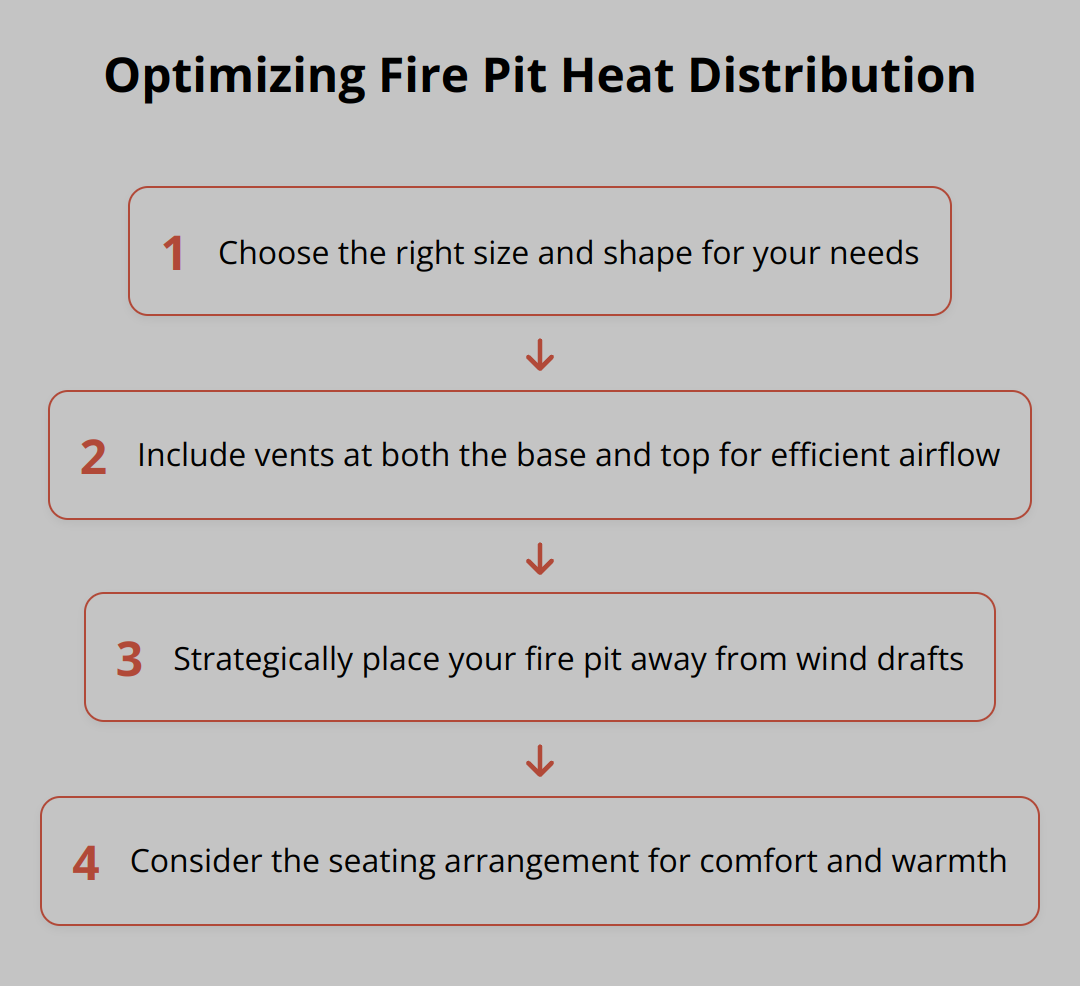
Heat Distribution Technology: Engineering the Perfect Flame
One of the key design elements that set S&S Fire Pits apart is our heat distribution technology. We have engineered our fire pits to provide a consistent and efficient flame, ensuring that the warmth is evenly distributed across the surrounding area.
Our precision-cut interlocking components play a crucial role in achieving this efficiency. By distributing weight and stress evenly throughout the structure, we minimize the risk of metal fatigue and ensure a longer lifespan for our fire pits.
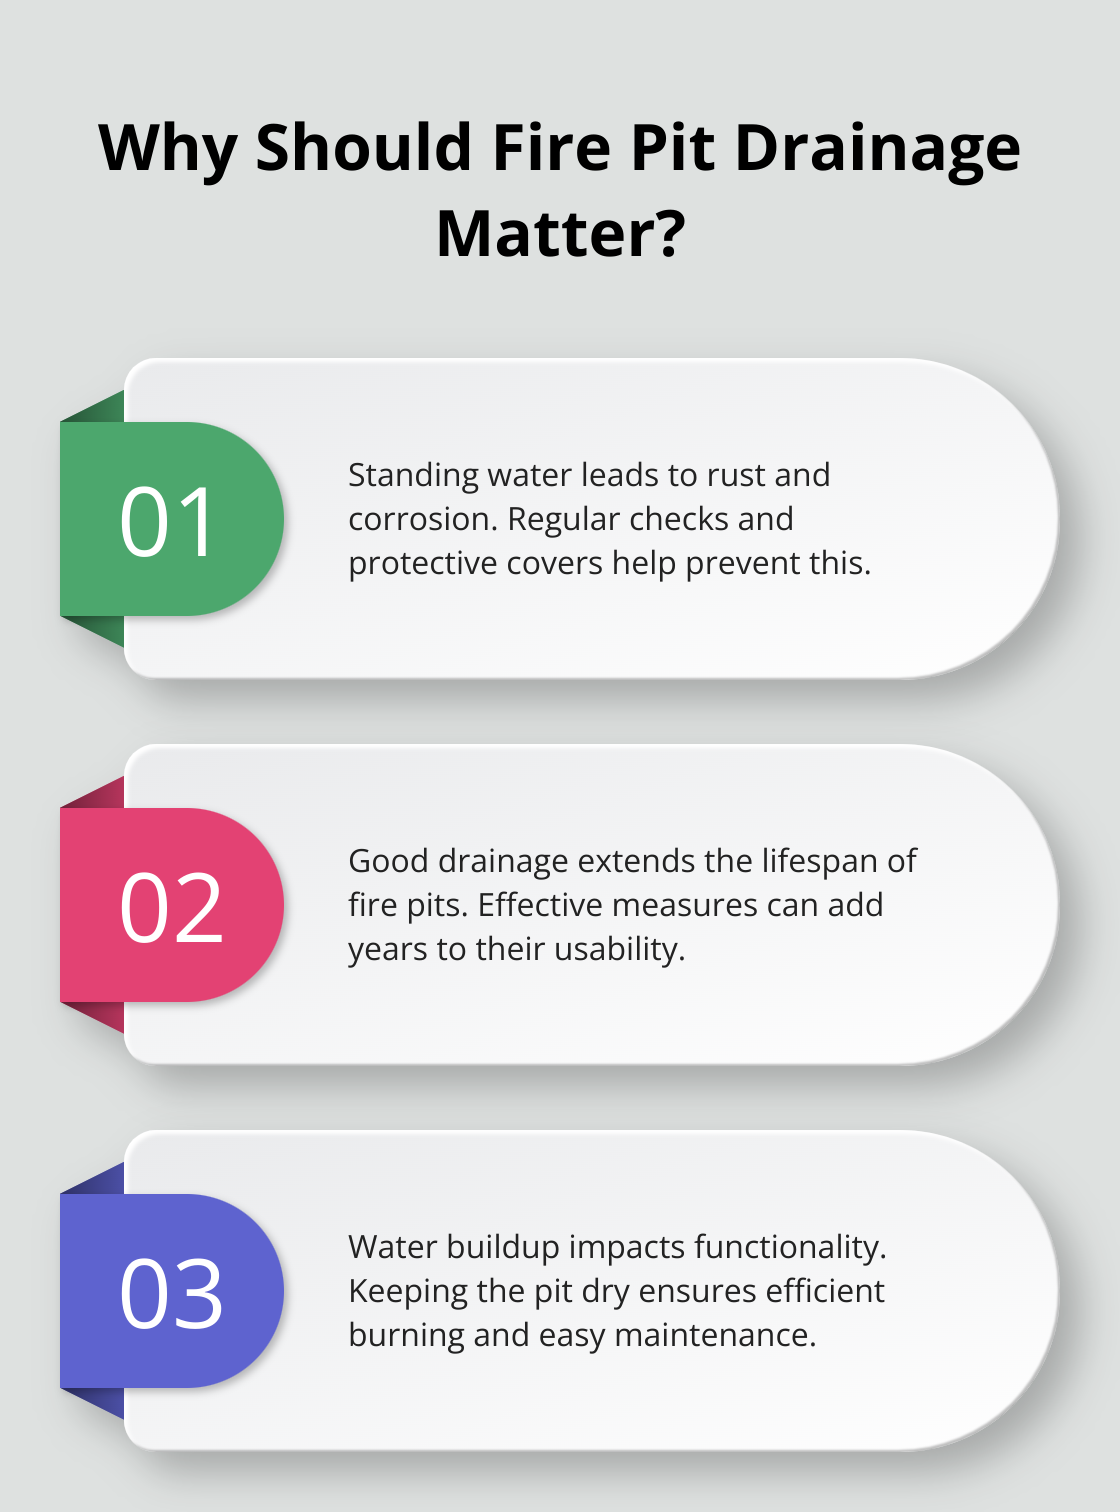
Furthermore, our base designs are engineered to provide exceptional stability on various surfaces while allowing for proper airflow and drainage, preventing corrosion and ensuring the longevity of the product.
Structural Integrity: Building Fire Pits That Last Generations
The structural integrity of an S&S Fire Pit is paramount. We engineer our fire pits to withstand physical impacts and environmental stresses beyond what would be expected in normal use, ensuring that they remain a cherished outdoor feature for generations.
The thickness and grade of materials used in our fire pits are strategically varied throughout the structure, providing reinforcement where needed without unnecessary weight. This approach not only enhances durability but also contributes to the overall aesthetic appeal of the fire pit.
Our construction techniques are designed to eliminate weak points where water could collect and cause deterioration over time, further enhancing the structural integrity and longevity of our fire pits.
S&S Fire Pit Collections: Finding Your Perfect Match
The world of S&S Fire Pits is where tradition meets innovation, offering a range of collections that cater to different aesthetics and functional requirements. Whether you’re looking to enhance your backyard, patio, or a commercial space, our diverse fire pit collections are designed to meet your needs.

The Classic Series: Timeless Elegance for Any Space
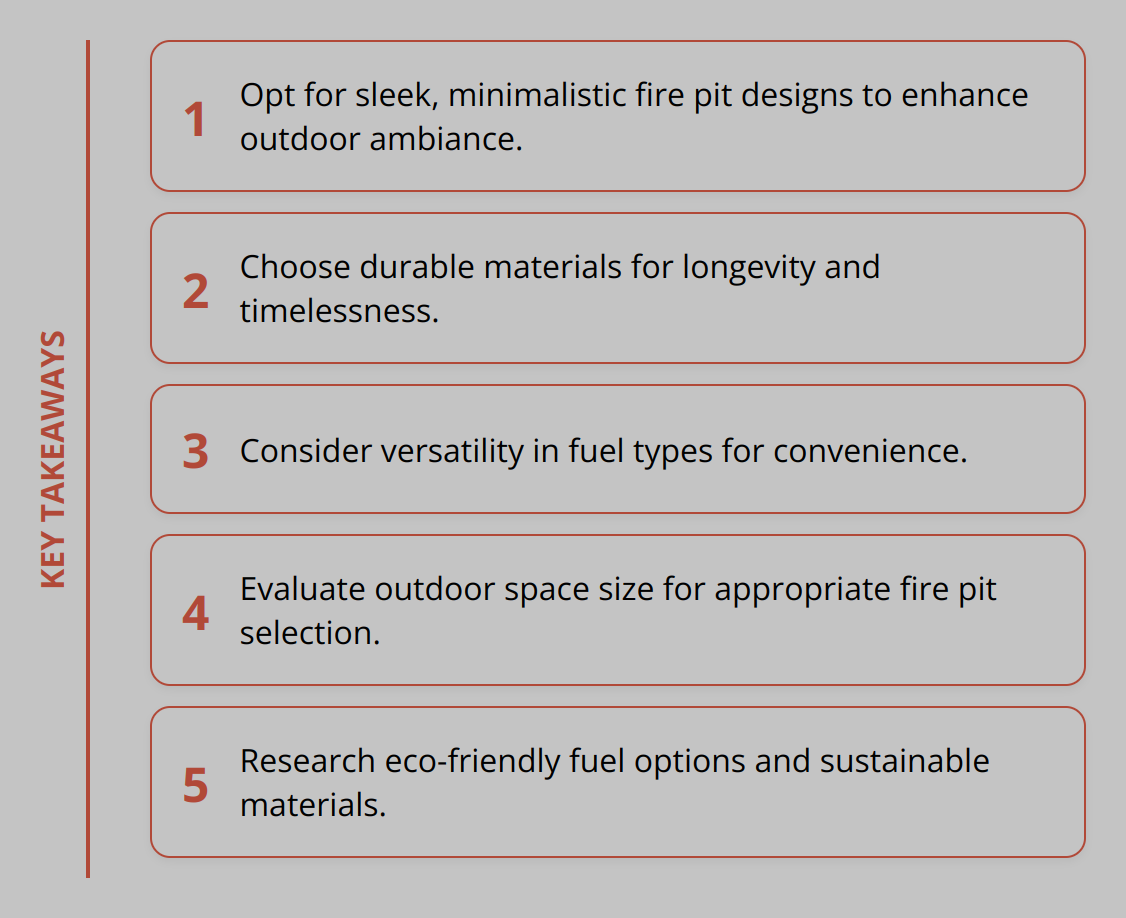
The Classic Series by S&S Fire Pits embodies timeless elegance, designed to complement any outdoor space with its sophisticated and clean lines. These fire pits are not just heating solutions but are also statement pieces that enhance the ambiance of your outdoor area.
With a focus on durability and quality, the Classic Series fire pits are constructed from premium materials, ensuring they withstand the elements while maintaining their aesthetic appeal.
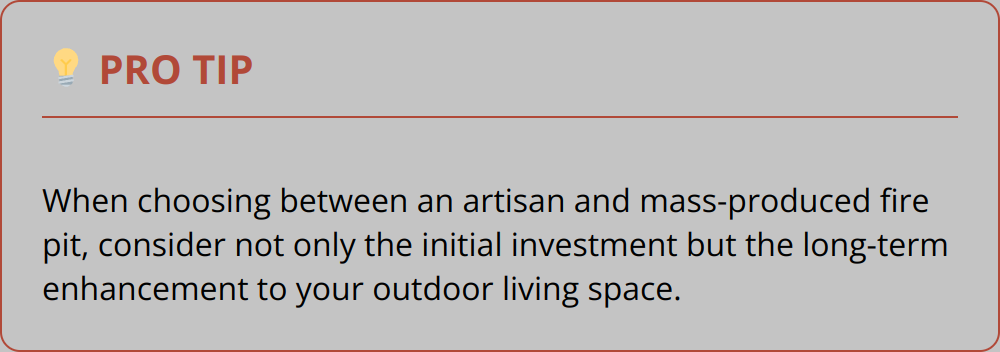
The Artisan Series: Unique Designs for Distinctive Tastes
For those with distinctive tastes, the Artisan Series offers unique designs that stand out in any setting. Each piece in this collection is a testament to the craftsmanship and creativity of our artisans.
These fire pits often feature intricate designs and rare materials, making each one a unique addition to your outdoor space.
The Commercial Series: Heavy-Duty Solutions for Public Spaces
The Commercial Series is designed for heavy-duty use in public spaces, offering robust fire pits that can withstand high traffic while maintaining their functionality and aesthetic appeal.
These fire pits are perfect for restaurants, hotels, and other commercial establishments looking to create inviting outdoor areas for their customers.
Limited Edition Collections: Rare Finds for Discerning Customers
Our Limited Edition Collections represent the pinnacle of our craftsmanship, featuring experimental techniques, rare materials, and collaborative designs with renowned artists.
These exclusive fire pits are produced in limited quantities, typically fewer than 50 units, making them distinctive collector’s items that appreciate in value over time.
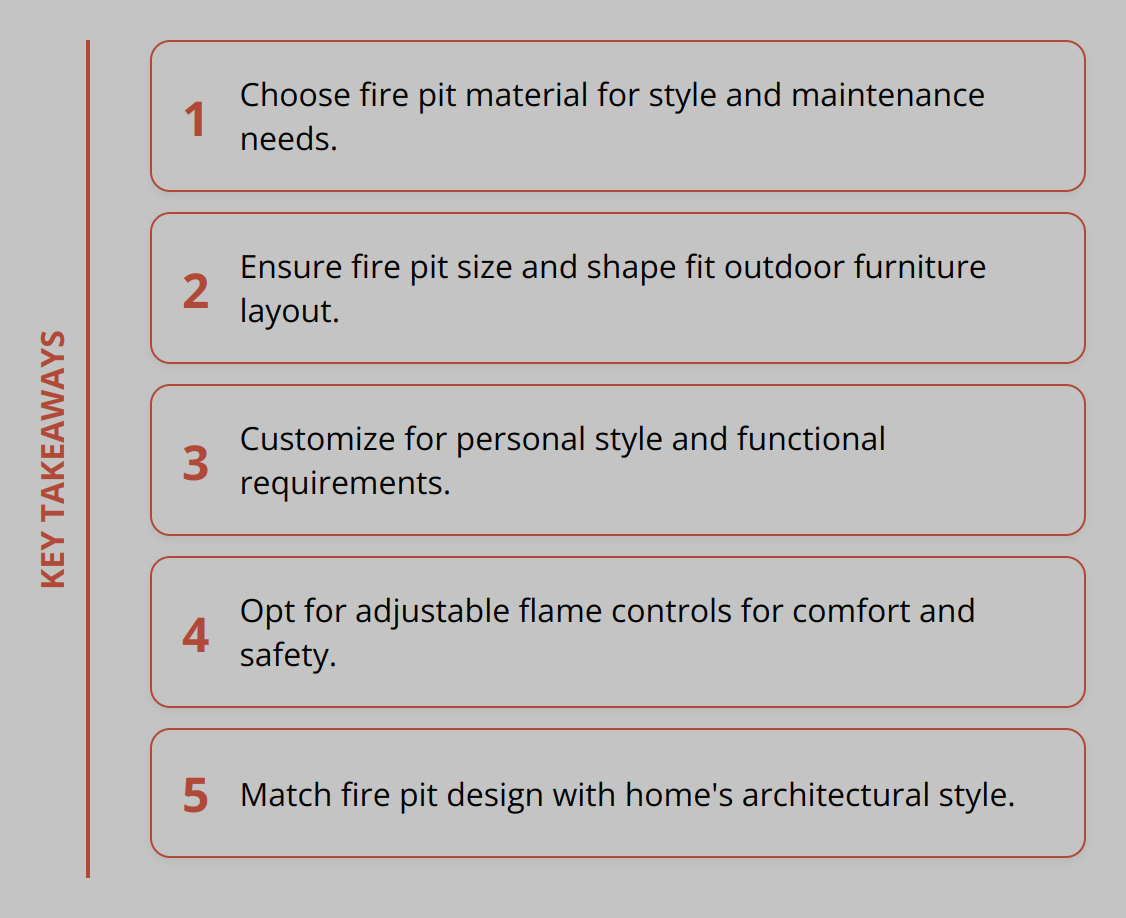
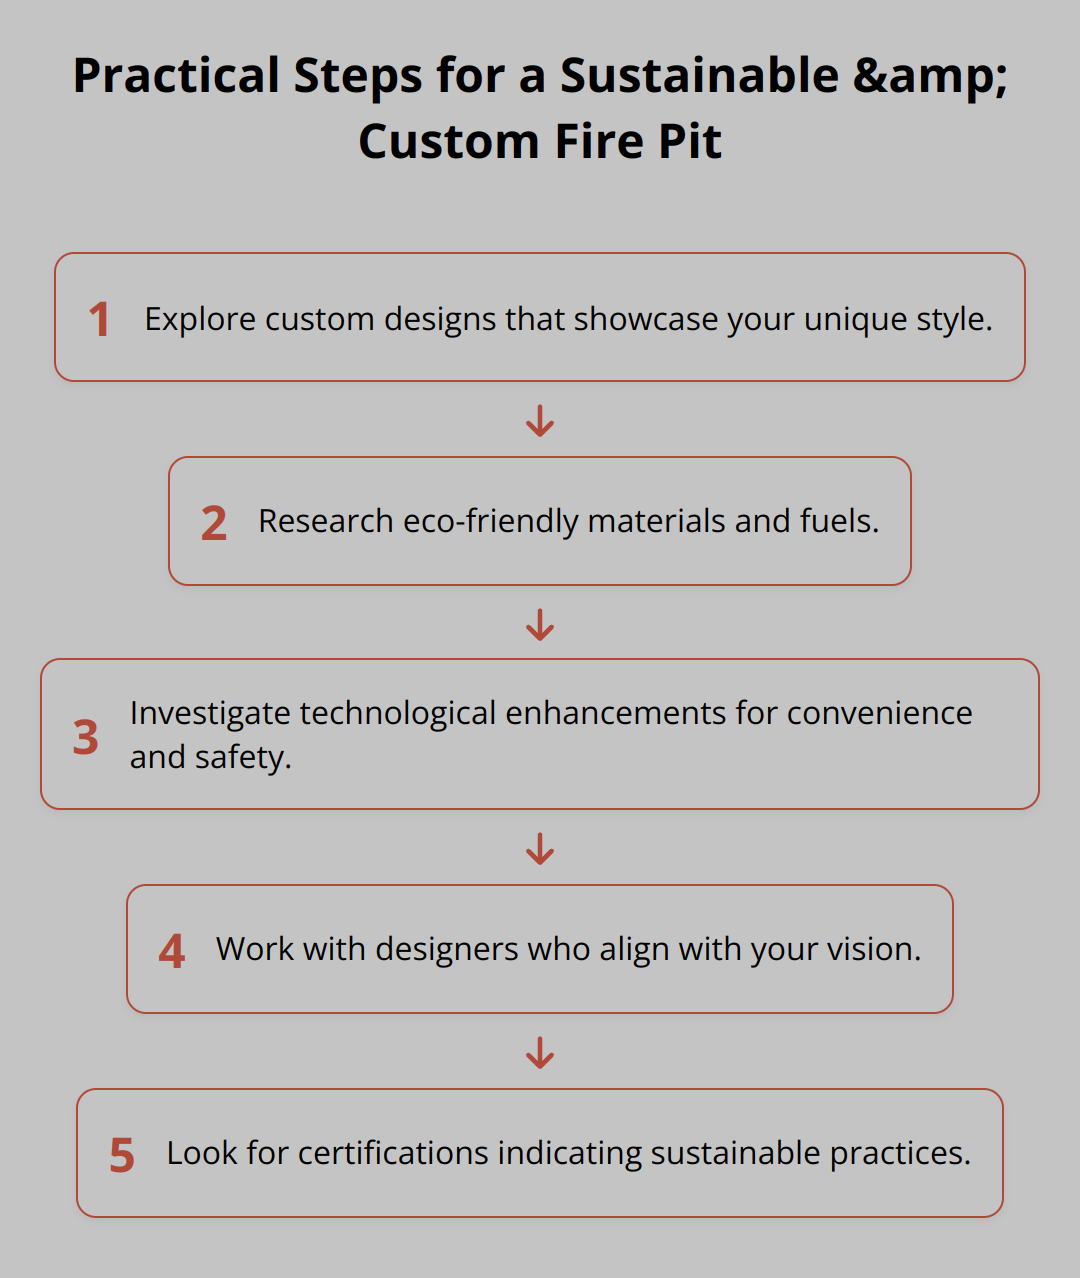
Customization Options: Making Your S&S Fire Pit Uniquely Yours

Creating a fire pit that’s truly one-of-a-kind is a journey we’re happy to embark on with our customers. At S&S Fire Pits, we understand the importance of having a unique outdoor feature that not only enhances your living space but also reflects your personal style.
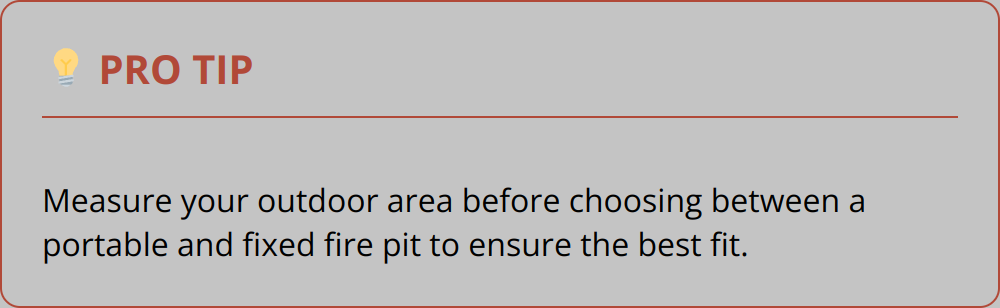
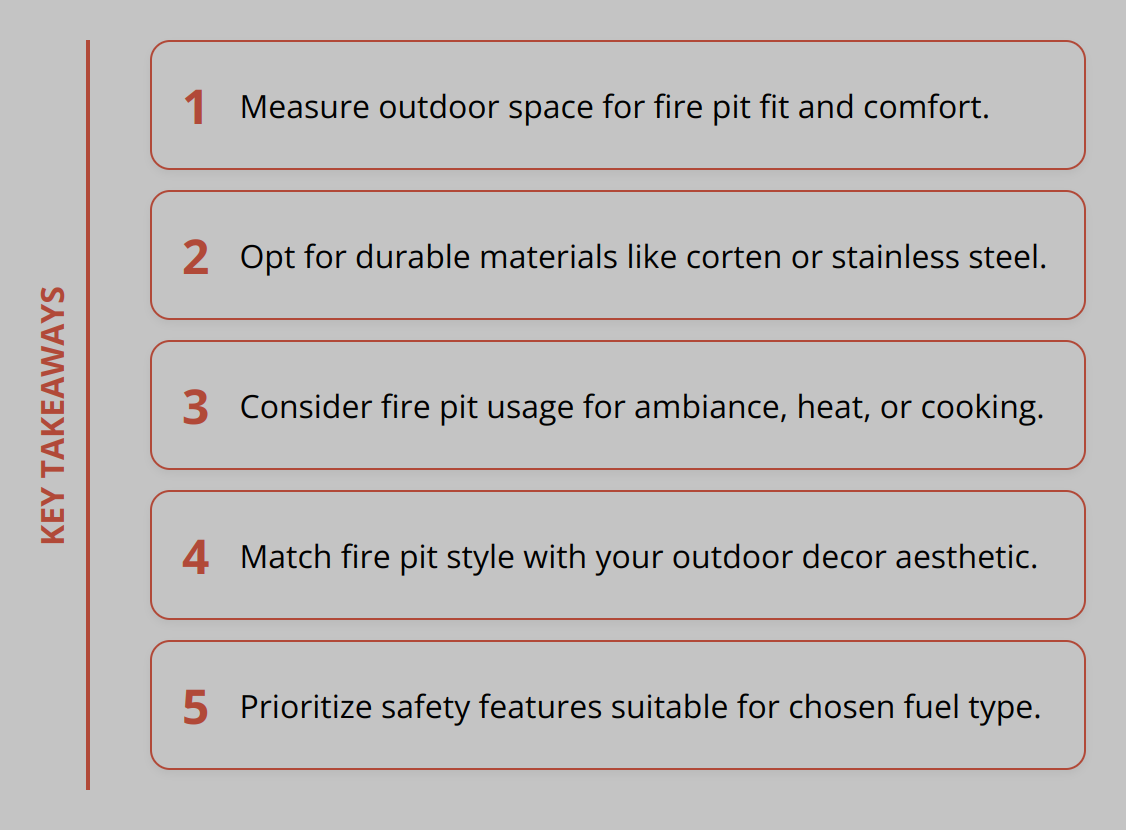
Size and Shape Considerations: Finding the Perfect Dimensions
When it comes to customization, one of the first considerations is the size and shape of your fire pit. We offer a range of standard sizes, but we also understand that every outdoor space is unique.
Our team works closely with customers to determine the perfect dimensions for their fire pit, taking into account factors such as available space, desired heat output, and aesthetic preferences.
Whether you’re looking for a compact fire pit for a cozy patio or a large, statement piece for a spacious backyard, we have the expertise to bring your vision to life.
Assessing Your Space
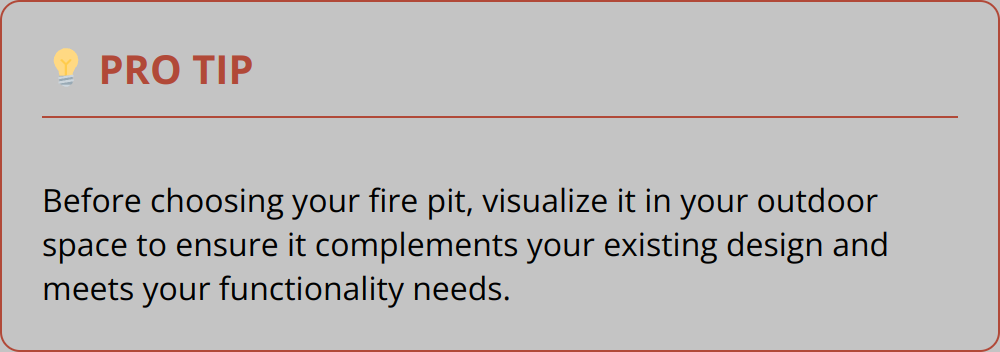
To ensure that your fire pit fits perfectly into your outdoor space, we recommend taking precise measurements and considering the layout of your patio or backyard.
Our design team can help you visualize how different sizes and shapes will work in your space, providing detailed renderings and scale models to guide your decision.
Finish Options: From Rustic to Refined
The finish of your fire pit is not just about aesthetics; it’s also about durability and maintenance. We offer a variety of finish options to suit different tastes and requirements.
From rustic, weathered finishes that add a touch of vintage charm to refined, polished finishes that exude modern sophistication, we have a range of choices to complement your outdoor decor.
Our craftsmen use high-quality materials and techniques to ensure that your fire pit not only looks great but also withstands the elements.
Material Selection
The choice of material for your fire pit’s finish is crucial. We work with premium metals and other materials, ensuring that your fire pit is both durable and visually appealing.
Whether you prefer the warmth of corten steel, the elegance of stainless steel, or the classic look of cast iron, we can help you select the perfect material for your fire pit.
Custom Designs and Personalization Features
For those who want a truly unique fire pit, we offer custom design services that allow you to incorporate personal elements and bespoke features.
Our design team can work with you to integrate logos, names, or custom artwork into your fire pit design, using precision cutting techniques to achieve intricate details.
We’ve created custom designs for corporate clients, families, and individuals looking to commemorate special occasions or simply to express their personal style.
Personalization Options
Personalization is about making your fire pit more than just a feature; it’s about making it a reflection of you. We can incorporate a range of personalized elements, from engraved names and dates to custom designs that become visible when the fire is burning.
Our craftsmen are skilled in working with various materials, including stone, glass, and specialized metals, to achieve unique design objectives that set your fire pit apart.
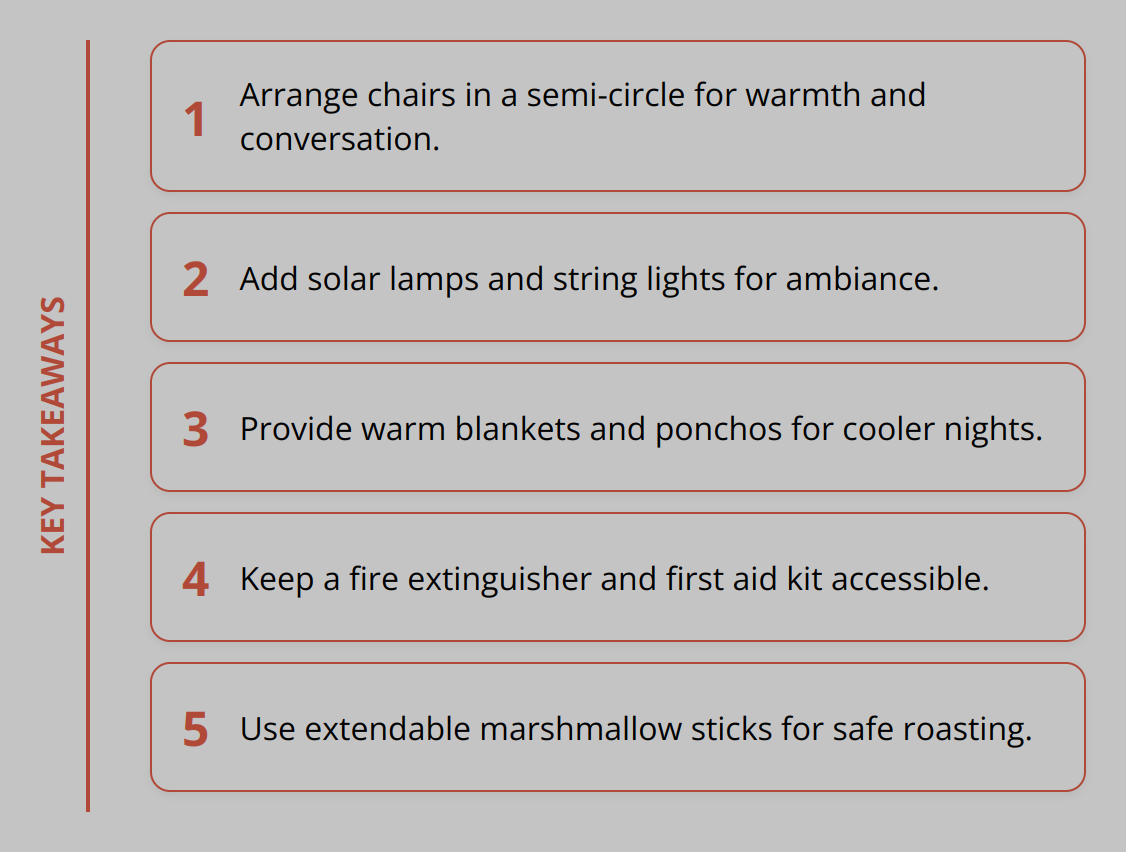
Installation and Setup: Getting Started With Your S&S Fire Pit
The journey to enjoying your S&S Fire Pit begins with proper installation and setup. This crucial first step ensures that your fire pit is not only safe but also performs optimally, providing you with years of warmth and ambiance.

Site Preparation: Creating the Ideal Foundation
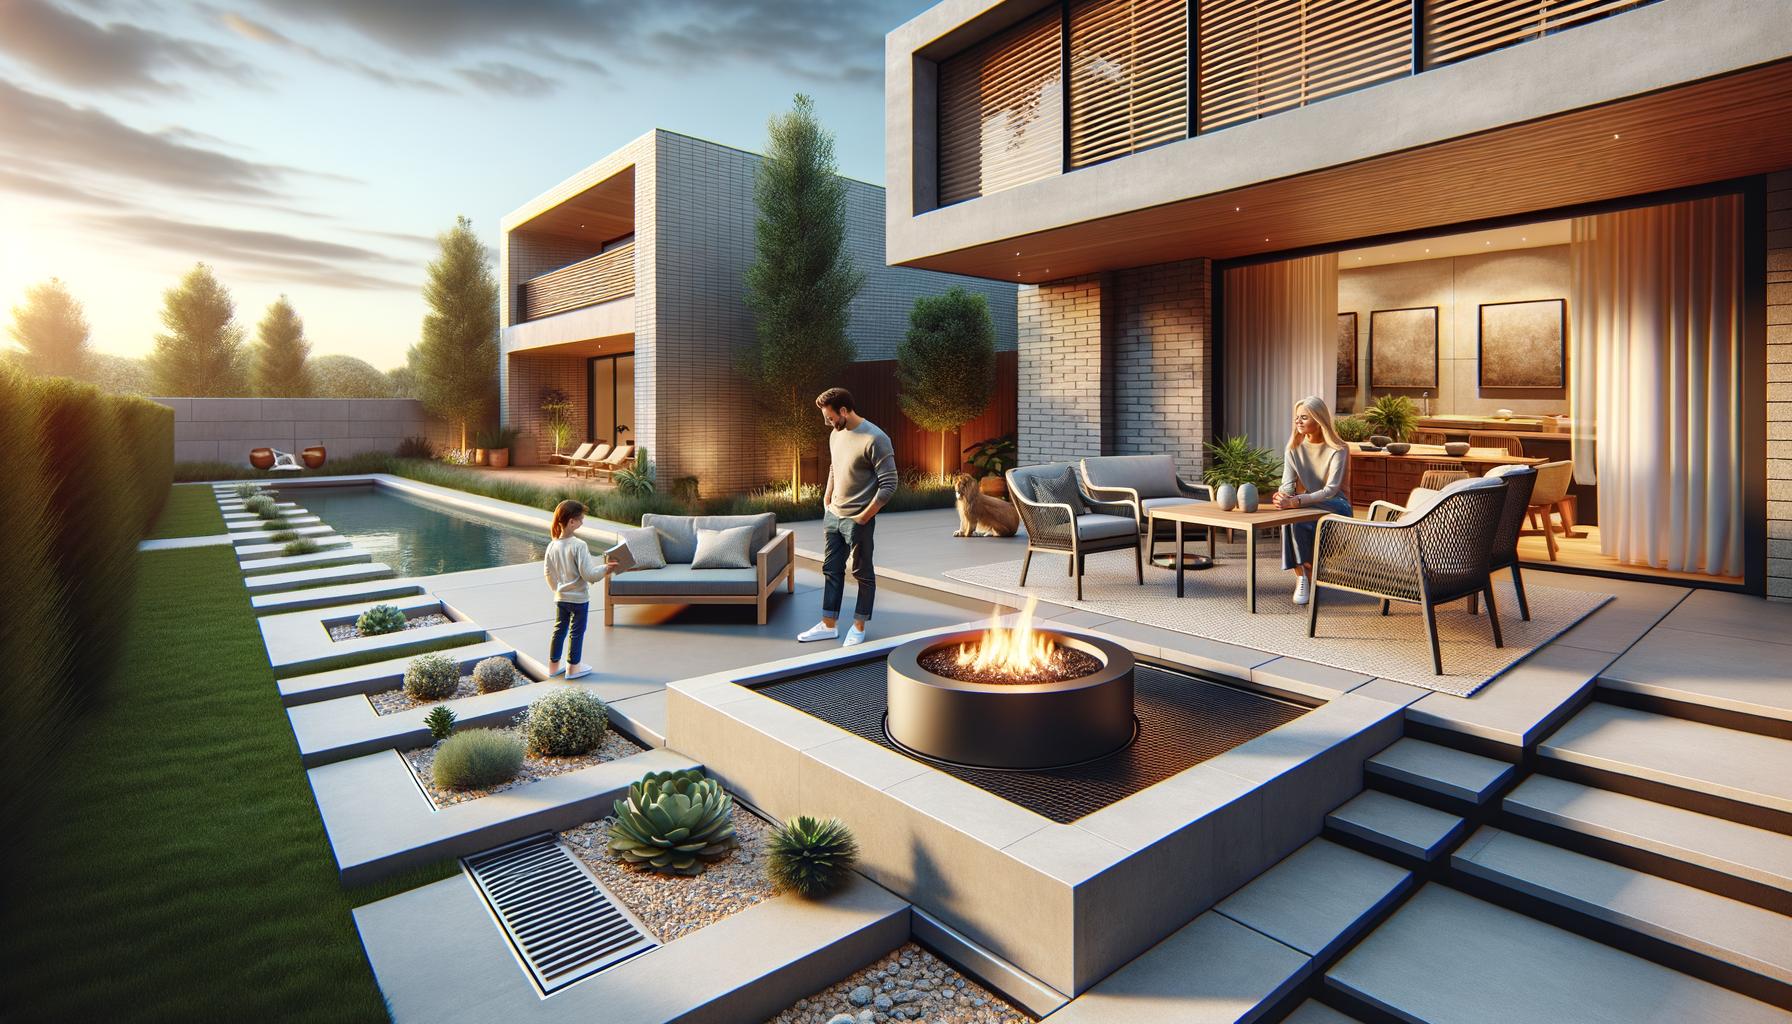
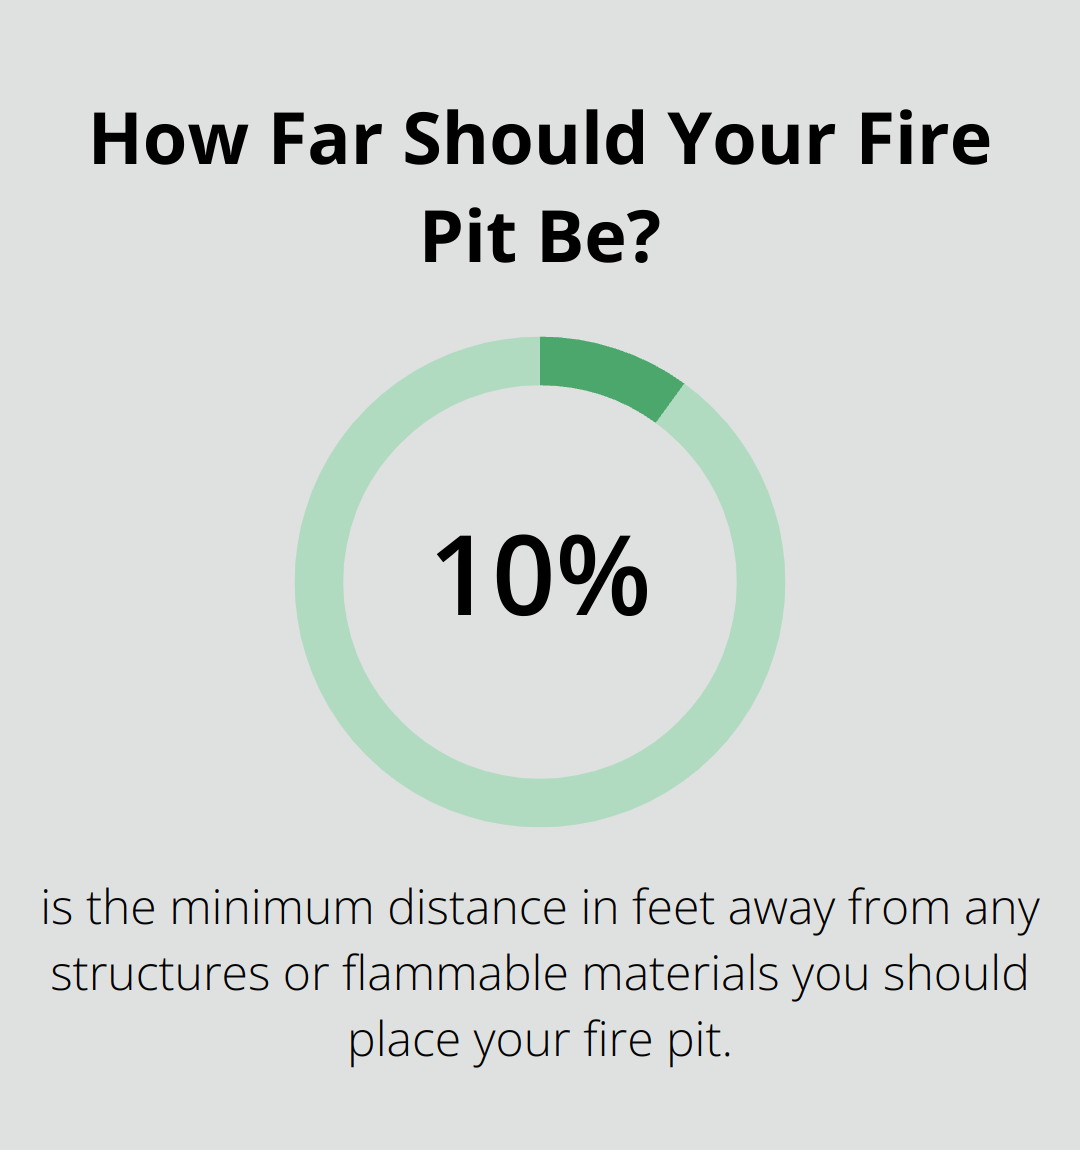
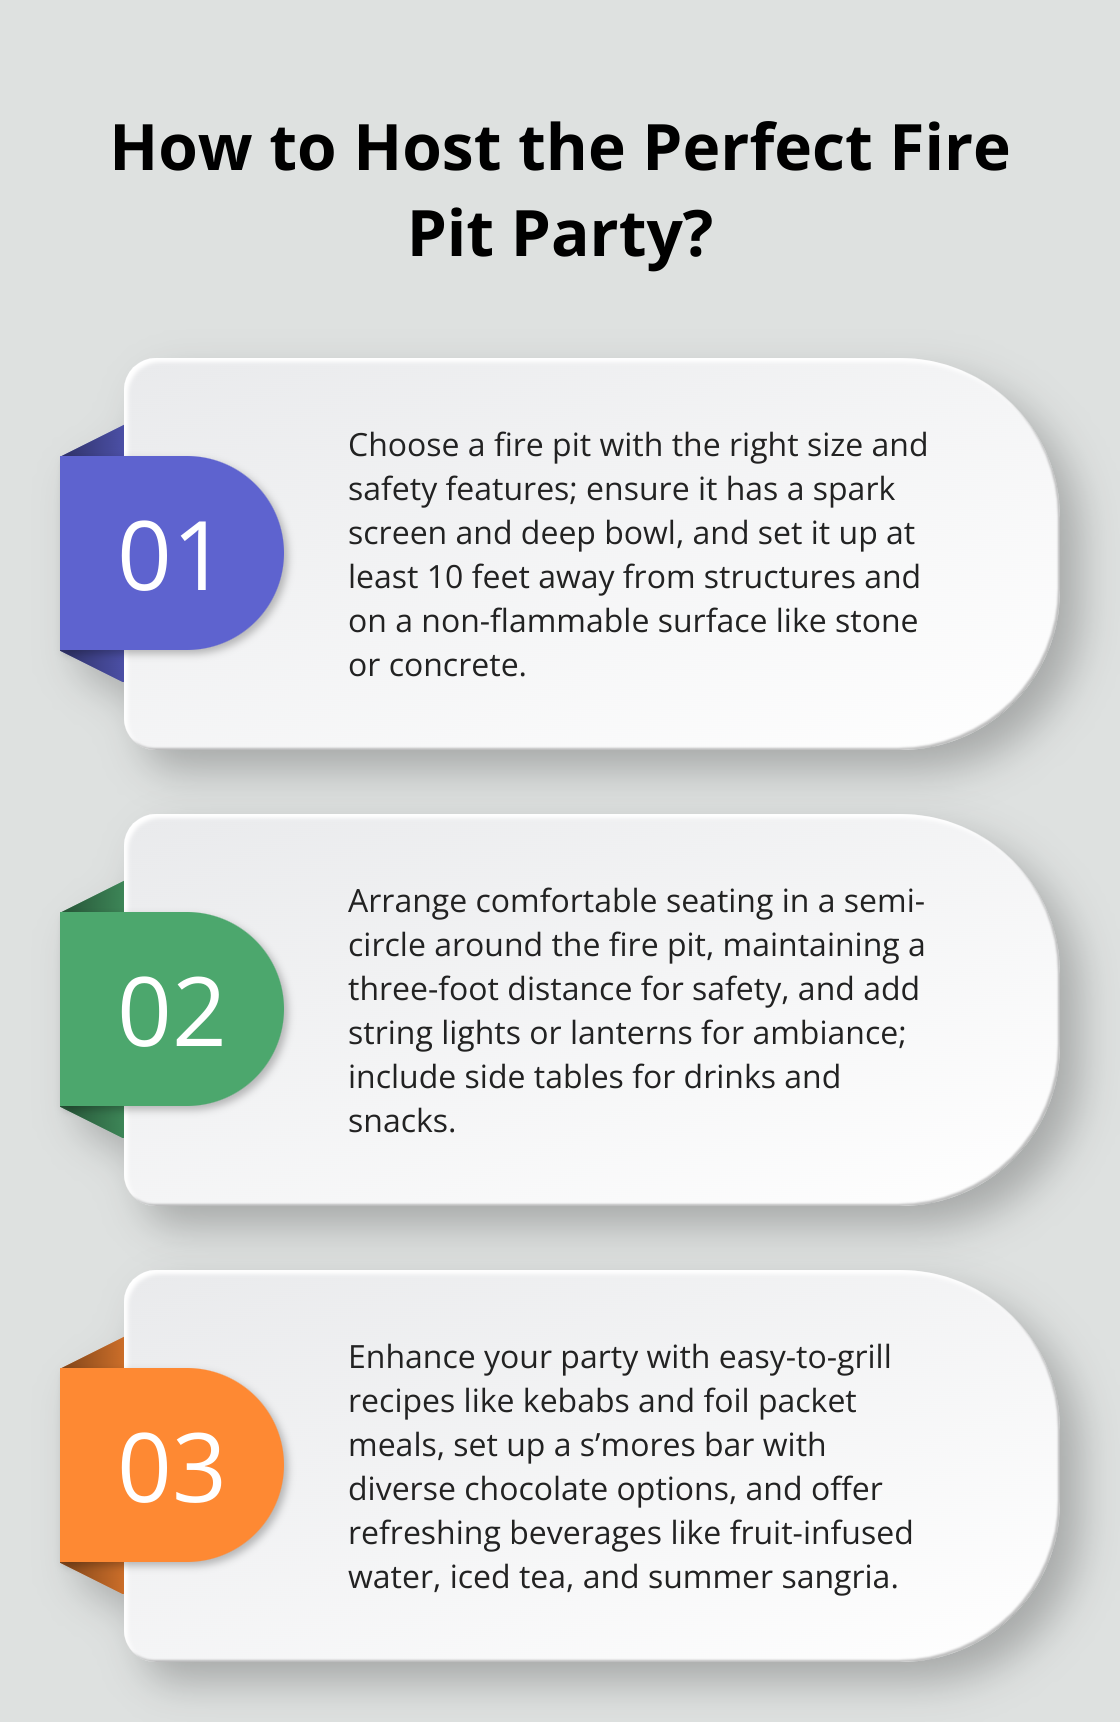
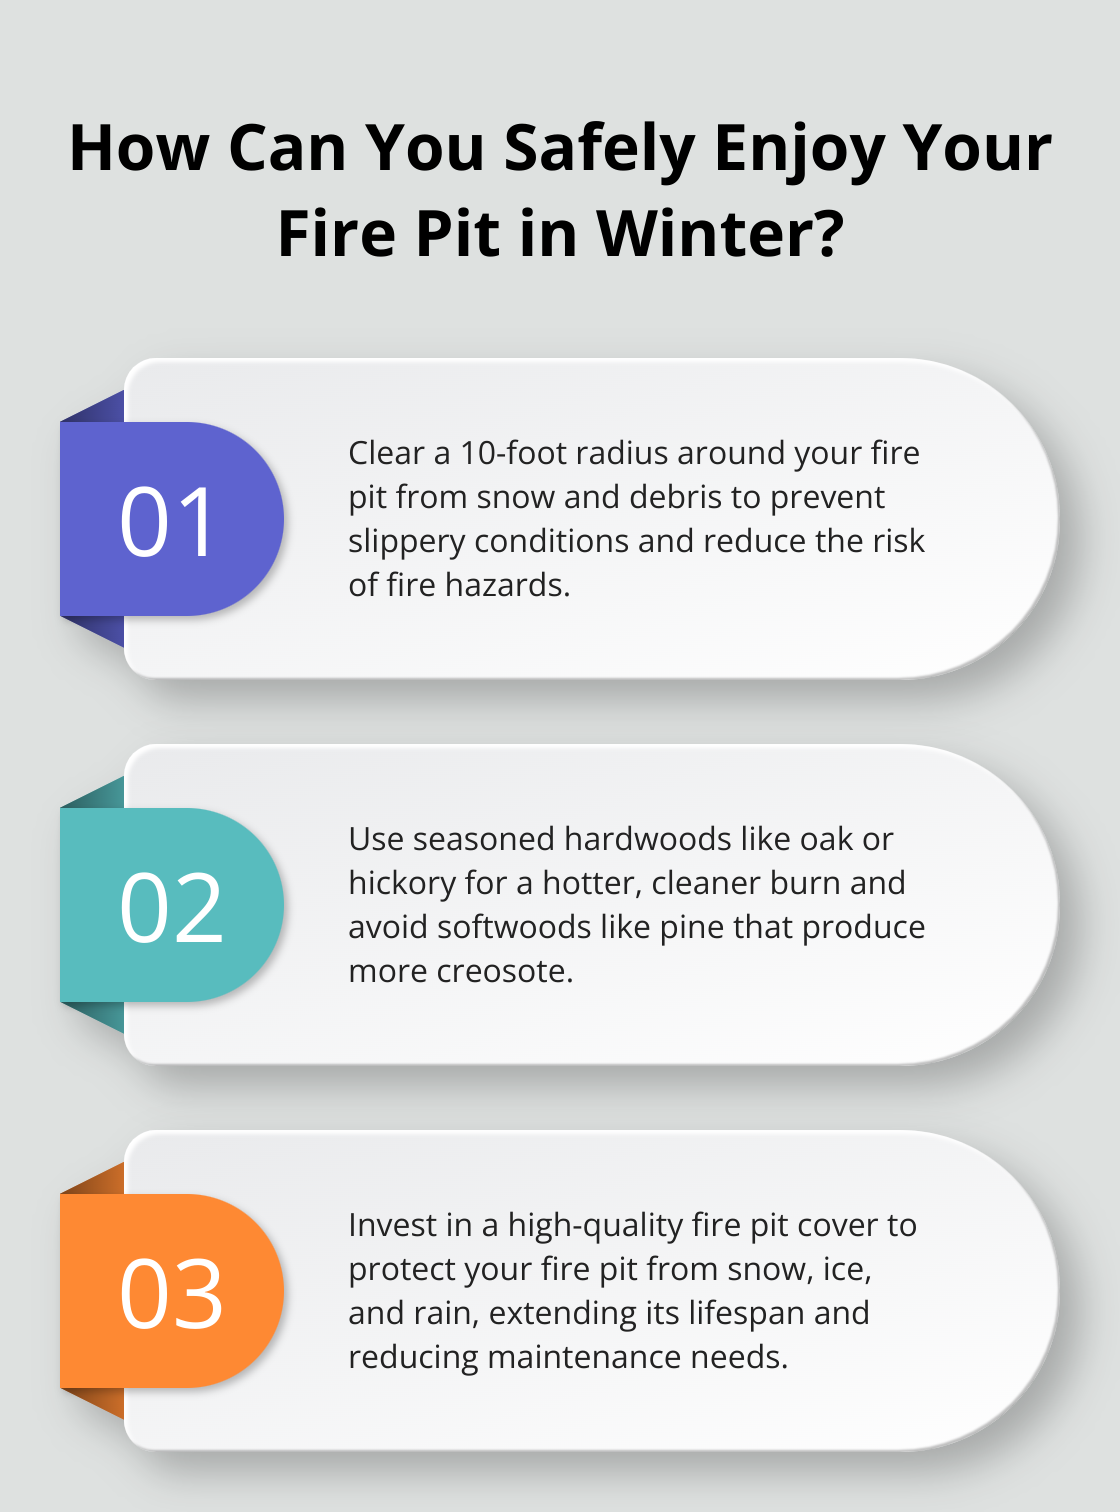
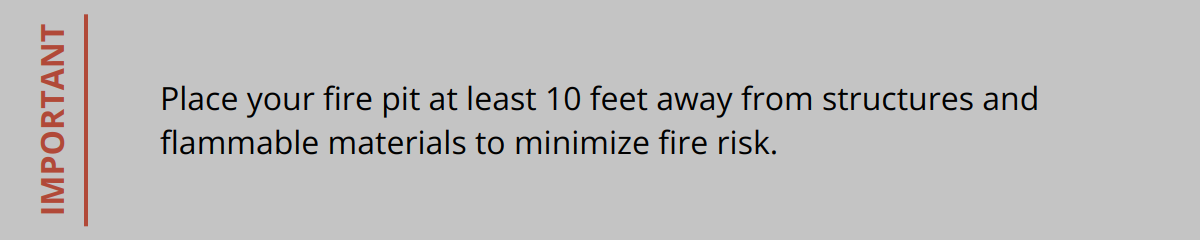
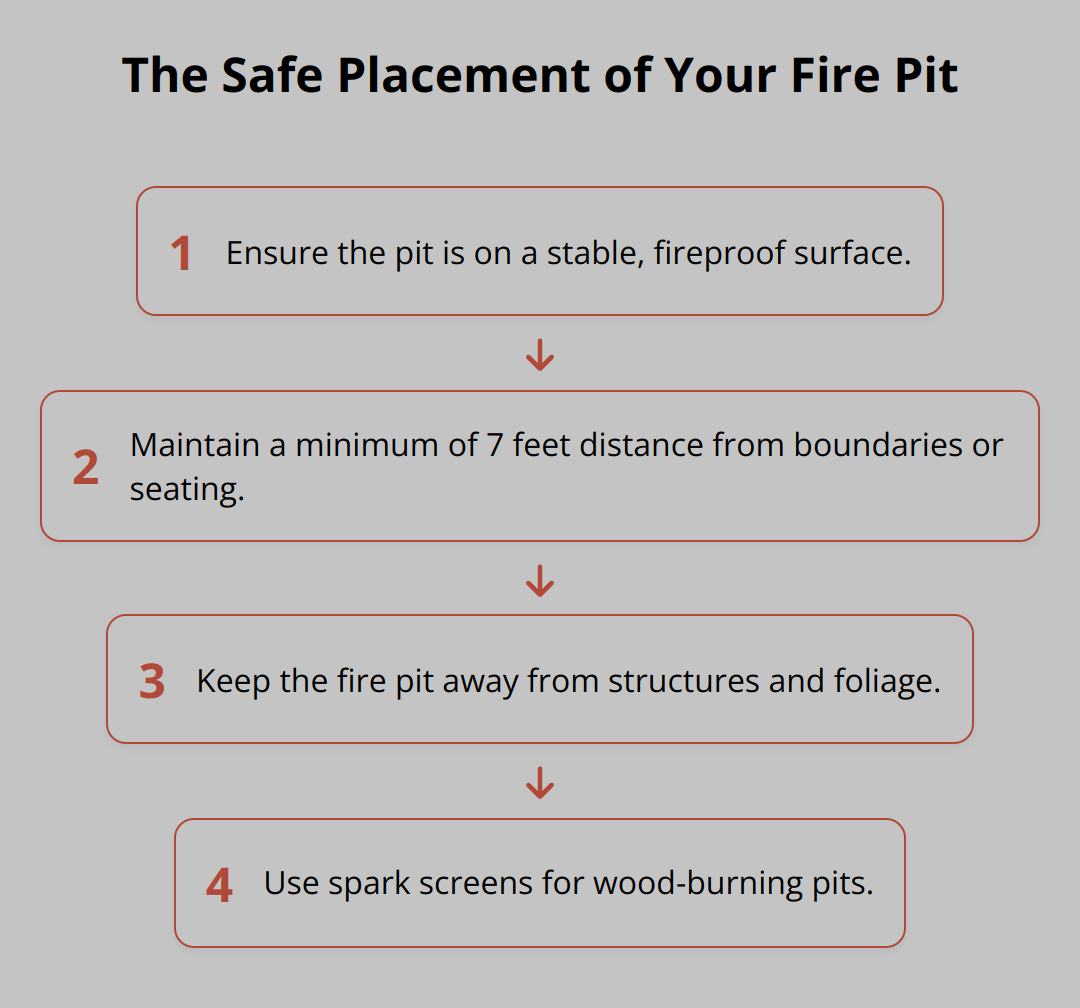
Before you even open the box containing your S&S Fire Pit, it’s essential to prepare the site where it will be installed. Proper site preparation is critical for both safety and performance. Start by selecting a flat, non-combustible surface that is away from overhanging branches, power lines, or other hazards.
Ensure the area is clear of debris and level. For fire pits that will be installed on combustible surfaces like wood decks, consider using a fire pit pad or other protective barrier to prevent damage.
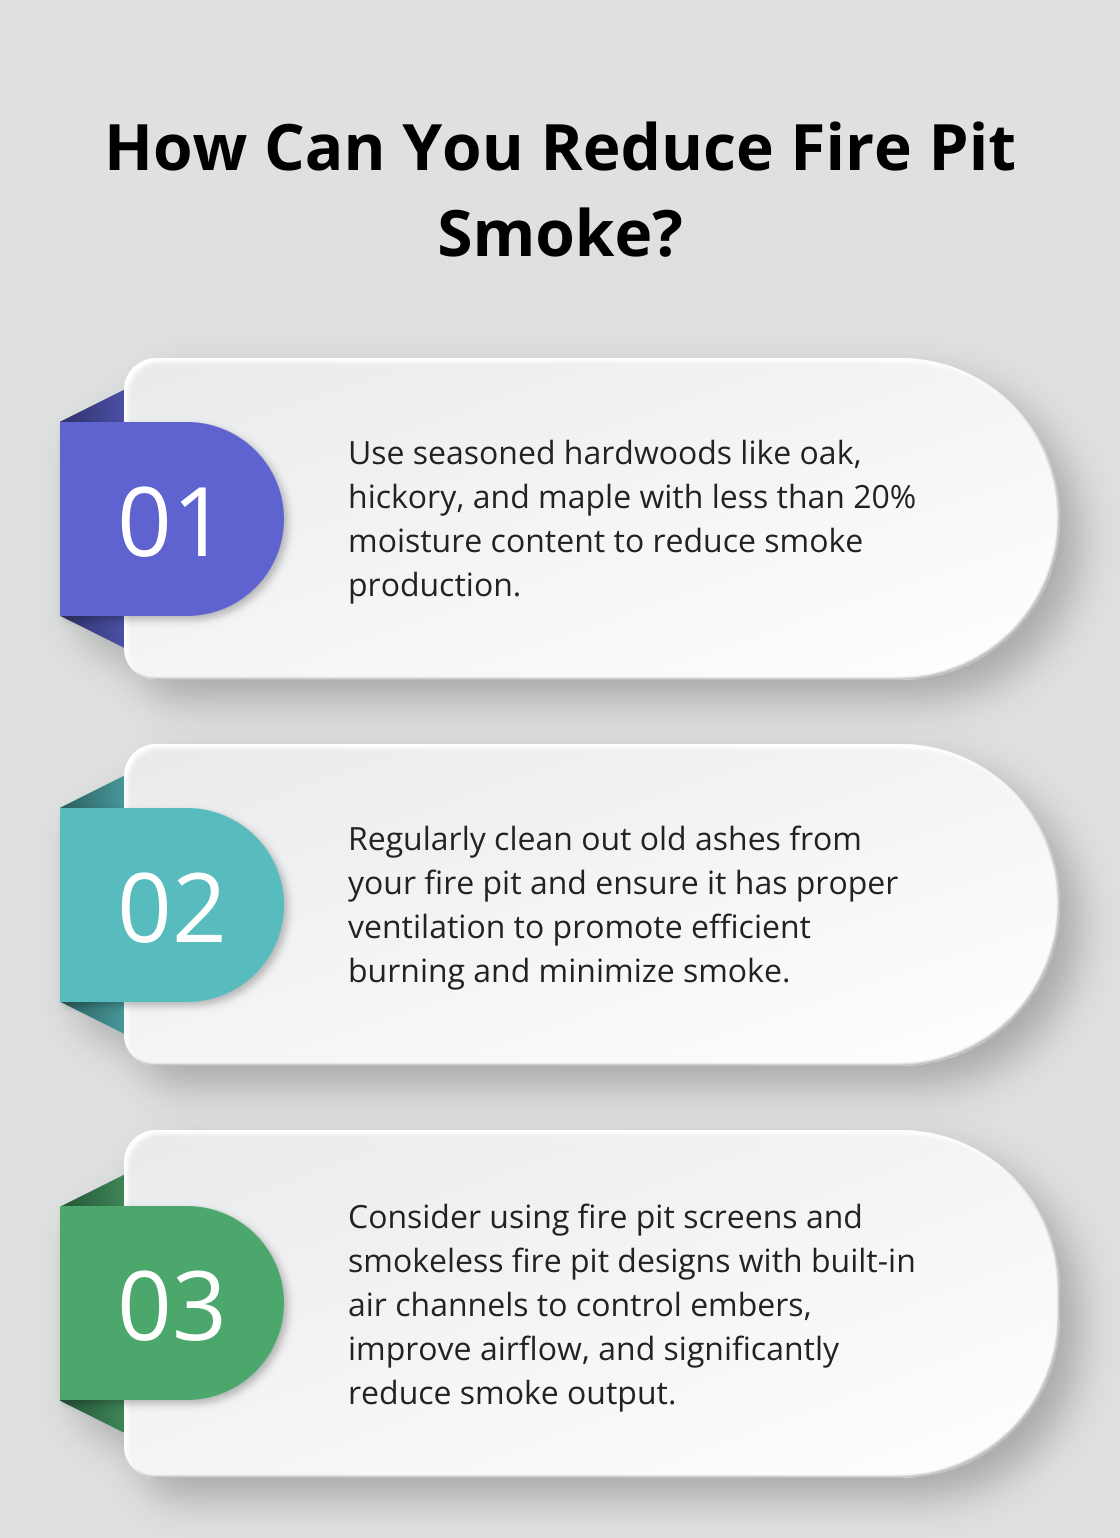
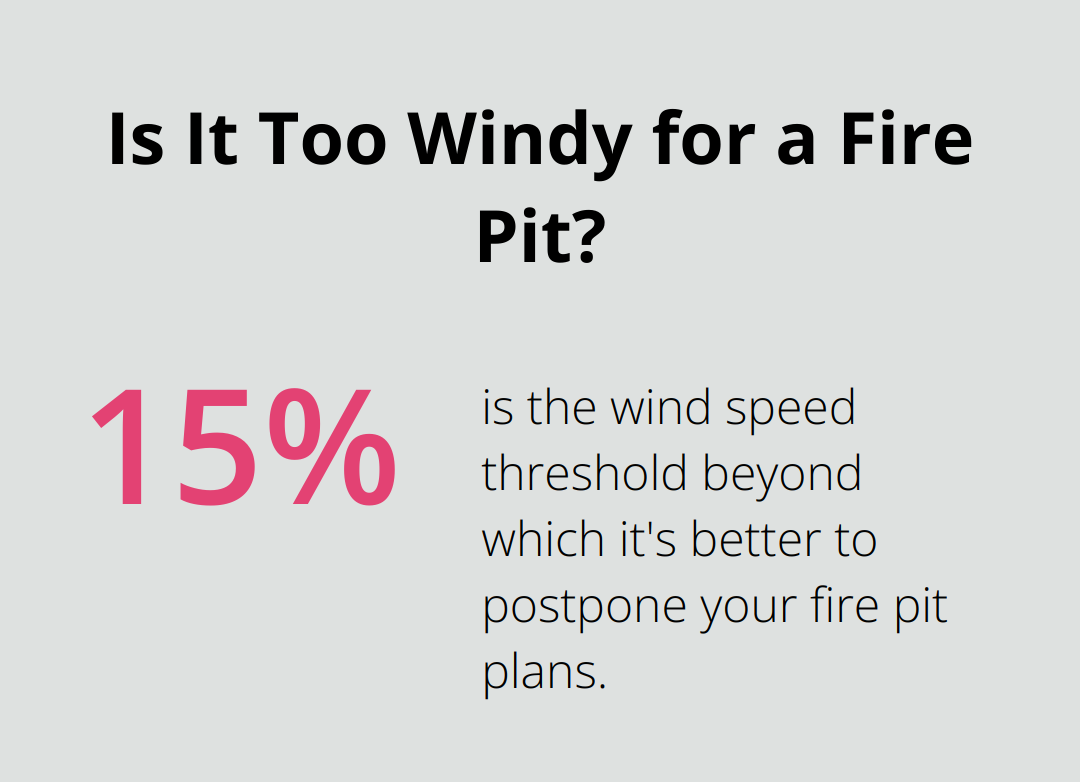
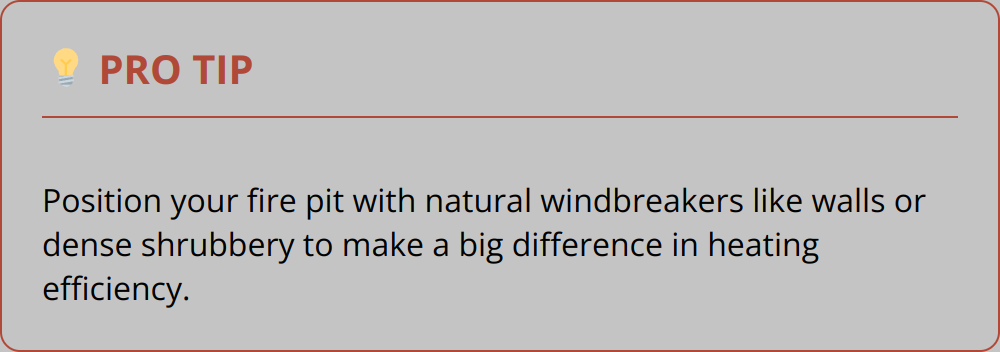
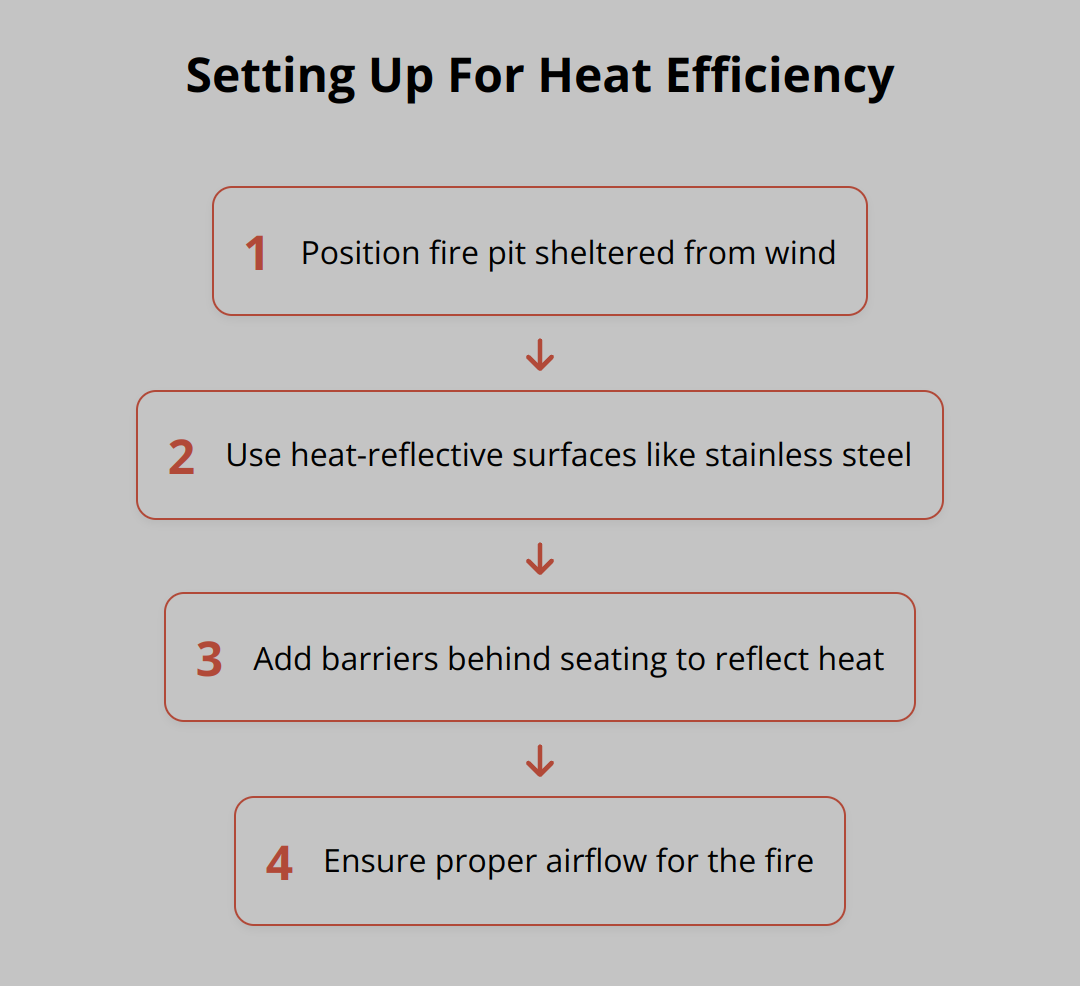
When choosing the location, also consider the direction of prevailing winds to minimize smoke intrusion into your living spaces. Additionally, think about the flow of traffic in your outdoor area to ensure the fire pit becomes a focal point rather than an obstacle.
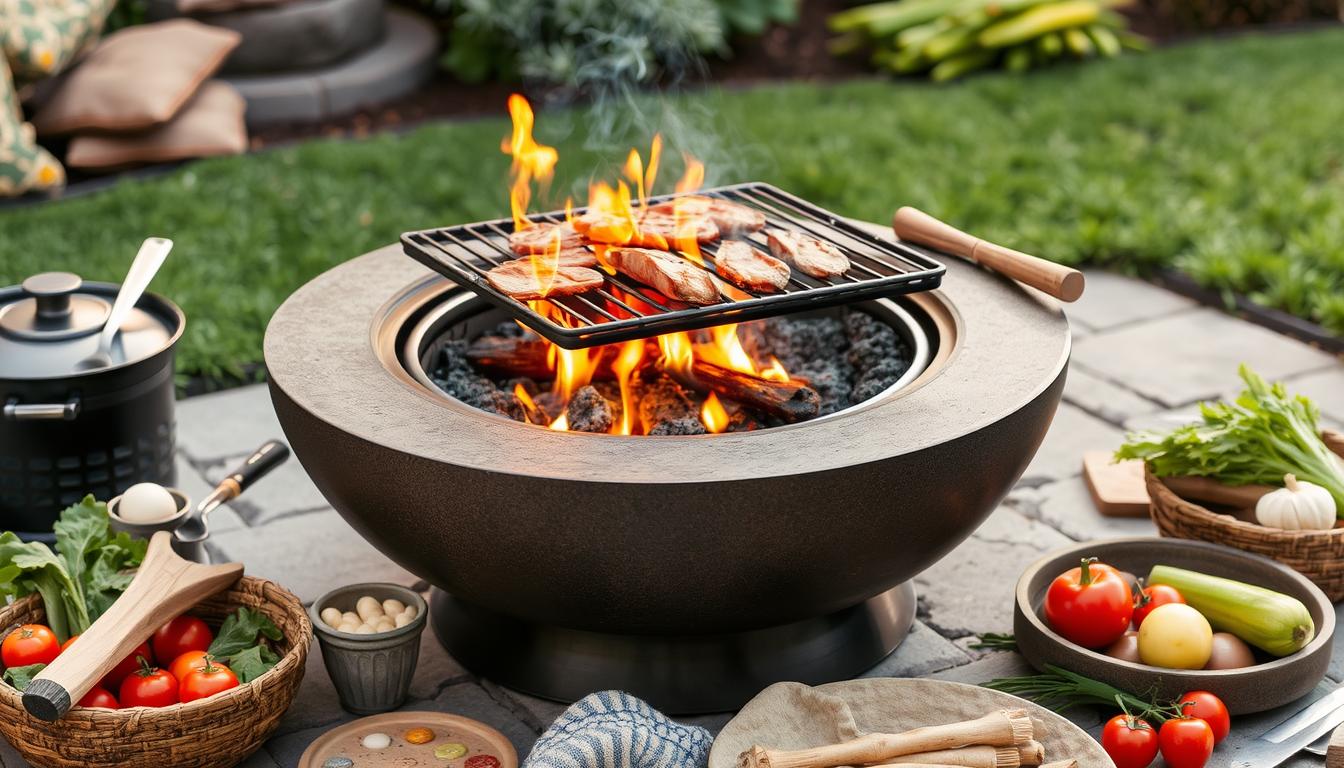
Assembly Guidelines: Step-by-Step Instructions
Assembling your S&S Fire Pit can be a straightforward process if you follow the provided instructions carefully. Begin by laying out all the components and verifying that you have everything needed according to the packing list.
Typically, assembly involves attaching the legs or base, installing any cooking grates or accessories, and ensuring all parts are securely fastened. It’s crucial to tighten all bolts and screws as specified to guarantee the stability and safety of the fire pit.
For specific assembly instructions, refer to the manual provided with your S&S Fire Pit. If you’re unsure about any part of the process, consider consulting a professional to ensure everything is correctly and safely assembled.
First Light: Tips for Your Inaugural Fire
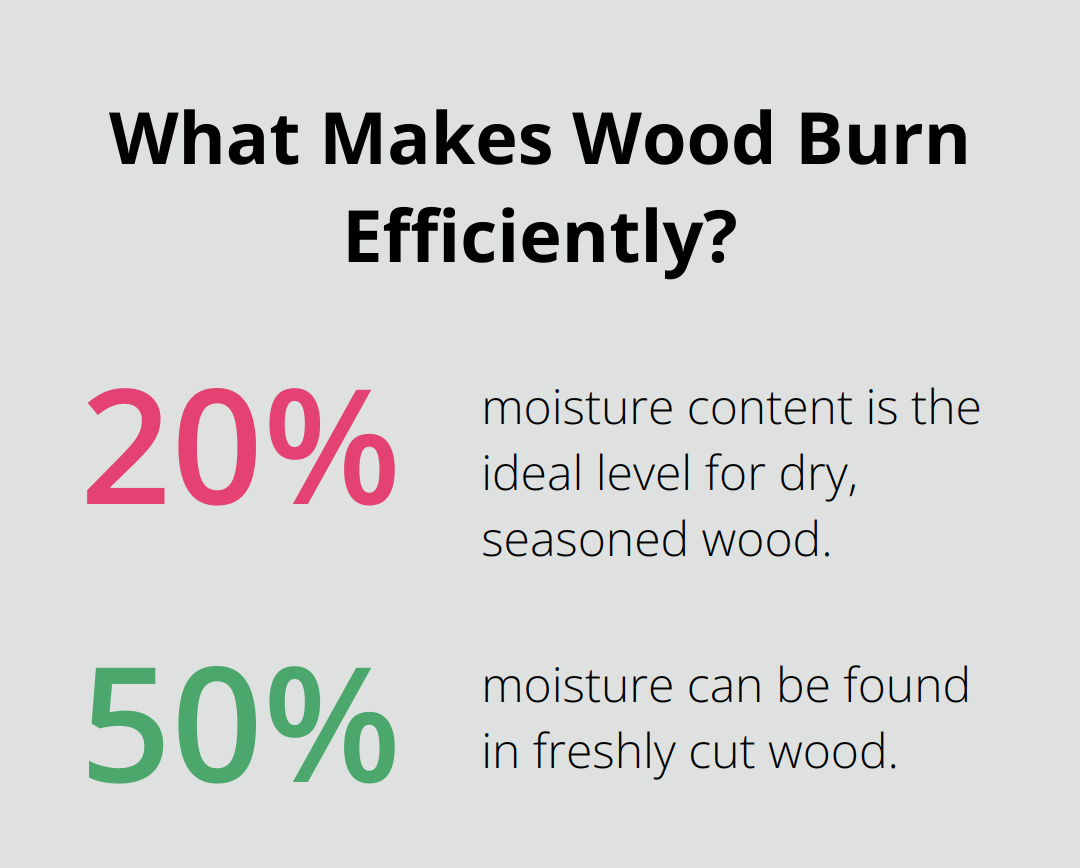
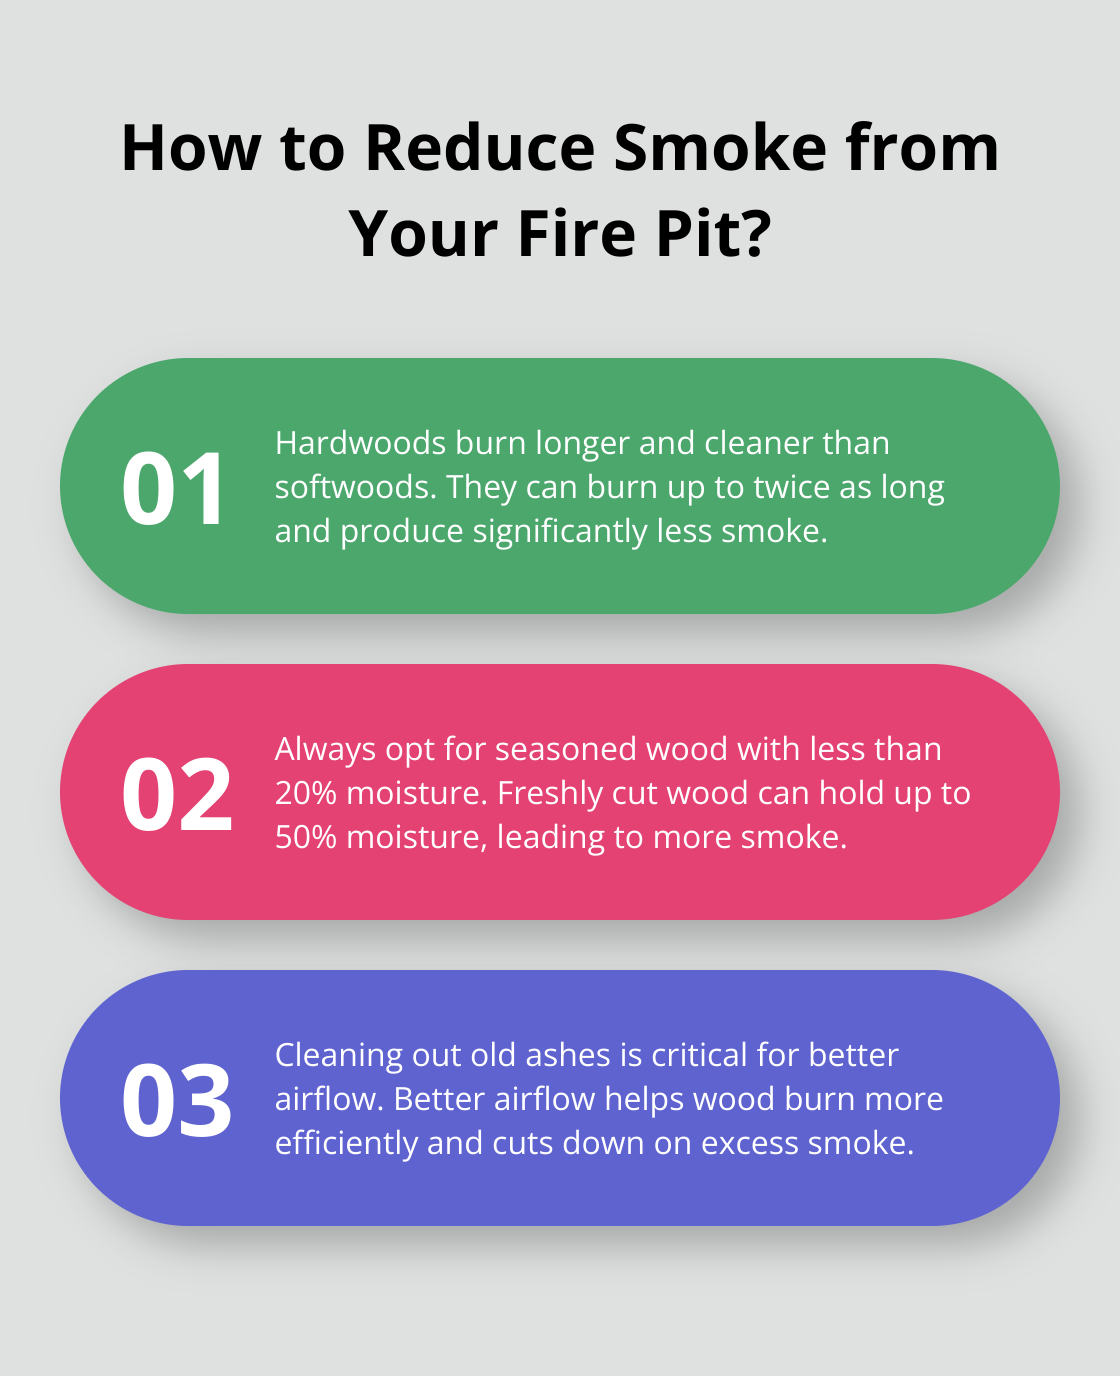
Lighting your S&S Fire Pit for the first time is an exciting moment. This initial fire is not just about enjoying the warmth and ambiance; it serves several important purposes. It helps to season the metal, establishing the initial patina that will evolve over time, and it allows you to familiarize yourself with the fire pit’s operation.
For the first fire, we recommend using a moderate amount of fuel to gradually bring the metal to operating temperature. This helps prevent thermal shock, which can occur if the metal is heated too quickly.
During this first session, you may notice some smoke or odor as any manufacturing residues are burned off. This is normal and will not recur in subsequent uses. Take this opportunity to observe how your fire pit performs, noting its draft characteristics and fuel consumption patterns.
Documenting your first use with photographs can be a fun way to track the evolution of your fire pit’s appearance over the years. Moreover, this first experience is a great chance to confirm that your fire pit is properly assembled and functioning as expected before you host larger gatherings.
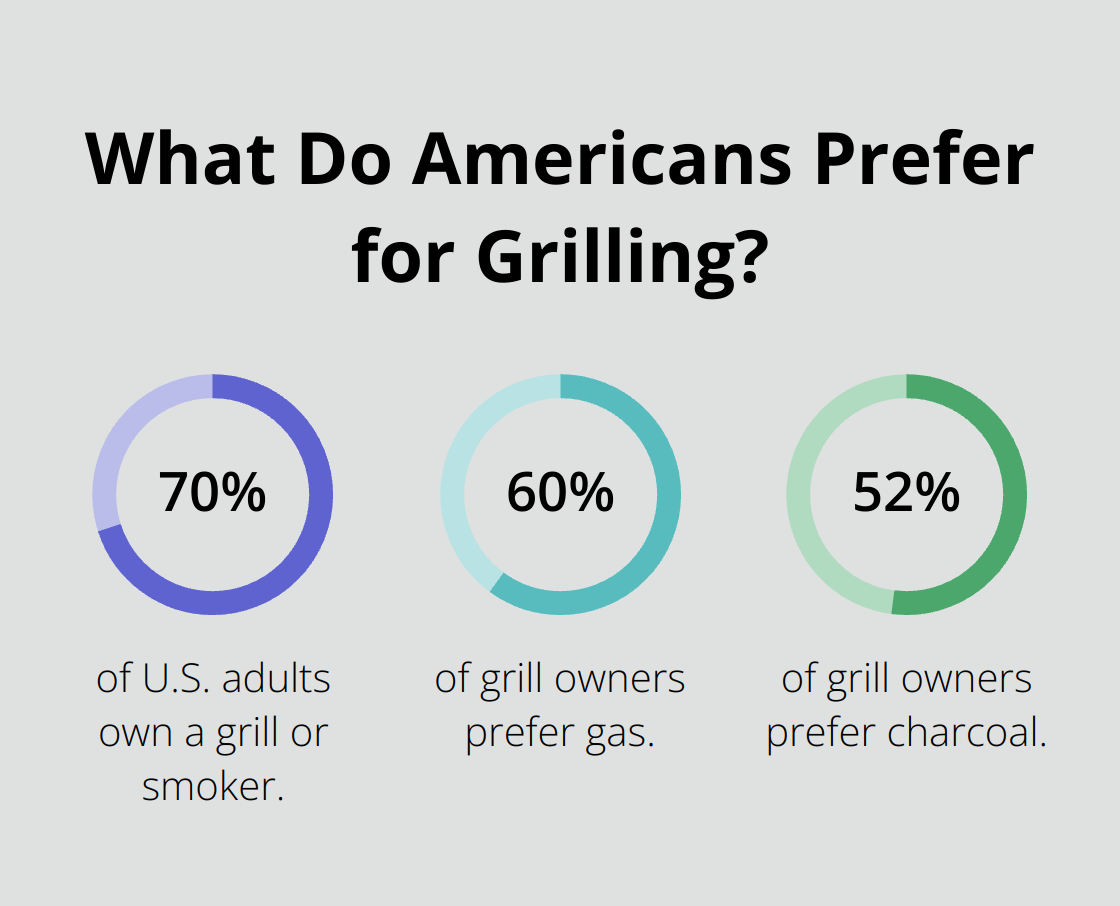
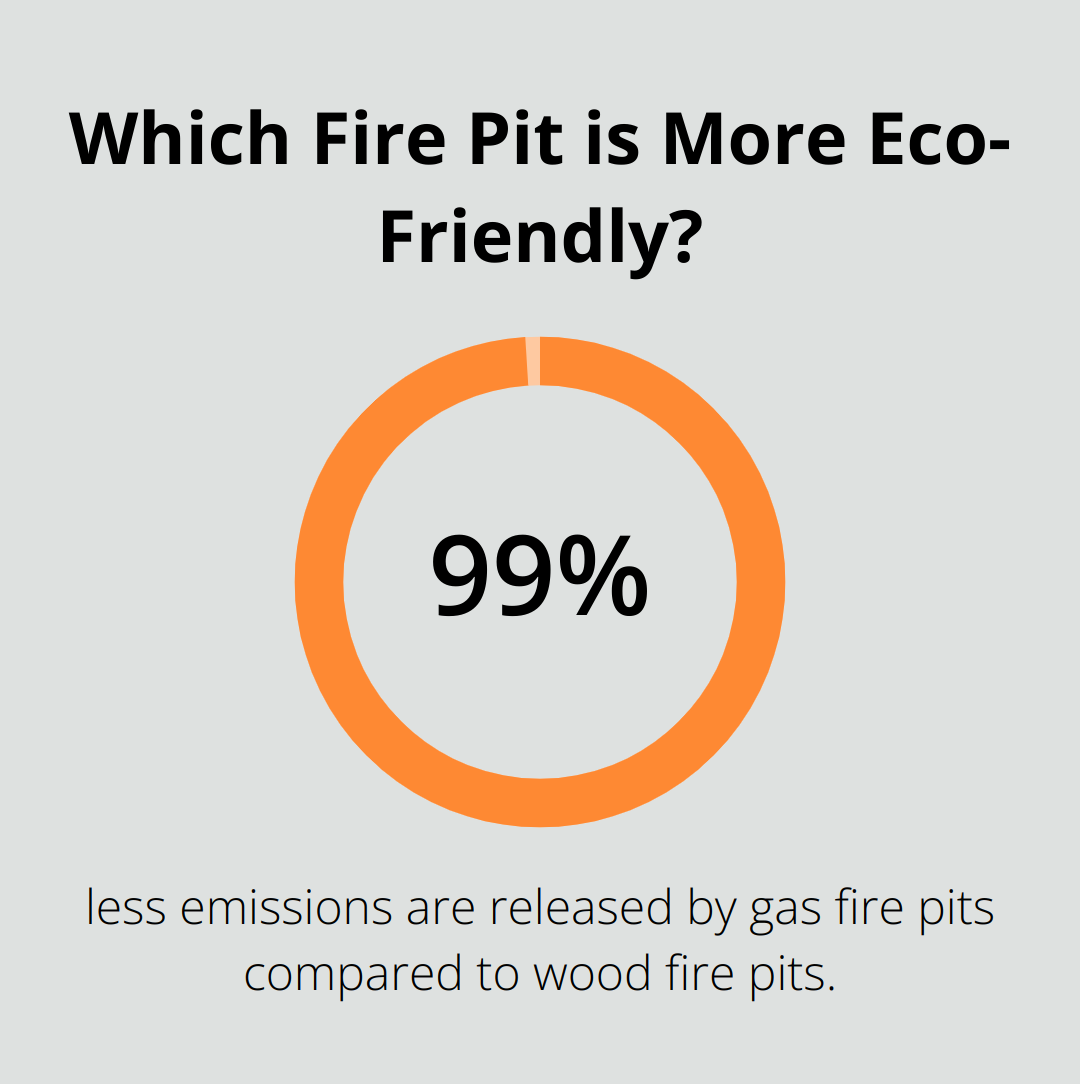
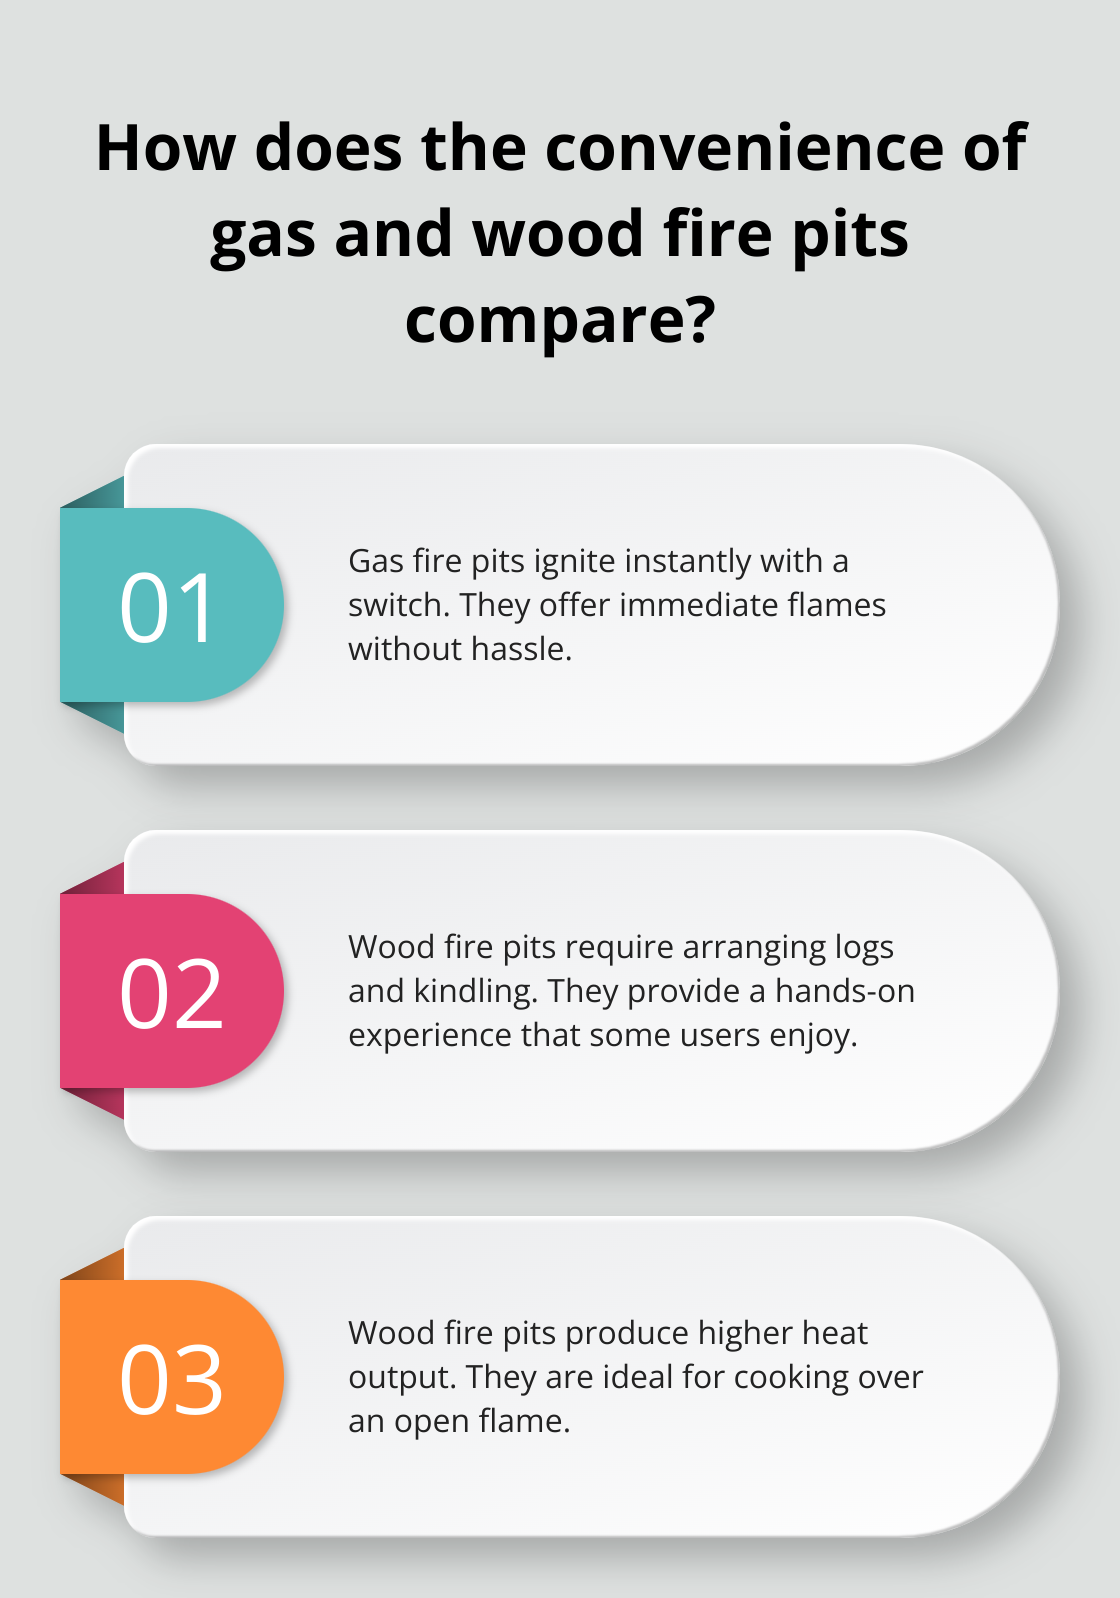
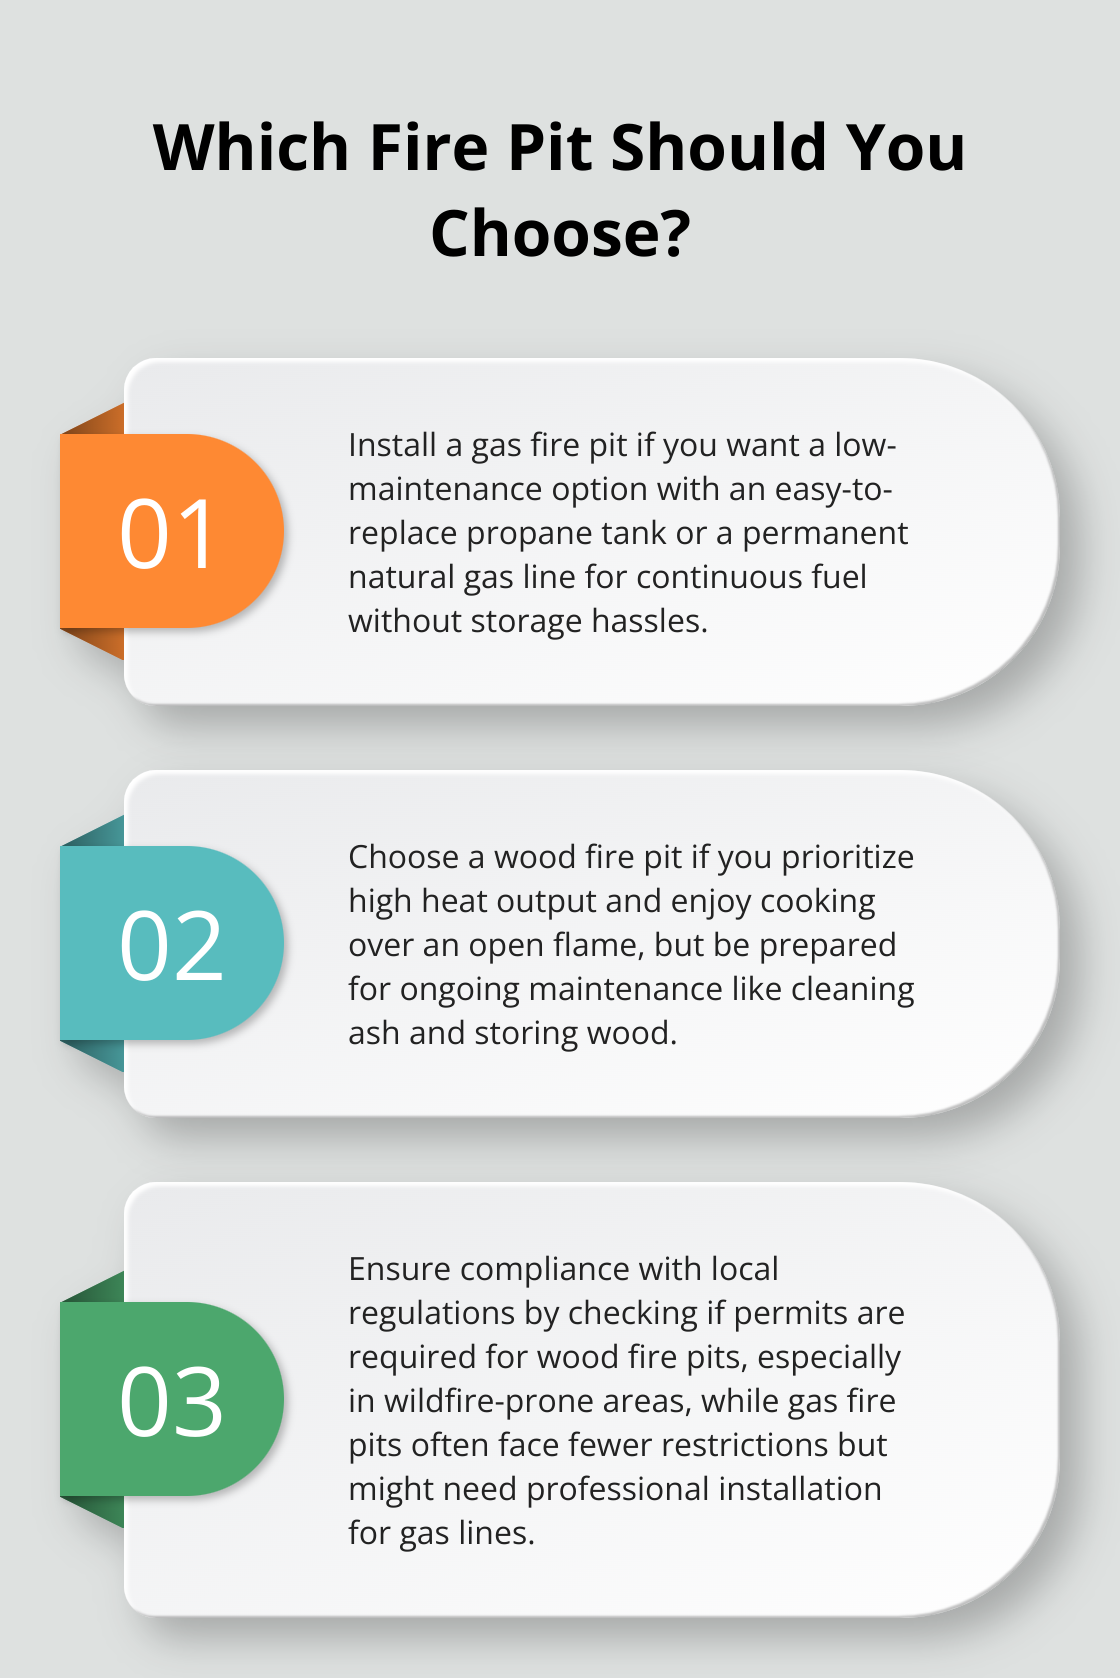
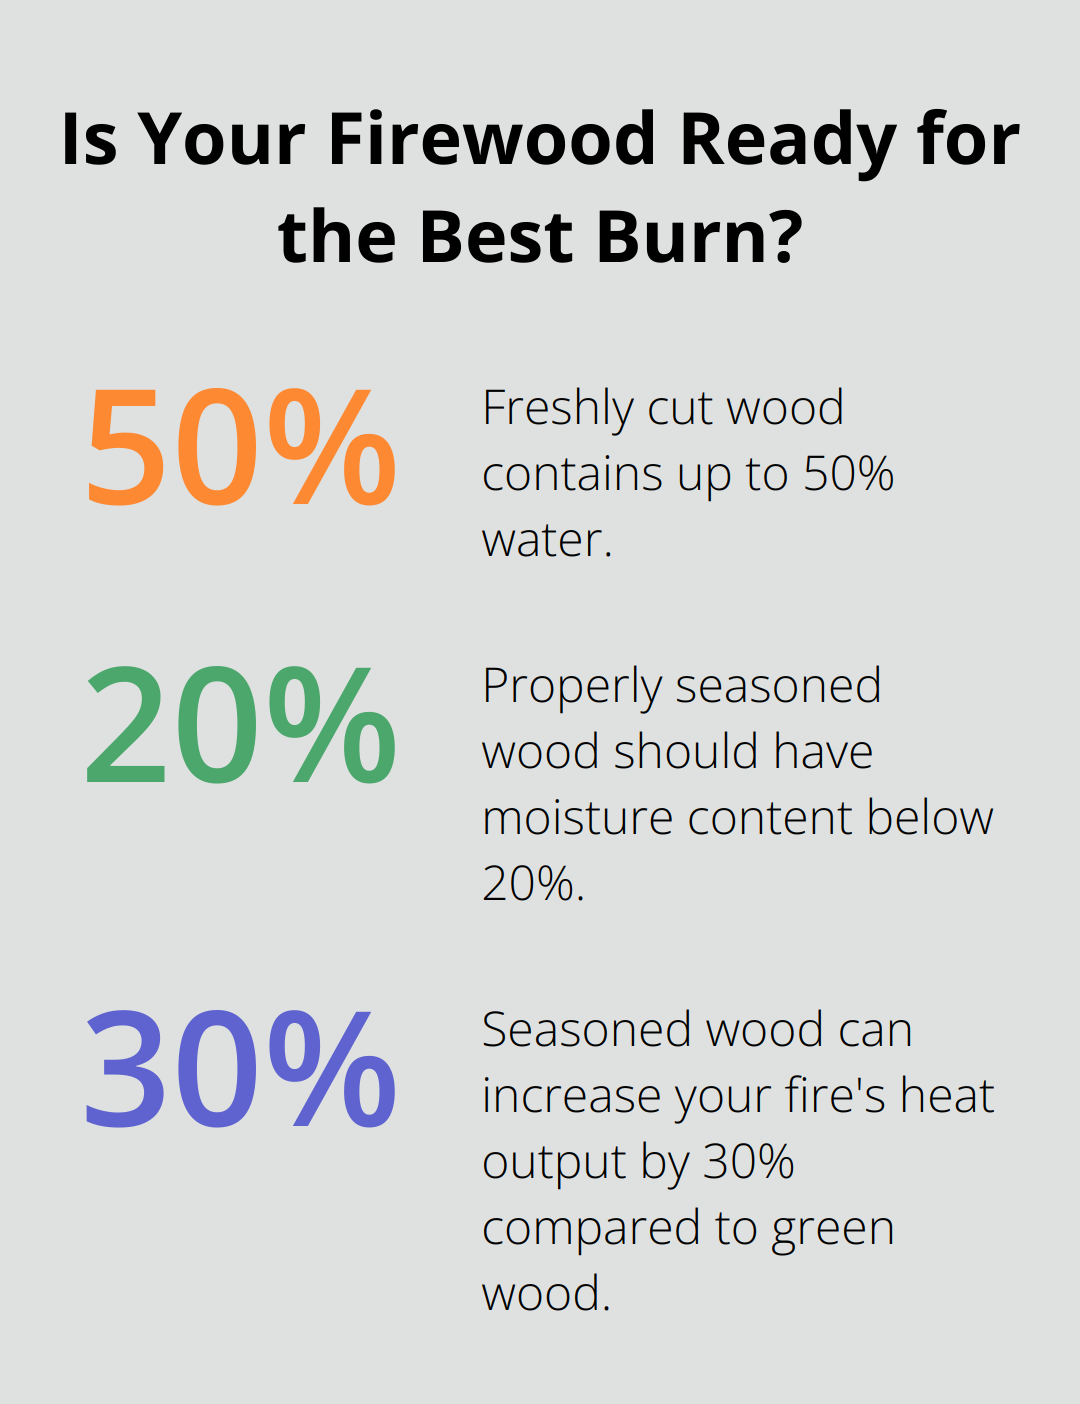
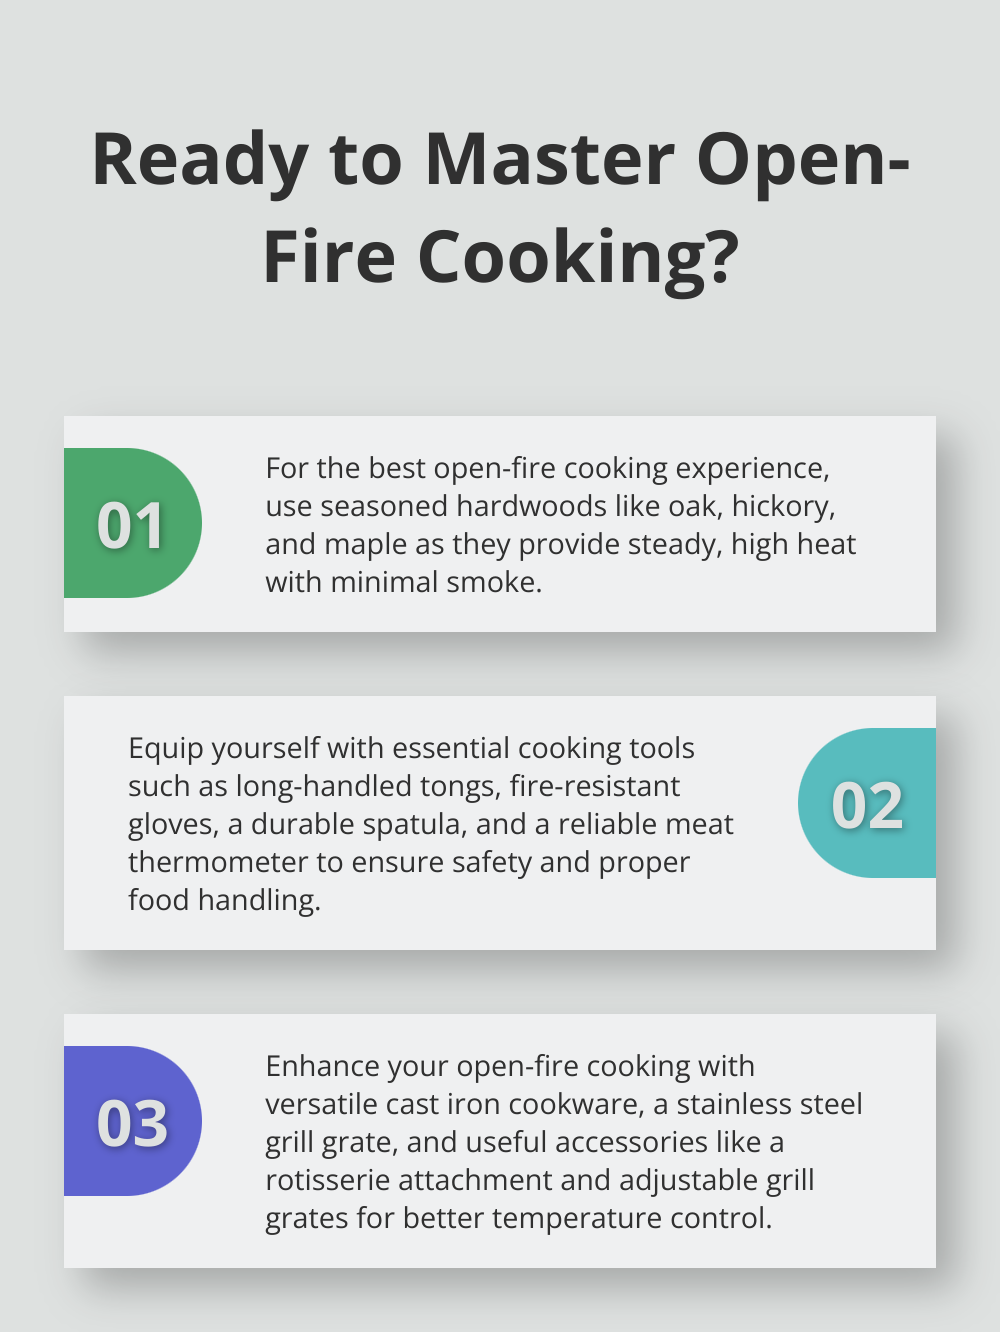
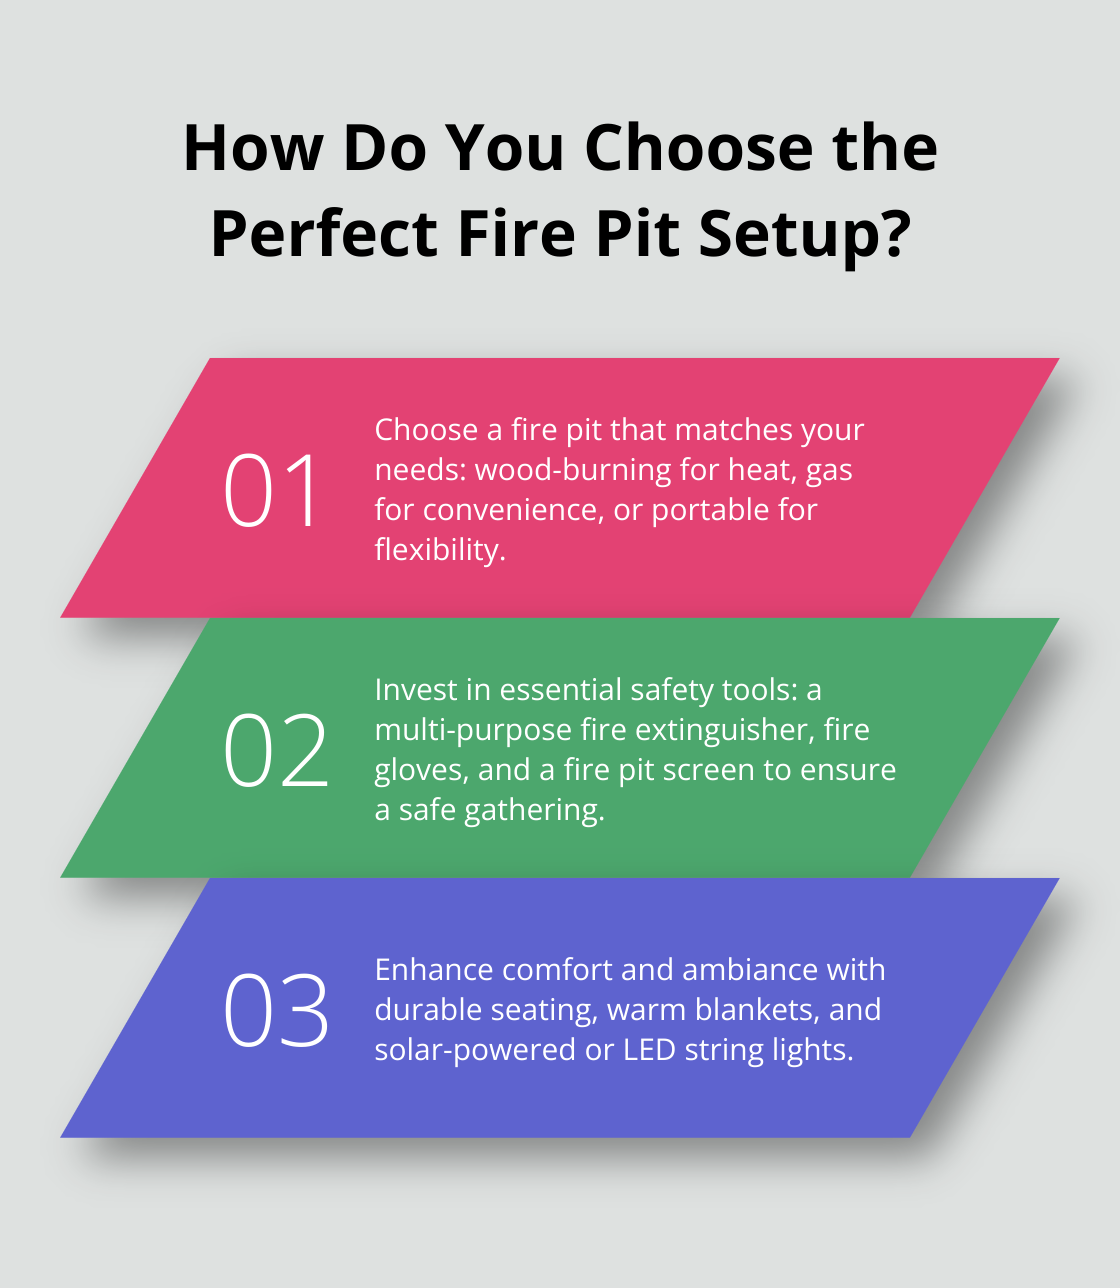
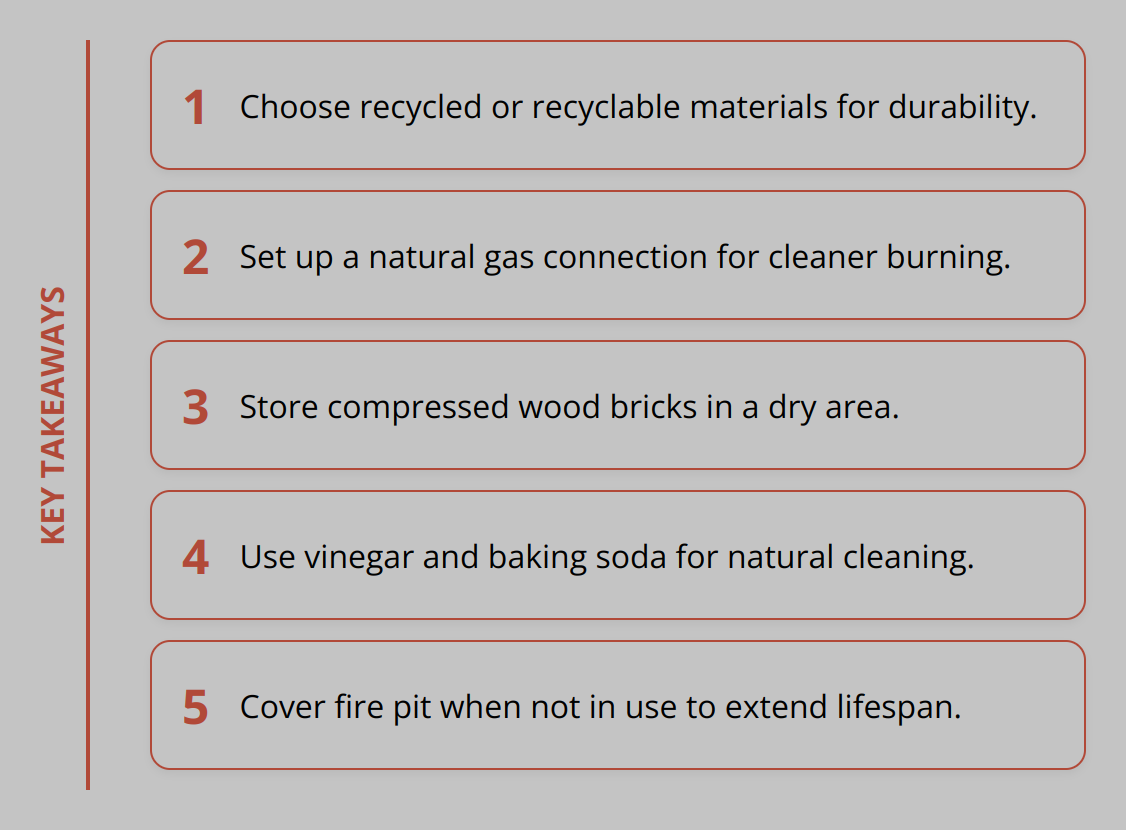
Fuel Options and Efficiency: Powering Your Perfect Fire

At S&S Fire Pits, we understand that the right fuel choice is crucial for optimal performance and enjoyment. Our fire pits are designed to accommodate various fuel types, ensuring that you can choose the one that best suits your needs and preferences.
Wood-Burning Models: The Classic Experience
Wood-burning fire pits offer a traditional and authentic experience, evoking the warmth and ambiance of a crackling flame. Our wood-burning models are designed to provide a genuine fire experience, with features such as:
- Efficient combustion systems for reduced smoke and emissions
- Durable construction to withstand high temperatures
- Aesthetic designs that complement any outdoor space
Our wood-burning fire pits are perfect for those who appreciate the nostalgic charm of a real fire. With proper maintenance, these units can provide years of enjoyment and warmth.
Gas-Powered Options: Convenience and Control
For those who prefer a more modern and convenient option, our gas-powered fire pits offer a hassle-free alternative. These models provide:
- Easy ignition and adjustable flame control
- Clean-burning operation with minimal emissions
- Low maintenance requirements
Gas-powered fire pits are ideal for those who value ease of use and flexibility. They are perfect for areas where wood burning is restricted or for those who prefer a more controlled fire experience.
Hybrid Systems: The Best of Both Worlds
Our innovative hybrid systems allow for both wood and gas operation in a single unit, providing unmatched versatility for different occasions and preferences. These models feature:
- Convertible configurations that can be easily switched between fuel types without specialized tools or technical knowledge
- Advanced air management systems to ensure optimal performance regardless of the fuel source
- Strategic shielding and thermal management to prevent damage to gas components during wood-burning operation
The dual-fuel capability of our hybrid systems makes them particularly valuable in areas with seasonal burn restrictions or changing entertainment needs. With comprehensive instructions for safe conversion between fuel types and proper maintenance for each configuration, our hybrid fire pits offer the ultimate flexibility and convenience.
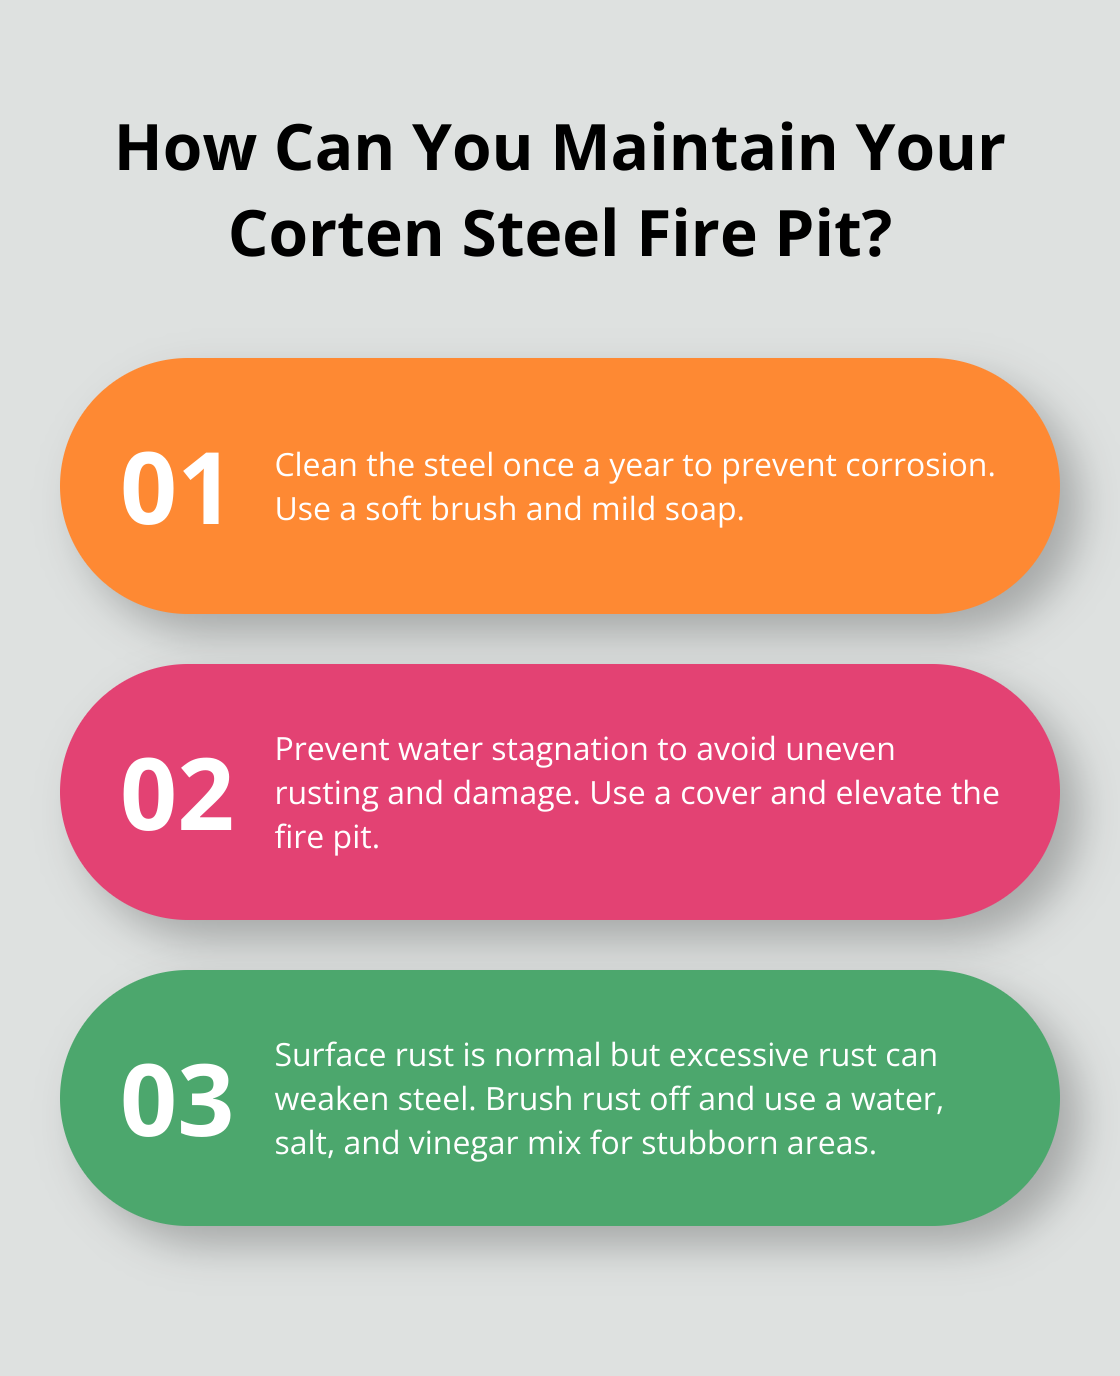
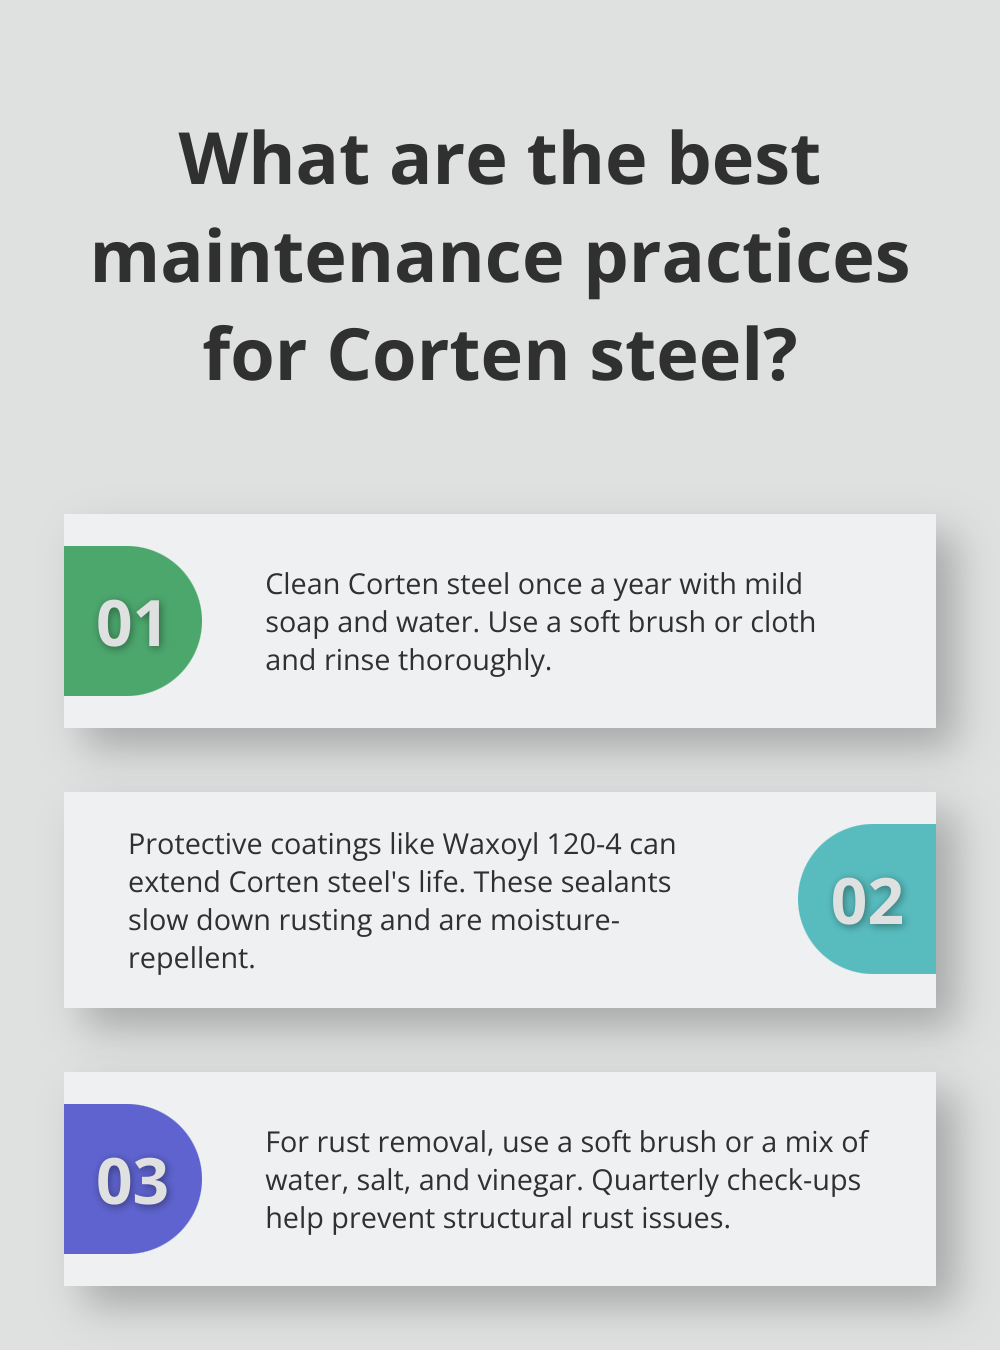
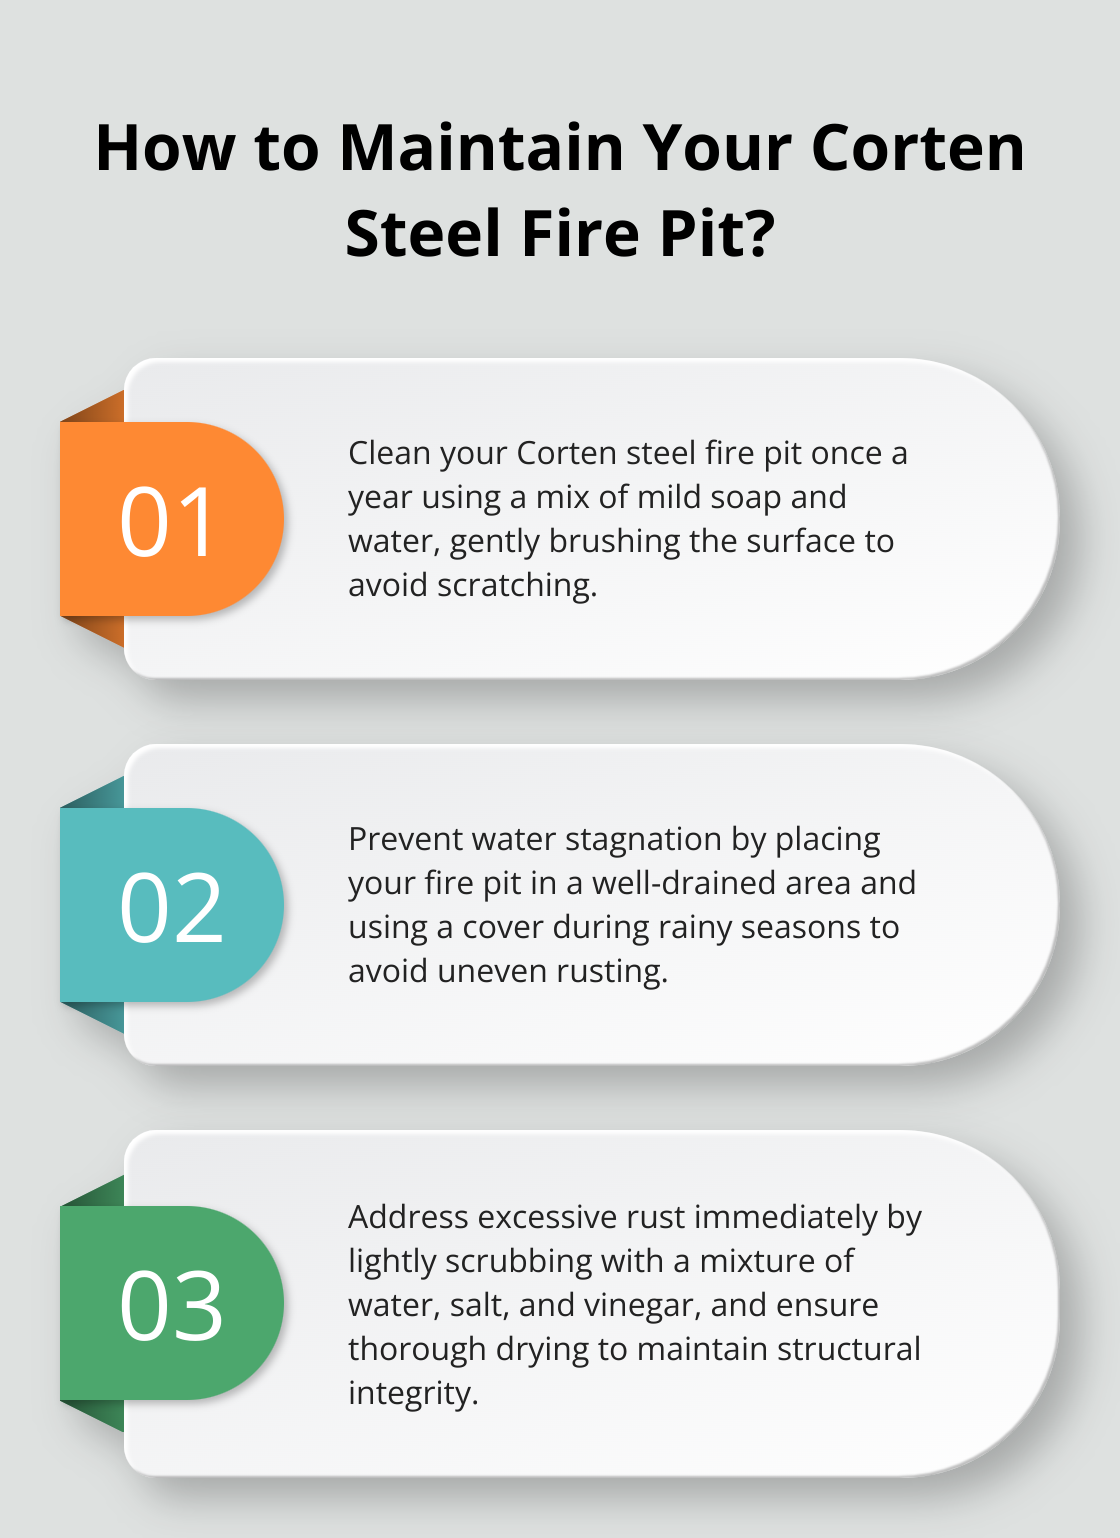
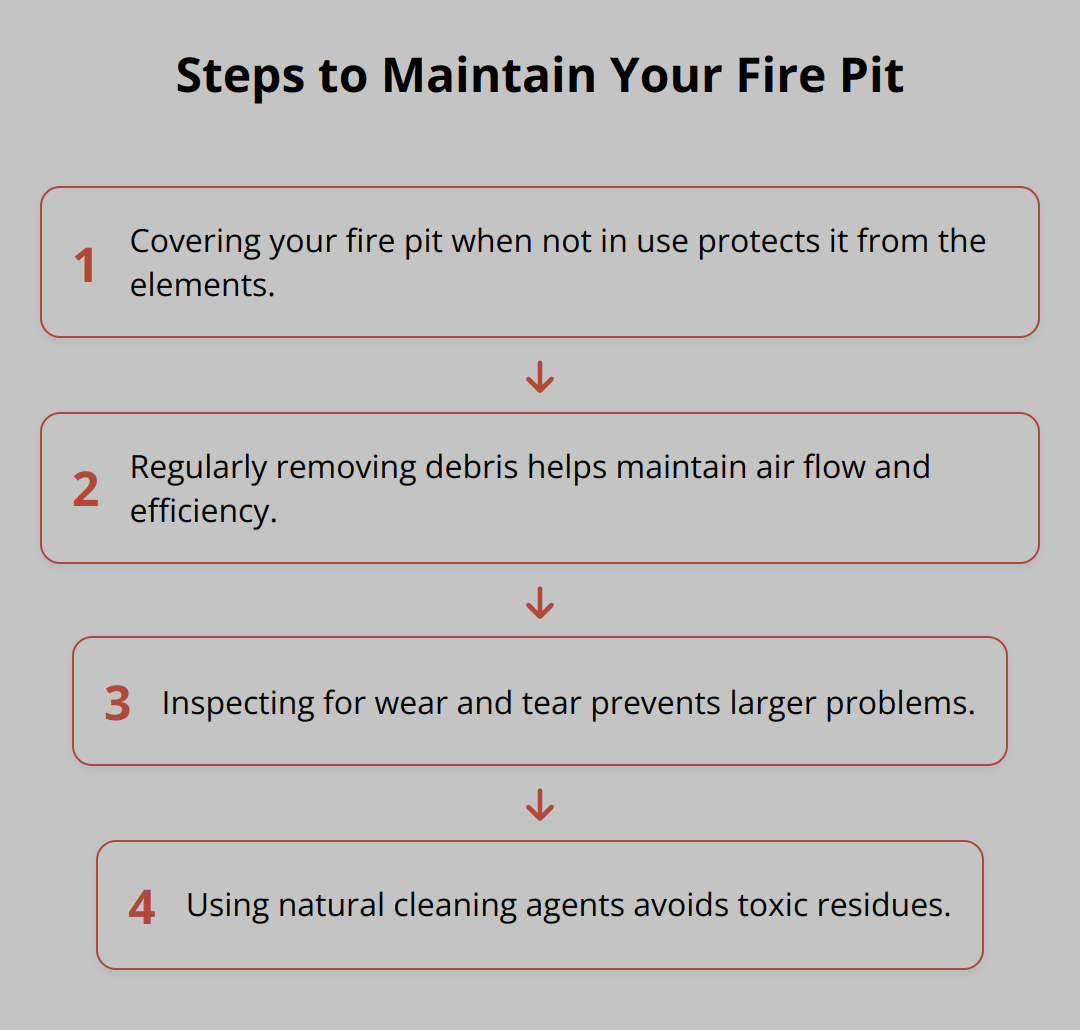
Maintenance and Care: Preserving Your Investment
The durability of S&S Fire Pits is unmatched, yet consistent care enhances their performance and aesthetic appeal. Our fire pits are designed to be a long-lasting addition to your outdoor space, and with the right maintenance, they will continue to provide warmth and ambiance for years to come.

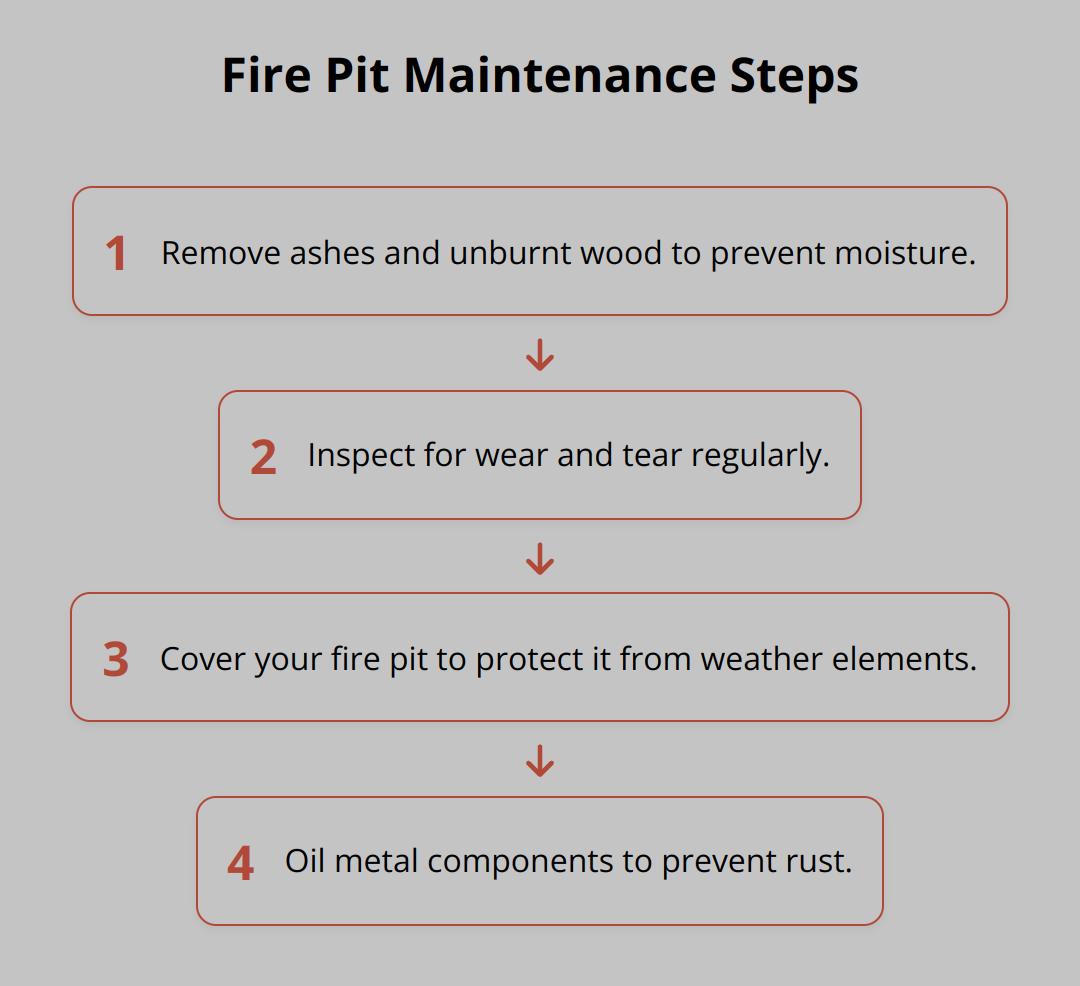
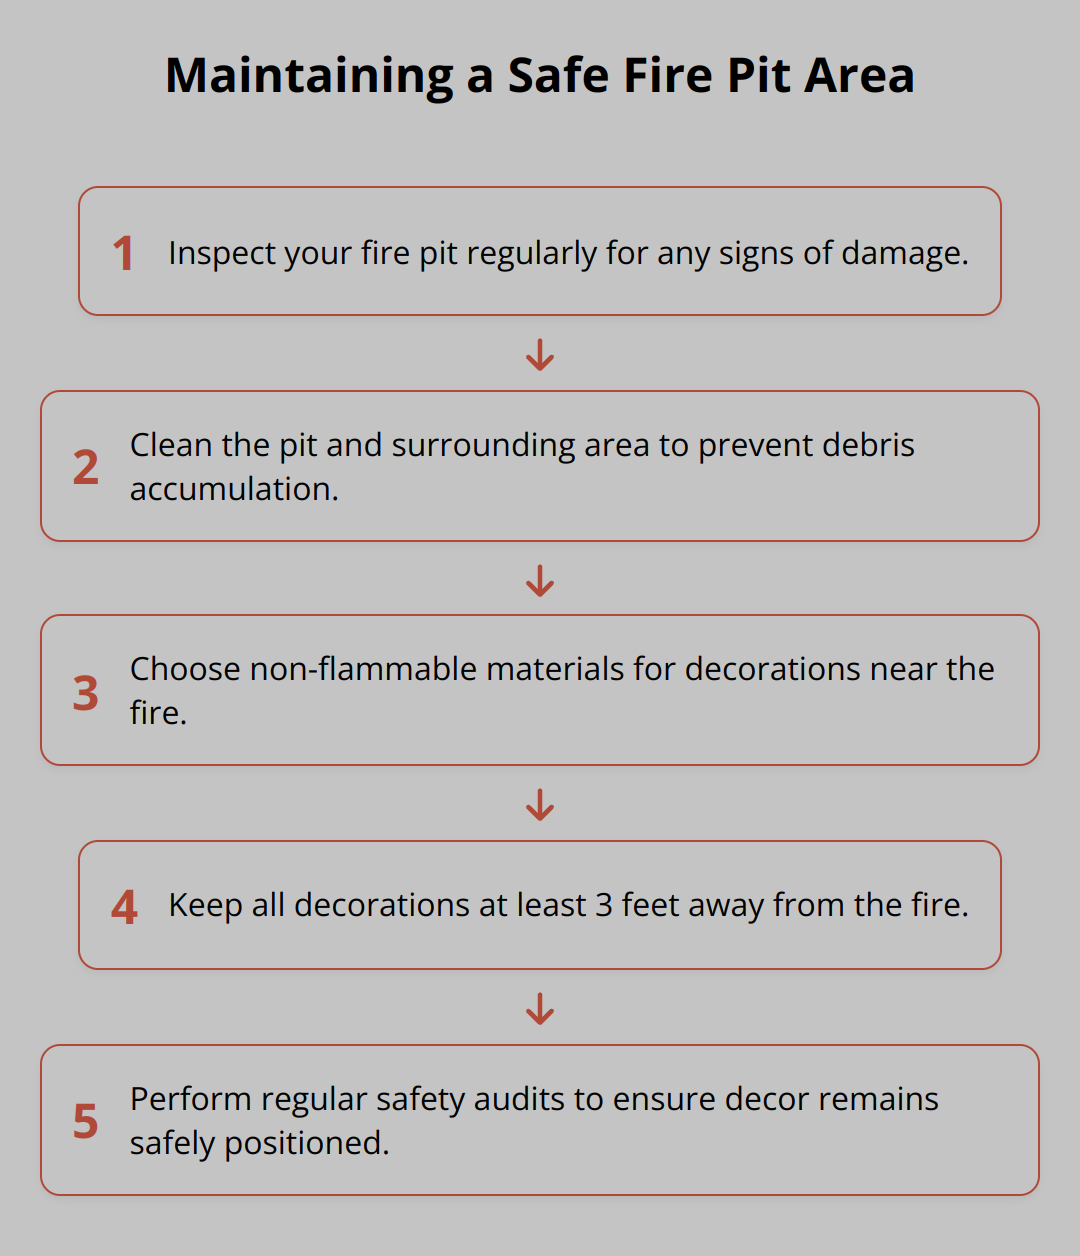
Seasonal Maintenance Schedule: What to Do When
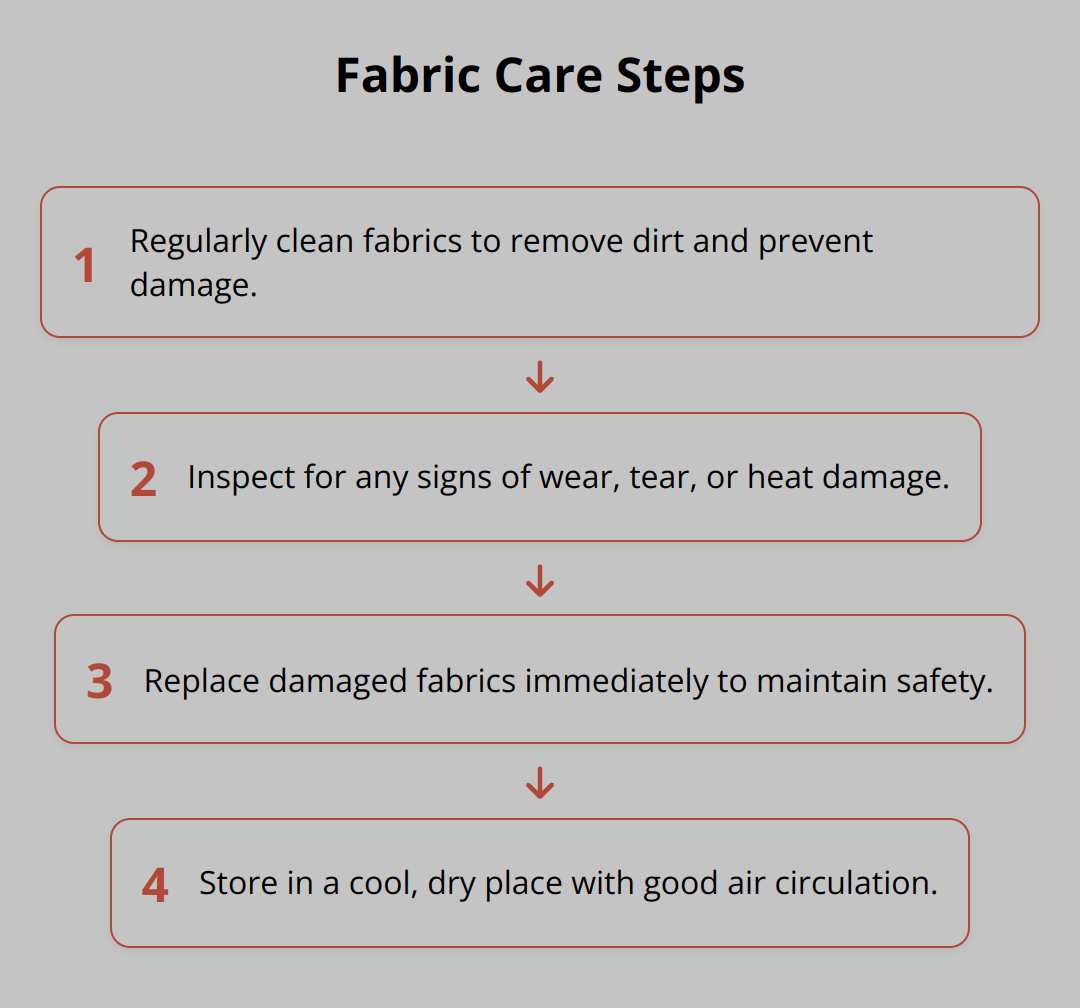
To keep your S&S Fire Pit in optimal condition, it’s essential to follow a seasonal maintenance schedule. This ensures that your fire pit remains safe, functional, and visually appealing throughout the year.
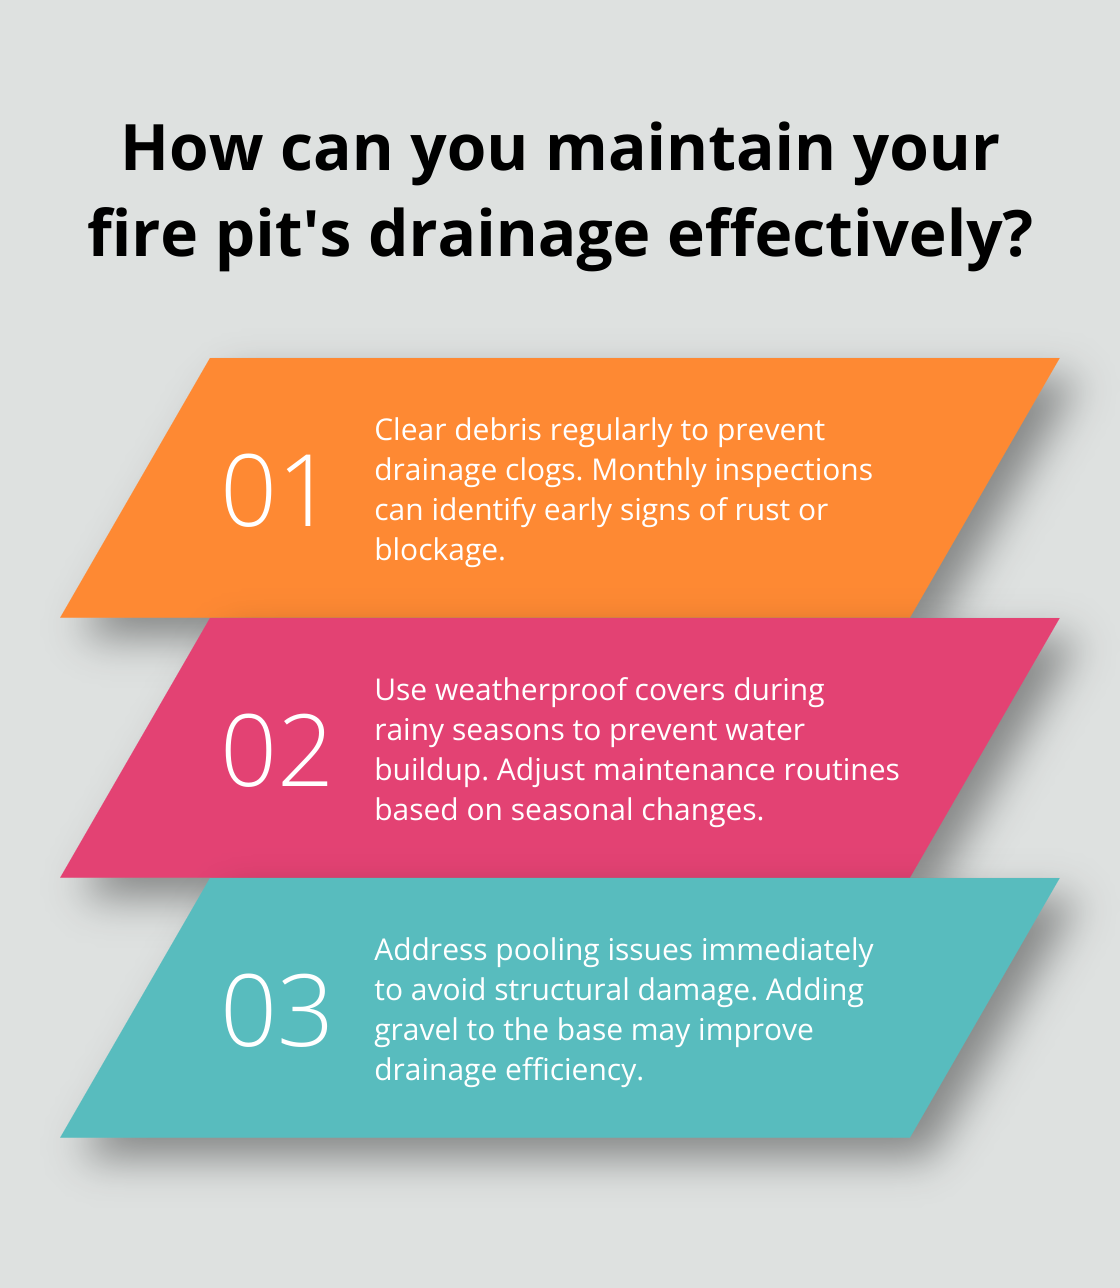
In the spring, inspect your fire pit for any damage or wear from the previous season. Clean out any debris and perform any necessary repairs before the first use.
During the summer, regular cleaning is crucial, especially if you use your fire pit frequently. Make sure to check for any signs of wear on the burner or other components.
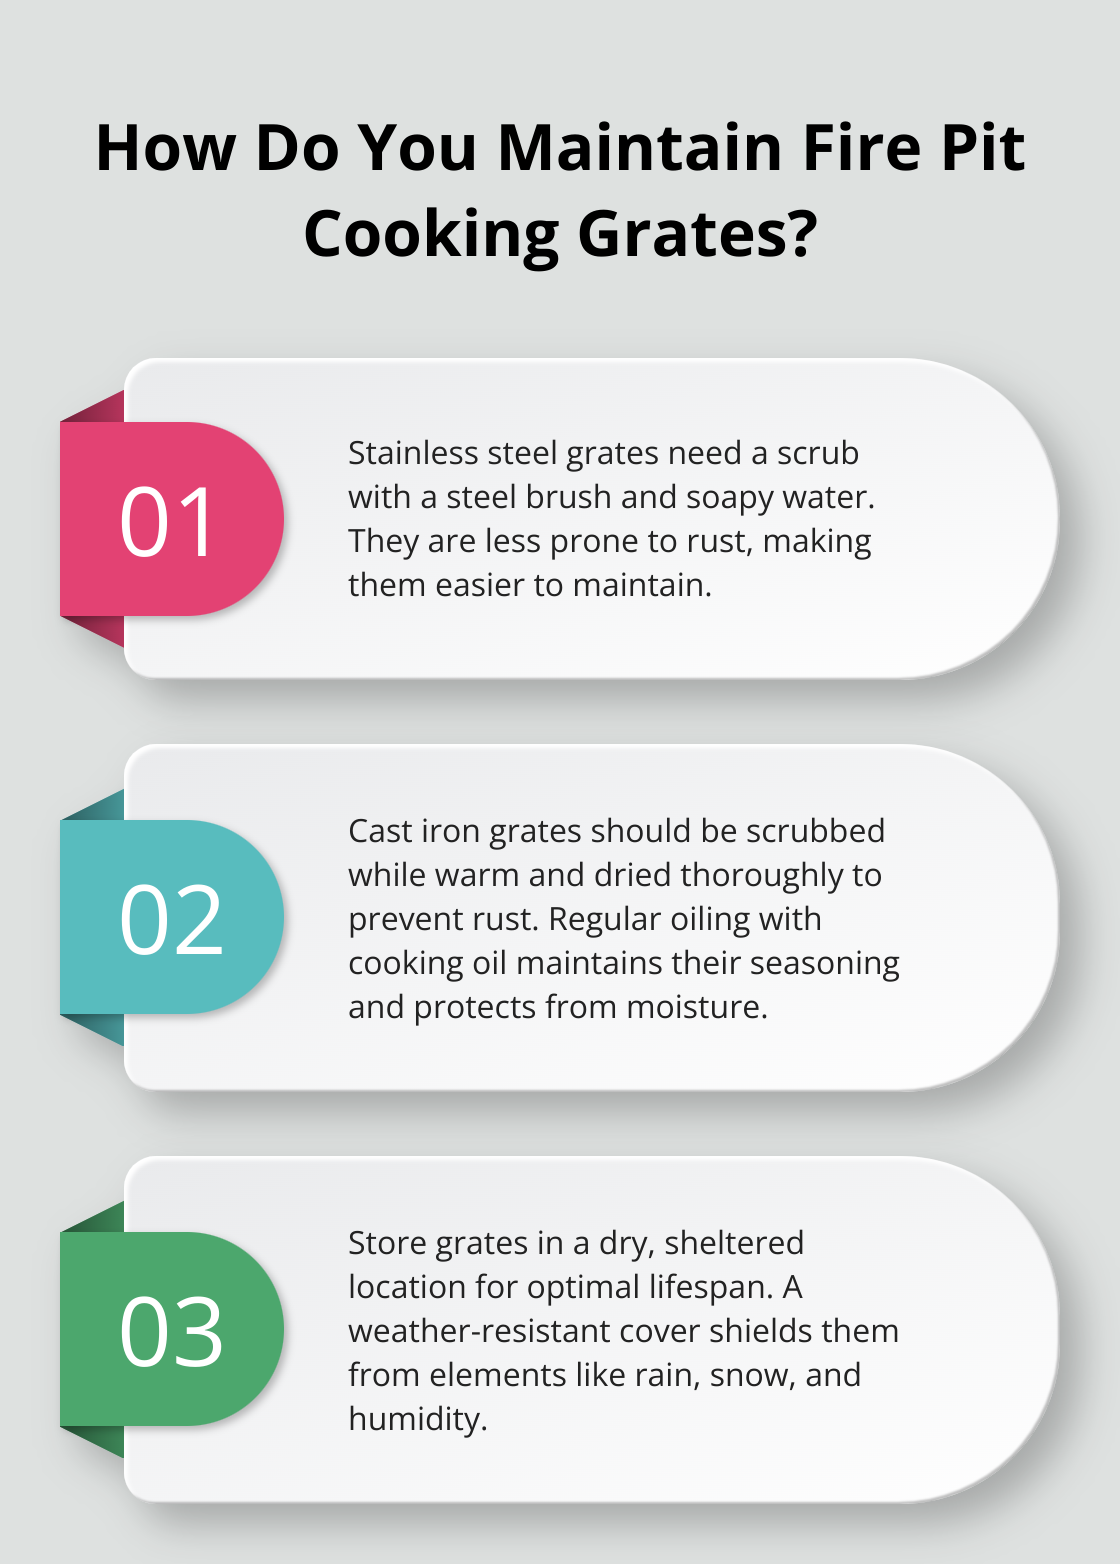
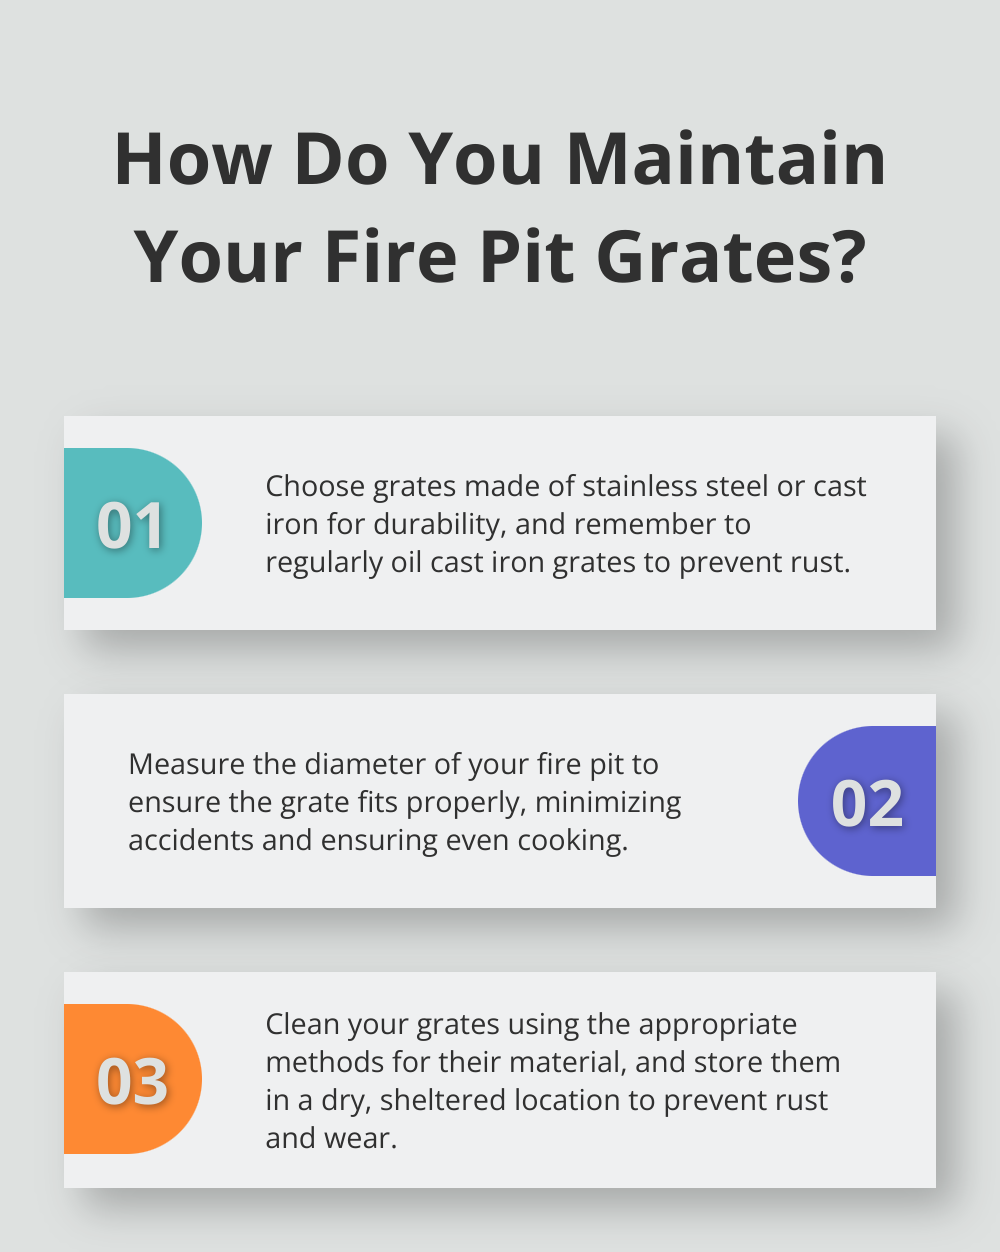
Cleaning Techniques for Different Materials and Finishes
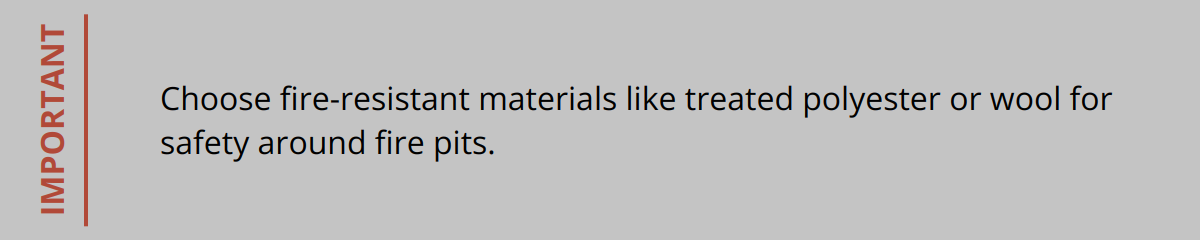
S&S Fire Pits come in a variety of materials and finishes, each requiring specific cleaning techniques to maintain their appearance and durability. For fire pits with a powder-coated finish, use a mild soap and water solution to clean the surface. Avoid using abrasive cleaners or scrubbers, as they can damage the finish.
For fire pits made from natural stone or brick, a gentle brushing with a soft-bristled brush is recommended. This helps remove dirt and debris without damaging the material.
Regular cleaning not only keeps your fire pit looking its best but also helps prevent damage and ensures optimal performance.
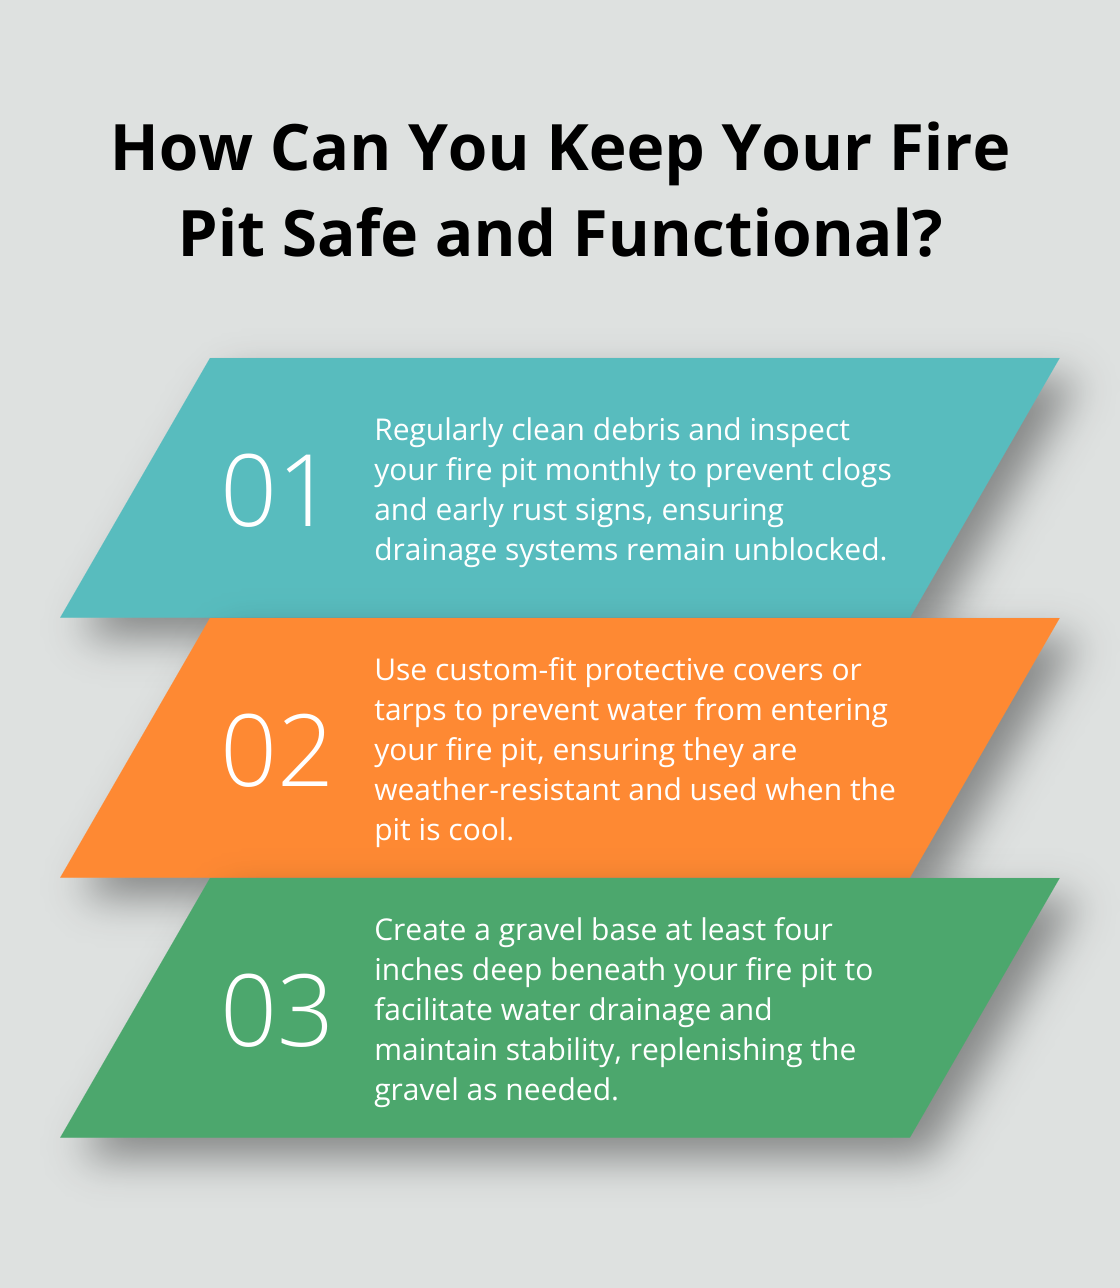
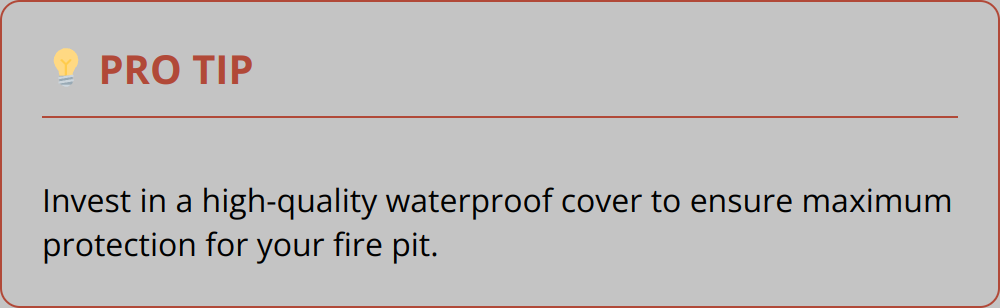
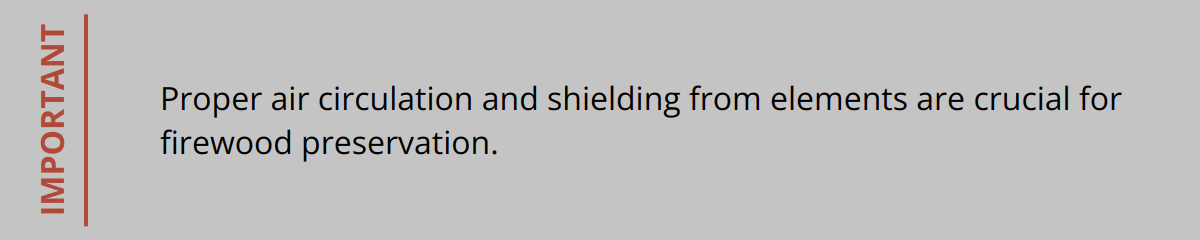
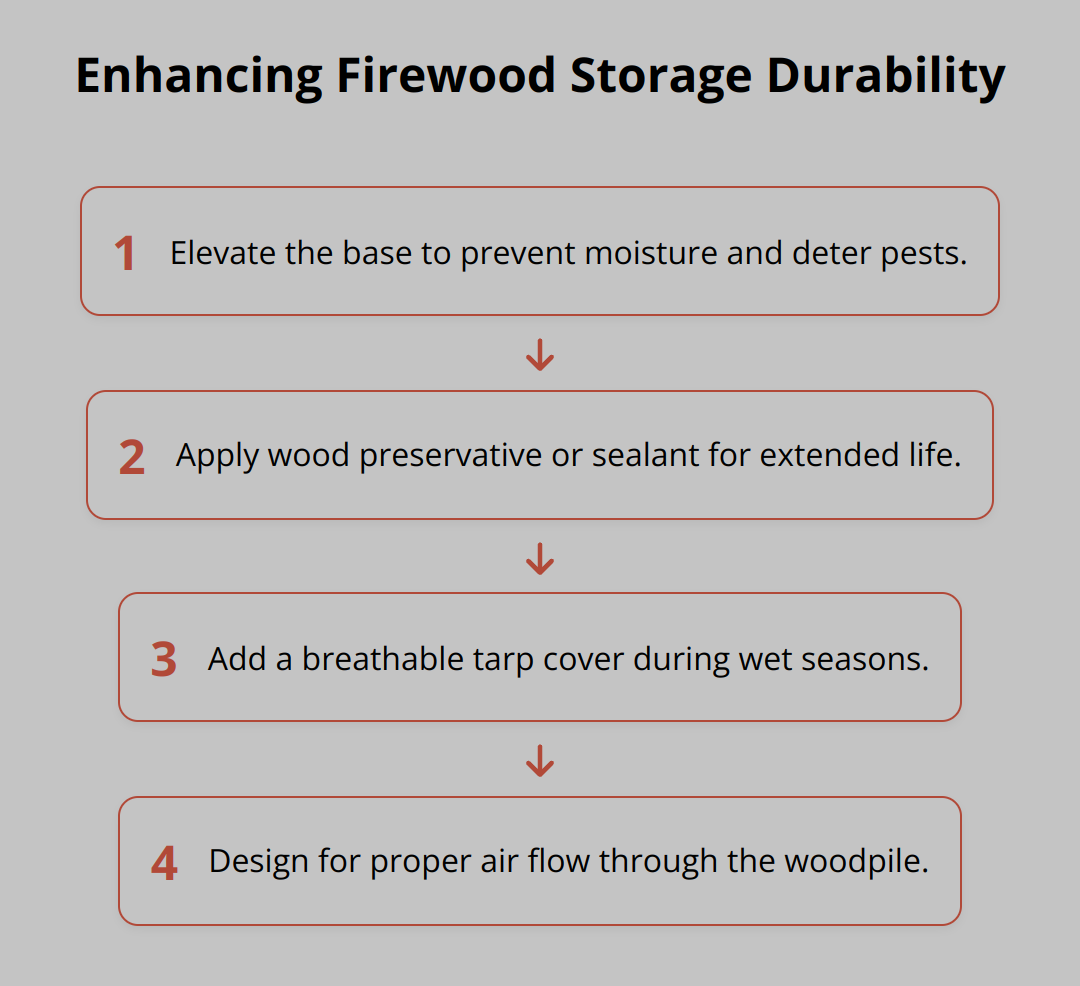
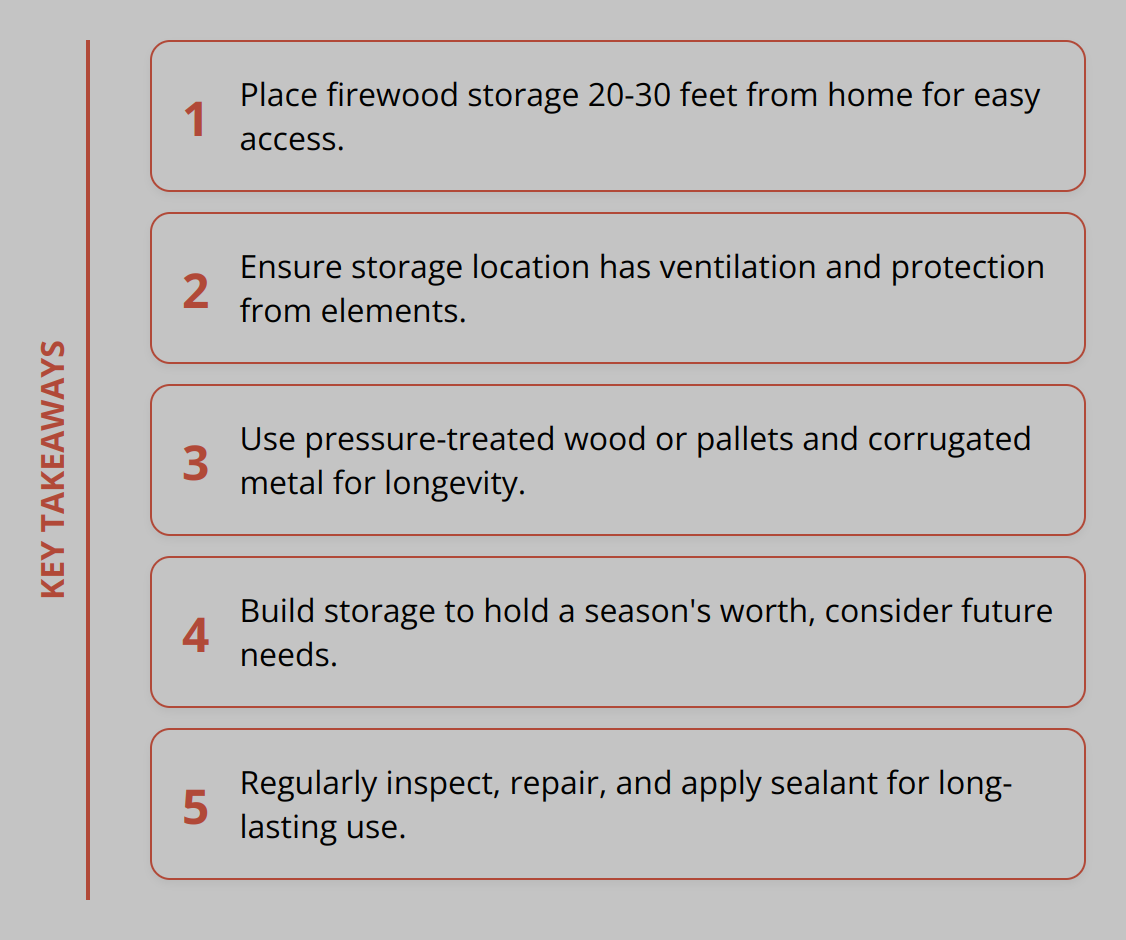
Storage Solutions for Off-Season Protection
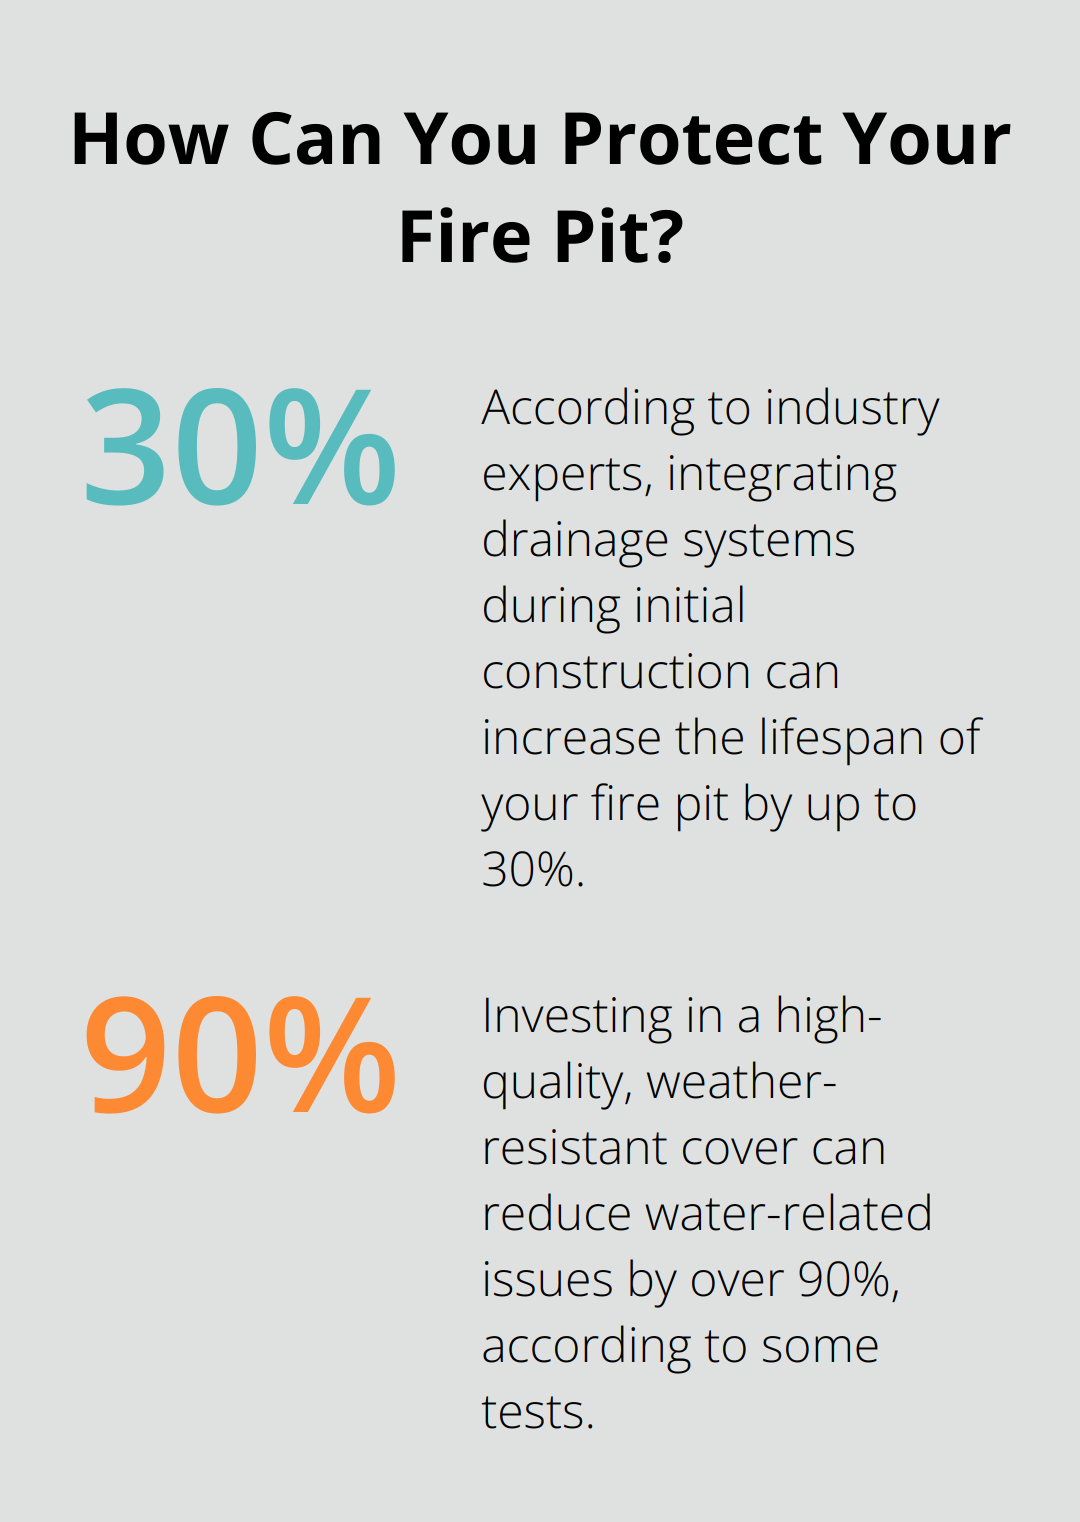
While S&S Fire Pits are designed to withstand the elements, proper storage during the off-season can significantly extend their lifespan. We offer custom-fitted covers engineered specifically for each model, providing optimal protection while allowing necessary airflow to prevent condensation.
For regions with severe winter conditions, consider relocating your fire pit to a protected area or using additional protective measures beyond standard covers.
Proper preparation before storage is key. Ensure your fire pit is clean and dry before covering it, and consider applying a rust-inhibiting coating to metal components.
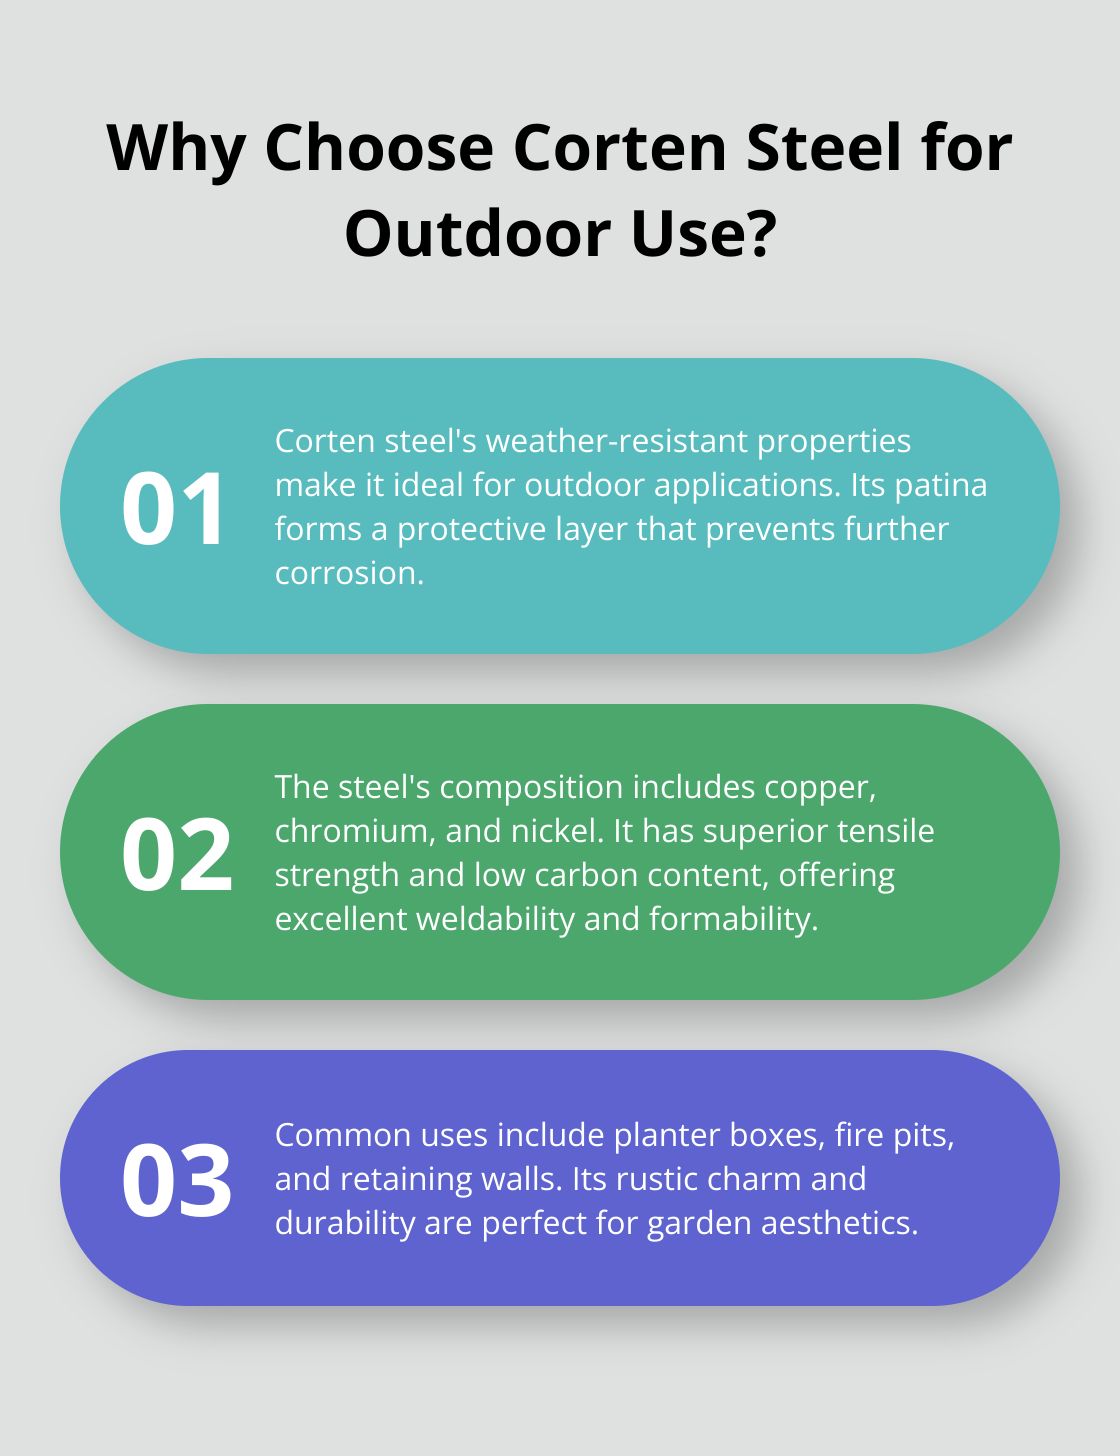
Weather Resistance: How S&S Fire Pits Stand Up to the Elements
Weather resistance is not just a feature; it’s a fundamental aspect of every S&S Fire Pit, engineered to withstand the elements. Our commitment to durability means that whether you’re using your fire pit in the dry heat of a desert climate or the damp chill of a coastal environment, it remains a reliable and enjoyable centerpiece for your outdoor space.

Rust Prevention Technology: Our Multi-Layer Approach
At S&S Fire Pits, we take rust prevention seriously. Our multi-layer approach starts with the selection of premium materials that are inherently resistant to corrosion. We then apply a series of protective coatings that further enhance the durability of our fire pits.
The first layer involves a meticulous cleaning and preparation process to ensure the metal surface is free from contaminants. This is followed by the application of a primer that creates a strong bond between the metal and the subsequent protective layers.
Our topcoat is designed not only to protect against rust but also to maintain its appearance over time, ensuring your fire pit continues to be a beautiful addition to your outdoor space.
Temperature Fluctuation Resistance: From Freezing to Scorching
S&S Fire Pits are engineered to perform across a wide range of temperatures. From the freezing cold of winter to the scorching heat of summer, our fire pits are designed to withstand extreme temperature fluctuations.
This is achieved through the careful selection of materials that can expand and contract without compromising the structural integrity of the fire pit. Additionally, our designs incorporate features that help to manage thermal stress, ensuring that your fire pit remains safe and functional.
Whether you’re enjoying a warm fire on a chilly evening or simply using your fire pit as a decorative element, you can trust that it will endure through the temperature extremes of your local climate.
Coastal Considerations: Battling Salt Air and Humidity
For those living in coastal areas, S&S Fire Pits offers specialized models designed to withstand the corrosive effects of salt air and high humidity. Our coastal models incorporate marine-grade materials and finishes that provide enhanced protection against the accelerated corrosion found in seaside environments.
These models also feature additional drainage provisions to prevent water accumulation, further reducing the risk of corrosion. We recommend specific maintenance protocols for coastal installations to counteract the effects of salt accumulation and persistent humidity.
The fasteners and hardware in our coastal models are selected for their resistance to galvanic corrosion, ensuring that every component of your fire pit is as durable as the main structure. By providing guidance on optimal placement in coastal settings, we help minimize direct exposure to salt spray while maintaining convenient access.
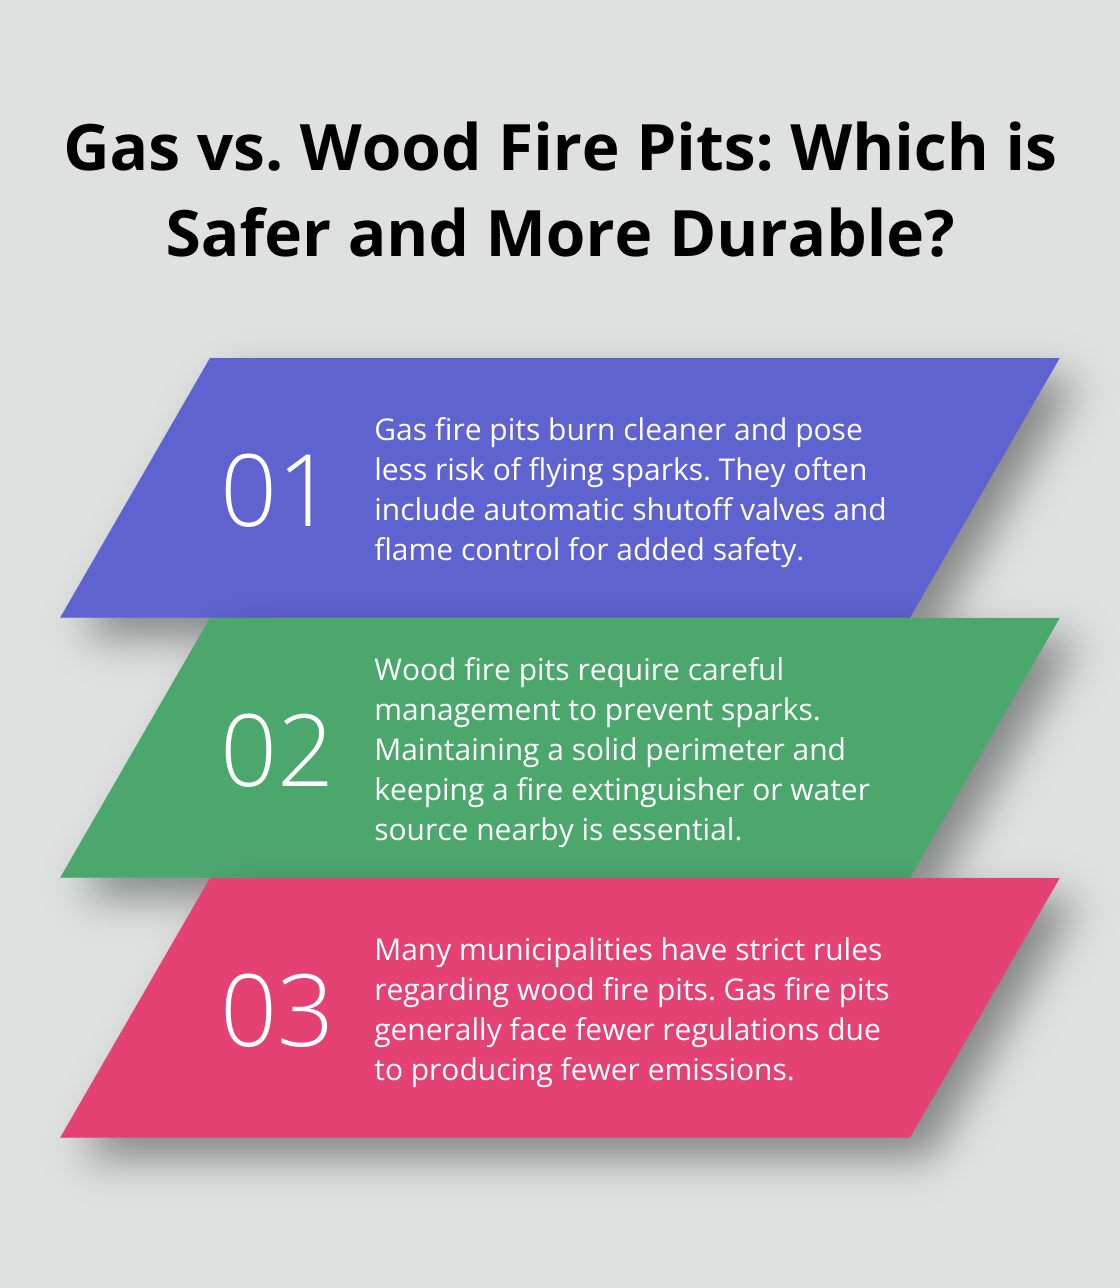
Safety Features and Best Practices
Our commitment to safety is unwavering, reflected in the meticulous design and manufacturing process of every S&S Fire Pit. We understand that safety is paramount when it comes to outdoor heating solutions, and we’ve made it our mission to ensure that our products not only meet but exceed industry safety standards.

Built-In Safety Elements in Every S&S Design
At S&S Fire Pits, we don’t just build fire pits; we craft safe havens for families to gather and enjoy the outdoors. Every S&S Fire Pit is designed with safety in mind, incorporating features such as robust construction materials, secure installation guidelines, and advanced ventilation systems to prevent accidents.
Our gas models, for instance, comply with ANSI Z21.97 standards for outdoor decorative gas appliances, ensuring they meet rigorous safety requirements. We also conduct independent third-party testing to verify compliance with applicable standards, rather than relying solely on internal assessments.
Safe Operation Guidelines for Families
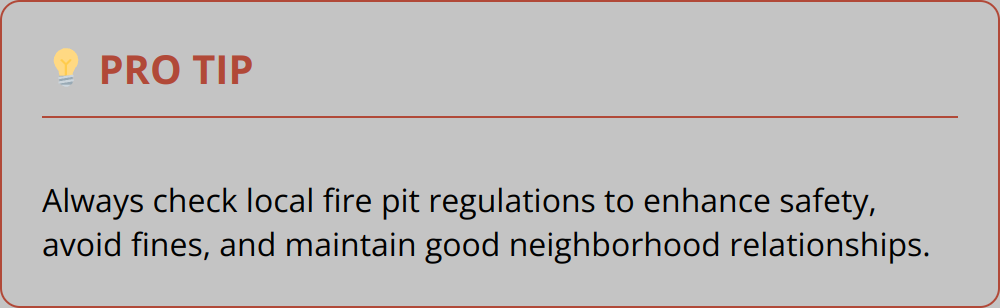
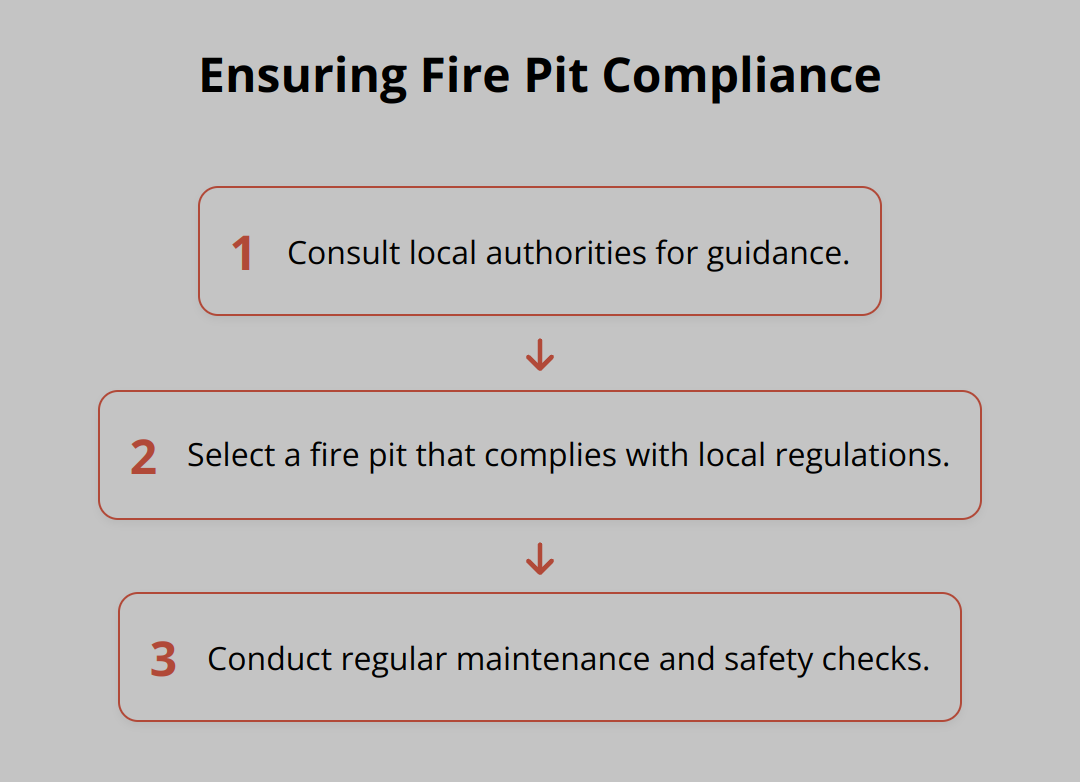
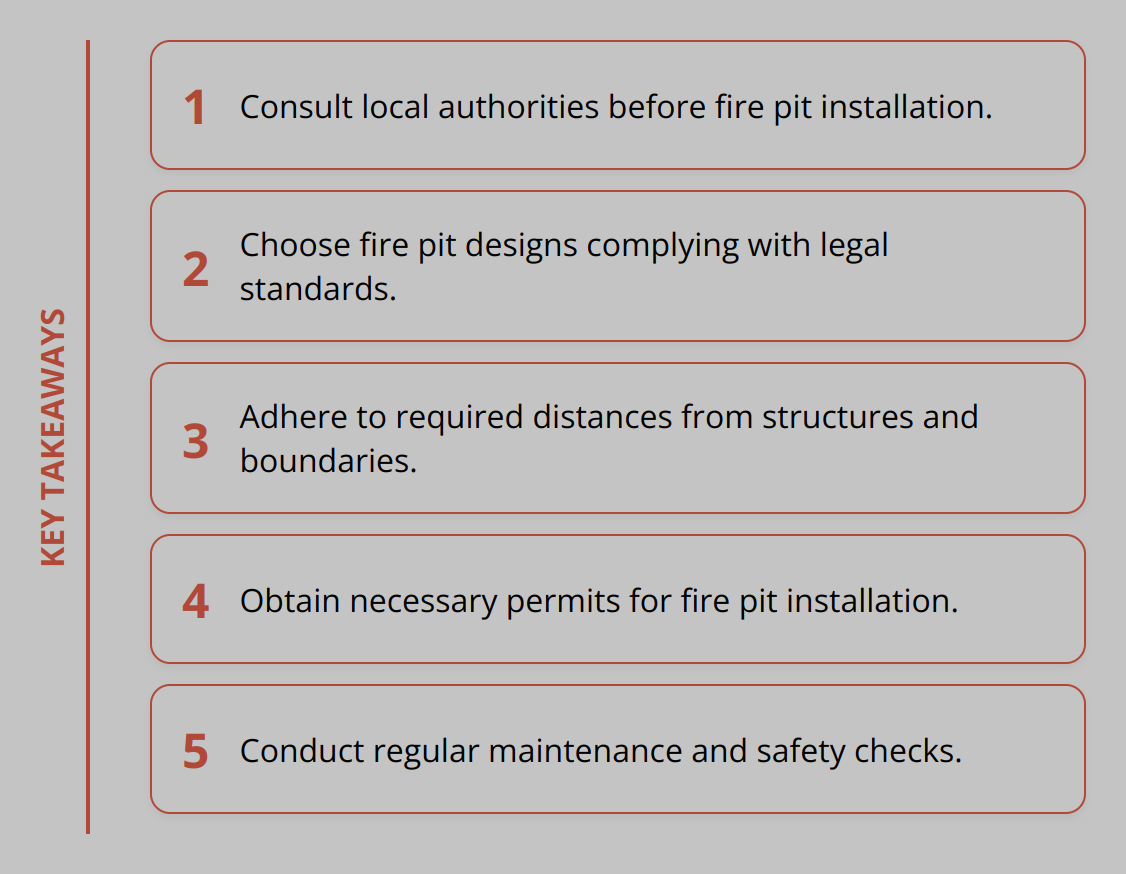
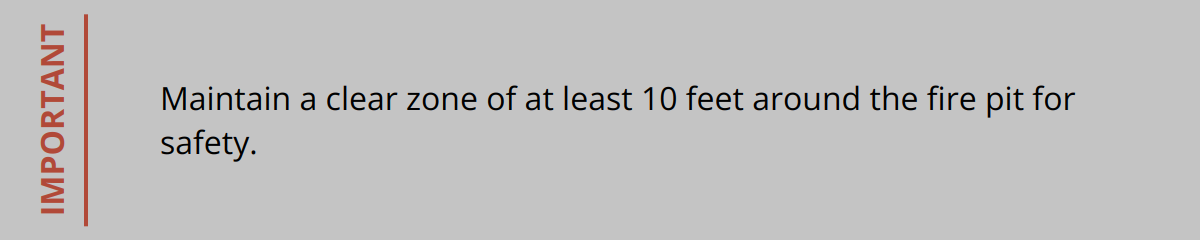
Operating a fire pit safely is crucial for enjoying its warmth and ambiance without risk. We provide comprehensive guidelines for the safe operation of S&S Fire Pits, including proper clearance from combustible materials, regular maintenance schedules, and supervision of children and pets around the fire pit.
Our documentation includes detailed information on relevant local codes and regulations that might affect installation or operation in specific jurisdictions, ensuring our customers are always compliant with local laws.
Compliance with Industry Safety Standards and Regulations
We maintain active participation in standards development committees to stay at the forefront of evolving safety requirements. Our commitment to safety extends beyond minimum requirements to incorporate additional protective features based on our extensive field experience.
Our fire pits are designed to meet or exceed all applicable safety standards established by regulatory bodies and industry organizations. We regularly update our designs to incorporate new safety innovations and respond to emerging best practices in the industry.
The S&S Warranty: Our Promise of Quality

At S&S Fire Pits, we stand behind the quality of our products with a comprehensive warranty that reflects our commitment to excellence. Our warranty is designed to protect your investment and ensure that you enjoy your fire pit for years to come.
Understanding Your Warranty Coverage
Our warranty coverage is designed to be straightforward and easy to understand. We cover defects in materials and workmanship for a specified period, ensuring that you’re protected against manufacturing issues.
The warranty period varies depending on the model and components of your S&S Fire Pit. Generally, our warranty covers parts and labor for a comprehensive period, reflecting our confidence in the durability and quality of our products.
To understand the specifics of your warranty coverage, it’s essential to review the documentation provided with your fire pit or to contact our customer service team directly.
The Registration Process: Securing Your Protection
Registering your S&S Fire Pit is a crucial step in securing your warranty protection. The registration process is simple and can be completed online or by contacting our customer service department.
By registering your product, you ensure that we have a record of your purchase and can provide you with the necessary support and warranty service if needed.
Our registration process also allows us to keep you informed about product updates, safety notices, and other important information related to your S&S Fire Pit.
Our Repair and Replacement Philosophy
At S&S Fire Pits, we’re committed to making the warranty service process as convenient and satisfactory as possible. When issues arise, we first attempt to provide customer-installable solutions with detailed instructions and any necessary specialized tools.
For more complex repairs, we coordinate with local service partners or arrange factory service, depending on the nature of the issue and your location.
Our goal is to minimize disruption to your enjoyment of your fire pit while ensuring that any issues are resolved promptly and efficiently.
Shipping, Delivery, and White Glove Services
We take pride in not just crafting exceptional fire pits, but also in delivering them safely and efficiently to our valued customers. At S&S Fire Pits, we understand that the delivery and installation process is just as crucial as the quality of our products. That’s why we’ve developed a comprehensive shipping, delivery, and installation service that ensures your fire pit arrives safely and is ready for use.
Domestic Shipping: Getting Your Fire Pit Safely to Your Door
For customers within the United States, we offer reliable domestic shipping services designed to get your S&S Fire Pit to your doorstep safely and on time. Our domestic shipping process is carefully managed to minimize the risk of damage during transit.
We partner with experienced logistics providers to ensure that your fire pit is handled with care, from the moment it leaves our factory until it arrives at your home. Our shipping team works closely with our manufacturing department to coordinate the delivery schedule, ensuring that your fire pit is shipped as soon as it is ready.
Upon dispatch, you will receive tracking information, allowing you to monitor the progress of your delivery. We understand that timely delivery is crucial, and we strive to deliver your S&S Fire Pit within the timeframe promised.
International Delivery Options and Considerations
For our international customers, we provide international delivery options that cater to the unique requirements of shipping heavy and bulky items like fire pits across borders. We work with a network of international shipping partners who are experienced in handling such deliveries.
When shipping internationally, there are several factors to consider, including customs clearance, import duties, and longer transit times. Our international shipping team is well-versed in these matters and will guide you through the process, ensuring compliance with all relevant regulations and minimizing any potential delays.
We also provide detailed documentation and support to help navigate the complexities of international shipping, making the process as smooth as possible for our customers.
Professional Installation Services: Let the Experts Handle It
For those who prefer a hassle-free experience, S&S Fire Pits offers professional installation services. Our team of trained technicians is equipped to handle the installation of your fire pit, ensuring it is done correctly and safely.
Our white glove installation service includes site preparation, assembly, initial testing, and orientation. This comprehensive service ensures that you have immediate access to the full enjoyment of your fire pit. Our technicians are familiar with S&S fire pit specifications and bring specialized equipment to facilitate perfect positioning and setup, even in challenging locations.
For gas-powered models, our installation includes connection to existing gas lines or the installation of propane systems. During the installation process, our technicians provide personalized instruction on operation, maintenance, and safety features, ensuring you’re fully equipped to enjoy your new fire pit.
Our white glove service also includes the removal and environmentally responsible disposal of all packaging materials, leaving your new fire pit ready for use. This service is particularly valuable for commercial installations, complex custom designs, or locations with difficult access.
S&S Fire Pits vs. Competitors: What Sets Us Apart
What makes S&S Fire Pits superior to its competitors is a story of craftsmanship, quality, and dedication. In the world of outdoor fire features, the difference between a good fire pit and a great one can be measured in terms of materials, design, and the value it brings to your outdoor space.
At S&S Fire Pits, we pride ourselves on our commitment to excellence, a trait that is evident in every aspect of our products. From the selection of premium materials to the meticulous attention to detail in our designs, every element is geared towards providing an unparalleled outdoor experience.
Material Quality Comparisons: The S&S Advantage
The foundation of any fire pit lies in its materials. At S&S, we use only the highest quality metals that are designed to withstand the elements and the test of time. Our materials are selected for their durability, resistance to corrosion, and ability to retain their aesthetic appeal even after years of use.
In contrast, many of our competitors compromise on material quality to reduce costs. This can result in fire pits that rust, degrade, or lose their structural integrity over time. Our commitment to using premium materials not only enhances the longevity of our fire pits but also ensures that they remain a beautiful focal point in your outdoor space.
Design Distinctions: Aesthetic and Functional Differences
The design of a fire pit is not just about aesthetics; it’s also about functionality. At S&S Fire Pits, our designs are the result of a careful balance between form and function. We understand that a fire pit is not just a source of warmth but also a gathering place, a focal point that can transform your outdoor space into an inviting area for relaxation and entertainment.
Our designs are crafted to provide optimal heat distribution, ensuring that everyone around the fire pit feels its warmth. Moreover, our fire pits are designed with safety in mind, incorporating features that prevent accidental burns and ensure a controlled burning environment.
Value Proposition: Investment Analysis Over Time
While the initial cost of an S&S Fire Pit may be higher than that of our competitors, the true value lies in its long-term benefits. Our fire pits are built to last, with a durability that eliminates the need for frequent replacements. This not only saves you money over time but also reduces the hassle and environmental impact of disposal and replacement.
Furthermore, the timeless design of our fire pits means they won’t go out of style, avoiding the hidden costs associated with trendy products that may need to be replaced as styles change. Additionally, the superior heat efficiency of our fire pits can lead to significant savings on fuel costs over time.
Customer Stories: S&S Fire Pits in Real Homes and Businesses

At S&S Fire Pits, we’re proud to share the stories of our customers who’ve made our fire pits a central part of their homes and businesses. Our products have been designed not just to provide warmth and ambiance, but to become a focal point for gatherings, memories, and traditions.
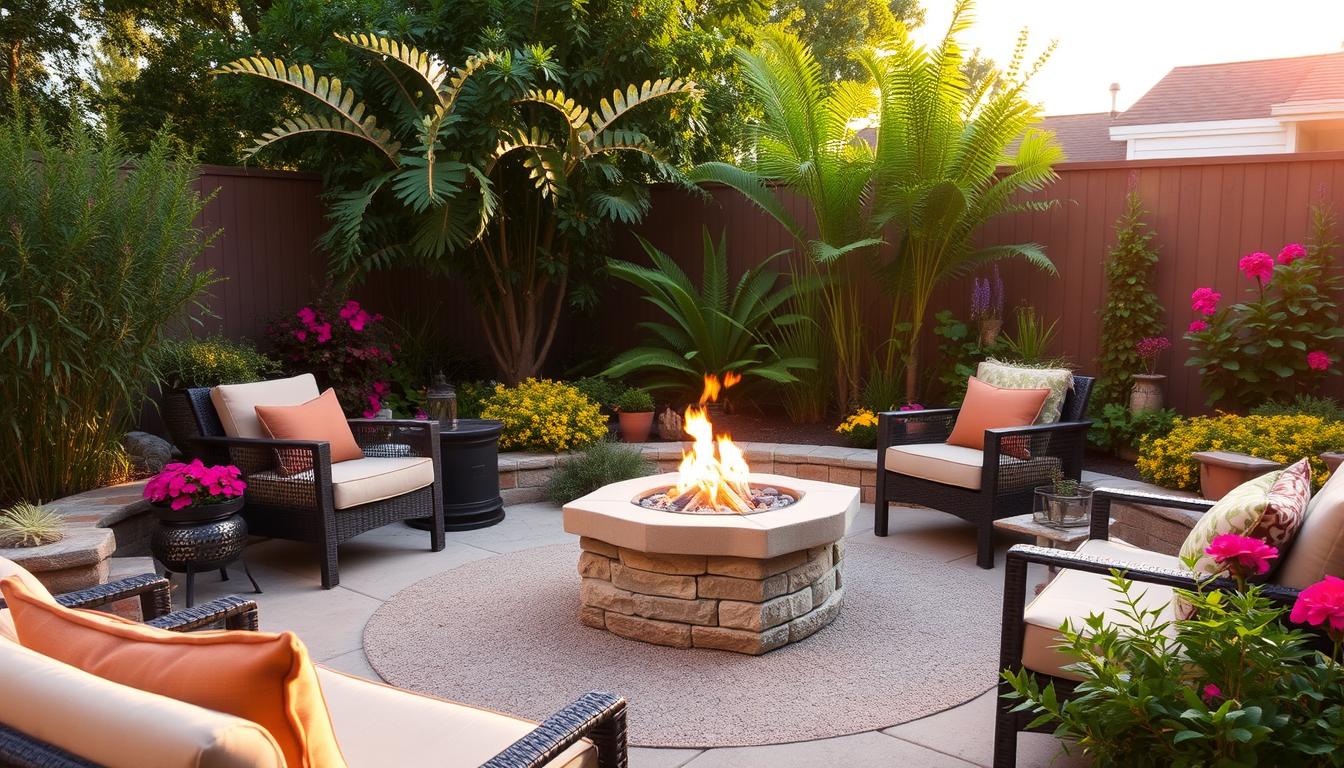
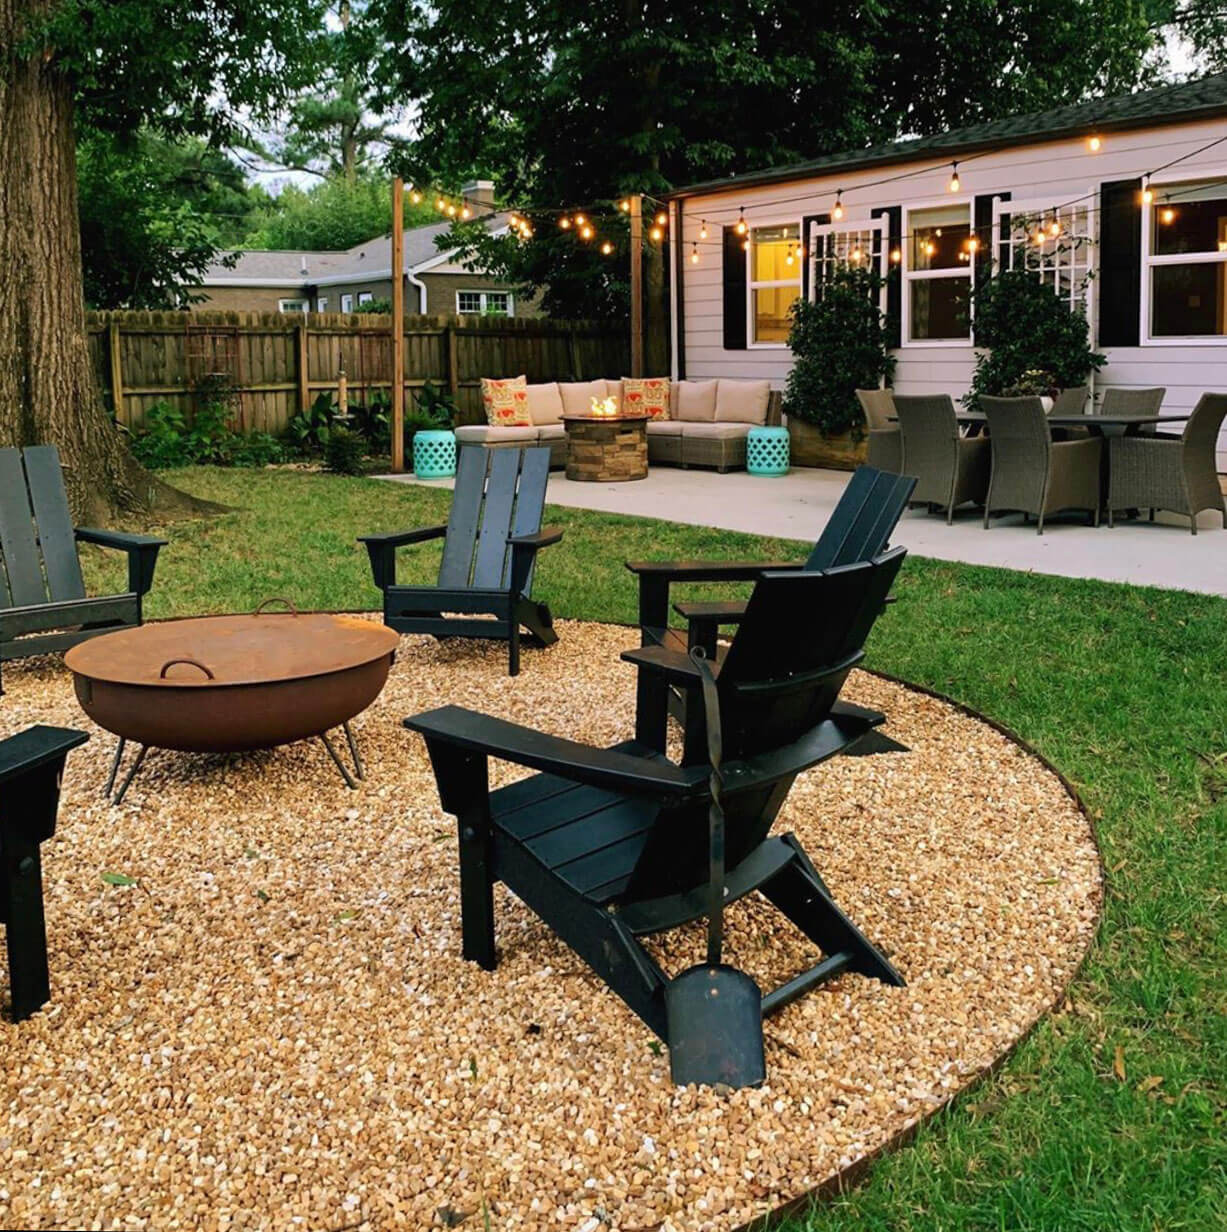
Residential Showcases: Transforming Backyards and Patios
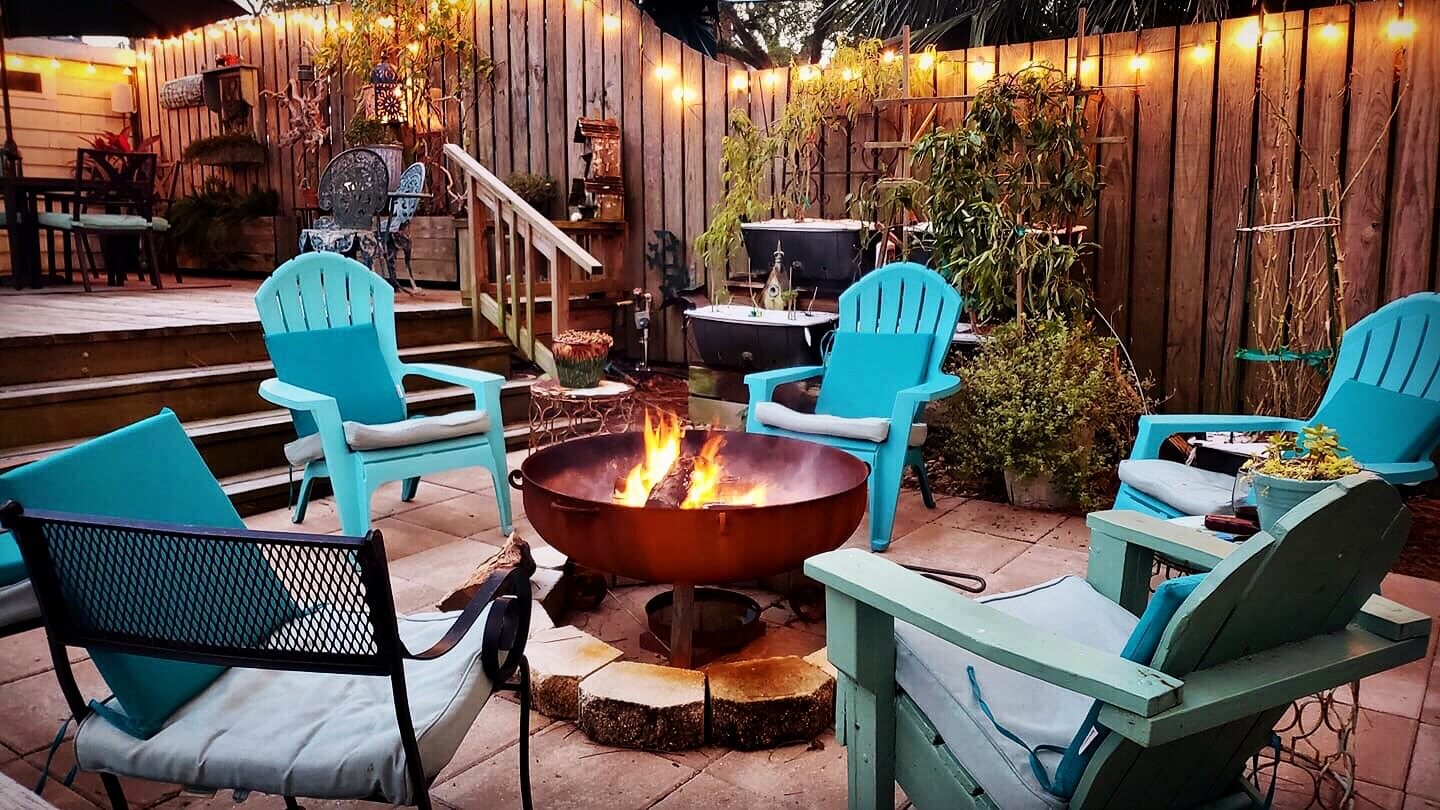
For many homeowners, an S&S Fire Pit is more than just an outdoor heating solution – it’s a way to transform their outdoor space into an inviting area for relaxation and entertainment. Our customers have shared with us how our fire pits have become the heart of their outdoor living areas, hosting countless family dinners, parties, and quiet nights under the stars.
One such customer is the Smith family from California. They installed an S&S Fire Pit in their backyard and have since made it the centerpiece of their outdoor entertainment area. “Our S&S Fire Pit has been a game-changer for us,” they said. “We can now enjoy our backyard even on chilly evenings, and it’s become a favorite gathering spot for our family and friends.”
Commercial Success Stories: Restaurants, Hotels, and Public Spaces
In commercial settings, S&S Fire Pits have proven to be a valuable addition, enhancing the ambiance and appeal of restaurants, hotels, and public spaces. Business owners have reported increased customer satisfaction and extended outdoor seating seasons thanks to our fire pits.
The management at a popular Denver restaurant shared their experience with us: “Installing S&S Fire Pits on our patio has significantly boosted our outdoor seating revenue. Customers love gathering around the fire, and it’s become a signature element of our dining experience.”
Multi-Generational Users: Fire Pits Passed Down Through Families
One of the most rewarding aspects of our business is seeing S&S Fire Pits become family heirlooms, passed down through generations. These stories are a testament to the quality and durability we’ve built into our products.
The Johnson family from Texas shared with us their story of an S&S Fire Pit that’s been in their family for over three decades. “We purchased our S&S Fire Pit in the early 90s, and it’s been a part of every family gathering since then,” they said. “Now, our grandchildren are grown and have children of their own, and they’re the ones who now gather around the fire pit we inherited from our parents. It’s a truly special family tradition.”
Frequently Asked Technical Questions
Technical inquiries about our fire pits are common, and we’re here to address them with clarity and precision. At S&S Fire Pits, we believe that providing comprehensive technical information is crucial for our customers to make informed decisions and enjoy their fire pits to the fullest.
Heat Output and Coverage Area Specifications
Understanding the heat output and coverage area of your S&S fire pit is essential for maximizing its performance and ensuring it meets your needs. Our fire pits are designed to provide efficient heat distribution, and their coverage area can vary based on the model and size.
Key Factors Affecting Heat Output:
- Fuel type: Wood-burning, gas-powered, or hybrid
- Fire pit size and design
- Environmental conditions: Wind, humidity, and ambient temperature
For specific heat output and coverage area specifications, please refer to your model’s documentation or contact our customer support team for personalized assistance.
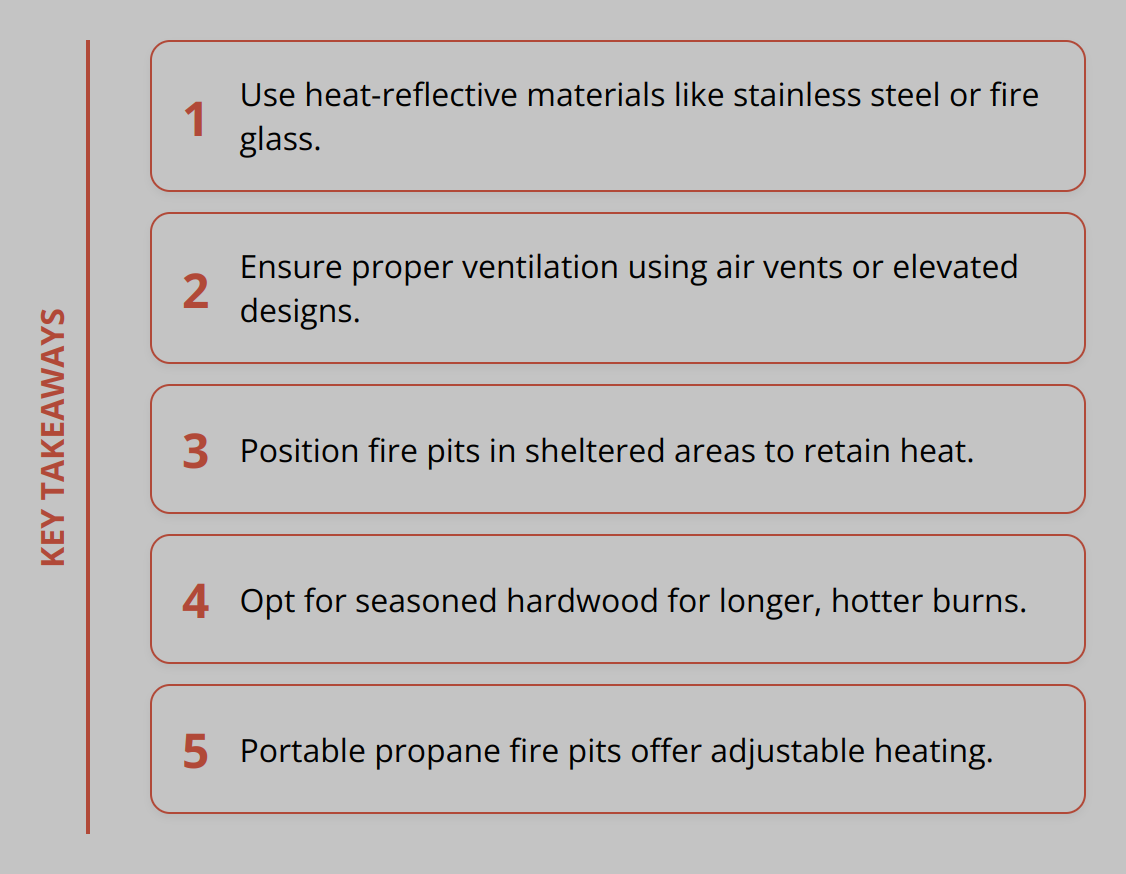
Our fire pits are engineered to provide optimal heat distribution. For instance, our wood-burning models are designed to maximize airflow, ensuring a consistent and warm flame. The coverage area can range from intimate settings for smaller backyards to expansive outdoor spaces for larger commercial areas.
Calculating Heat Output
To determine the appropriate heat output for your space, consider both the size of the area and the desired temperature. Our technical support team can guide you through this process, ensuring you select the perfect fire pit for your needs.
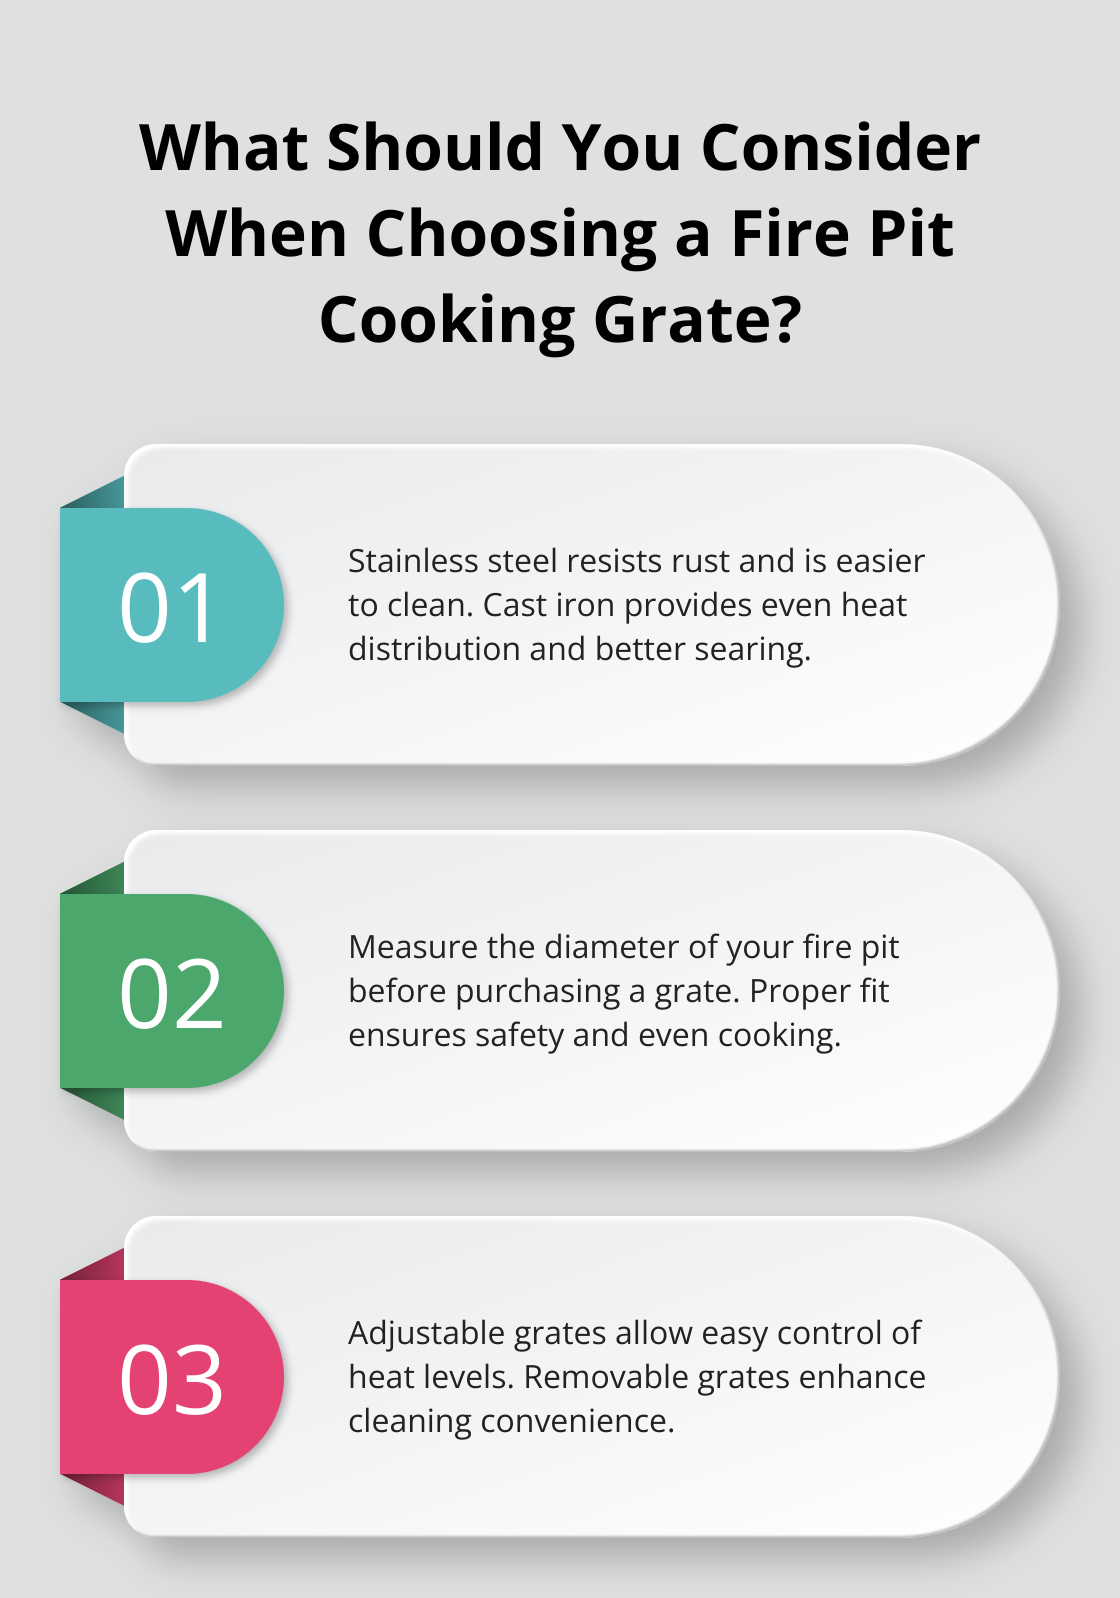
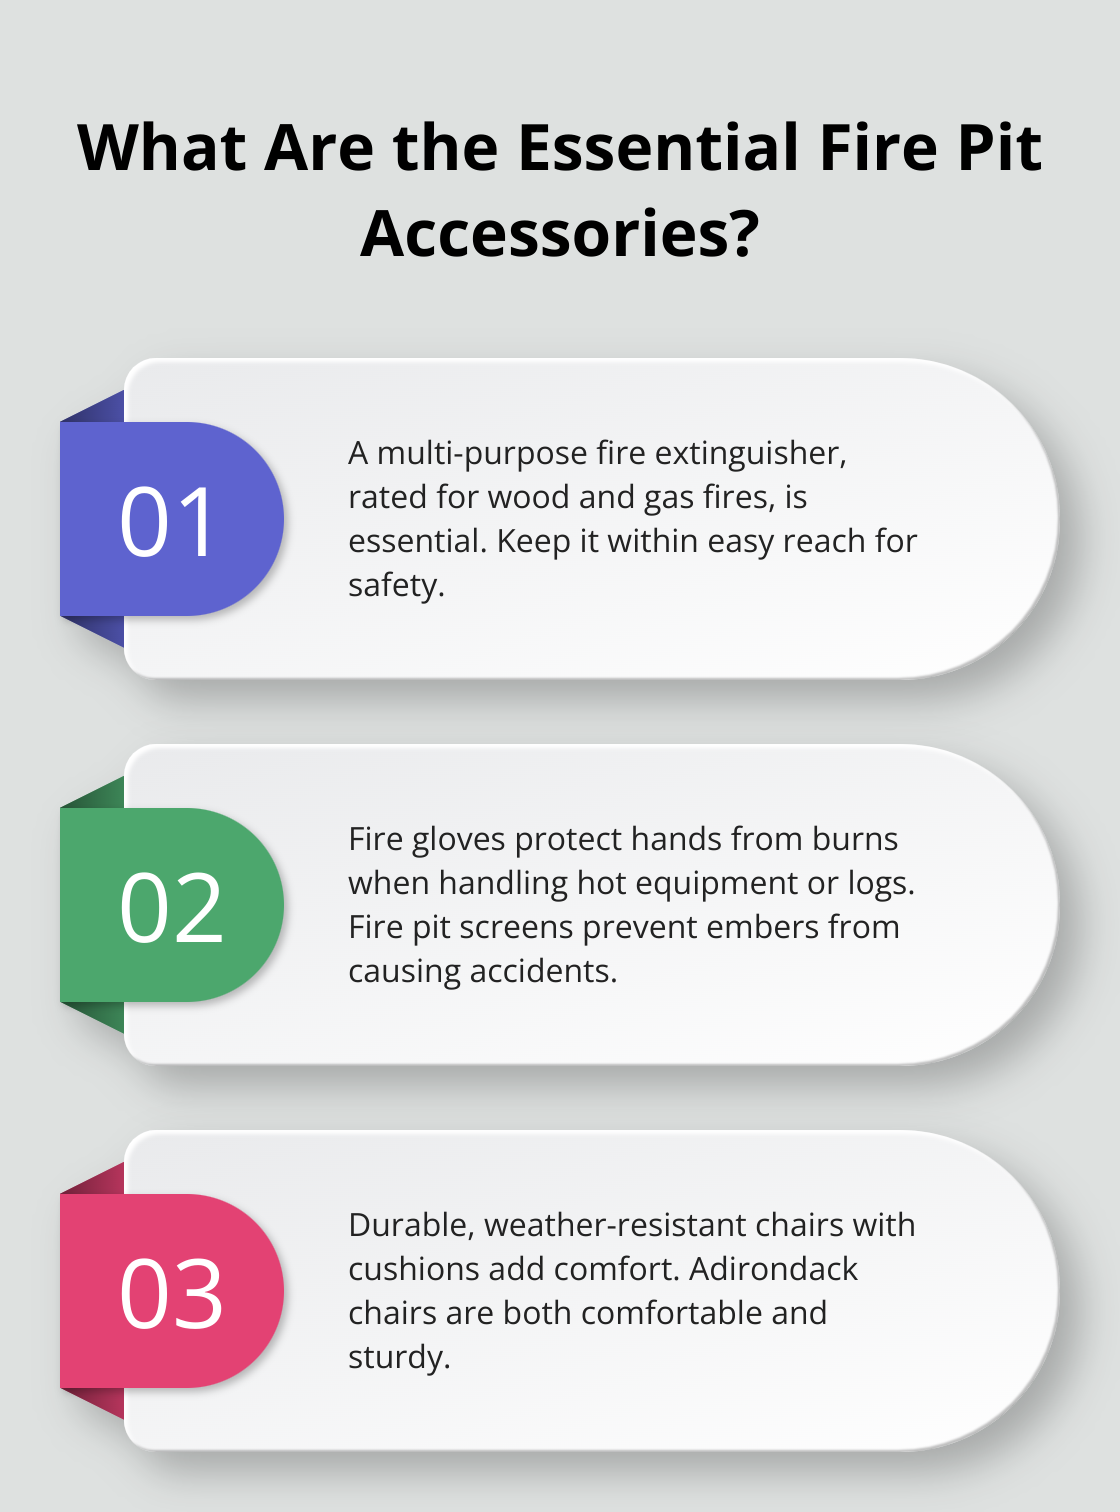
Compatibility with Accessories and Add-ons
S&S Fire Pits offers a range of accessories and add-ons designed to enhance your fire pit experience. From cooking grills to decorative spark guards, our accessories are engineered to be compatible with our fire pits, ensuring a seamless integration.
Popular Accessories Include:
- Cooking grills and griddles for culinary enthusiasts
- Spark guards for added safety
- Decorative covers and screens for aesthetic appeal
To ensure compatibility, always check the product description or consult with our customer support team before making a purchase. We maintain a comprehensive database of compatibility information to help you make informed decisions.
Customization Options
For those looking to personalize their fire pit experience, we offer customization options for certain models. This includes varying sizes, finishes, and additional features. Contact us to explore the customization possibilities for your S&S fire pit.
Troubleshooting Common Issues and Solutions
While our fire pits are designed for reliability and performance, occasional issues may arise. Our comprehensive troubleshooting guide is here to help you identify and resolve common problems, ensuring your fire pit continues to operate at its best.
Common Issues and Solutions:
- Poor flame quality: Check fuel supply, airflow, and burner condition
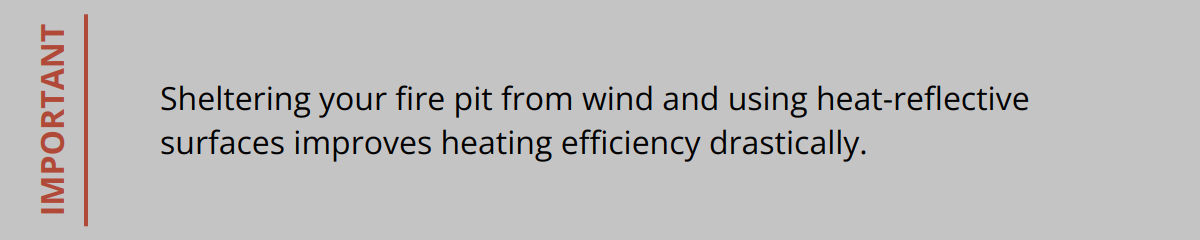
- Uneven heating: Adjust fire pit positioning and ensure proper ventilation
- Ignition problems: Inspect ignition system and ensure proper maintenance
For more detailed troubleshooting, refer to your model’s user manual or contact our technical support team. We are committed to providing you with the support you need to enjoy your S&S fire pit without interruption.
Our troubleshooting guides are designed to be comprehensive and easy to follow, addressing the rare issues that might arise during the lifetime of your S&S fire pit. We provide immediate access to solutions for common questions, detailed diagnostic procedures, and both quick fixes and comprehensive solutions for long-term reliability.
At S&S Fire Pits, we’ve always believed that the true measure of our success lies in the memories our products help create for families and communities. As we conclude our journey through the story of S&S Fire Pits, it’s evident that our commitment to exceptional quality has been the cornerstone of our legacy. This dedication has not only established us as the benchmark for premium fire features but has also fostered a community that values the warmth and connection that our fire pits bring.
Our story is rooted in a rich tradition of craftsmanship, where every weld, every detail, and every product is a testament to our founding philosophy: quality over quantity. We continue to balance innovation with traditional craftsmanship, ensuring that our products are not only aesthetically pleasing but also built to last for generations. The S&S legacy is built on thousands of customer experiences where our fire pits have exceeded expectations for performance and longevity, becoming an integral part of homes, businesses, and public spaces.
The role our products play in creating meaningful human connection and memory-making is at the heart of everything we do. We remain dedicated to crafting fire features that serve as gathering points for families and communities, fostering moments that are cherished for years to come. Our ongoing investment in materials research, design refinement, and manufacturing excellence ensures that we continue to lead the industry, pushing the boundaries of what’s possible in fire pit design and functionality.
As we look to the future, we’re excited to continue this journey, innovating and improving while staying true to our core values. The true measure of our success is not just in the quality of our products but in the special moments and traditions they help create. We invite you to become part of the S&S story by experiencing the difference that genuine quality makes in creating lasting enjoyment and warmth in your home or business.
In conclusion, the enduring legacy of S&S Fire Pits is a testament to the power of quality, craftsmanship, and community. We’re proud of what we’ve achieved and are excited for what’s to come, knowing that our products will continue to be at the heart of many memorable moments.


![Key Takeaways - Rustic Fire Pit Settings [Guide]](https://ssfirepits.com/wp-content/uploads/2024/05/Rustic_Fire_Pit_Settings__Guide__4_2024_05_26_07_04_02_631946_00_00.png)


![Key Takeaways - Entertaining Kids Around Fire [Guide]](https://ssfirepits.com/wp-content/uploads/2024/04/Entertaining_Kids_Around_Fire__Guide__5_2024_04_10_07_11_25_016248_00_00.png)