Posted on

You Have Never Seen Artisan Fire Pits Like These – Plus They Are Guaranteed To Last Forever


You have never seen artisan fire pits like this – plus they are guaranteed to last forever

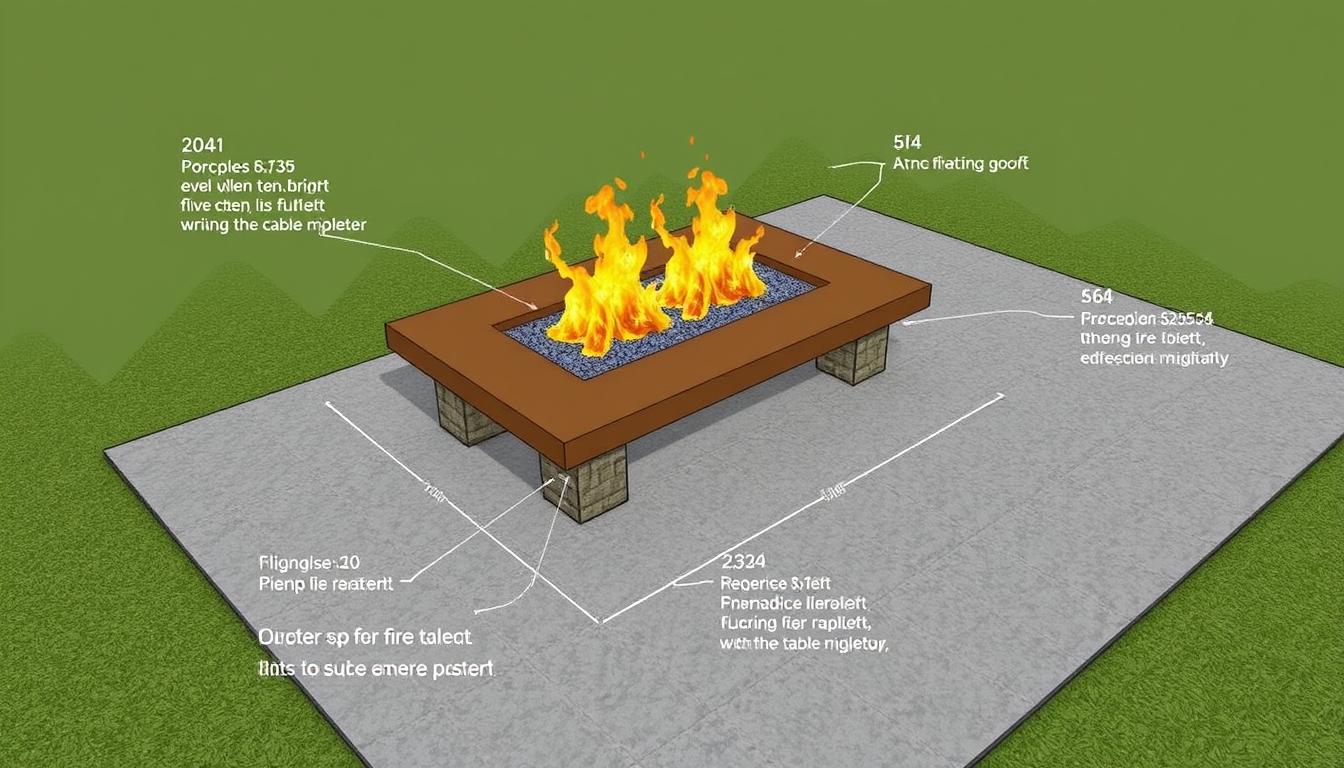
Explore a new world of outdoor living with custom artisan fire pits. These handcrafted masterpieces turn your backyard into a magical place. They make your outdoor living experience unforgettable. They mix beauty with strength, lasting a lifetime while looking amazing.

Key Takeaways

  • Discover custom artisan fire pits that redefine outdoor living
  • Experience handcrafted masterpieces designed for unparalleled durability
  • Transform your backyard into a captivating oasis with these stunning fire pits
  • Enjoy the finest craftsmanship and outdoor living experience
  • Fire pits built to last a lifetime, withstanding the elements

Introducing Custom Artisan Fire Pits

Take your outdoor living to the next level with our stunning custom fire pits. These artisan fire pits are not just for burning wood. They are beautiful handcrafted masterpieces that change how we think about outdoor design.

Redefining Outdoor Living

Picture a space where beauty meets practicality. A fire pit at the center makes your backyard a cozy spot for chilling out. Our custom fire pits are designed to draw people together. They make your outdoor space perfect for relaxing, talking, and enjoying nature.

Handcrafted Masterpieces

  • Every artisan fire pit is a piece of art, made with care by our skilled artisans.
  • We use top-quality materials and advanced techniques to turn outdoor living design into eye-catching pieces.
  • Our handcrafted fire pits come in many styles, from modern to rustic, fitting any backyard look.

“Bringing the warmth and ambiance of a fire into your outdoor living space is a game-changer. Our artisan fire pits do just that, elevating the experience and creating a true oasis in your backyard.”

Unparalleled Durability

Our custom artisan fire pits are made to last. They are crafted with top-quality materials and designed to handle tough outdoor weather. These weather-resistant fire pits look great and last for years.

Built to Withstand the Elements

Our long-lasting fire pits are made to fight off wind, rain, and extreme heat. They have rust-resistant steel and weatherproof finishes. Every part is picked for its durability and long life.

Enjoying a cozy night by the fire or hosting a big event? Your artisan fire pit will look great and work well, season after season. Its durability shows our commitment to quality and detail.

Feature Benefit
Durable Carbon Steel Construction Withstands weathering and corrosion for long-lasting performance
Weather-Resistant Finishes Maintains the fire pit’s appearance even in harsh outdoor conditions
Durable Design Engineered to endure the elements, ensuring years of enjoyment

Discover the unmatched durability of our custom artisan fire pits. Make your outdoor space better with a fire pit that lasts a long time.

Timeless Beauty

Each custom artisan fire pit is a true work of art. It combines timeless design with modern elegance. These fire pits are made with great care, fitting perfectly into any outdoor space. They make the area look better with their eye-catching look.

The timeless fire pit design and elegant fire pit design make these fire pits a highlight of your outdoor area for years. You can choose a custom fire pit aesthetic that fits your style, whether it’s rustic or modern. These pieces are made to match your unique taste.

“These fire pits are truly works of art that elevate the entire outdoor experience. The attention to detail is unparalleled.”

These fire pits are made from top-quality materials and can stand up to the weather. They add beauty and make your outdoor space warm and welcoming. Your outdoor events will be memorable with these fire pits.

Every part of these custom artisan fire pits shows off timeless beauty. The metalwork and finishes are carefully chosen to highlight their beauty. Get ready to be amazed by the stunning look of these outdoor highlights.

Eco-Friendly and Sustainable

Our custom artisan fire pits focus on caring for the environment. They are made with eco-friendly and sustainable ideas. These nature-inspired fire pits blend well with the outdoors, making a peaceful and eco-friendly experience for our customers.

Embracing Nature

Our sustainable fire pits aim to lessen their effect on nature. We use materials that are renewable and sourced responsibly. This way, we make sure our products are not only beautiful but also eco-friendly.

  • Renewable and responsibly sourced materials
  • Minimized environmental impact during production
  • Harmonious integration with the natural landscape

Our nature-inspired fire pits fit right into outdoor areas, making a calm and eco-aware setting. They’re perfect for a quiet evening or a party with friends. Our sustainable fire pits bring a green and nature-focused option that makes outdoor time better.

“Our custom artisan fire pits are not just functional; they are a celebration of nature’s beauty, designed to inspire a deeper connection with the outdoors.”

Custom Artisan Fire Pits

Make your outdoor space amazing with our custom artisan fire pits. We offer a wide range of unique designs. We work with you to create a special piece that fits your backyard, patio, or garden perfectly.

Unique Designs for Every Space

Do you want a sleek, modern fire pit or a rustic one? Our skilled artisans can make it happen. We’re experts in custom fire pit designs and personalized fire pits. We’ll turn your outdoor area into a space that shows off your style.

  • Innovative shapes and silhouettes
  • Customizable materials and finishes
  • Seamless integration with your landscape

Our unique fire pit styles look great and last long. They’re made to handle the weather, giving you years of fun with loved ones.

“Our custom artisan fire pits are the centerpiece of our outdoor living space, creating a warm and inviting atmosphere that we can enjoy year-round.”

Enhance Your Outdoor Experience

Make your outdoor living better with a custom artisan fire pit. These beautiful pits are not just for heat. They turn your space into a cozy spot for making memories with family and friends.

A custom artisan fire pit does more than just provide warmth. It enhances your outdoor living area’s ambiance, making it perfect for relaxing and chatting. Whether it’s a big party or a quiet night, the fire pit makes the moment special.

Picture enjoying time around a fire pit you designed yourself. The flames light up the night, improving your outdoor living. These fire pits are great for any event, turning your backyard into a place of joy and connection.

  • Elevate the outdoor living enhancement of your space with a custom artisan fire pit
  • Experience the captivating fire pit ambiance that fosters memorable moments
  • Enhance the overall fire pit experience and create a warm, inviting gathering place
Feature Benefit
Custom Designs Seamlessly integrate the fire pit into your outdoor living area, complementing your unique style and aesthetic.
Functional Heat Source Extend the enjoyment of your outdoor space by providing a cozy and inviting heat source, perfect for chilly evenings.
Ambiance Enhancement Elevate the overall fire pit experience with the captivating glow and flickering flames, creating a warm and welcoming atmosphere.

“The fire pit has become the centerpiece of our backyard, transforming it into a true oasis where we can unwind and reconnect with loved ones.”

Craftsmanship at Its Finest

Our custom artisan fire pits are made with a deep commitment to craftsmanship. We pick top-quality materials and put them together with great care. This makes sure our fire pits are the best in the market.

Attention to Detail

Our high-quality fire pits are more than just products. They are beautiful works of art made with a lot of thought and effort. Each fire pit shows off the artisan craftsmanship that goes into making it. You can see the care in every detail, from the shape to the finish.

“Our custom artisan fire pits are the result of a dedication to exceptional craftsmanship that is unmatched in the industry.”

Turning raw materials into a finished product is a big job that our skilled artisans do with love. They shape, sculpt, and put each part together with amazing precision. This focus on quality means every fire pit we make is a masterpiece. It’s built to last and to make a statement.

Our custom artisan fire pits are more than just useful. They celebrate the art of craftsmanship in a big way. They bring together beauty and function in a perfect way. With each fire pit, we aim to change the outdoor experience. We give our clients a way to add beauty and quality to their outdoor areas.

Transforming Backyards into Oases

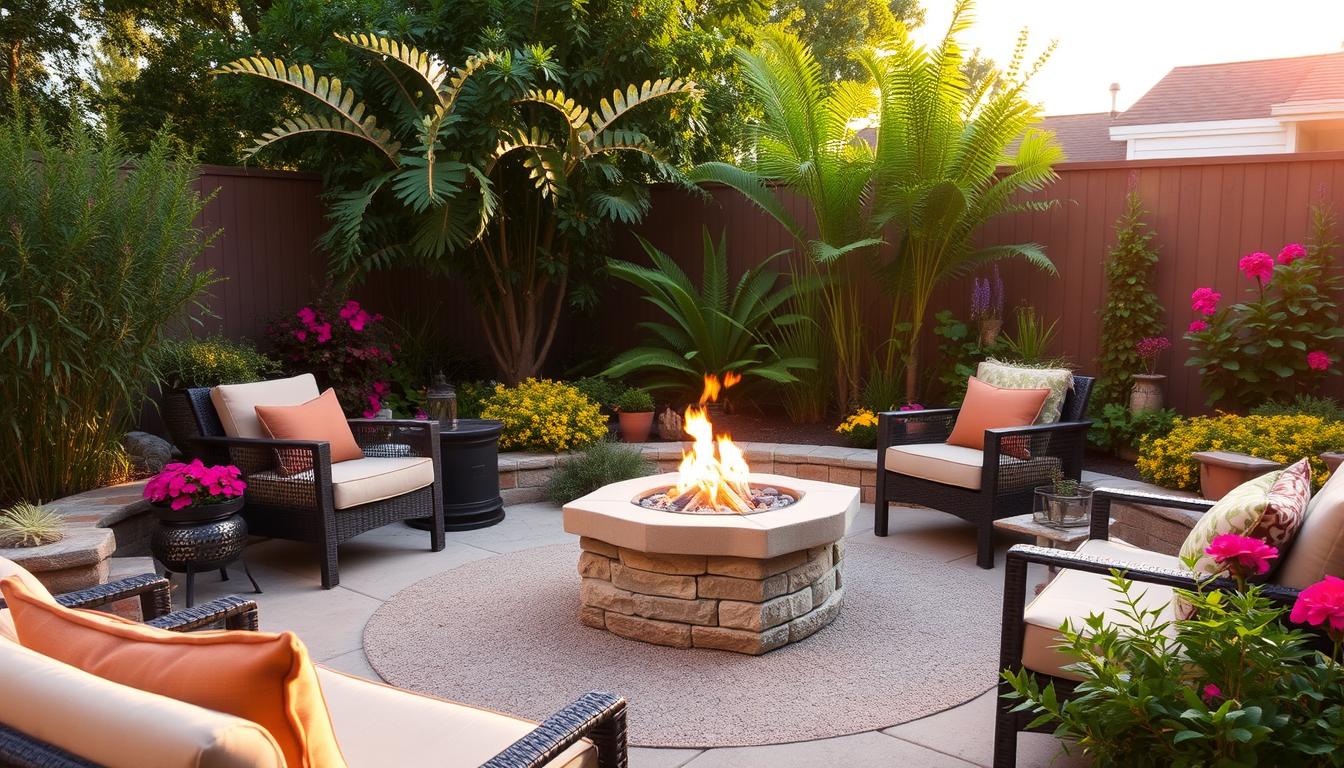
Make your outdoor space amazing with a custom artisan fire pit. It turns your backyard into a beautiful outdoor oasis. These fire pits become the main attraction, making your space more inviting and warm. They create a special backyard transformation experience.

Picture a cozy night by the fire pit centrepiece. The flames light up the area, making it perfect for making memories with loved ones. The sound of the fire and the moving flames bring peace and relaxation. Your backyard turns into a real outdoor oasis.

  1. Get a custom fire pit that’s the highlight of your backyard makeover.
  2. Make your outdoor area inviting, perfect for relaxing and enjoying nature.
  3. Use your outdoor space all year, creating special moments and gatherings.

Discover how a custom artisan fire pit can change your backyard. It turns it into a personal outdoor oasis you’ll always want to be in.

“The fire pit is the heart of our outdoor living space, creating a cozy and inviting atmosphere that we love to gather around.”

Safety First

Our custom artisan fire pits put safety first, making sure you and your loved ones have a worry-free time outdoors. They are made with the latest safety features and strict quality checks. This means you get a safe and dependable place to make lasting memories.

Worry-Free Enjoyment

Our fire pits are made with your safety in mind. They have easy controls, strong build, and safe mechanisms. This means you can enjoy the warmth and look of the flames without worrying about safety.

  • Robust, durable materials that withstand the elements
  • Reliable ignition systems for easy and consistent lighting
  • Thoughtful design elements that prevent accidental fires or spills
  • Adherence to the highest safety standards in the industry

With our safe fire pits, you can enjoy worry-free outdoor living. Create lasting memories with family and friends, all while knowing your fire pit is safe. Enjoy the peaceful setting, knowing your fire pit is built for years of carefree use.

“Our custom artisan fire pits are designed to seamlessly integrate safety and beauty, allowing you to focus on creating cherished memories without the burden of constant vigilance.”

Elevating Outdoor Gatherings

Hosting outdoor events for family, friends, or backyard parties is a joy. Our custom artisan fire pits can make these outdoor entertainment moments special. They create a warm, inviting atmosphere for deep connections and memorable fire pit gatherings.

These beautiful fire pits become the centerpiece of your backyard parties. They draw guests in with their beauty. The flickering flames and warm heat make a cozy setting. This encourages guests to stay, enjoy the moment, and each other’s company.

“Gathering around the fire pit has become the highlight of our outdoor events. It’s where memories are made.”

Our custom artisan fire pits are not just beautiful. They are also safe and worry-free. They are made to last, standing up to the elements for years. This means you can enjoy them for many gatherings to come.

Upgrade your outdoor living with a custom artisan fire pit from our collection. Make your backyard a place for connection and lasting memories with family and friends.

Features Benefits
Captivating Design Becomes the focal point of your outdoor space, enhancing the ambiance and inspiring conversation.
Unparalleled Durability Engineered to withstand the elements, ensuring years of reliable performance and enjoyment.
Eco-Friendly Materials Crafted with sustainable, natural materials that are kind to the environment.
Custom Tailoring Designed to fit your unique outdoor space and personal style preferences.

Conclusion

The journey into custom artisan fire pits has shown us a new way to enjoy outdoor living. These handcrafted beauties are durable and beautiful, changing how we see backyard fun. They mix function and art perfectly, making every outdoor event special.

Buying a custom fire pit is more than a purchase; it’s a choice for a future where nature and design meet. These unique pieces turn backyards into personal havens. Here, friends and family can make memories and enjoy the warmth of a special outdoor space.

When you’re looking to improve your outdoor space, think about custom artisan fire pits. They’re not just for looks; they’re a way to live life to the fullest. They bring together the beauty of nature, the joy of being together, and lasting elegance. Choose a custom fire pit to start a new chapter in outdoor living that will impress everyone.

FAQ

What sets these custom artisan fire pits apart?

These fire pits mix beauty with strength, making your outdoor area a special place. Skilled artisans make them, so they last a long time and show off great craftsmanship.

How are these fire pits designed to withstand the elements?

Our fire pits are made to handle tough outdoor weather. They use top-quality materials and careful design. This means they look great and work well for years.

What makes the design of these fire pits timeless and elegant?

Each fire pit is a piece of art, mixing classic style with modern beauty. They’re made with a focus on details. This makes them fit well in any outdoor area, adding beauty and charm.

How do these fire pits embrace eco-friendly and sustainable principles?

We focus on being kind to the planet with our fire pits. They’re made with materials that are good for the earth and are sourced responsibly. This makes your outdoor space feel in tune with nature.

Can I customize the design of my fire pit?

Yes, you can. We have many unique designs and work with you to make a fire pit that fits your outdoor space perfectly.

How do these fire pits enhance the outdoor experience?

A custom artisan fire pit makes your outdoor time better. They’re not just for heat; they turn your space into a cozy spot for fun times with people you care about.

What level of craftsmanship goes into these fire pits?

A lot of care and skill goes into making our fire pits. We pick the best materials and put them together with great precision. This makes our fire pits stand out for their quality.

How do these fire pits ensure worry-free enjoyment?

Our fire pits focus on safety, so you can relax and have fun. They have the latest safety features and are made with quality in mind. This means you get a safe and enjoyable outdoor time.

How do these fire pits elevate outdoor gatherings?

A custom artisan fire pit makes your outdoor events special. They become the center of attention, creating a warm and welcoming space. This encourages people to connect, talk, and make memories.


Posted on

Outdoor Cooking Equipment: Practical Tips

Outdoor cooking is a wonderful way to enjoy the great outdoors while preparing delicious meals. Selecting the right equipment can make a significant difference in your cooking experience.

At S&S Fire Pits, we are passionate about helping you elevate your outdoor cooking game. From choosing the perfect cooker to maintaining your gear, we’ve got practical tips to ensure success.

What Should I Look for in Outdoor Cooking Equipment?

Choosing the right outdoor cooking equipment is vital for a successful outdoor dining experience. The options you choose can greatly influence your cooking efficiency and the quality of your food. Here’s what you need to know.

Types of Outdoor Cookers

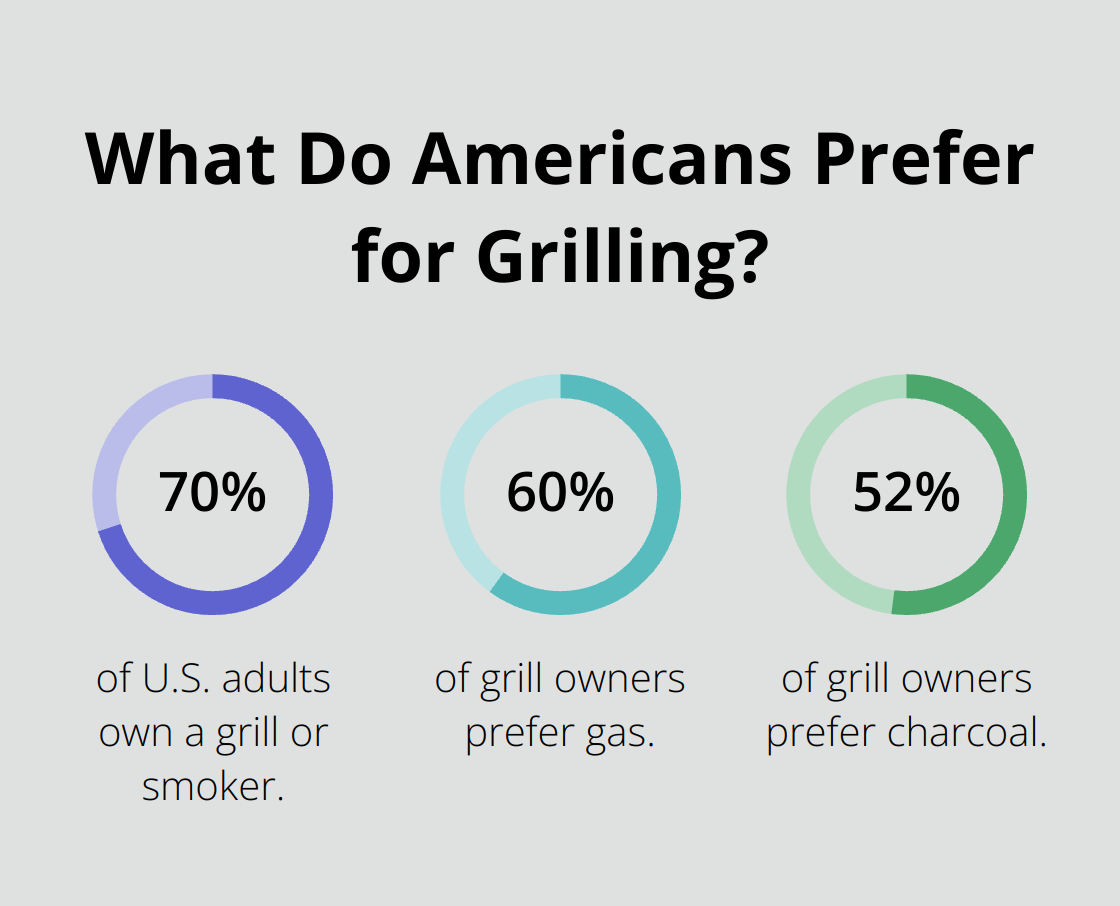
Outdoor cookers come in various types, each suited for different cooking styles and needs. Grills, both charcoal and gas, are popular for their versatility. Charcoal grills often provide a smoky flavor that many enthusiasts love, while gas grills offer more convenience and temperature control. Portable grills can be perfect for camping trips or small gatherings. Options like smoker grills are ideal for those who enjoy slow-cooked, flavorful meats. According to the Hearth, Patio & Barbecue Association, 70% of U.S. adults own a grill or smoker. This highlights the growing preference for outdoor cooking.

Fact - What Do Americans Prefer for Grilling?

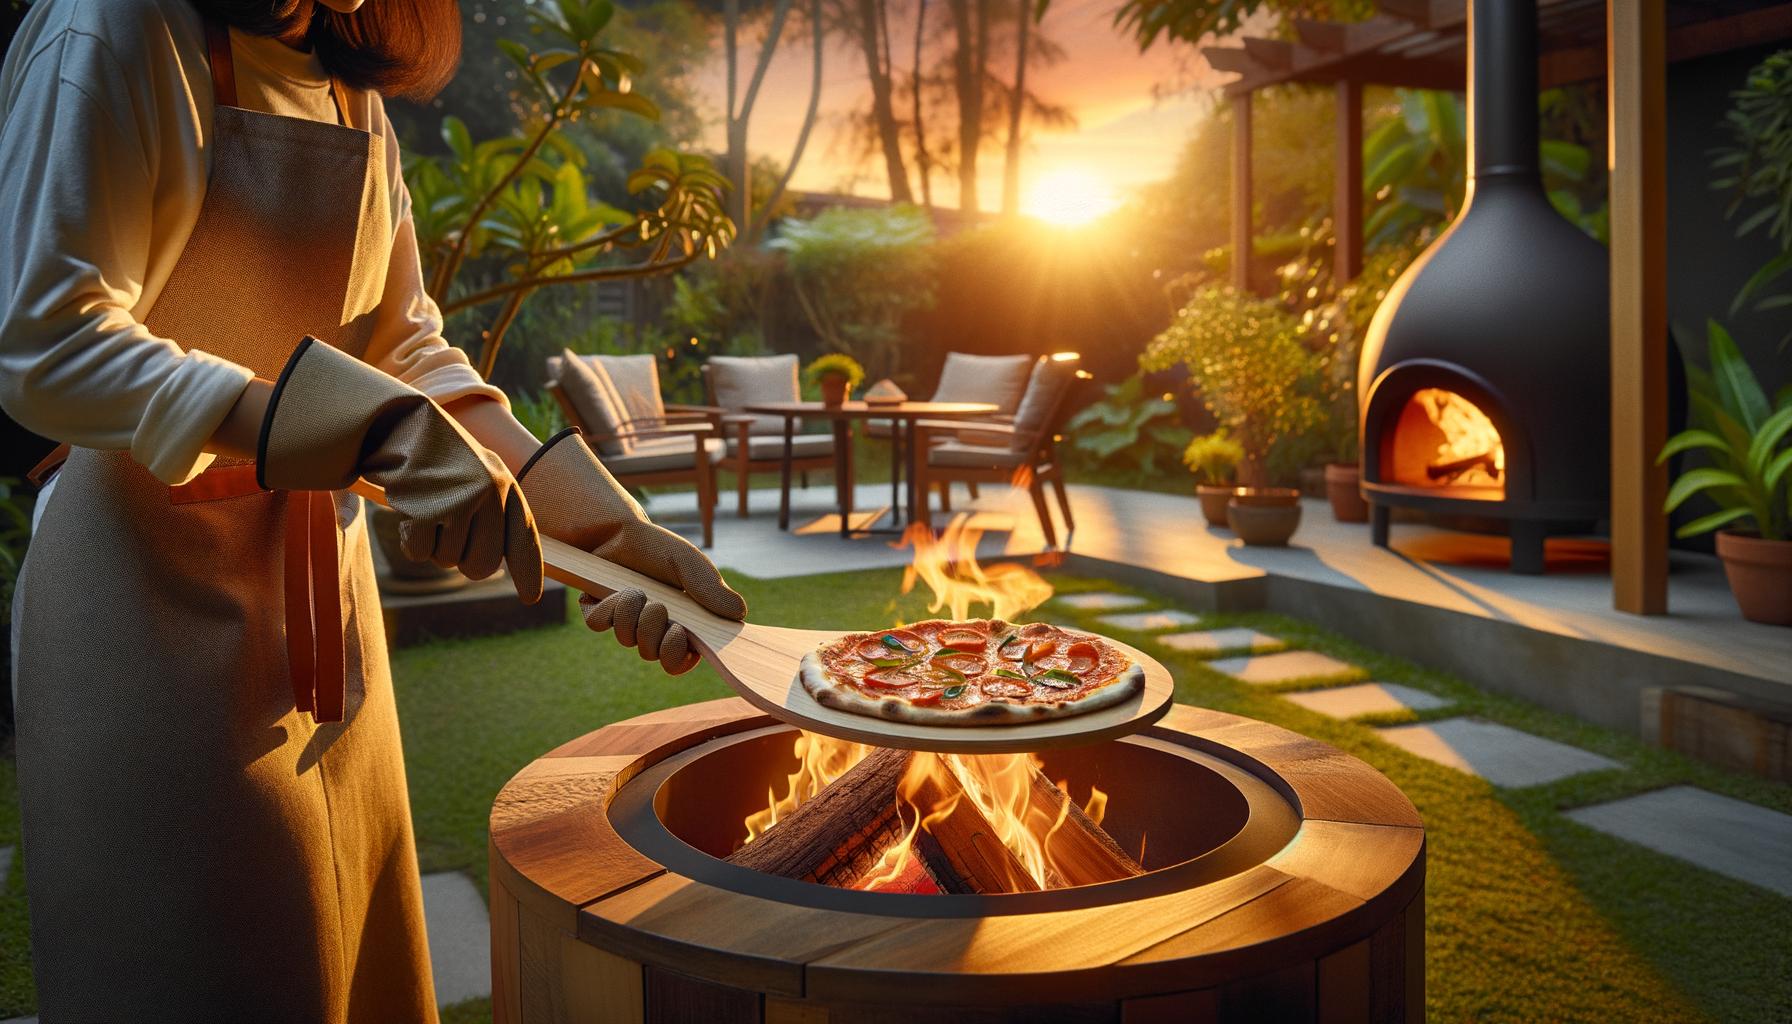
Camp stoves and griddles offer a more traditional approach to outdoor cooking. These are great for cooking breakfasts or meals that require flat, evenly heated surfaces. Outdoor pizza ovens are gaining traction as well, loved for their ability to deliver restaurant-quality pizza with crispy crusts and gooey cheese.

Key Considerations: Size, Fuel Type, and Portability

When evaluating outdoor cooking equipment, it is essential to consider the size that will suit your needs. A family of four may not require the same grill size as someone who hosts large parties. The size of your cooking equipment can impact both your cooking capacity and the space it occupies in your yard.

Fuel type is another major factor. Charcoal grills, while often favored for the flavor they impart, can be messier and require more preparation time. Gas grills, on the other hand, offer immediate heat and easy cleanup but may lack the depth of flavor. For those seeking a versatile option, wood-burning fire pits allow for both grilling and the traditional campfire experience. Data from Statista shows that 60% of grill owners prefer gas while 52% prefer charcoal, indicating that fuel type is a major decision point for many people.

Portability is also a crucial aspect to consider, especially for those who enjoy camping or tailgating. A portable grill or stove should be lightweight and easy to set up, without compromising on cooking power. For instance, compact gas grills or foldable camp stoves are practical for outdoor enthusiasts always on the go.

Popular Brands and Models

Several brands are recognized for their reliability and performance in outdoor cooking. Weber is a household name, known for its durable and user-friendly grills. Traeger Pellet Grills are also quite popular, particularly for those interested in smoker grills. They’ve been noted for their innovative designs and robust temperature control.

Similarly, brands like Coleman offer a range of portable cooking solutions, perfect for camping and outdoor gatherings. Big Green Egg is another brand that has made a name for itself in the smoker grill category, offering versatility and high-quality cooking results.

For those looking to make their outdoor kitchens more comprehensive, Bull Outdoor Products offers a range of built-in grills and outdoor kitchen accessories.

In your quest for the perfect outdoor cooking setup, these practical tips and recommendations can steer you toward equipment that meets both your needs and preferences. From the fuel type to size and portability, carefully considering these factors will make your outdoor cooking more enjoyable and stress-free.

For more in-depth advice on how to choose the right outdoor furniture or other aspects of outdoor living, check out our guide to outdoor living.

How to Maintain Outdoor Cooking Equipment

Maintaining your outdoor cooking equipment is essential for longevity and optimal performance. Here are some practical tips to keep your gear in top shape.

Cleaning and Care Routines

Regular cleaning is non-negotiable. After each use, allow the equipment to cool before scraping off food residue. For grills, a wire brush is effective for removing stuck-on debris. For deeper cleaning, soapy water and a non-abrasive sponge are best. Inspect burners and ensure they are unclogged for even cooking.

Fact - Is Your Grill Getting the Care It Deserves?

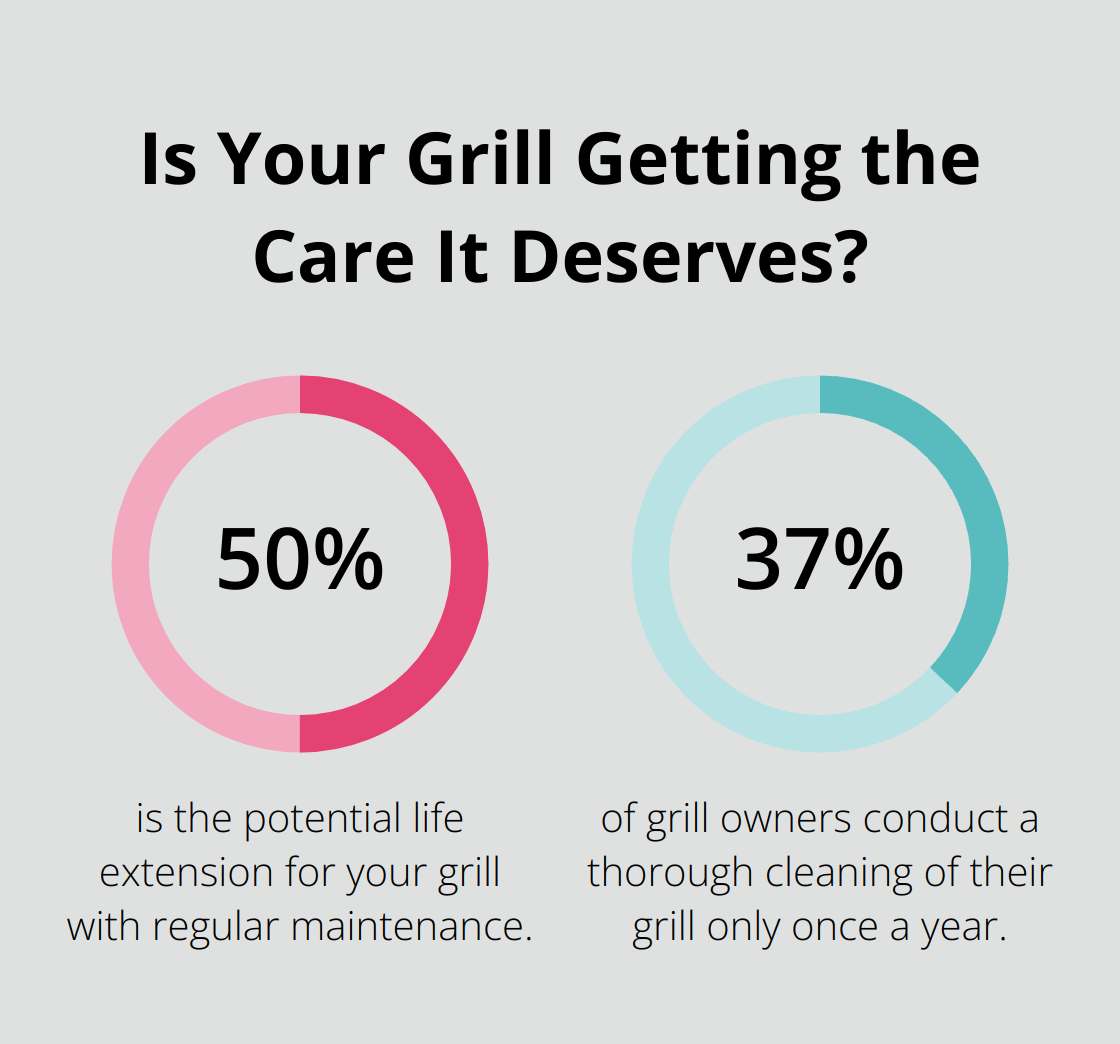
For smoker grills, it’s crucial to clean both the grate and the firebox. Ashes can accumulate and dampen the smoker’s efficiency. A study by Weber revealed that regular maintenance could extend the life of your grill by up to 50%. Using a high-quality cover also protects against corrosion and weather damage.

Seasonal Maintenance Checklists

Before the start of any cooking season, a full inspection is essential. Gas grills should have their fuel lines checked for leaks. Charcoal grills need thorough cleaning to remove any ash buildup. In colder months, ensure your equipment is well-protected. Rust can be a common issue, so applying a light layer of oil can prevent it.

Autumn is the perfect time for a thorough inspection. Remove and clean the grates, burners, and flavorizer bars. Replace any worn-out parts. According to a report by HPBA, 37% of grill owners conduct a thorough cleaning of their grill only once a year. This can lead to malfunctioning equipment and uneven cooking. Consistent seasonal checks can preempt these issues.

Storage Solutions to Prolong Equipment Life

Proper storage is paramount. Keeping your equipment in a dry, covered area can dramatically extend its lifespan. For ease of access and protection, invest in weather-resistant storage sheds or cabinets. If indoor storage is feasible, it is the best option for safeguarding your gear against extreme weather.

Portable grills and camp stoves should be stored in their carrying cases, which often come with built-in protection features. Elevate your stored equipment off the ground to prevent it from getting wet from ground moisture.

For more detailed tips on protecting your gear, you might find this article on outdoor furniture interesting.

Maintaining your outdoor cooking equipment with these practical steps will ensure it remains functional and reliable for many seasons of enjoyable outdoor meals.

How Can You Enhance Your Outdoor Cooking Experience?

Outdoor cooking can offer more than just meals; it’s an experience. By focusing on key accessories, safety measures, and unique recipes, you can elevate your outdoor cooking to an entirely new level.

Essential Accessories for Outdoor Cooking

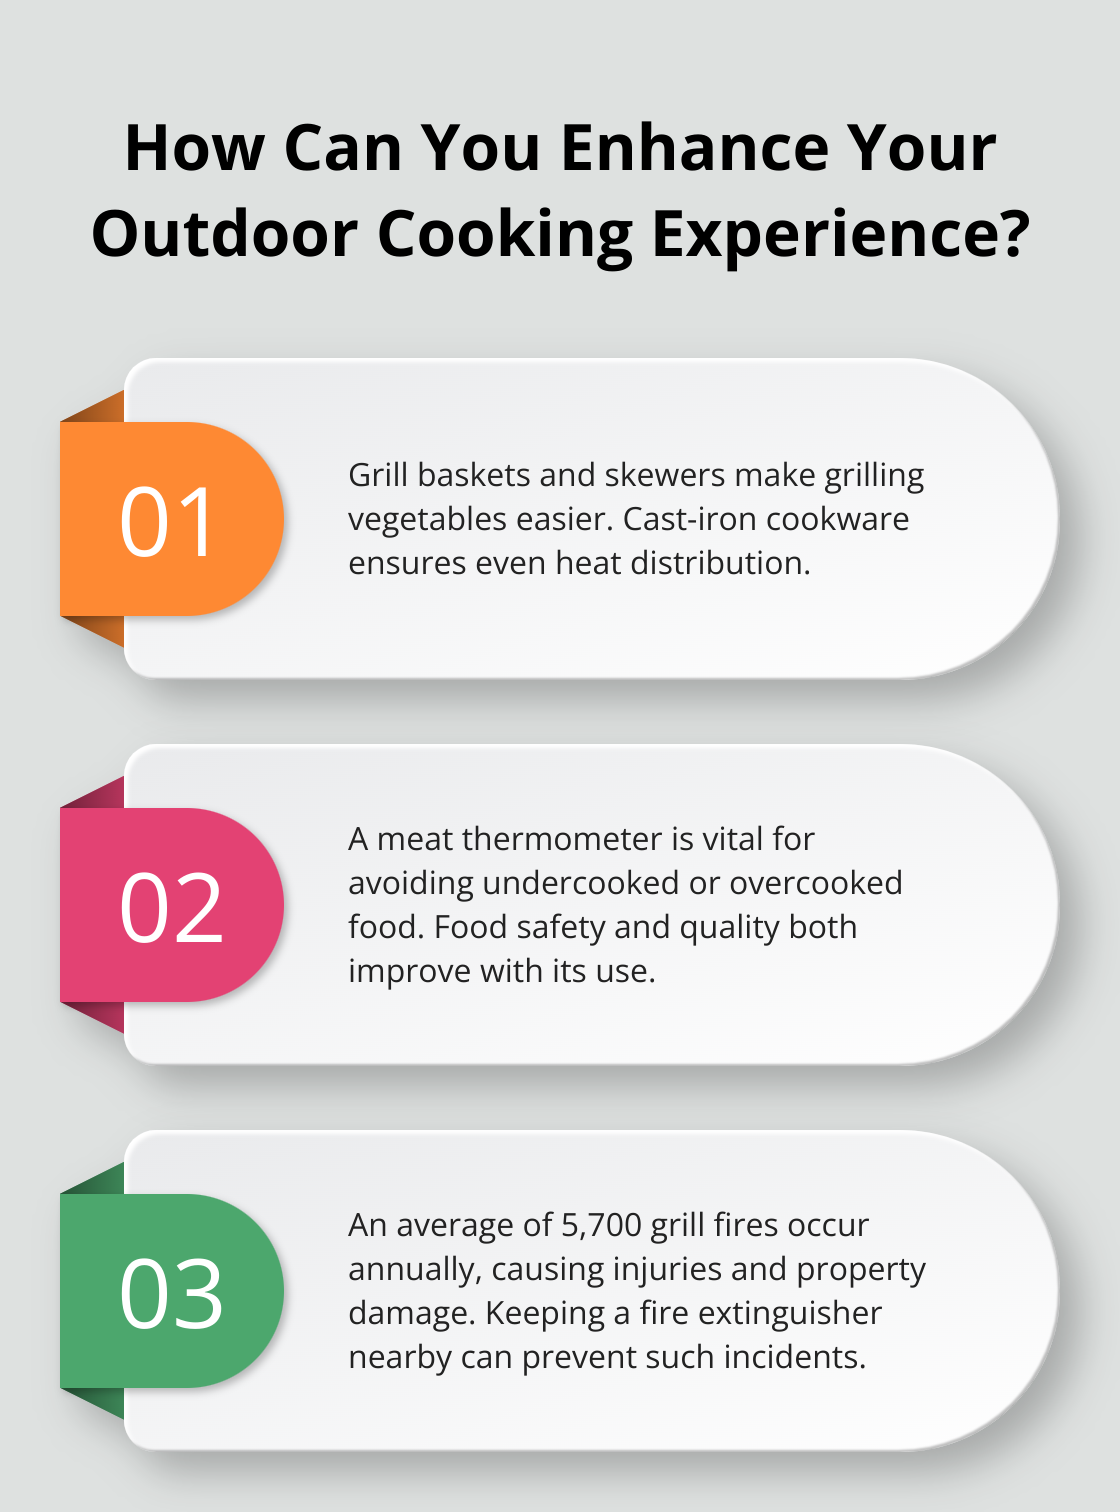
Investing in the right accessories can significantly improve your outdoor cooking setup. Grill baskets and skewers can make grilling vegetables and smaller items much easier. Cast-iron cookware is another must-have, as it provides even heat distribution and is exceptionally durable.

Fact - How Can You Enhance Your Outdoor Cooking Experience?

For those who enjoy slow-cooking, a good meat thermometer is invaluable. Knowing the internal temperature helps in avoiding undercooked or overcooked food. Studies show that food safety and quality both improve when using a meat thermometer.

Another essential accessory is a set of long-handled tools, such as spatulas, tongs, and forks. These tools make it easier to manipulate food over high heat, reducing the risk of burns.

Safety Tips and Best Practices

Safety should always be a top priority when cooking outdoors. One fundamental tip is to set up your cooking area on a flat, stable surface away from flammable materials. The U.S. Fire Administration reports that an average of 5,700 grill fires occur annually, causing property damage and injuries. These incidents can often be prevented by adhering to basic safety rules.

It’s essential to keep a fire extinguisher or a bucket of sand nearby in case of emergencies. Ensuring your grill or cooker is in good working condition can also help prevent accidents. Check for gas leaks by applying soapy water to connections and looking for bubbles.

Finally, always have proper ventilation. Never use outdoor cooking equipment indoors or in enclosed spaces to avoid carbon monoxide poisoning. According to the Centers for Disease Control and Prevention, around 400 Americans die from unintentional CO poisoning every year.

Recipe Ideas and Techniques

Experimenting with different recipes and techniques can make your outdoor cooking sessions more exciting. For instance, using wood chips for smoking can add a unique flavor to meats. Hickory, applewood, and mesquite are popular choices for different types of meat. A study by the National Center for Biotechnology Information indicates that smoking not only enhances flavor but also acts as a natural preservative.

One technique gaining popularity is the reverse sear method. This involves cooking meat slowly to the desired internal temperature and then searing it at high heat to create a crispy exterior. This method works particularly well for steaks and larger cuts of meat.

For something different, consider trying a campfire classic like S’mores, but with a twist. Use flavored marshmallows or add fresh fruit to the mix for an added layer of taste. For more inspiration on outdoor recipes, check out these S’mores ideas.

By integrating these accessories, safety tips, and recipe ideas into your outdoor cooking routine, you can create an enjoyable and memorable culinary experience.

Final Thoughts

Selecting the right outdoor cooking equipment can transform your mealtime into an exciting outdoor experience. Whether you opt for a gas grill’s convenience or a charcoal grill’s rich flavor, making informed choices will enhance your culinary endeavors. Key factors like size, fuel type, and portability should guide your selection.

Fact - How Can You Optimize Your Outdoor Cooking?

Maintaining your equipment is equally important. Regular cleaning and seasonal inspections are essential to ensure longevity and performance. Simple practices like using a cover and storing your gear properly can make a big difference.

Experimenting with different recipes and techniques adds another layer of enjoyment to outdoor cooking. From using wood chips for smoking to trying campfire classics like S’mores, there’s always something new to explore.

We at S&S Fire Pits are here to support your outdoor cooking adventures with high-quality, handmade fire pits and a range of unique outdoor products. Discover our offerings at S&S Fire Pits and make your outdoor living space truly exceptional.

For more insights, check out detailed guides on outdoor living and other practical tips to enhance your outdoor space.

Posted on

Best Wood for Fire Pits: All You Need to Know

Choosing the right wood for your fire pit can enhance your outdoor experience in numerous ways. Each type of wood offers unique benefits, from burn temperature to smoke production.

In this post, we’ll guide you through the best options and provide practical tips for selection and storage. At S&S Fire Pits, we want to help you make informed decisions for optimal enjoyment.

What Wood Should You Use?

Choosing the right type of wood is a game-changer for your fire pit experience. The type of wood not only influences burn time but also the amount of smoke and aroma. Here’s what you need to know about different wood types.

Hardwoods vs. Softwoods

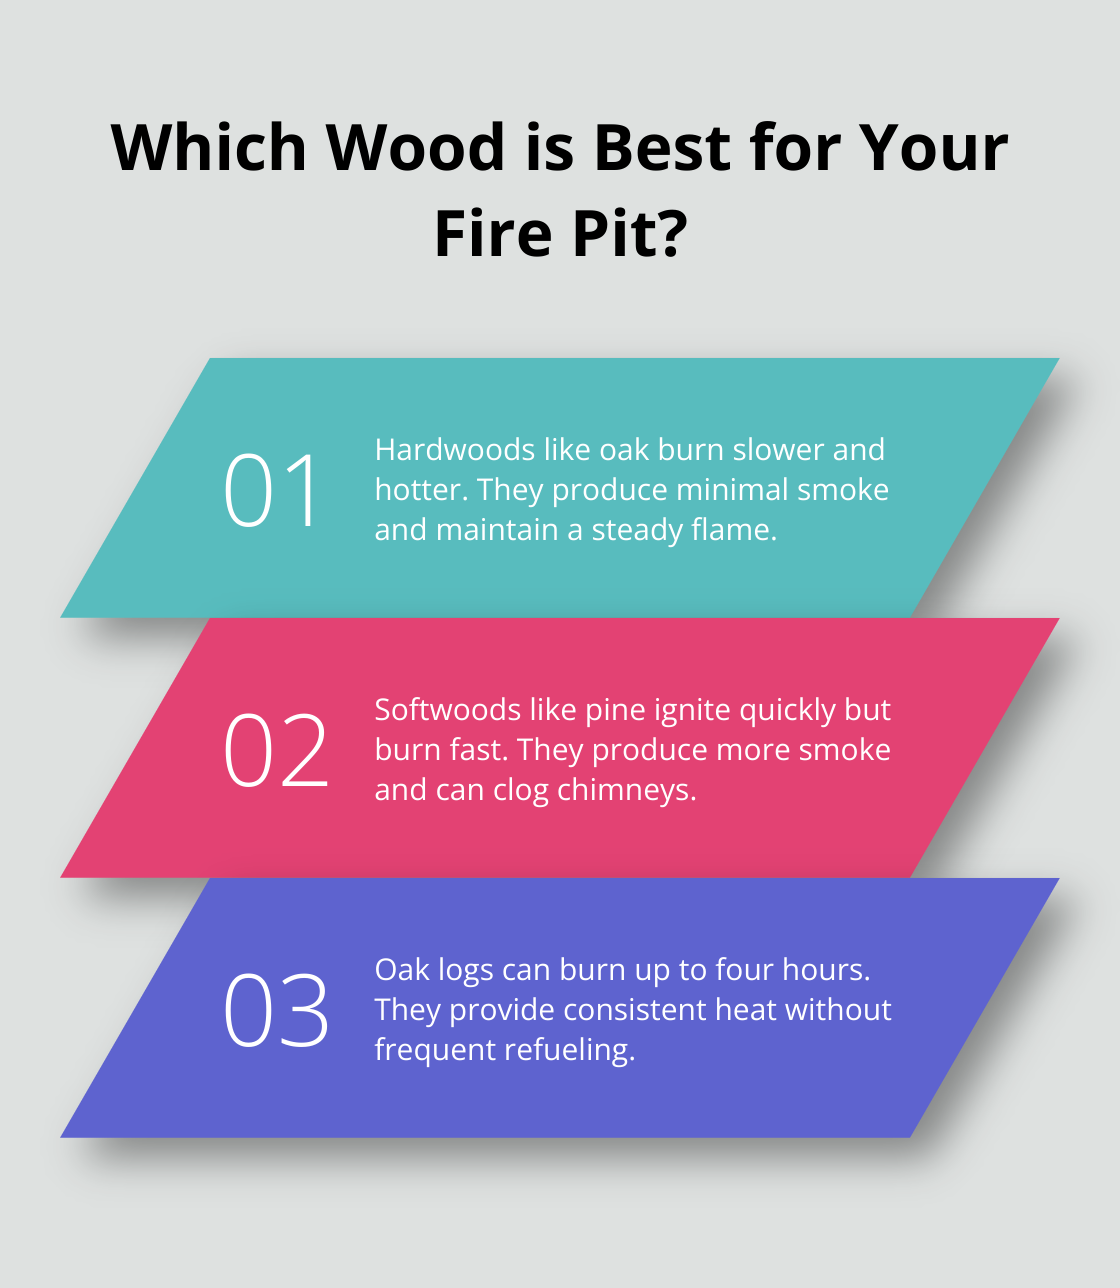
Hardwoods like oak, hickory, and maple are the gold standard for fire pits. They burn slower and hotter, producing a steady flame and minimal smoke. Oak is exceptionally popular due to its long-lasting burn and high heat output. Hickory, known for its robust flavor, is a favorite for cooking. Maple, on the other hand, burns clean and offers a pleasant aroma.

Fact - Which Wood is Best for Your Fire Pit?

Softwoods, such as pine and cedar, ignite quickly, making them suitable for kindling. However, they burn fast and produce more smoke and creosote, which can clog chimneys and flues. While softwoods can be handy for starting a fire, they shouldn’t be the primary wood used in your fire pit.

Popular Options: Oak, Hickory, Maple

Oak is a top choice for fire pits because of its high density. An oak log can burn up to four hours, providing consistent heat without frequent refueling. This makes it ideal for long evenings around the fire.

Hickory stands out for its versatility. It not only burns hot and long but also imparts a rich, smoky flavor to food, making it excellent for cooking. Hickory can reach temperatures of up to 1,200 degrees Fahrenheit.

Maple is valued for its clean burn and sweet aroma. It produces less smoke, making it pleasant to sit around. Plus, its embers last longer, maintaining heat even after the flames die down.

Less Common Choices: Cherry, Applewood

Cherry wood offers a fragrant and visually appealing burn. It ignites quickly and produces a steady heat, but it burns faster than oak or hickory. Still, it’s a fantastic choice for those who enjoy a pleasant aroma.

Applewood is another excellent option, especially for cooking. It burns hot and slow, imparting a mild, sweet flavor to grilled foods. Perfect for a campfire cooking experience, though it might be harder to source.

For a deeper look into different firewood options, consider what best matches your fire pit needs.

Practical Tips for Storing Wood

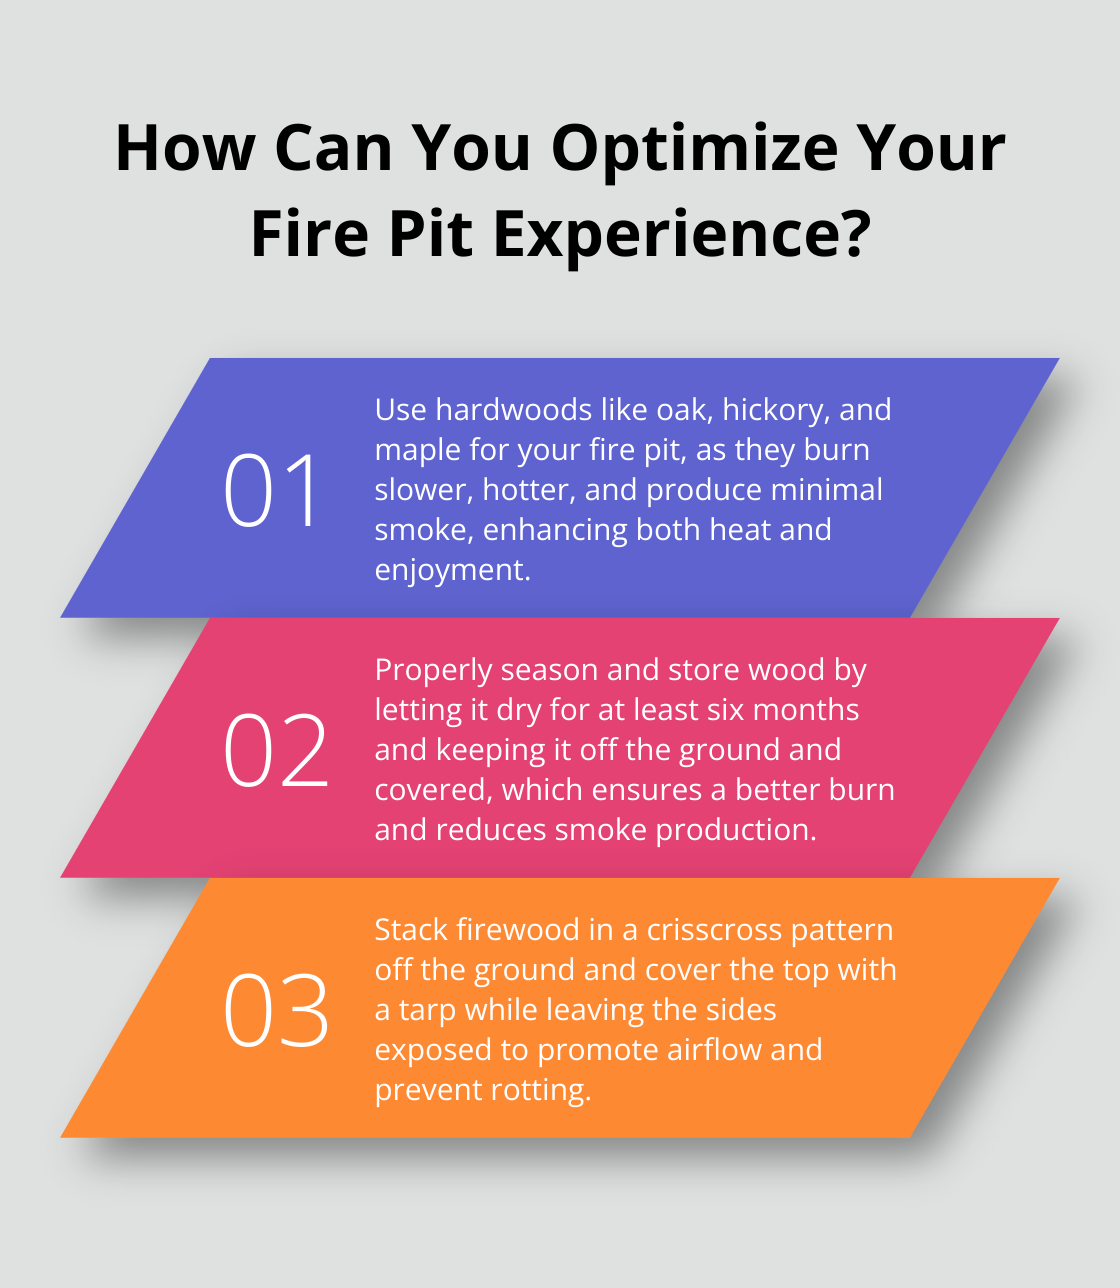
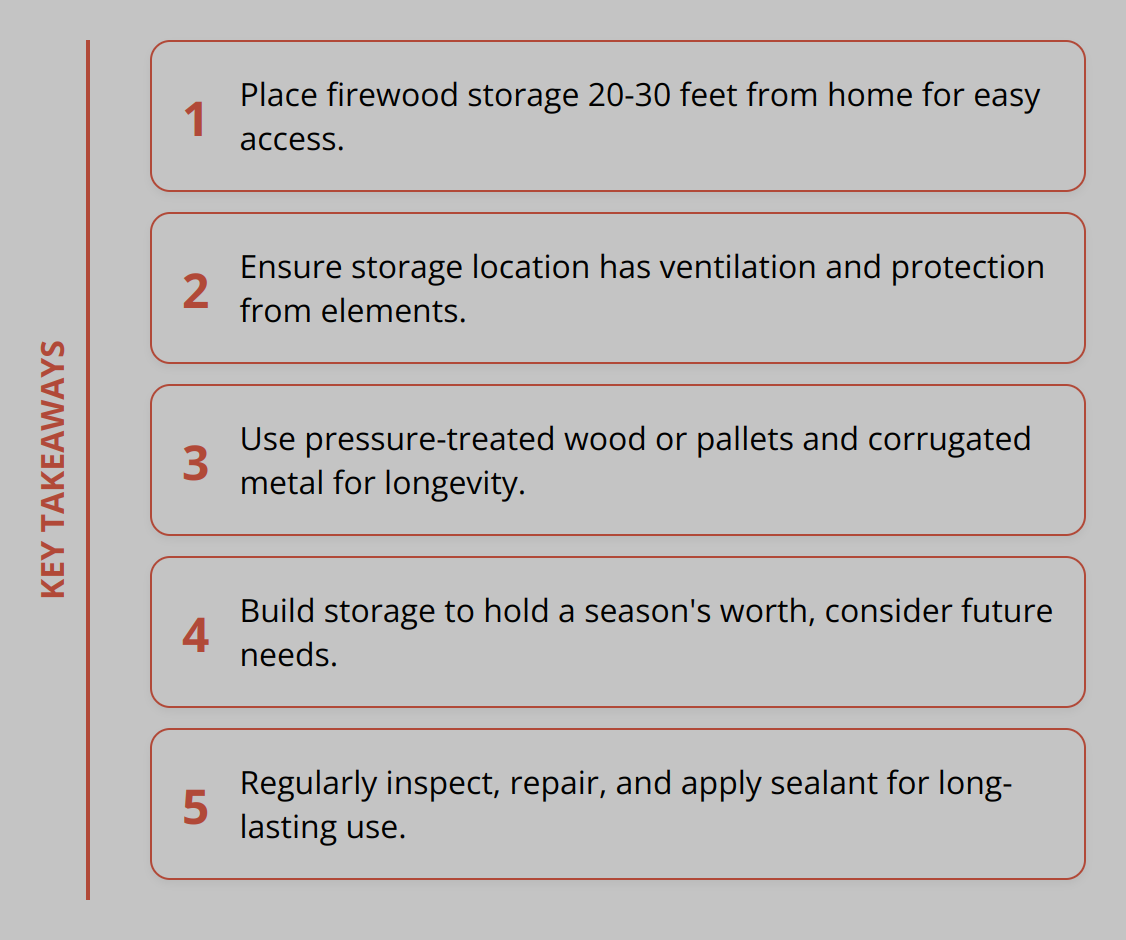
To get the best out of your firewood, proper storage is essential. Keep wood off the ground and covered to protect it from moisture. A good rule of thumb is to let seasoned wood cure for at least six months. Storing wood correctly not only ensures a better burn but also reduces smoke production and waste. For more on firewood storage, check these practical tips.

Selecting the right wood can drastically enhance your fire pit experience, maximizing both enjoyment and efficiency. Make informed choices and relish those cozy nights by the fire.

What Factors Matter When Choosing Firewood?

Several factors play a significant role in determining the best wood for your fire pit. Burn temperature and duration, smoke production, availability, and cost are crucial considerations for the ultimate fire pit experience.

Burn Temperature and Duration

The burn temperature and duration of your wood directly impact the quality of your fire. Hardwoods like oak and hickory are renowned for their high heat output and prolonged burning times. Oak can sustain a fire for approximately four hours per log, delivering consistent warmth throughout the evening. Hickory, with its capacity to reach temperatures up to 1,200 degrees Fahrenheit, ensures a hot and enduring flame perfect for cooking and long gatherings.

Is Your Firewood Ready?

In contrast, softwoods burn at lower temperatures and for shorter periods. Pine and cedar ignite rapidly, providing instant flames but requiring frequent refueling. This quick burn makes them ideal for kindling rather than as the primary fuel source. The choice between hardwoods and softwoods ultimately hinges on your needs—sustained heat and longer burn times favor hardwoods, while ease of ignition favors softwoods.

Smoke Production

Smoke production is a critical factor to consider, especially for those who want a clean and comfortable fire pit experience. Hardwoods such as maple burn cleanly, emitting minimal smoke compared to softwoods like pine, which produce more smoke and creosote buildup. Excessive smoke can cause discomfort and even respiratory irritation, especially if the wood is not properly seasoned.

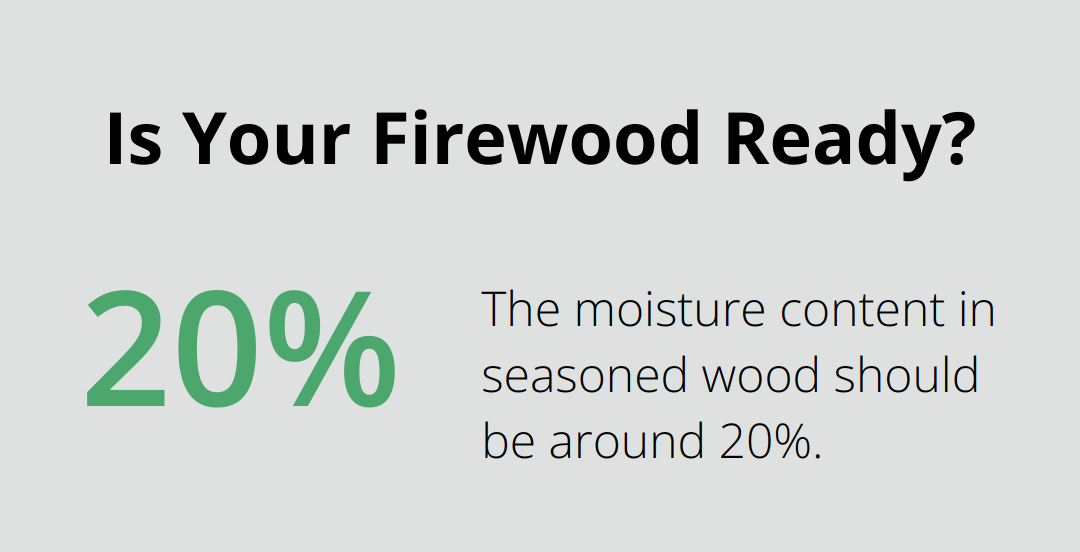
Seasoned wood—wood that has been dried for at least six months—burns far more efficiently than green wood. This drying process reduces the moisture content to around 20%, minimizing smoke production and ensuring a cleaner burn. It’s advisable to avoid burning construction wood or driftwood due to their potential to release toxic fumes and pollutants.

For more practical storage advice, consider these firewood storage tips.

Availability and Cost

Availability and cost are often overlooked but are just as vital. High-quality hardwoods like oak and hickory might come with a higher price tag, partly due to their superior burning characteristics. However, the longer burn time and higher heat output can justify the initial investment. For instance, investing in a cord of oak, which typically costs around $300 depending on the region, pays off in the long run with fewer refueling needs.

Locally sourcing firewood can also affect cost and availability. Region-specific woods like applewood, popular in certain areas for its cooking properties, may vary in price and accessibility. It’s crucial to research and understand what types of wood are readily available in your locality.

Understanding these factors will guide you in selecting the best wood for your fire pit, optimizing both performance and cost-efficiency.

Up next, we’ll explore how to maintain and extend the life of your fire pits, ensuring they remain a centerpiece of your outdoor gatherings.

How to Store Firewood Properly

Proper storage and handling of firewood are essential to ensure efficient burning and to maximize the lifespan of your firewood. With the right techniques, you can maintain wood quality and readiness for use in your fire pit.

Seasoning and Drying Methods

Seasoning wood involves drying it to reduce moisture content, which should ideally be around 20%. Freshly cut green wood has moisture content above 50%, making it difficult to burn and prone to producing excess smoke. The seasoning process requires at least six months, though some hardwoods like oak may take up to a year to season completely.

How Moist is Freshly Cut Wood?

There are two primary methods for drying firewood:

  1. Air drying: Stack the wood in an open space with good airflow. This is the most common method and ensures natural drying.
  2. Kiln drying: Involves drying wood in a controlled environment using heat. This method is quicker and can reduce the seasoning time to a few weeks, but it is typically more expensive.

Stacking and Covering Techniques

Proper stacking and covering are crucial to keep your firewood dry and prevent it from rotting. Here are some effective techniques:

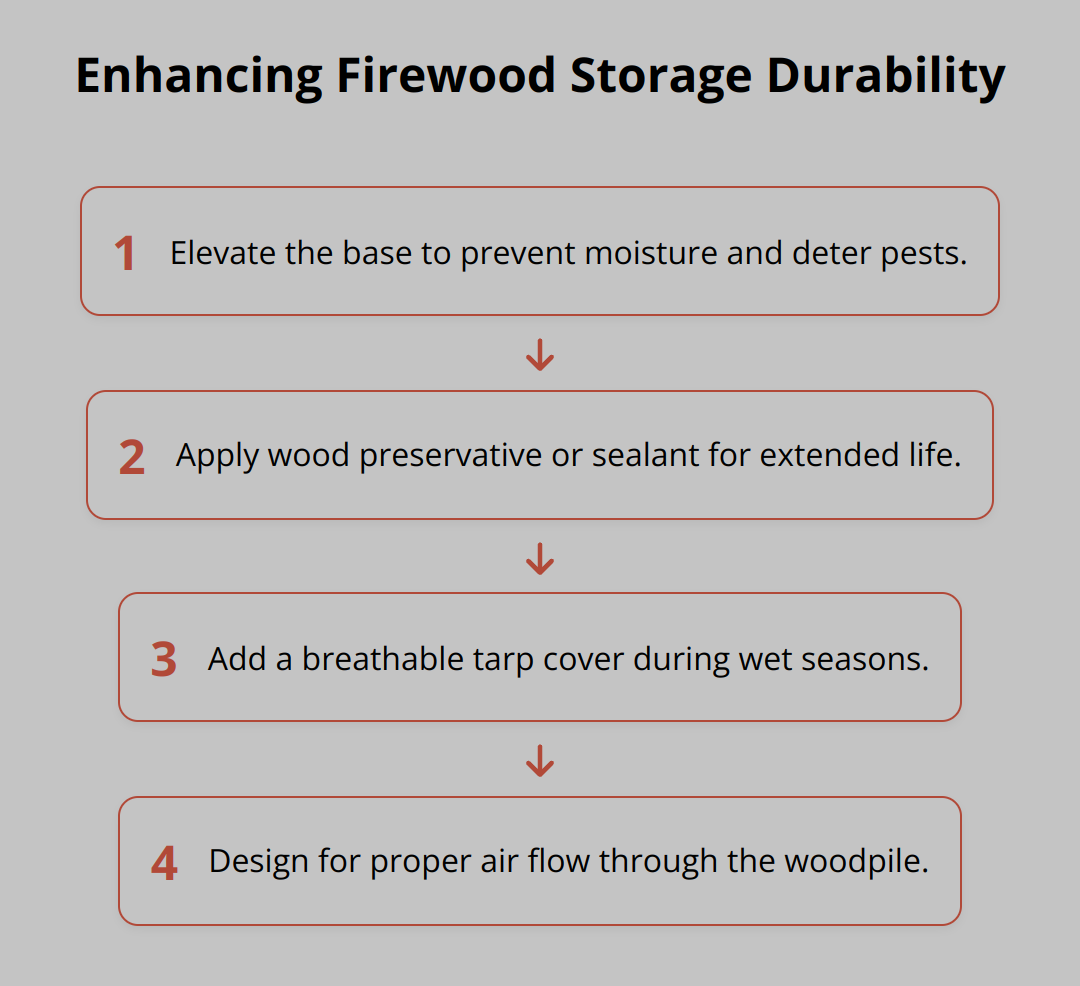
  • Stack wood off the ground using pallets or a firewood rack to prevent moisture absorption from the soil.
  • Arrange the logs in a crisscross pattern to enhance airflow, promoting even drying.
  • Cover the top of the stack with a tarp or firewood cover, but leave the sides exposed. This protects the wood from rain while allowing moisture to escape.

For a detailed guide on building your own firewood rack, you might want to look into these firewood storage tips.

Tips for Maintaining Wood Quality

Maintaining the quality of your firewood ensures you get the best burn. Here are practical tips:

  • Ensure adequate spacing between stacks to promote airflow and prevent mold growth.
  • Rotate older wood to the front of the stack and use it first, following the first-in, first-out principle.
  • Check for pests regularly. Infestations, such as termites, can degrade firewood quality. Using insect repellents can help keep pests at bay.

Regularly inspect your firewood for any signs of mold or decay. Discard any compromised wood to avoid unpleasant smoke and inefficient burning. Learning how to prevent firewood from rotting can save you from wasting valuable resources.

By following these best practices, you’ll ensure your firewood remains dry, seasoned, and ready to provide a warm, efficient fire every time.

Conclusion

Choosing the right wood for your fire pit is essential for an enjoyable and efficient outdoor experience. Hardwoods like oak, hickory, and maple are top choices due to their prolonged burn times, high heat output, and minimal smoke production. Softwoods such as pine and cedar ignite quickly and are excellent for kindling, but they burn fast and produce more smoke, making them less suitable as primary firewood.

Fact - How Can You Optimize Your Fire Pit Experience?

When selecting firewood, consider factors such as burn temperature, smoke production, availability, and cost. Hardwood generally offers a cleaner and longer-lasting fire, while softwood provides a quick start. Ensuring your wood is well-seasoned, with a moisture content around 20%, is key to reducing smoke and increasing burning efficiency.

Proper storage techniques, like air drying or kiln drying, stacking wood off the ground, and covering the top while leaving the sides exposed, help maintain wood quality and readiness for use. Regularly checking for pests and rotating older wood to the front of the stack can further enhance your firewood’s performance.

For a durable and high-quality fire pit, consider the handmade options from S&S Fire Pits. We craft unique fire pits and over 100 different products, all from solid USA steel. Our products are guaranteed for life, ensuring you never need to replace them.

By choosing the right wood and following proper storage practices, you can optimize your fire pit experience, making your outdoor gatherings warm and memorable. For more tips on optimizing your fire pit, you can explore our guides on wood burning tips and firewood storage.

Posted on

What Are the Best Fire Pit S’mores Recipes?

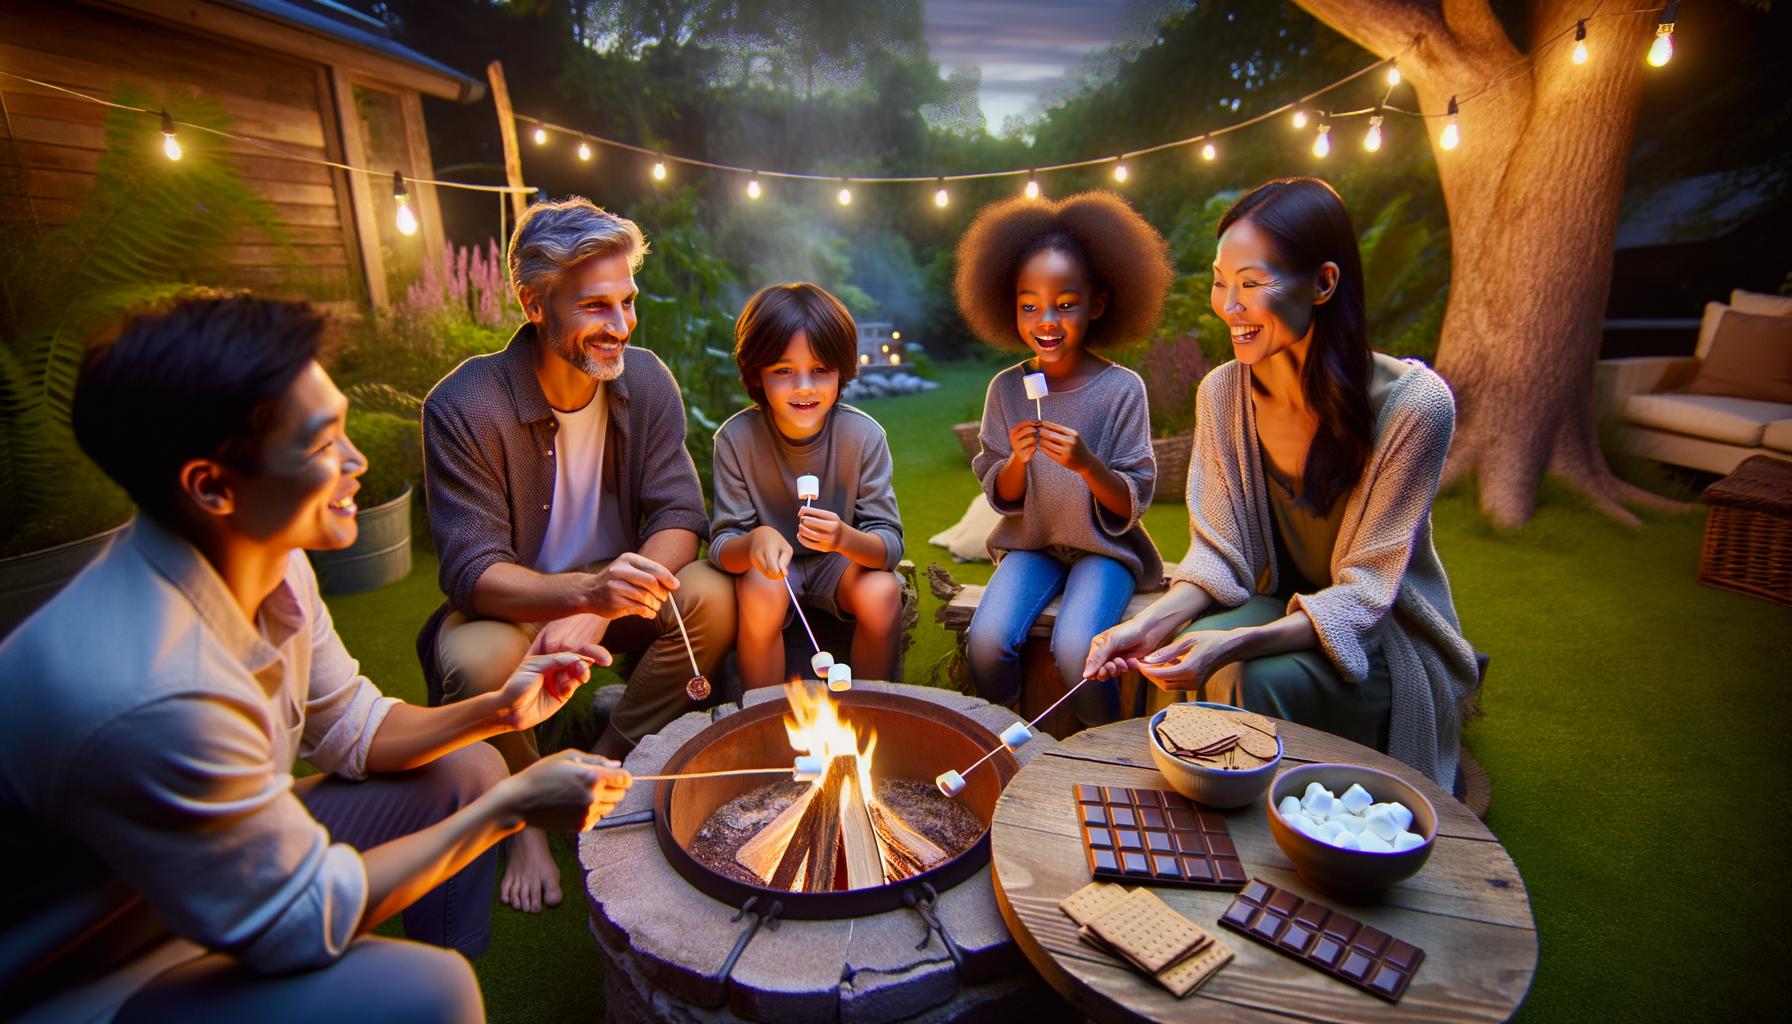
Gathering around a fire pit is a cherished tradition, and what better way to enhance the experience than with delicious s’mores recipes?

At S&S Fire Pits, we are passionate about creating memorable moments, and we’ve compiled a list of our favorite s’mores combinations.

Whether you stick to the classics or explore gourmet variations, these recipes are sure to delight.

Classic S’mores Recipes

Traditional S’mores

Nothing beats the classic combination of graham crackers, Hershey’s chocolate, and roasted marshmallows. Start by assembling your ingredients: two graham cracker squares, a piece of Hershey’s chocolate, and a marshmallow. Use a skewer to roast the marshmallow over hot coals until golden brown, then sandwich it between the graham crackers and chocolate. The heat from the marshmallow will melt the chocolate perfectly. This straightforward yet delightful recipe has stuck around since the first recorded recipe by the Girl Scouts in 1927 for good reason – simplicity and nostalgia.

Peanut Butter S’mores

For a richer and more indulgent s’more, incorporate peanut butter. Spread a layer of peanut butter on one of the graham crackers before adding the chocolate and roasted marshmallow. The added peanut butter offers a contrast to the sweetness, creating a more balanced flavor profile. According to data from Food Network, peanut butter variations have been increasingly popular in recent years – a trend that’s hard to argue with once you’ve tried it.

Dark Chocolate and Raspberry S’mores

Elevate your s’mores game with dark chocolate and fresh raspberries. Replace the traditional milk chocolate with dark chocolate for a more intense cocoa flavor. Add a few fresh raspberries between the dark chocolate and marshmallow. The tartness of the raspberries complements the richness of the dark chocolate, making this variation a sophisticated take on the classic. Studies from the American Journal of Clinical Nutrition show that dark chocolate has health benefits, including improved lipid profiles, making this not only a delicious but also a slightly healthier option.

Fact - How Have S'mores Evolved Over the Years?

By integrating these s’mores variations into your fire pit gatherings, you create unique and memorable experiences. Whether sticking to tradition or venturing into gourmet territory, these recipes highlight the versatility and delight of s’mores.

What Are Some Creative S’mores?

Adding a twist to the traditional s’mores can enhance your fire pit evenings with unexpected flavors and textures. We’ve got some creative variations that will surely impress your friends and family.

Nutella and Banana S’mores

For those who love combining chocolate and fruit, Nutella and banana s’mores are a must-try. Start with the usual graham crackers, but replace the chocolate with a generous spread of Nutella. Add a few thin slices of ripe banana and then top with the roasted marshmallow. The creamy Nutella pairs wonderfully with the banana, creating a rich and satisfying treat. Bananas are an excellent source of potassium, adding a tiny health boost to your dessert. Nutella’s smooth texture complements the gooey marshmallow, making every bite delightful.

Salted Caramel S’mores

Caramel lovers will find salted caramel s’mores irresistible. Begin by applying a layer of salted caramel sauce on one of the graham crackers. Then, add a piece of chocolate – dark chocolate can balance the sweetness if preferred – and top with the roasted marshmallow. The hint of salt in the caramel enhances the overall sweetness, creating a balanced and luxurious flavor profile. Salted caramel desserts have surged in popularity, proving that people enjoy the blend of sweet and salty. These s’mores will quickly become a favorite around the fire pit.

White Chocolate and Berry S’mores

For a refreshing and fruity twist, try white chocolate and berry s’mores. Replace the traditional milk chocolate with a piece of creamy white chocolate. Add a few fresh berries – strawberries, raspberries, or blueberries work well – between the white chocolate and roasted marshmallow. The tartness and slight acidity of the berries balance the sweetness of the white chocolate, providing a refreshing and sophisticated taste. Berries are packed with antioxidants, adding an extra bit of nutritional value to your s’mores. This combination not only tastes great but also looks visually appealing, perfect for impressing guests.

Fact - What Are Some Creative S'mores?

These creative s’mores recipes are guaranteed to add excitement to your fire pit gatherings. Experimenting with different flavors and ingredients can result in some unforgettable treats. Stay tuned for more gourmet s’mores ideas in our next chapter.

Gourmet S’mores Ideas

Almond Joy S’mores

For those who enjoy a mix of coconut, almond, and chocolate, Almond Joy s’mores offer a decadent twist. Begin by replacing the regular chocolate with an Almond Joy bar. This candy bar already contains almonds and coconut, adding extra texture and flavor to your s’mores. Toast your marshmallow to a golden brown and place it between two graham cracker squares along with half an Almond Joy bar. The melting chocolate, combined with the chewy coconut and crunchy almonds, creates a complex and delightful dessert. The popularity of coconut-based desserts has risen by 18% since 2018, making this variation both trendy and delicious. Grocery sales of plant-based foods that directly replace animal products have grown 6% in recent years, reflecting a broader trend towards alternative ingredients in sweet treats Almond Joy s’mores.

Mexican Hot Chocolate S’mores

Bring a bit of spice to your s’mores with a Mexican Hot Chocolate version. Use dark chocolate infused with a hint of chili or cayenne pepper. These are increasingly available in specialty stores and can turn an ordinary s’more into a gourmet experience. Roast your marshmallow as usual, then sandwich it between two graham crackers and the spiced dark chocolate. This combination provides a warm, spicy kick that complements the sweetness of the marshmallow. According to Mintel, spicy dessert flavors have grown by 22% in the past five years, reflecting a burgeoning interest in adventurous palates. This variation is sure to be a hit with those looking for something beyond the traditional sweet treat.

Strawberry Shortcake S’mores

For a fresh and fruity twist, Strawberry Shortcake s’mores are an excellent choice. Start with graham crackers, but add a layer of strawberry jam or fresh strawberry slices. Replace the usual chocolate with white chocolate to mimic the creaminess of shortcake. After roasting your marshmallow, assemble the s’more with the strawberry and white chocolate layers. The berries’ natural sweetness and slight tartness work perfectly with the creamy white chocolate and toasted marshmallow. This combination not only tastes divine but also adds a pop of color, making it visually appealing. Berry desserts have seen a 15% increase in popularity over the last three years, highlighting the return of fresh fruit flavors in dessert recipes.

Fact - What's Driving the Growth in Plant-Based and Dessert Trends?

These gourmet s’mores ideas elevate your traditional campfire treats to a whole new level. By incorporating different textures and flavors, you can delight your guests with sophisticated and unexpected combinations. Cooking over an open fire is not only a unique culinary experience but connects us with nature.

Wrapping Up

Exploring the world of s’mores, from the nostalgic traditional recipes to the exciting gourmet twists, offers something for everyone. The classic combination of graham crackers, Hershey’s chocolate, and roasted marshmallows has remained a beloved favorite since 1927, while variations like peanut butter, Nutella and banana, and salted caramel add new dimensions of flavor that cater to diverse palates. Our more adventurous suggestions, such as the Almond Joy and Mexican Hot Chocolate s’mores, elevate the experience with unique ingredients and textures.

Fact - Looking for S'mores Variety Ideas?

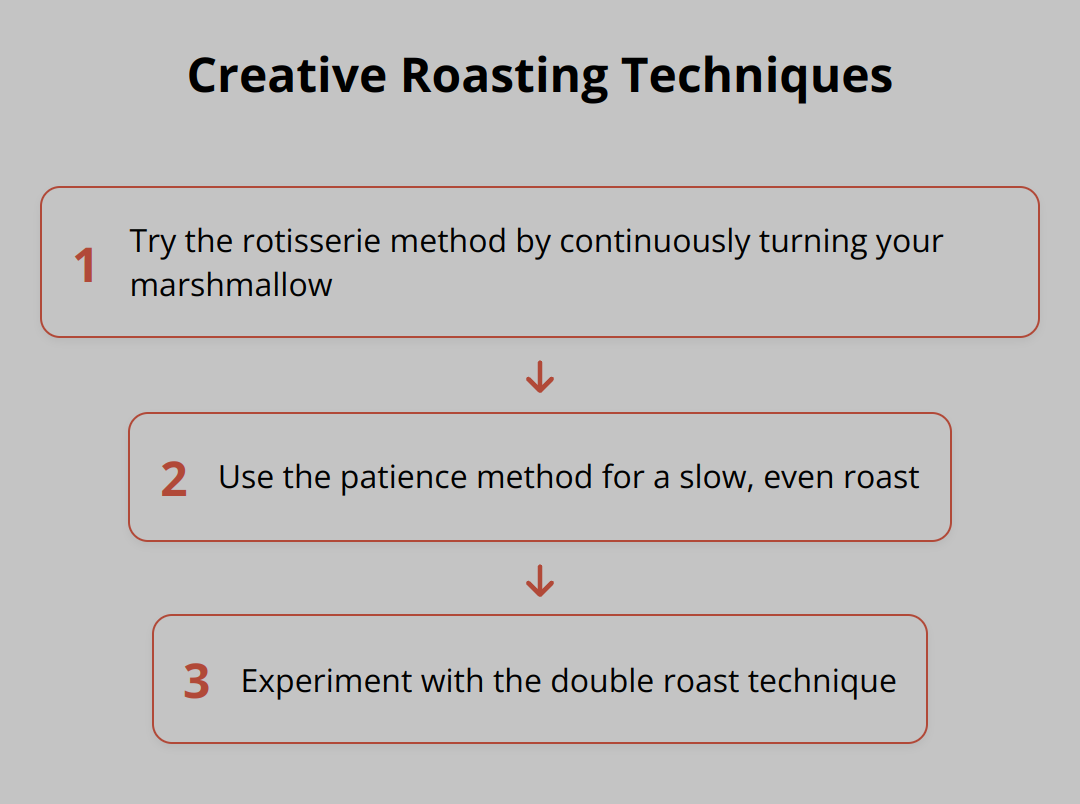
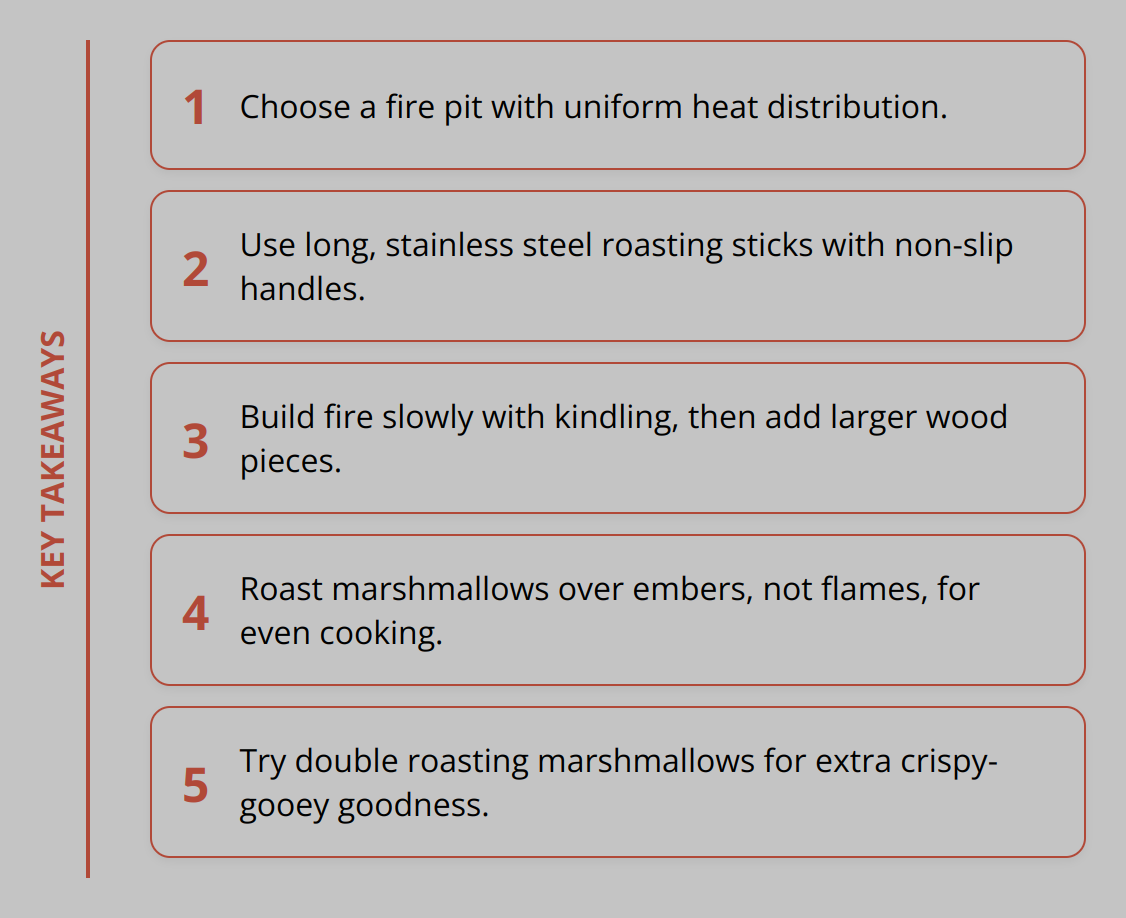
To achieve the perfect s’more, roasting the marshmallow just right is key. Using a skewer, rotate the marshmallow over glowing coals until it reaches a golden brown. The ideal marshmallow is crispy on the outside and ooey-gooey on the inside, ensuring it melts the chocolate properly for that quintessential s’more experience.

We encourage you to experiment with your ingredients to create new combinations that suit your taste. Part of the magic of s’mores is their versatility, allowing for creativity and personalization. Every gathering around a fire pit becomes an opportunity to try something new and enjoy the wonderful process of making and sharing s’mores with loved ones.

Enhancing your fire pit experience starts with the right equipment. At S&S Fire Pits, we make handmade, 100% unique fire pits and over 100 different products for fire pits and outdoor living. Built from corten solid USA steel, each fire pit is crafted to last a lifetime, offering a one-of-a-kind addition to your outdoor space. Embrace the joy of cooking over an open fire, creating cherished memories, and delightful treats along the way.

Posted on

Fire Pit Cooking Recipes: All You Need to Know

Cooking over a fire pit is an experience like no other, providing both flavor and warmth.

We at S&S Fire Pits are here to guide you through the essentials.

From necessary tools to delicious recipes, we cover everything you need to make the most of your fire pit.

Safety is also key, and we’ll share tips to keep your cooking experience enjoyable and secure.

What Do You Need for Fire Pit Cooking

Cast Iron Cookware

When it comes to fire pit cooking, cast iron cookware is indispensable. It stands up to high temperatures and provides even heat distribution. A sturdy cast iron skillet or Dutch oven is perfect for everything from searing steaks to slow-cooking stews.

Fact - Are You Grilling Safely?

A Dutch oven, used with hot coals, can create mouthwatering dishes like stews and casseroles without burning the food. It’s been documented that a well-maintained cast iron skillet can last for generations. Ensure you have a good lid lifter and hot handle holder as cast iron gets extremely hot.

Grills and Grates

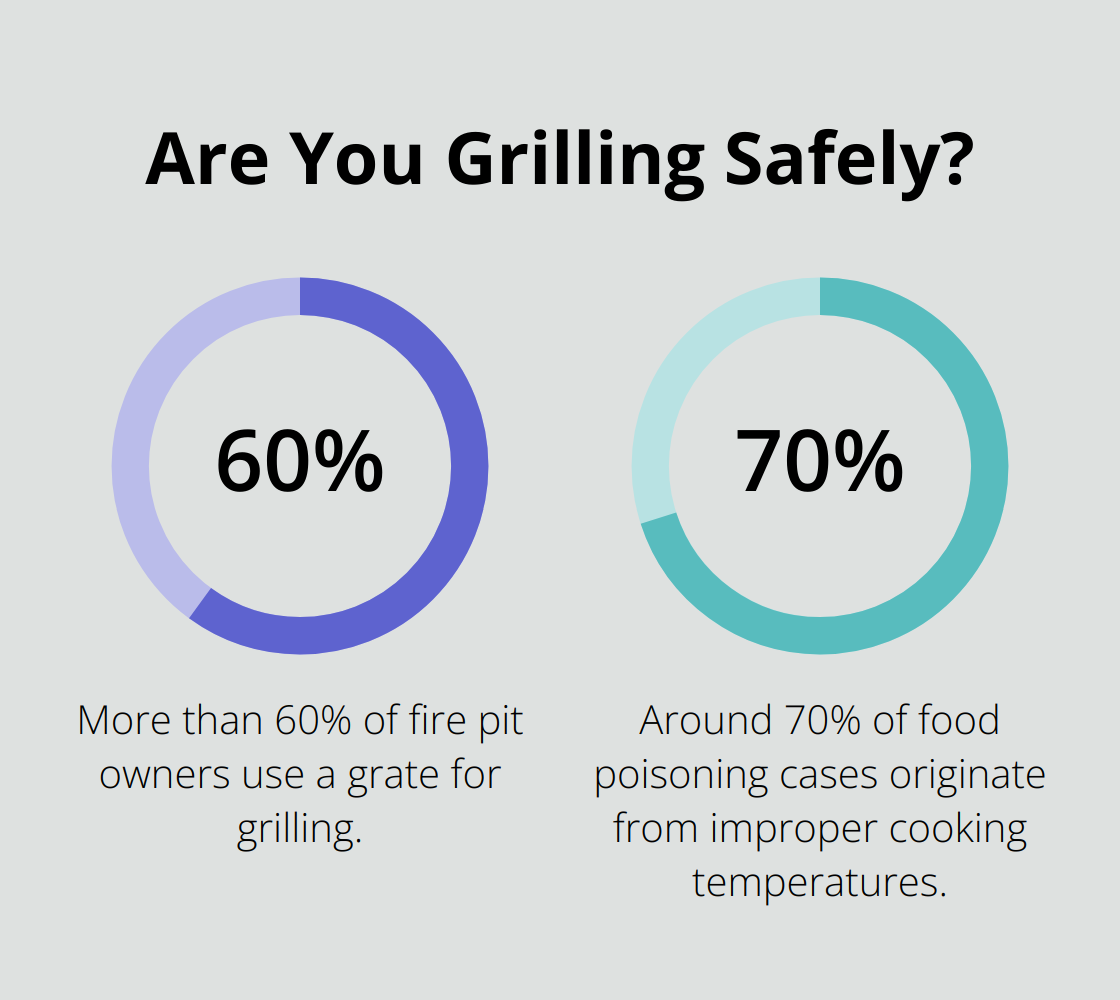
Second on the list are grills and grates. These allow versatile cooking methods. Use a grill grate directly over the flames for grilling meats and vegetables. According to the Hearth, Patio & Barbecue Association, more than 60% of fire pit owners use a grate for grilling. Opt for adjustable grates to easily manage the distance between food and flames.

A cooking tripod with a grate can expand your options, letting you lower and raise your food to control cooking speed. For even more control, consider a swivel grill that attaches to your fire pit.

Cooking Utensils and Accessories

Investing in the right utensils and accessories makes a world of difference. Long-handled metal tongs and spatulas are essential to keep your hands safe from the heat. Fire-resistant gloves are a non-negotiable item. Silicone oven gloves are particularly recommended due to their high heat resistance.

A meat thermometer, essential for any meat preparation, ensures your food is cooked to a safe internal temperature. It’s been observed that around 70% of food poisoning cases originate from improper cooking temperatures. Don’t overlook marshmallow roasting sticks for desserts like smores. Lastly, having a good set of fire starters can speed up the cooking process, letting you get to the fun part quicker.

Equipping yourself with these essential tools will set you up for a successful and enjoyable fire pit cooking experience.

What Recipes Work Best?

Grilled Vegetables and Skewers

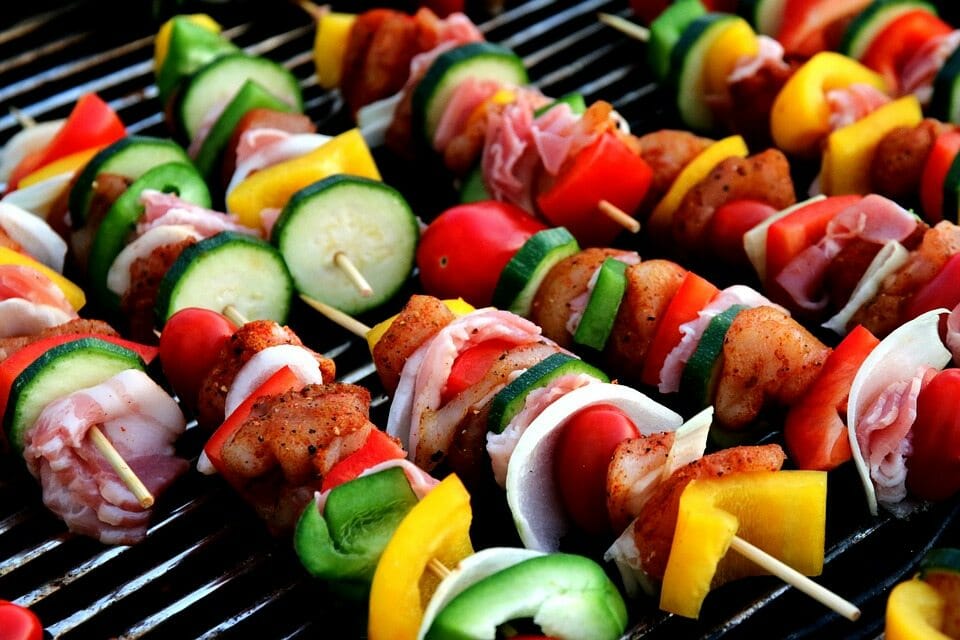
Fire pit cooking lets you prepare grilled vegetables and skewers with unmatched flavor. Vegetables like bell peppers, zucchinis, and asparagus can be seasoned with salt, pepper, and olive oil. Thread them onto skewers for easy handling. Studies from the USDA show that grilling vegetables helps retain their nutrients and enhances their natural sweetness.

Master different cooking techniques when grilling vegetables and meat. Shrimp, chicken, and beef skewers marinated with spices can also be grilled directly over the fire. Using a meat thermometer ensures they are cooked to a safe internal temperature of 165°F for poultry and 145°F for red meat.

Campfire Stews and Soups

Campfire stews and soups are ideal for slow cooking over a fire pit. A cast iron Dutch oven is perfect for making hearty dishes like beef stew or chicken soup. Add ingredients like chunks of meat, potatoes, carrots, onions, and seasonings. Simmering them over low heat allows the flavors to meld beautifully.

How Do You Use Your Fire Pit?

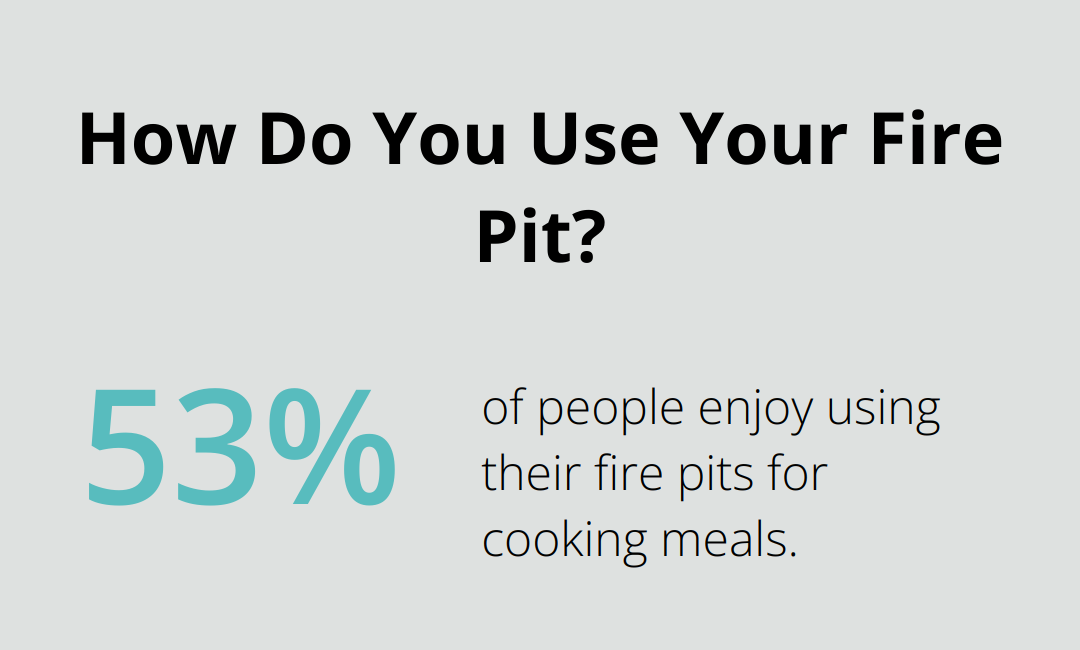
According to a survey by the National Fire Protection Association, 53% of people enjoy using their fire pits for cooking meals. Stews and soups maintain their moisture and are less likely to burn, making them perfect for extended cooking times. Adjust the height of your cooking tripod to control the heat and prevent boiling over.

Desserts like S’mores and Campfire Cones

Fire pit desserts bring joy to both kids and adults. Traditional s’mores made with graham crackers, chocolate, and marshmallows are a must-have. Use long roasting sticks to toast marshmallows to your preferred level of gooeyness. Experts suggest rotating the marshmallow slowly for even caramelization.

For a twist, try campfire cones by filling waffle cones with chocolate chips, mini marshmallows, and fruits like strawberries. Wrap the cones in aluminum foil and place them over the hot coals for about 5–7 minutes. A study by the Harvard T.H. Chan School of Public Health found that engaging in shared activities like cooking fosters better relationships and communication.

Adding these popular recipes to your fire pit repertoire guarantees a delightful and memorable outdoor cooking experience.

Safety Tips

A successful fire pit cooking experience hinges on safety. Neglecting safety can turn a fun activity into a hazard. Following these critical safety tips ensures a safe and enjoyable fire pit cooking environment.

Proper Fire Management

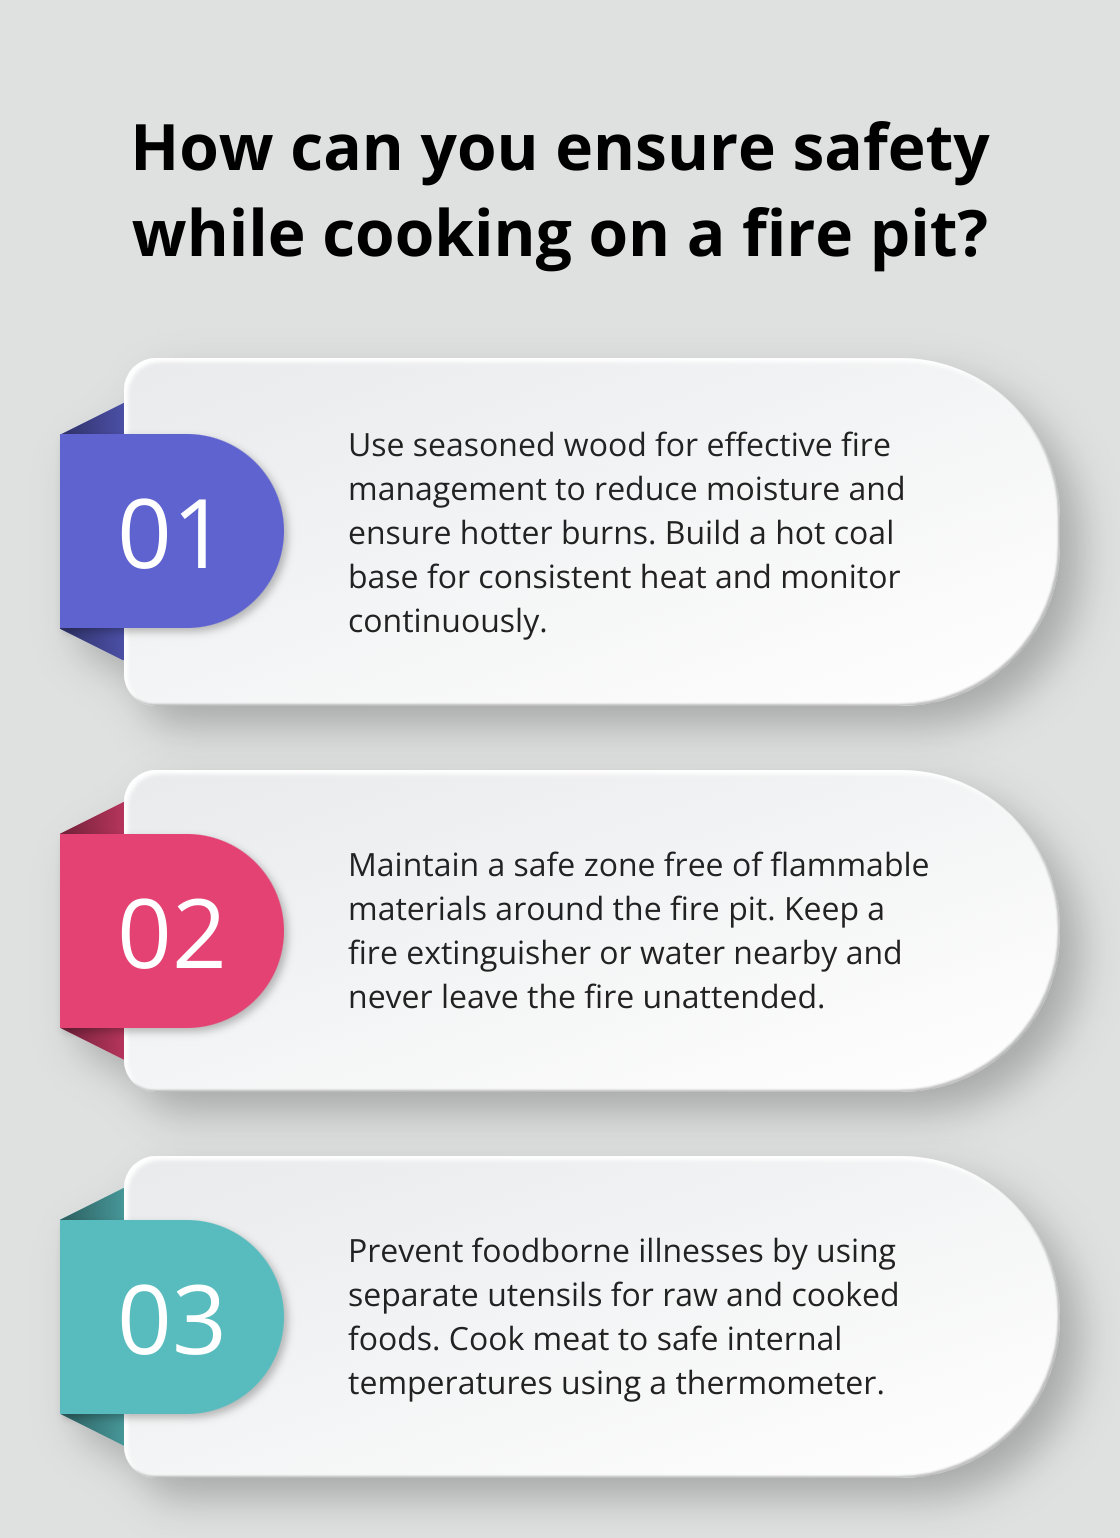
One of the primary considerations in fire pit cooking is managing the fire effectively. Always use dry, seasoned wood. Seasoned wood does have less moisture than green wood, and therefore burns hotter. Building a strong base of hot coals before cooking is essential. It provides even heat and reduces the risk of food burning. Continuously monitor the fire and adjust the wood to maintain consistent heat.

Fact - How can you ensure safety while cooking on a fire pit?

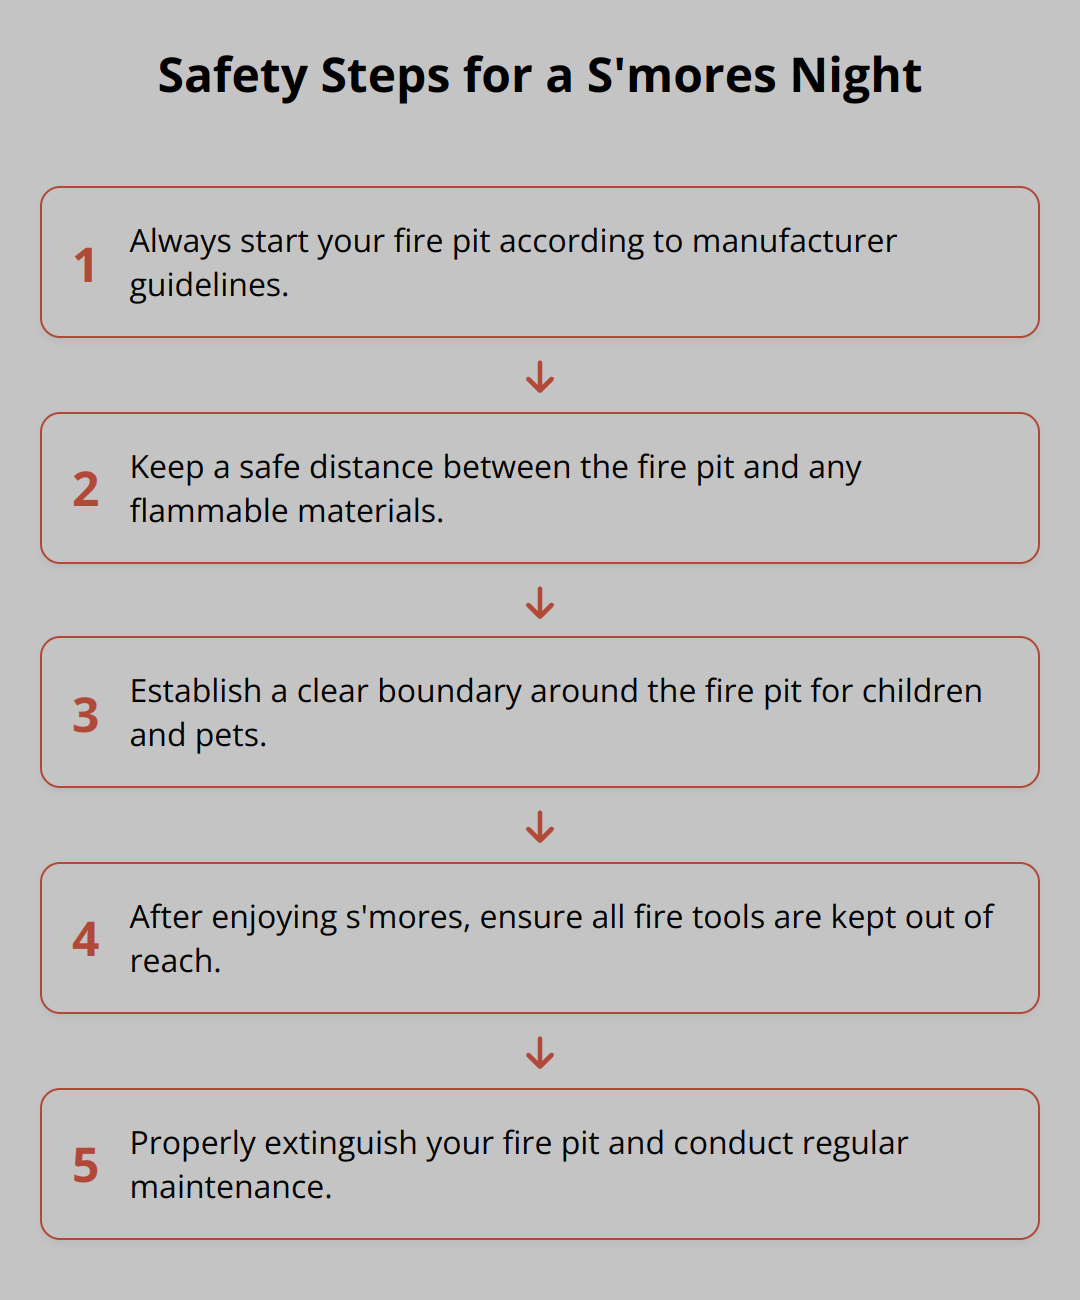
Ensure there is a safe zone around the fire pit. Keep it clear of flammable materials like dry leaves or paper. It’s recommended to keep a fire extinguisher or a bucket of water within reach, just in case the fire gets out of control. Never leave the fire unattended, especially if there are children or pets around.

Food Safety and Hygiene

Foodborne illnesses are a serious concern, so maintaining proper food hygiene is critical. Many people think that once a food has been properly cooked, all disease-causing organisms (pathogens) have been killed. This is not true. Some pathogens can survive the cooking process. Use separate cutting boards and utensils for raw and cooked foods to prevent cross-contamination. Washing hands before and after handling food minimizes the risk.

Always cook meat to safe internal temperatures. A meat thermometer is indispensable here. According to the CDC, consuming undercooked meat is one of the leading causes of food poisoning. Poultry should reach an internal temperature of 165°F, ground meats 160°F, and steaks at least 145°F.

Proper storage of perishables is another important aspect. Keep perishable foods in coolers with ice until they are ready to be cooked. Bacteria can start multiplying quickly if food is left out for more than two hours. In hot weather, this time reduces to one hour.

Safe Handling of Hot Equipment

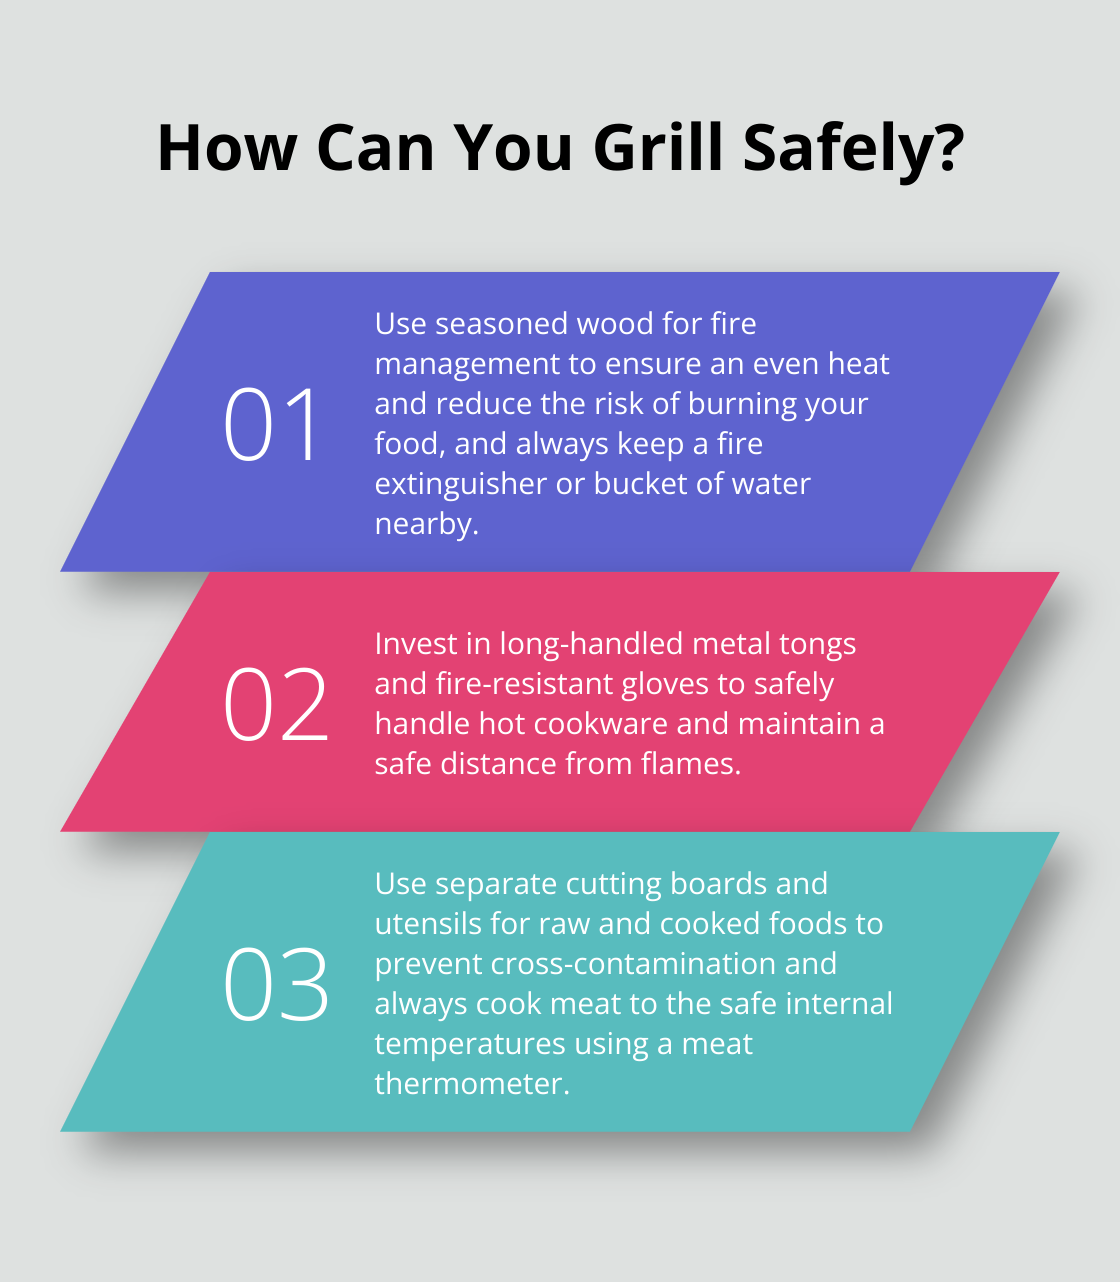
Handling hot cookware and utensils requires caution. Use fire-resistant gloves to protect your hands from burns. Silicone oven gloves are particularly effective as they withstand high temperatures. Long-handled tools like tongs and spatulas keep you at a safe distance from the flames, reducing the risk of burns.

Never place hot equipment directly on surfaces that can catch fire. Always have a designated spot, preferably on a non-flammable surface, to set down hot pots and pans. Keep an eye out for potential tripping hazards around the cooking area.

In addition, educate everyone around the fire pit about the dangers of touching hot equipment. Ensuring everyone is aware can prevent accidents and burns.

By implementing these safety measures, fire pit cooking can remain an enjoyable and safe activity for everyone involved.

Wrapping Up

Fire pit cooking offers a unique blend of culinary delight and outdoor fun. To get started, essential tools like cast iron cookware, durable grills, adjustable grates, and proper utensils ensure you have everything you need for a seamless cooking experience.

Fact - How Can You Grill Safely?

Popular recipes such as grilled vegetables and skewers, hearty campfire stews, and classic desserts like s’mores can transform any gathering into a memorable event. These dishes benefit from the rich flavors imparted by live fire cooking, making them a favorite among fire pit enthusiasts.

Safety remains paramount. Managing your fire properly with seasoned wood, maintaining hygiene to prevent foodborne illnesses, and handling hot equipment with care are all vital practices. These precautions not only protect you and your guests but also keep the fire pit cooking experience enjoyable and hazard-free.

For the perfect fire pit setup, consider S&S Fire Pits. We make handmade, unique fire pits and over 100 different products for outdoor living. Crafted from corten solid USA steel, our products are built to last a lifetime, ensuring that your fire pit adventures are supported by the highest quality equipment available.

Embrace the art of fire pit cooking and enjoy the warmth, flavors, and camaraderie it brings.

Posted on

What to Know About Fire Pit Cooking Grates

Cooking over a fire pit can be a rewarding experience, enhanced significantly with the right cooking grate.

We at S&S Fire Pits want to help you understand the essentials of choosing, using, and maintaining a fire pit cooking grate.

From materials to benefits and maintenance tips, this guide covers it all to elevate your outdoor cooking game.

Which Fire Pit Cooking Grate Is Best?

Choosing the right fire pit cooking grate is essential for a seamless and enjoyable outdoor cooking experience. Here’s what you need to consider.

Materials and Durability

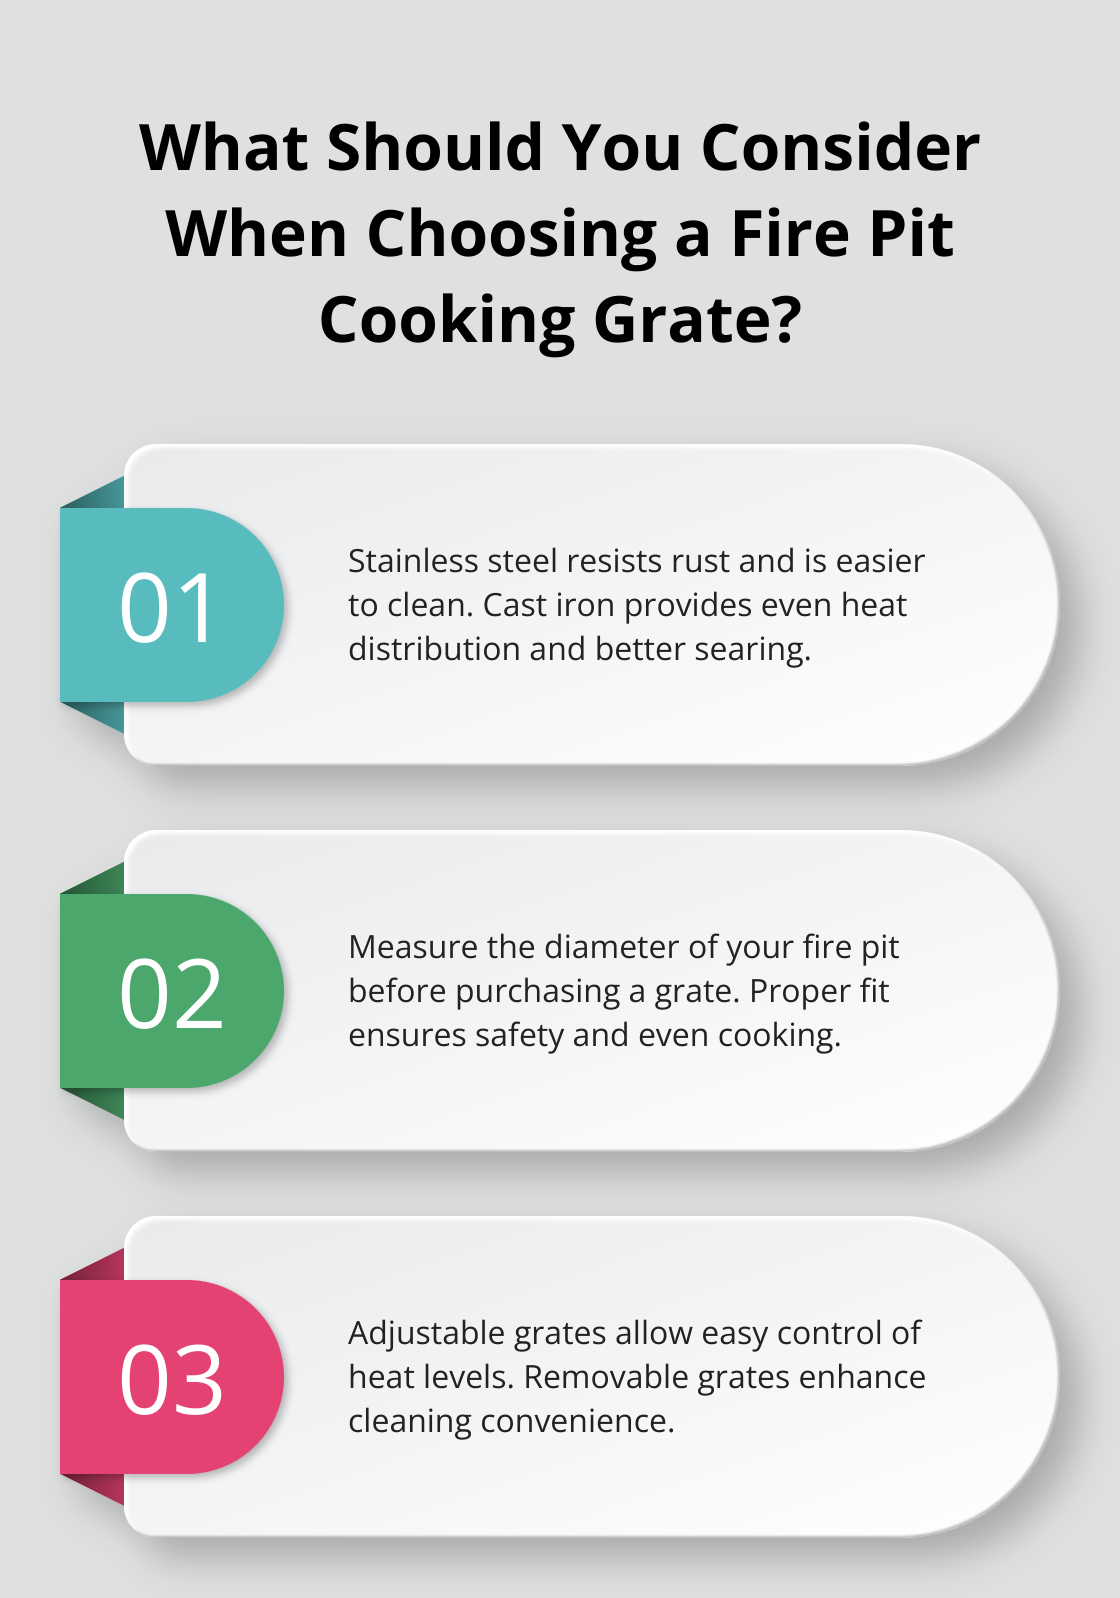
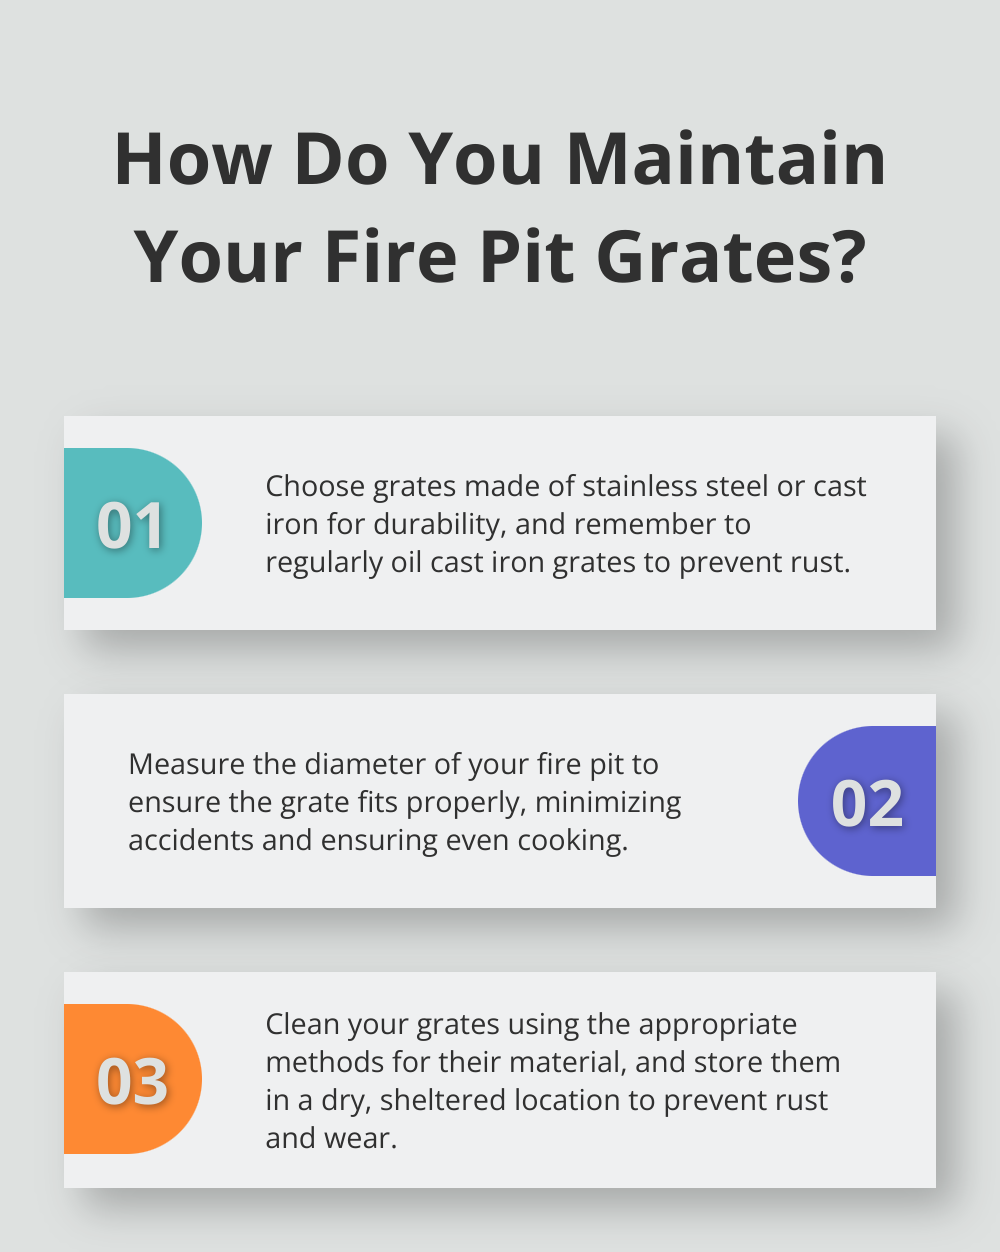
Selecting the right material for your cooking grate is fundamental. Stainless steel and cast iron are the top choices due to their durability and heat retention capabilities. Stainless steel is resistant to rust, making it an excellent option for those living in humid areas. It’s also easier to clean, ensuring that maintenance doesn’t become a chore. Cast iron, on the other hand, distributes heat evenly and can produce a better sear on meats. We recommend oiling cast iron grates regularly to prevent rust and maintain their longevity.

Size and Compatibility

Ensuring that your cooking grate fits your fire pit is crucial for both safety and efficiency. Measure the diameter of your fire pit before purchasing a grate. A proper fit minimizes the risk of accidents and ensures even cooking. For custom sizes, consider options that cater to specific fire pit dimensions to avoid any ill-fitting mishaps.

Fact - What Should You Consider When Choosing a Fire Pit Cooking Grate?

It’s also worth noting that larger grates provide more cooking space, allowing for simultaneous grilling of various items. If you regularly host gatherings, a larger grate is beneficial. Custom size heavy-duty handcrafted grates can be tailored to meet unique needs, providing both flexibility and reliability.

Design and Features

The design of your cooking grate can significantly impact your cooking experience. Look for grates with sturdy construction and reinforced features. Adjustable cooking grates offer versatility, allowing you to control heat levels easily. Removable grates are practical for cleaning, enhancing overall convenience.

Modern cooking grates come with comfortable, heat-protected handles for safer handling, even in high-heat conditions. Spring handles on searing griddle plates add another layer of safety and usability. Also, consider grates that come with accessories such as rotisserie attachments or heat deflectors to expand your cooking repertoire.

These features provide a practical and enjoyable grilling experience, transforming your fire pit into a versatile cooking station.

Benefits of Fire Pit Cooking Grates

Even Cooking and Heat Distribution

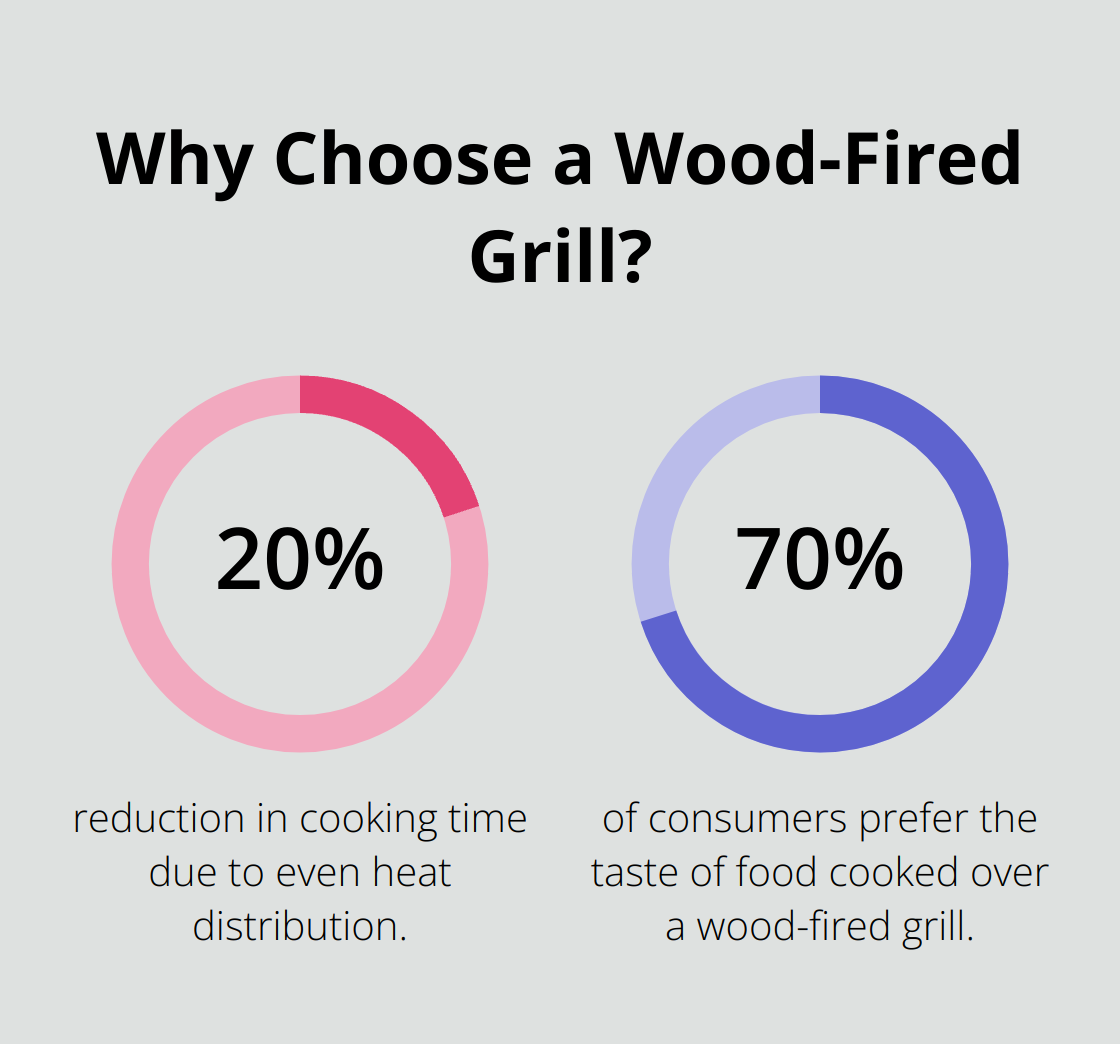
One of the paramount benefits of using fire pit cooking grates is their ability to distribute heat evenly. Unlike traditional grilling methods that might create hot spots, a well-designed fire pit cooking grate minimizes this issue. For example, cast iron grates known for their excellent heat retention and distribution ensure that every inch of your food cooks uniformly. Studies have shown that even heat distribution can reduce cooking time by up to 20%, allowing you to enjoy your meals faster. Moreover, by maintaining uniform heat, you can achieve desired cooking outcomes consistently, whether it’s a perfect sear on a steak or evenly roasted vegetables.

Versatility in Cooking Methods

Fire pit cooking grates offer unparalleled versatility, enabling various cooking techniques that can cater to different culinary needs. You can easily switch between grilling, searing, and even indirect cooking methods with the right grate. Adjustable grates let you control the proximity of your food to the flames, making it simple to execute slow-roasting, smoking, or high-heat searing. For instance, incorporating wood chips can add a smoky flavor, enhancing dishes such as smoked ribs or brisket. An adjustable grate also allows for two-zone cooking, where one side is hotter for searing meats, while the other can be used for cooking delicate items like fish and vegetables. This flexibility is particularly advantageous for outdoor cooking enthusiasts who enjoy experimenting with various recipes.

Enhanced Flavor through Open Flame Cooking

Cooking over an open flame brings a unique flavor profile that cannot be replicated by gas or electric grills. The combination of natural fats dripping onto the flames and the smoke created by burning wood infuses your food with a rich, smoky taste. This method is especially effective with hardwoods like oak or hickory, known for their ability to impart robust flavors to meats and vegetables. According to a survey by the Hearth, Patio & Barbecue Association, 70% of consumers prefer the taste of food cooked over a wood-fired grill. By using a fire pit cooking grate, you can unlock these delectable flavors right in your backyard. Furthermore, the sear achieved by direct open flame cooking adds a caramelized outer crust while keeping the inside of meats juicy, enhancing both texture and taste.


Fact - Why Choose a Wood-Fired Grill?

How to Maintain Fire Pit Cooking Grates

Proper maintenance of your fire pit cooking grate ensures longevity and optimal performance. Here’s how you can keep your grate in top shape year-round.

Cleaning Techniques

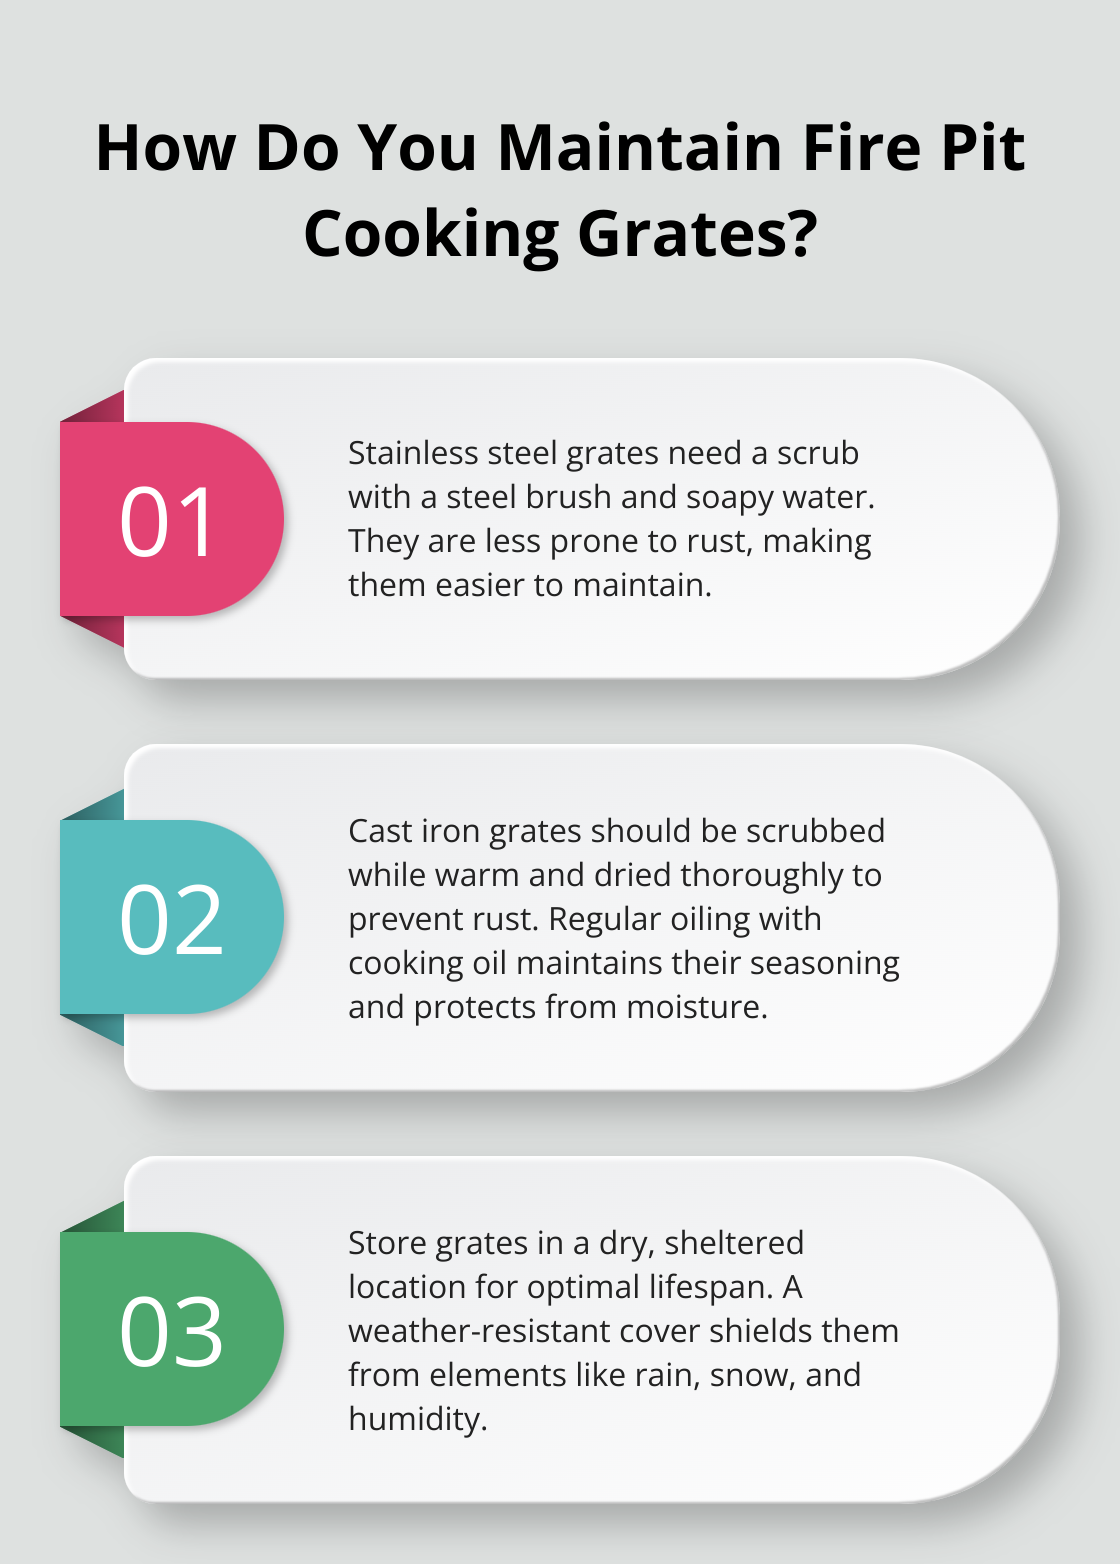
Each material requires a specific cleaning approach to maintain its integrity. For stainless steel grates, a simple scrub with a steel brush and soapy water is usually sufficient to remove food particles and grease. This material is less prone to rust, making it easier to maintain.

Fact - How Do You Maintain Fire Pit Cooking Grates?

Cast iron grates need a different kind of care. Start by scrubbing off food remnants while the grate is warm using a brush designed for cast iron. After cleaning, dry it thoroughly to prevent rust. Once dry, oil the grate lightly with cooking oil to maintain the seasoning and protect it from moisture. Regular oiling is crucial for cast iron, ensuring it remains non-stick and rust-free.

Proper Storage Tips

Where and how you store your cooking grate can significantly affect its lifespan. Ideally, store the grate in a dry, sheltered location to protect it from the elements. Exposure to moisture can lead to rust, especially in cast iron grates.

For added protection, consider using a weather-resistant cover. This shields the grate from rain, snow, and humidity, crucial for those living in areas with high rainfall or humidity.

Before storing, ensure the grate is completely clean and dry. Any residual moisture or food particles can cause corrosion and attract pests, compromising the grate’s condition.

Avoiding Common Wear and Tear

To prevent wear and tear, regular inspection and maintenance are essential. Check for signs of rust, especially in cast iron grates. If rust appears, remove it immediately with a wire brush and re-season the grate to restore its protective layer.

Avoid overheating the grate beyond its material capacity. Excessive heat can warp the grate, especially if it’s made from thinner metals. Stick to the recommended heat levels to ensure longevity and maintain cooking efficiency.

Handling the grate with care is also crucial. Always use heat-protected gloves when removing or adjusting the grate to prevent accidental drops and damage. Mishandling can lead to bending or breaking, affecting the cooking experience.

Maintaining these practices can extend the life of your fire pit cooking grate, ensuring it provides consistent performance and enhances your outdoor cooking adventures.

Conclusion

Choosing the right fire pit cooking grate can transform your outdoor cooking experience. Materials like stainless steel and cast iron offer durability and excellent heat retention respectively, making each a valuable choice depending on your needs. Ensure the size of your grate fits your fire pit to prevent accidents and achieve even cooking. Features such as adjustable grates and comfortable handles can enhance usability and safety.

Fact - How Do You Maintain Your Fire Pit Grates?

The benefits of using fire pit cooking grates are numerous. They offer even heat distribution, versatile cooking methods, and unique flavor profiles only achievable with open flame cooking. Proper maintenance, including regular cleaning and appropriate storage, is key to extending the life of your cooking grate. Stainless steel grates are easier to maintain, while cast iron grates require regular oiling to prevent rust.

Maintaining your fire pit cooking grate involves avoiding common wear and tear by handling the grate with care and sticking to recommended heat levels. Regular inspections can help you catch rust early and maintain the grate’s longevity and performance.

By following these guidelines, you can make the most of your cooking grate, ensuring it serves you well for many outdoor cooking sessions. For durable, handmade fire pits and accessories, visit S&S Fire Pits. We pride ourselves on creating high-quality, lifetime-guaranteed products that enhance your outdoor living experience. Our fire pits, made from corten solid USA steel, are built to last, offering unique and one-of-a-kind designs that never need replacing.

Posted on

Cooking Over Open Fire: Practical Tips

Cooking over an open fire is not only a unique culinary experience but also a skill that connects us with nature.

We at S&S Fire Pits are passionate about helping you master this art.

From choosing the right firewood to selecting essential tools, our practical tips will guide you through every step.

Which Firewood is Best?

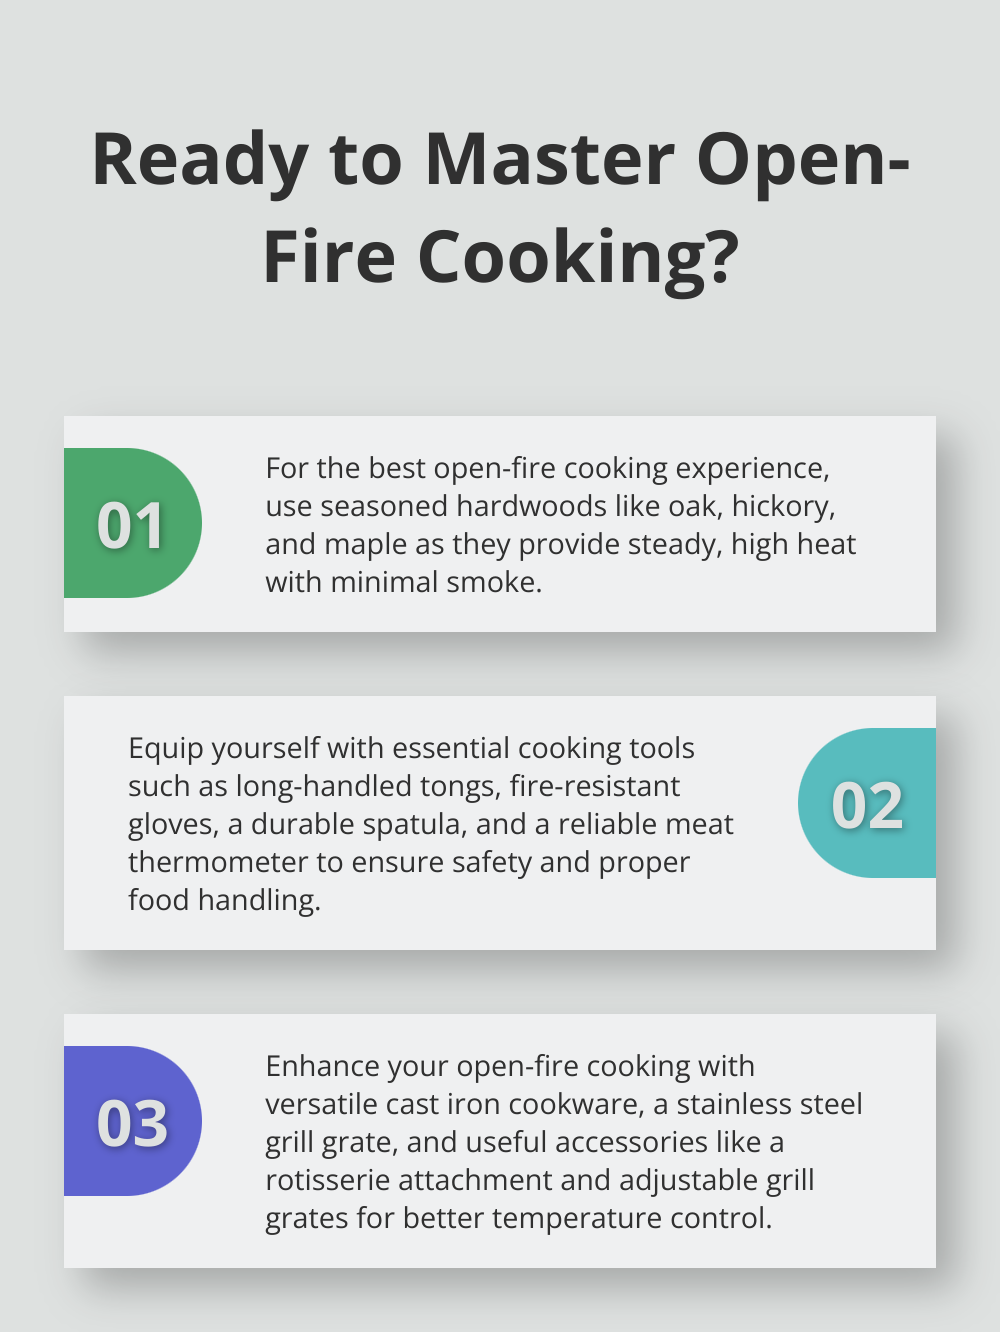
Choosing the right firewood is essential for a successful open-fire cooking experience. Different types of wood offer various flavors and burn characteristics. For optimal cooking, use hardwoods like oak, hickory, and maple. These woods burn longer and produce steady, high heat. Oak is known for its slow burn and consistent heat, making it perfect for cooking meats evenly. Hickory adds a rich, smoky flavor ideal for grilling.

Proper Seasoning and Storage

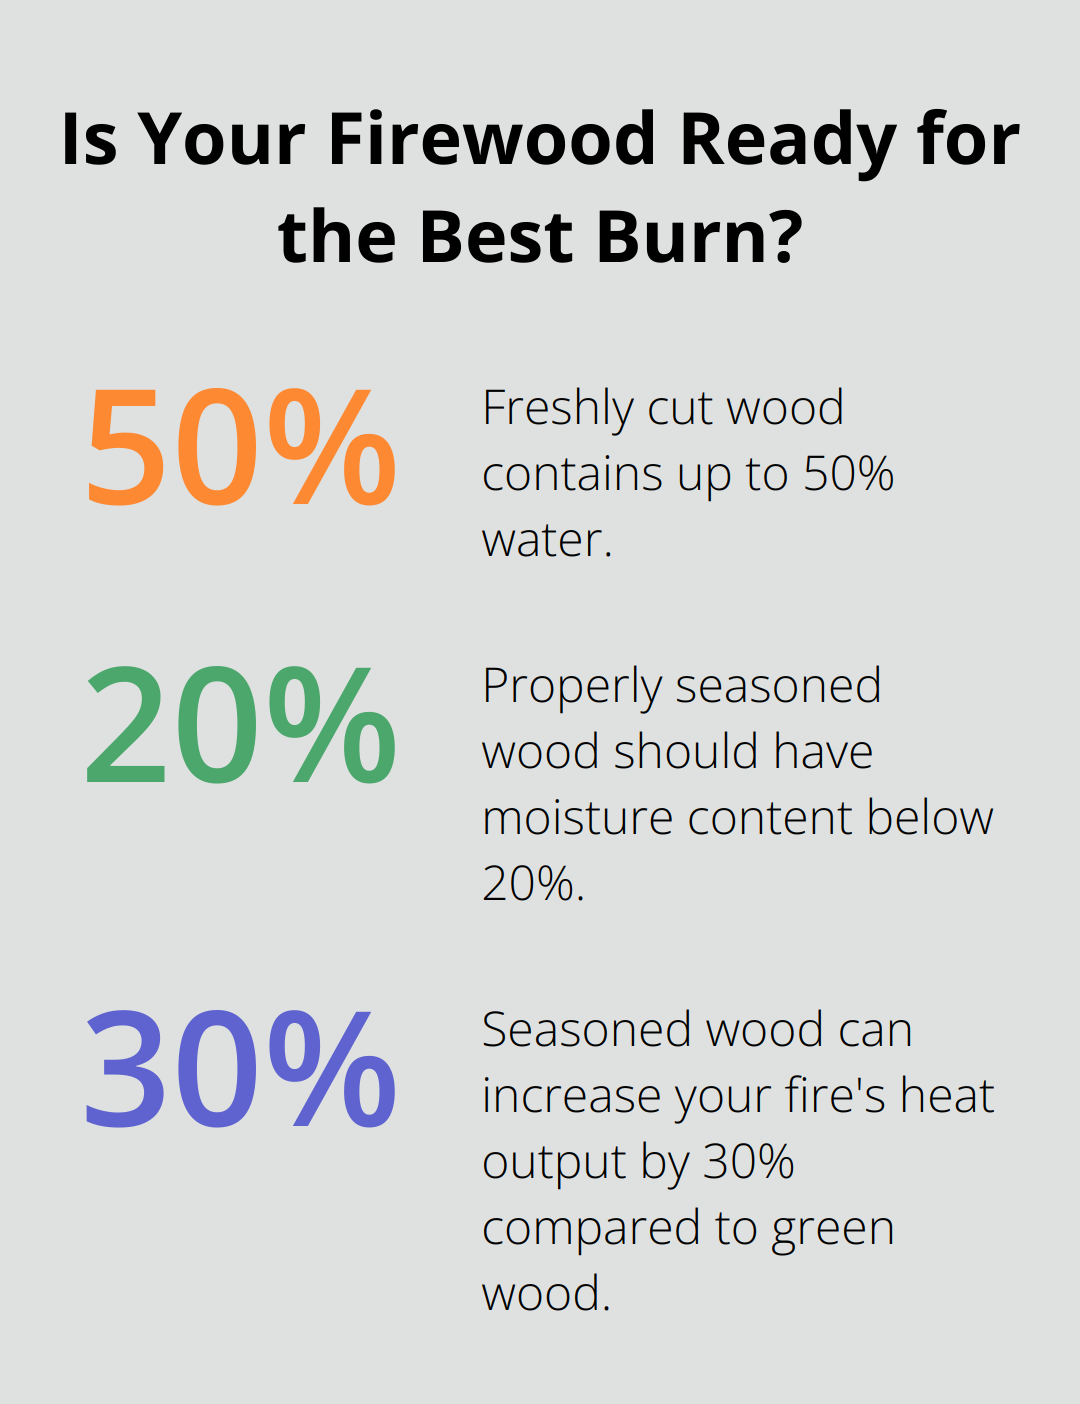
Firewood must be properly seasoned to ensure it burns well and minimizes smoke. Seasoned wood is wood that has been dried to reduce its moisture content. Freshly cut wood, or green wood, contains up to 50% water, making it difficult to light and producing excess smoke.

Fact - Is Your Firewood Ready for the Best Burn?

To season firewood, split it into smaller pieces and stack it in a dry, well-ventilated area. The wood should be off the ground to prevent moisture absorption. On average, firewood requires six months to one year to season fully, depending on the wood type and climate. Properly seasoned wood should have moisture content below 20%, which can be measured using a moisture meter.

Safety Precautions

Handling firewood safely is crucial to avoid injuries and accidents. Always wear gloves to protect your hands from splinters and cuts. When splitting or moving large logs, use proper lifting techniques to avoid strain. Additionally, store firewood away from your home to prevent pests from entering and to reduce fire hazards.

Burning seasoned wood is not only safer but also more efficient. On average, seasoned wood can increase your fire’s heat output by 30% compared to green wood. If you’re interested in more details on wood selection, check out best wood to burn.

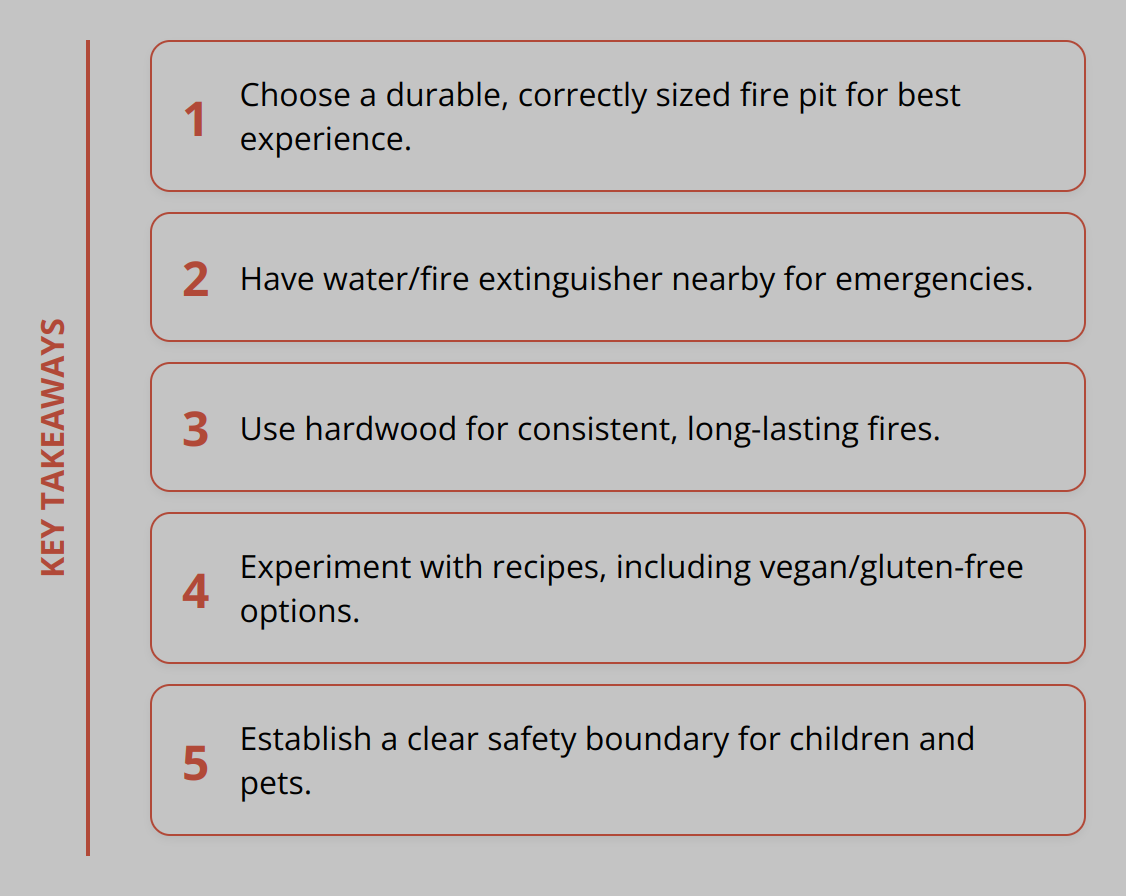
Maintaining a safe cooking environment includes keeping water or a fire extinguisher nearby to manage unexpected flare-ups. Adhering to these precautions ensures a pleasant and secure cooking experience.

What Tools Do You Need?

Must-Have Cooking Utensils

Proper utensils are vital for successful open-fire cooking. Essential items include long-handled tongs, fire-resistant gloves, and a spatula designed for high heat. Long-handled tongs let you maneuver food without getting too close to the flames, increasing safety. Fire-resistant gloves protect your hands while adjusting logs or handling hot cookware. A durable spatula helps manage thicker cuts of meat and larger food portions efficiently.

How Can Thermometers Improve Food Safety?

Investing in tools like a meat thermometer is also practical. Overcooking or undercooking not only affects taste but poses safety concerns. A reliable meat thermometer ensures your food reaches safe internal temperatures. Studies by the USDA highlight that using thermometers reduces foodborne illnesses by 23%.

Ideal Cookware

Choosing the right cookware makes a difference. Cast iron is the preferred material because it retains and distributes heat evenly. It is perfect for Dutch ovens, skillets, and griddles used over open flames. A stainless steel grill grate is another essential for open-fire grilling, allowing you to cook meats and vegetables directly over the coals.

Use cast iron cookware for making stews, soups, and one-pot meals, whereas a grill grate is ideal for searing meats and grilling vegetables. When camping, multi-purpose cookware helps. A Dutch oven, for instance, can serve as a pot, pan, and even bakeware when properly prepped with coals on top and bottom.

Enhancing Cooking with Accessories

Maximize your fire pit’s culinary potential with accessories. A rotisserie attachment is excellent for even roasting meats. Adjustable grill grates offer flexibility in height, providing precise control over cooking temperatures. Cooking grates with handles make it easier to adjust and move your cooking surface.

For example, using a heat deflector can help manage flare-ups and distribute heat more evenly. This is particularly useful when cooking fatty cuts of meat that tend to drip grease. Another practical accessory is a coal shovel. It allows you to move and manage hot coals without disturbing the main fire.

Maintaining and organizing your tools is equally critical. Storing them in a dedicated fire pit tool kit keeps everything in one place, making setup and cleanup more efficient. To learn more about must-have fire pit tools, visit our tool sets guide.

Prioritizing quality cookware and essential accessories will elevate your open-fire cooking, making it safer and more enjoyable.

How to Cook Different Foods

Cooking different types of foods over an open fire requires distinct techniques to maximize flavor and texture. Mastering these can lead to consistent success whether grilling meats, roasting vegetables, or preparing desserts.

Best Practices for Grilling Meat and Fish

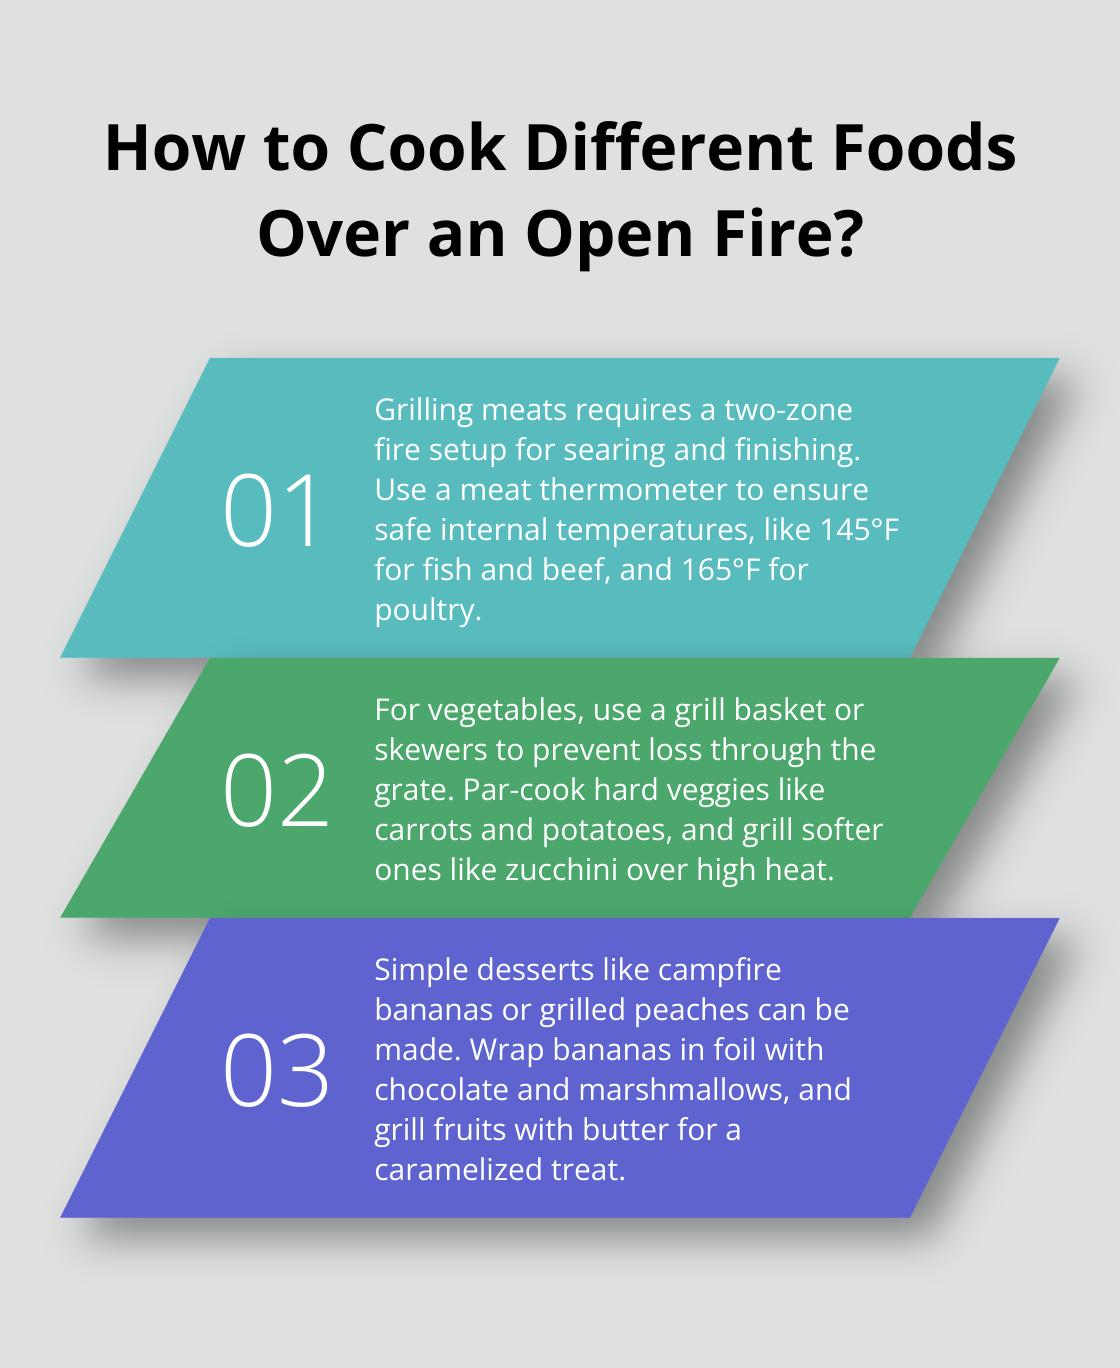
When grilling meat and fish, controlling heat is crucial. Meats benefit from a two-zone fire setup, which involves creating a hot zone for searing and a cooler zone for finishing. Start by searing the meat over direct heat to get a well-charred exterior, then move it to indirect heat to cook through without burning. For fish, a well-oiled grill grate and quick cooking over direct heat works best to prevent sticking and breakage.

Fact - How to Cook Different Foods Over an Open Fire?

A meat thermometer ensures internal temperatures are safe. For example, the USDA recommends 145°F for fish and whole cuts of beef, and 165°F for poultry. Marinating meats before grilling enhances flavor and tenderness; acidic components in marinades, like lemon juice or vinegar, help break down proteins.

Techniques for Cooking Vegetables and Sides

Cooking vegetables over an open fire can elevate their natural sweetness and add a smoky flavor. Use a grill basket or skewers to prevent smaller pieces from falling through the grate. Hard vegetables like carrots and potatoes should be par-cooked before grilling to ensure they are tender inside when charred on the outside. Softer vegetables like bell peppers, zucchini, and mushrooms benefit from quick grilling over high heat.

For sides like corn on the cob, cooking directly on the coals with the husk on traps moisture, resulting in a juicy, smoky treat. Wrapping sliced vegetables in foil packets with a bit of oil and seasoning is also effective, creating a steamed effect that intensifies flavors. Avoid overcooking to retain their crunch and nutrients.

Simple Desserts Perfect for Open Fire Cooking

Desserts over an open fire can be surprisingly simple and delicious. One excellent choice is campfire bananas. Slice a banana lengthwise, stuff it with chocolate and marshmallows, wrap it in foil, and place it on the coals. In fifteen minutes, you’ll have a gooey, sweet treat.

Another favorite is grilled fruit. Peaches, pineapples, and apples take on a caramelized flavor when grilled. Brush them lightly with oil or melted butter, and cook over medium heat until soft and slightly charred. Adding a sprinkle of cinnamon or a scoop of vanilla ice cream can turn these grilled fruits into a gourmet dessert.

Mastering grilling techniques for meat, vegetables, and even desserts opens endless possibilities for open-fire cooking. For more on grilling steak, check out our tips on grilling.

Wrapping Up

Cooking over an open fire connects us with nature and offers a unique culinary adventure. Here are essential tips for making your experience successful. First, choose hardwoods like oak and hickory for their steady, high heat and flavor. Ensure your firewood is properly seasoned to avoid excess smoke and achieve optimal burning. Safety is key, so always handle firewood with care, use gloves, and store it correctly.

Fact - Ready to Master Open-Fire Cooking?

Equip yourself with the right tools. Essential utensils such as long-handled tongs, fire-resistant gloves, and a reliable meat thermometer ensure safe and effective cooking. Invest in quality cookware like cast iron for even heat distribution. Accessories like adjustable grill grates and heat deflectors enhance control over your cooking.

Master different cooking techniques based on the food. Grilling meat requires a two-zone fire setup, while vegetables benefit from tools like skewers or grill baskets. Simple desserts like campfire bananas and grilled fruit can add a sweet finish to your meal.

Experimenting with different recipes and techniques can elevate your open-fire cooking experience. Enjoy the process and embrace the versatility that cooking over an open flame offers.

Always prioritize safety. Keep a water source or fire extinguisher handy, and never leave your fire unattended. Properly extinguish your fire, ensuring it is completely out before you call it a night.

For a quality fire pit that enhances your outdoor cooking, check out S&S Fire Pits. Our handmade solid steel fire pits guarantee a unique and durable addition to your outdoor living space. Embrace the joy of open-fire cooking with confidence and creativity!

Posted on

How to Master Fire Pit Griddle Cooking

Griddle cooking over a fire pit offers a unique and flavorful way to prepare meals outdoors.

At S&S Fire Pits, we want to help you make the most of your griddle cooking experience by providing expert advice on choosing the right griddle, mastering cooking techniques, and maintaining your equipment.

Choosing the Right Griddle

When selecting a griddle for your fire pit, several practical aspects can make or break your outdoor cooking experience. Understanding the different materials and sizes is crucial for finding the best fit for your needs.

Types of Griddles

One of the first decisions to make is choosing the appropriate type of griddle. They come in a variety of materials and sizes, each with its own set of advantages and disadvantages.

Griddle Materials

  1. Carbon Steel: Similar to cast iron but lighter, carbon steel griddles heat up quickly and evenly. They are also less prone to rust when compared to cast iron. A handcrafted carbon steel griddle can be an excellent investment for versatility and longevity.
  2. Stainless Steel: These griddles are resistant to rust and easy to clean. While they don’t hold heat as well as cast iron or carbon steel, stainless steel griddles are lightweight and highly durable, making them suitable for frequent use.
  3. Non-stick Coated: These are easy to clean and require less oil for cooking. However, they may not last as long as other materials and can degrade at high temperatures.

Selecting the Right Size

Choosing the right size griddle for your fire pit involves measuring the diameter of your pit and considering what you plan to cook. A larger griddle provides more cooking space but requires more heat.

Reviewed Brands and Products

  • Lodge: Well-known for their cast iron products, Lodge griddles are heavy-duty and perfect for robust cooking. However, their weight can be a drawback.
  • Matfer Bourgeat: This brand offers high-quality carbon steel griddles that balance durability with weight, making them user-friendly.
  • Blackstone: Popular in outdoor cooking circles, Blackstone’s stainless steel and non-stick griddles are praised for their ease of use and maintenance.

Practical Tips

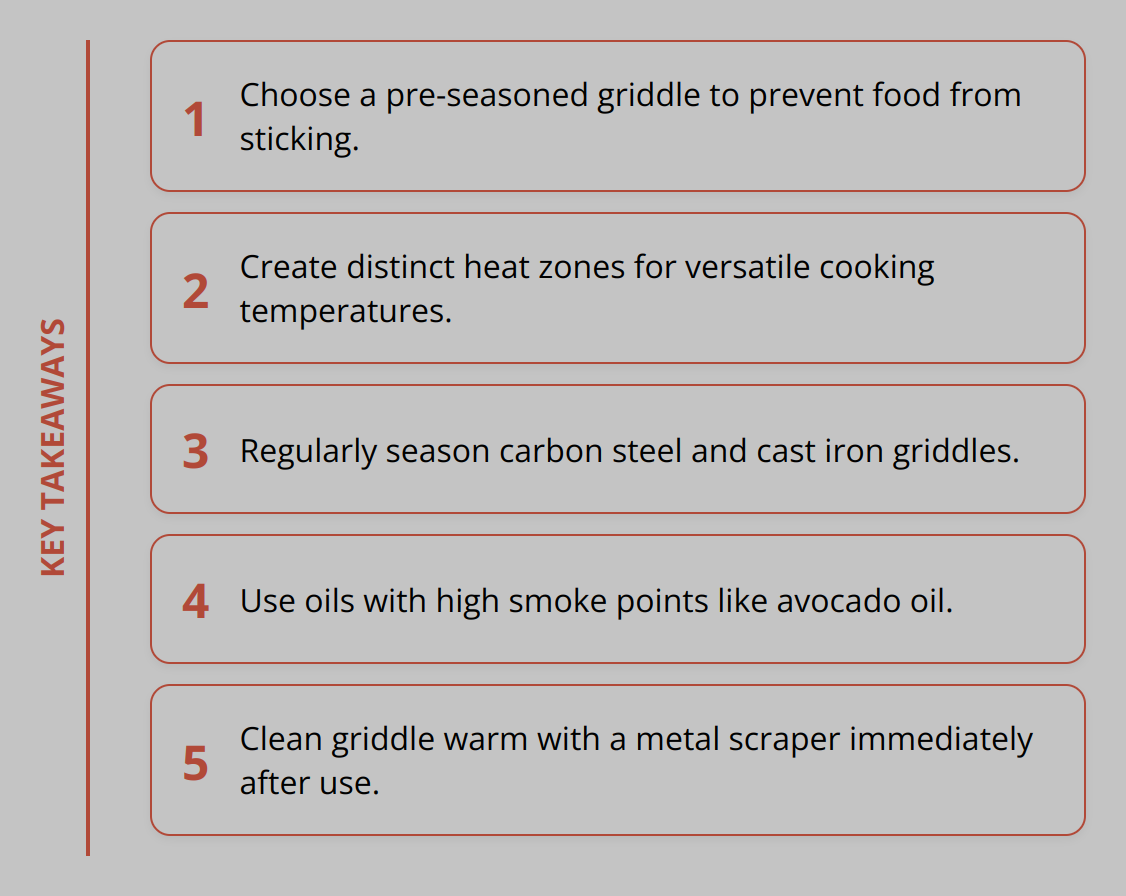
  • Always preheat your griddle before adding food to ensure even cooking.
  • Use oils with high smoke points like ghee or avocado oil for better results.
  • Regularly season cast iron and carbon steel griddles to maintain their non-stick properties and prevent rust.
Quote - The best way to find yourself is to lose yourself in the service of others. - Mahatma Gandhi.

Choosing the right griddle can elevate your fire pit cooking experience. Evaluating materials and understanding your needs will help you make an informed decision. For more on creating an inviting fire pit setting, check out essentials for a fire pit gathering.

Essential Tips for Griddle Cooking

Temperature Control Techniques

Effective temperature control is vital for successful griddle cooking. Unlike traditional grills, a griddle offers even heating across its surface, but you still need to manage temperature zones. To achieve this, create distinct heat zones by placing more coals or wood on one side of your fire pit. This allows for both high and low heat cooking simultaneously. According to experts, maintaining a steady temperature between 350°F and 375°F is ideal for most foods, though precise temperatures can vary based on what you’re cooking.

Pro Tip - Create distinct heat zones on your griddle for more versatile cooking.

Cooking Times for Different Foods

Cooking times can vary greatly, depending on the type of food. For instance, vegetables like bell peppers and onions cook quickly, usually within 5-10 minutes, whereas thicker meats like pork chops or steak may require 10-15 minutes to reach the desired doneness. Knowing the appropriate cooking times ensures your food is perfectly cooked and also minimizes the risk of burning.

Best Practices for Using Oil and Seasoning

Using the right oil is key to enhancing your griddle cooking. Oils with a high smoke point, such as avocado oil, coconut oil, and ghee, are highly recommended. These oils can withstand higher heat without burning, giving you a cleaner cooking surface and better-tasting food. Season your griddle before cooking to not only add flavor but also to create a non-stick surface.

  • Here’s a quick list:
    • Preheat the griddle to ensure even cooking.
    • Add oil with a high smoke point.
    • Use moderate heat to avoid burning, especially for delicate foods.
    • Turn food frequently for even cooking and better flavor.

For a deep dive into understanding more about cooking on griddles, check out these cooking tips.

This practical advice will help you get the most out of your fire pit griddle. By mastering temperature control, understanding cooking times, and using optimal oils and seasonings, you’ll enhance your outdoor cooking experience immeasurably.

How Do You Clean and Maintain Your Fire Pit Griddle?

Maintaining your fire pit griddle is essential for ensuring its longevity and optimal performance. A well-kept griddle not only enhances cooking efficiency but also ensures food safety. Here are practical tips to help you keep your griddle in top shape.

Effective Cleaning Methods

Cleaning your griddle immediately after use is crucial. Allow the griddle to cool slightly but remain warm, which makes it easier to remove food residues. Use a metal scraper to scrape off any remaining food particles. A mixture of warm water and mild dish soap can then be applied to the surface with a non-abrasive scrub pad. Never submerge your griddle in water — this can lead to rust and damage the material.

For cast iron or carbon steel griddles, avoid using soap and instead clean with coarse salt and warm water. The salt acts as an abrasive to remove food residues without stripping away the seasoning. Rinse thoroughly and dry immediately. To prevent rust, apply a thin layer of oil to the surface after cleaning.

Common Maintenance Tips

Regular maintenance can significantly extend the lifespan of your griddle. Season your cast iron and carbon steel griddles regularly to maintain their non-stick properties. This involves heating the griddle, applying a thin layer of oil, and allowing it to polymerize on the surface. This protective layer not only improves cooking performance but also prevents rust.

Fact - Seasoning your cast iron and carbon steel griddles regularly maintains their non-stick properties.

Store your griddle in a dry, cool place. If possible, keep it indoors to avoid exposure to the elements, which can hasten the rusting process. For added protection, consider investing in a griddle cover. Regular inspection for signs of wear and tear, such as cracks or rust, allows for early intervention before major issues develop.

Troubleshooting Common Issues

Occasionally, you may encounter problems like rust, food sticking, or uneven heating. For rust removal, use a wire brush or steel wool followed by re-seasoning the griddle. If your food starts sticking, it might be a sign that your griddle needs re-seasoning. Uneven heating can usually be attributed to overuse of the griddle in one spot; redistribute usage to even out the wear.

Here are some quick tips:

  • Rust Removal: Use steel wool or a wire brush.
  • Prevent Sticking: Regularly season your griddle.
  • Even Heat: Rotate cooking areas to avoid overuse in one spot.

For detailed steps on maintaining your griddle, check out our guide on fire pit maintenance tips.

Important - Regular cleaning and seasoning are crucial for maintaining your fire pit griddle's longevity and performance.

By following these cleaning and maintenance practices, you’ll keep your fire pit griddle in top condition, enhancing your outdoor cooking experience for years to come.

Conclusion

Mastering griddle cooking on a fire pit can transform your outdoor culinary experiences. Here are some key points to remember:

Key Takeaways - How to Master Fire Pit Griddle Cooking
  • Preheat your griddle for even cooking.
  • Use high smoke point oils like avocado or ghee.
  • Regular seasoning is crucial for maintaining non-stick properties.
  • Maintain appropriate cooking temperatures for different foods.

Using a fire pit griddle has numerous benefits. It provides consistent heat across a large cooking surface, allowing you to cook a variety of meals simultaneously. The versatility of griddles means you can prepare anything from breakfast to dinner outdoors, all while enjoying the ambience of a fire pit. Plus, it’s a fantastic way to bring people together through social, interactive cooking.

At S&S Fire Pits, we pride ourselves on crafting handmade, one-of-a-kind fire pits and griddles that are built to last. Our products are made from corten solid USA steel, guaranteeing you a lifetime of memorable cooking experiences. Visit us at S&S Fire Pits to explore our extensive range of fire pits and accessories.

By following these tips and choosing quality equipment from our store, you’ll be well on your way to enjoying delicious, expertly cooked meals on your fire pit griddle. Happy cooking!

Posted on

Why Fire Pit Grilling Tips Can Elevate Your Outdoor Cooking

At S&S Fire Pits, we believe outdoor cooking is not just about the meal; it’s an experience. Fire pit grilling offers a unique way to connect with friends and family while enjoying delicious flavors.

In this post, we’ll share why incorporating fire pit grilling into your outdoor activities can truly elevate the cooking experience. From enhancing flavors to providing valuable tips on maintenance and accessories, we’ve got you covered.

Elevating Outdoor Cooking with Fire Pit Grilling

Fire pit grilling transforms outdoor cooking from a simple meal preparation into an immersive, flavorful experience. Unlike traditional grilling methods, cooking over a fire pit infuses food with a distinct smoky flavor that’s hard to replicate with propane or electric grills. The high heat and open flames caramelize the surface of meats and vegetables, creating a rich, complex taste that elevates any dish.

Enhancing Flavor and Aroma

The secret to the unrivaled taste of fire pit grilling lies in the choice of fuel. Hardwoods, like oak and hickory, not only burn hotter and longer but also contribute to the food’s aroma and flavor profile. The key is to let the wood burn down to coals, which provide a consistent and even heat source, minimizing direct flames that can cause sooting or uneven cooking. This method ensures that every bite is infused with a subtle smokiness that enhances rather than overwhelms the natural flavors of the food.

Important - Fire pit grilling uses hardwoods like oak and hickory to infuse food with a unique smoky flavor.

Versatility in Cooking Techniques

One of the greatest advantages of fire pit grilling is its versatility. Whether searing steaks to perfection, slowly roasting vegetables, or even baking pizza, the possibilities are endless. By adjusting the distance between the food and the coals, or by using different cooking accessories like grilling baskets or Dutch ovens, you can master a variety of cooking techniques with just one fire pit.

For those looking to explore the full potential of fire pit cooking, incorporating a handcrafted fire pit cooking grate can expand your culinary options, allowing you to effortlessly switch between grilling, searing, and even smoking.

Offers a Unique Social Experience

Beyond the flavor and versatility, fire pit grilling stands out for its ability to bring people together. Gathering around a fire pit creates an inviting atmosphere that encourages conversation, laughter, and shared experiences. It’s not just about the food; it’s about creating memories that last a lifetime. Whether it’s a family gathering, a friendly barbecue, or a quiet night under the stars, the warmth of the fire pit and the delicious meals prepared on it have a way of making any event special.

Fact - Gathering around a fire pit fosters a unique social environment, enhancing the outdoor experience beyond just cooking.

In summary, fire pit grilling offers more than just a means to cook food; it provides an opportunity to enhance the flavor of your meals, explore a range of cooking techniques, and foster a unique social environment that enriches your outdoor experiences. Happy grilling, and remember to maintain your fire pit for years of enjoyable outdoor cooking adventures.

Essential Fire Pit Grilling Advice

Grilling over a fire pit can substantially enhance your outdoor cooking endeavors with a bit of know-how. Paying close attention to the type of fuel you use and mastering heat management are keys to achieving that perfect sear and delicious smoky flavor. Moreover, adhering to safety guidelines not only ensures a pleasurable grilling experience but also safeguards your well-being and that of your guests.

Selecting the right fuel makes a significant difference in both the taste and efficiency of your fire pit grilling. Hardwoods such as oak and hickory are top choices for their long burn times and the rich flavors they impart to the food. These woods also burn cleaner and produce consistent heat, essential for cooking. Softwoods, on the other hand, tend to burn quickly with a lot of smoke, adversely affecting the taste of your food.

Effective heat management is paramount for optimal cooking results. Start your fire early, allowing the wood to burn down to coals. This provides a more uniform cooking surface, reducing the likelihood of flare-ups while ensuring food cooks evenly. For searing meats, a brighter, hotter flame might be desirable, while slow-cooking or smoking benefits from a lower, steady heat. Utilizing a handcrafted cooking grate can further assist in managing the distance between your food and the heat source, offering control over cooking temperatures.

Safety should always be a priority when grilling with a fire pit.

  • Position your fire pit on a non-flammable surface, away from buildings and overhead tree branches.
  • Keep a bucket of water or a garden hose nearby in case you need to quickly extinguish the fire.
  • Ensure all guests, especially children, maintain a safe distance from the fire pit to prevent burns or accidents.
  • Never leave the fire unattended; winds can unexpectedly spread flames beyond the pit.
  • Use heat-resistant gloves when adjusting logs or cooking grates to prevent burns.
Pro Tip - Remember to let the wood burn down to coals for an even, consistent cooking heat.

By focusing on these aspects, not only will your food taste better, but you’ll also enjoy a safer and more rewarding fire pit grilling experience. For more detailed insights into fire pit maintenance and safety, explore fire pit care and safety tips.

Armed with the right techniques and precautions, fire pit grilling can elevate your outdoor cooking to new heights, turning simple meals into memorable gastronomic events.

Fire Pit Care and Must-Have Accessories

Maintaining your fire pit and equipping it with the right accessories not only extends its lifespan but also enhances your grilling experience. Investing time in regular cleaning and maintenance can prevent deterioration and ensure your fire pit remains a centerpiece for your outdoor gatherings. Here are practical tips on keeping your fire pit in prime condition and the indispensable accessories that can make your grilling sessions more efficient and enjoyable.

Regular Cleaning and Care for Longevity

The longevity of your fire pit significantly depends on how well you maintain it. Irrespective of the material your fire pit is made from, regular cleaning is paramount. Here are action-oriented maintenance tips:

  • After each use, remove ashes and unburnt wood. Accumulated ashes can trap moisture, leading to rust in metal fire pits.
  • Inspect your fire pit for signs of wear and tear. Look for cracks in stone or concrete fire pits and rust in metal ones. Early detection can prevent further damage.
  • Cover your fire pit when not in use. Weather elements can be harsh; a cover protects it from rain, snow, and excessive sun.
  • Oil metal components periodically. This prevents rust and keeps moving parts, like adjustable cooking grates, functioning smoothly.
Flow Chart - Fire Pit Maintenance Steps

For detailed steps on cleaning different types of fire pits, our guide on fire pit maintenance offers comprehensive advice.

Must-Have Accessories for Efficient Grilling

Equipping yourself with the right accessories can dramatically improve your fire pit grilling experience. Here’s a list of essential items every fire pit owner should consider:

  • Grill Grate: A high-quality grill grate is indispensable for direct grilling. Opt for cast iron or thick steel for even heat distribution.
  • Heat-Resistant Gloves: Always protect your hands. Heat-resistant gloves are essential for handling hot cooking tools and adjusting logs.
  • Poker and Tongs: Manipulating logs and moving hot grates necessitate the right tools. A sturdy poker and long-handled tongs make this easier and safer.
  • Grill Basket: For small items or delicate foods, a grill basket is a lifesaver. It prevents food from falling through the grate and allows easy flipping.
  • Cast Iron Cookware: For versatility in cooking techniques, cast iron pots and pans are unmatched. They retain heat and are perfect for dishes that require slow cooking.

For an extensive list of fire pit accessories that can elevate your cooking game, check out our article on must-have fire pit accessories.

By dedicating time to proper care and curating a set of quality accessories, you ensure your fire pit remains not only a functional cooking device but also a source of warmth and enjoyment for years to come.

Final Thoughts

Embracing fire pit grilling fundamentally transforms outdoor cooking into a richer, more engaging experience. The unique flavor profile imparted by hardwoods, the versatility in cooking options, and the opportunity to foster memorable social gatherings around the warmth of a fire pit are unmatched benefits. S&S Fire Pits has been at the forefront of this experience, offering handcrafted fire pits built from corten solid USA steel. These are not only superb for grilling but also serve as a centerpiece for outdoor living, guaranteed for life thanks to their unmatched quality.

Key Takeaways - Why Fire Pit Grilling Tips Can Elevate Your Outdoor Cooking

The commitment to using the right tools and techniques, such as selecting proper fuel and mastering heat management, elevates the art of fire pit grilling. Safety considerations and regular maintenance ensure that these outdoor moments remain enjoyable and lasting. Equipped with the right accessories, from grill grates to cast iron cookware, the culinary possibilities become endless and effortlessly enjoyable.

In navigating the paths of traditional cooking methods, the essence of fire pit grilling with S&S Fire Pits is a testament to the timeless allure of gathering, cooking, and sharing meals under the open sky. The profound satisfaction derived from cooking over an open flame, augmented by the durability and beauty of handcrafted fire pits, underscores the significance of integrating this traditional method into modern outdoor living.

To explore a range of handcrafted fire pit options that promise to enhance your outdoor cooking and living spaces, visit S&S Fire Pits. Here, the perfect addition to your outdoor experiences awaits, promising not just a product, but a lifetime of memorable moments around the fire.

Posted on

Natural Fire Lighting Methods [Guide]

At S&S Fire Pits, we believe mastering the art of fire lighting is both a skill and a tradition worth preserving. From the ancient flint and steel technique to modern eco-friendly innovations, understanding how to ignite a fire naturally is fundamental for outdoor enthusiasts.

This guide walks you through traditional methods and introduces you to the latest in natural fire lighting. Whether you’re a seasoned camper or a curious beginner, enhancing your fire lighting skills can transform your outdoor experiences.

Traditional Fire Lighting Insights

Understanding how to light a fire using traditional methods is not just about embracing the past; it’s about equipping yourself with knowledge that can prove invaluable in various outdoor scenarios. These techniques, when mastered, ensure that you can start a fire without modern conveniences, which is essential for those passionate about genuine outdoor experiences. The traditional methods we are focusing on are the flint and steel technique, the bow drill method, and the fire plow technique.

Flint and Steel: A Spark of Tradition

The flint and steel technique is one of the oldest and most reliable methods for fire starting. It requires minimal tools: a piece of flint and a piece of carbon steel. The technique is simple yet effective; striking the flint against the steel produces sparks, which are then caught on a char cloth or other easily ignitable material. The main advantage of this method is its reliability under various weather conditions. Unlike matches or lighters, flint and steel are unaffected by water, making it a superior choice for wet conditions.

  • Ensure the flint is sharp to produce ample sparks.
  • Use char cloth to catch sparks, as its low ignition temperature makes it ideal.
Important - The flint and steel method is highly reliable under various weather conditions, making it a superior choice for outdoor fire lighting.

The Bow Drill: Mastery Through Friction

The bow drill method epitomizes the phrase “where there’s smoke, there’s fire.” This technique is all about creating enough friction between two pieces of wood to generate heat and ultimately an ember. Success with the bow drill requires practice and patience but mastering this technique offers a deep sense of accomplishment. The correct selection of wood, proper form, and technique are crucial. Softwoods are generally preferred due to their lower combustion temperatures.

  • Practice is key; expect to dedicate time to master this method.
  • Use softwood for both the spindle and fireboard for best results.
Fact - Success with the bow drill method requires practice and selection of the right wood, typically softwoods due to their lower combustion temperatures.

Fire Plow: Pushing Through to Ignition

The fire plow technique relies on the friction created by plowing a hardwood stick into a groove of a softer wood base. The motion generates fine wood particles and heat, culminating in the creation of an ember. What sets the fire plow apart is the minimal tool requirement, making it an excellent survival skill. However, it’s physically demanding and requires both stamina and technique.

  • Choose a softwood base and a hardwood stick for optimal friction.
  • Apply steady pressure and speed to build up enough heat for an ember.

In conclusion, traditional fire lighting techniques not only connect us with ancient practices but also prepare us for situations where modern tools might not be available. The flint and steel method offers reliability, the bow drill teaches patience and technique, and the fire plow demands physical effort but minimal tools. Each method has its unique advantages and challenges, providing outdoor enthusiasts with options and flexibility for starting a fire. For those interested in exploring these techniques further, resources like how to master fire pit lighting techniques offer valuable insights and instructions.

Mastering these methods enhances your outdoor skills portfolio and ensures you’re prepared for any situation, making your adventures not only more authentic but also safer.

Modern Fire Lighting Innovations

While traditional methods of fire lighting carry a sense of authenticity and skill, the modern era has introduced innovative techniques that are efficient, environmental-friendly, and highly effective. These innovations not only provide reliability in adverse conditions but also support eco-conscious outdoor activities. Let’s explore some of the forward-thinking tools that have redefined the way we start fires in the wilderness.

Solar Fire Starters

Harnessing the power of the sun, solar fire starters are a remarkable tool for outdoor enthusiasts. They require clear sunlight to function, focusing the sun’s rays to a single point to ignite your tinder. The beauty of solar fire starters lies in their simplicity and the fact that they leave no environmental footprint. Here are a few tips for using a solar fire starter successfully:

  • Always aim for the driest tinder possible.
  • Patience is key; it might take a few minutes to catch a spark.
  • Best used in clear, sunny conditions for optimal performance.

Magnesium Fire Starters

Magnesium fire starters are among the most reliable tools for outdoor adventurers, capable of working in wet conditions where traditional methods might fail. The process involves scraping off a small amount of magnesium from the block and then striking the flint part to ignite the shavings. The intense heat from magnesium burns can ignite even damp tinder, making it a go-to option for survival situations. Tips for using magnesium fire starters include:

  • Collect a sufficient pile of magnesium shavings before attempting to strike.
  • Shield your tinder and shavings from wind as magnesium burns quickly.
Pro Tip - Always have water nearby when practicing with magnesium fire starters to ensure safety.
  • Practice in a controlled environment first to perfect your technique.

Eco-Friendly Fire Lighter Cubes

Moving away from harmful chemicals, eco-friendly fire lighter cubes are designed to be a safe and sustainable option for lighting fires. Made from natural ingredients like wood chips, wax, and sawdust, these cubes burn cleanly and are non-toxic, offering peace of mind for health-conscious campers. They are extremely easy to use and store, making them an excellent addition to any camping toolkit.

  • Keep a pack in your camping gear for effortless fire starting.
  • Look for products certified as sustainable or eco-friendly to ensure minimal environmental impact.
Flow Chart - Effective Use of Eco-Friendly Fire Lighter Cubes
  • Combine with traditional methods like kindling for an efficient fire setup.

These modern innovations provide practical solutions for fire lighting, enhancing the outdoor experience while respecting the environment. Whether opting for the renewable energy of solar fire starters, the reliable spark of magnesium, or the clean burn of eco-friendly cubes, modern tools have made starting a fire more accessible and efficient than ever.

For more details on lighting techniques, exploring our fire pit lighting techniques offers additional insights into mastering the art of fire in any setting.

Preparing for Natural Fire Lighting

To ensure successful natural fire lighting, both preparation and a clear understanding of the materials and safety measures involved are paramount. These practical steps can elevate your fire-starting skills, making the process more efficient and safer.

Know Your Environment

Before even gathering materials, assess your environment. This ensures you’re choosing the best spot not just for ease of lighting the fire but also for safety and environmental impact. Always select a location away from overhanging branches, dry grass, and other flammable materials. If you’re in a designated camping area, use existing fire pits to minimize impact.

Gather the Right Materials

Collecting the correct materials is essential for natural fire lighting. You’ll need three main types: tinder, kindling, and fuel wood.

  • Tinder: Look for materials that catch fire easily and burn fast, like dry leaves, pine needles, or small twigs. Having a supply of char cloth can also make this step easier.
  • Kindling: Once your tinder is burning, you’ll add kindling to build your fire. Opt for small, thin sticks and gradually increase the size as your fire grows.
  • Fuel Wood: The final step to sustain your fire is adding larger pieces of wood. Choose dry, dead wood for the best burn.

Understanding your materials and their stages can significantly improve your fire-building success.

Ensure Safety

Safety should never be overlooked when lighting a fire. Here are key points to remember:

  • Always have water or a fire extinguisher nearby in case the fire gets out of control.
  • Avoid using flammable liquids to start or maintain your fire.
  • Keep your fire manageable; larger fires can become difficult to control and pose a higher risk.
  • After you’re done, fully extinguish your fire. Hot embers can reignite and cause wildfires.
Quote - In the end, we will remember not the words of our enemies, but the silence of our friends. - Martin Luther King Jr.

By focusing on preparation, material selection, and safety, you’re not just working toward starting a fire; you’re ensuring that the fire can be enjoyed without incident. This foundational knowledge supports not only traditional fire lighting techniques but also incorporates modern innovations for a comprehensive approach to fire in the outdoors. For those keen on refining their skills further, exploring detailed insights on maintaining a fire over time provides invaluable strategies for sustained fire enjoyment.

Final Thoughts

We’ve explored a journey from the traditional sparks of flint and steel to the innovative glow of solar fire starters, highlighting natural fire lighting methods that connect us with nature and our ancestors. These techniques, both ancient and modern, underline the importance of understanding and mastering the art of turning a spark into a blaze. At S&S Fire Pits, we’re passionate about enhancing your outdoor experiences, and mastering these skills can truly elevate your moments around the fire.

Key Takeaways - Natural Fire Lighting Methods [Guide]

The importance of mastering traditional techniques cannot be overstated. They don’t just serve as a backup for when modern methods fail; they deepen our connection to the wilderness, enhance our problem-solving skills, and provide a richer, more rewarding outdoor experience. The flint and steel, bow drill, and fire plow methods each carry centuries of wisdom, waiting to be passed on to every outdoor enthusiast willing to learn.

We encourage everyone, from seasoned adventurers to curious beginners, to practice and enhance their fire lighting skills. Whether it’s mastering the precise strike of flint and steel or the mechanical dance of the bow drill, each spark is a step towards greater self-reliance and understanding of the natural world. And remember, no matter your preferred method, incorporating eco-friendly practices and safety precautions ensures your fire lighting adventures are both responsible and enjoyable.

At S&S Fire Pits, we craft handmade, unique fire pits that can serve as the perfect centerpiece for your outdoor gatherings, turning every moment by the fire into a lasting memory. Our fire pits, built from solid USA steel, reflect our commitment to quality and longevity, ensuring countless nights of warmth and camaraderie. Explore our range of products and find the perfect fire pit to complement your new or enhanced fire lighting skills at S&S Fire Pits.

Lighting a fire touches something primal within us all. It’s a skill that bonds us to past generations and to the natural world around us. We hope this guide ignites a spark within you to explore, learn, and master these timeless techniques. Happy lighting!

Posted on

How to Choose Aromatic Woods for Your Fire Pit

There’s something magical about gathering around a fire pit, especially when the air is filled with the captivating aroma of wood. Selecting the right aromatic wood can transform any outdoor gathering into an unforgettable experience.

At S&S Fire Pits, we believe in enhancing those moments with the best choices in aromatic woods. Let’s explore how to elevate your fire pit experience with fragrant woods that not only warm your space but your senses as well.

Elevating Fire Pit Aromas with Wood

When it comes to enriching your fire pit experience, the type of wood you choose matters substantially. The right wood not only generates warmth but also fills the air with enticing aromas, making your gathering more memorable. Cedar, and Hickory are prime examples of aromatic woods that can significantly enhance the ambiance.

Cedar, on the other hand, is celebrated for its long burn time and rich, inviting smell. This durable wood emits a sweet, comforting aroma that’s perfect for those chilly evenings outdoors. Additionally, cedar has natural insect-repelling properties, making your outdoor experience even more enjoyable.

Hickory is highly sought after for its robust, bacon-like aroma. It burns longer and hotter than many other woods, making it an ideal choice for extended gatherings. The strong, savory scent of hickory is a significant enhancer for any fire pit ambiance, especially if you’re planning to cook over the flames.

Practical Tips for Using Aromatic Woods

  • Always mix your aromatic woods with harder, slower-burning woods like oak or maple for a longer-lasting fire.
  • For a more controlled aroma, consider adding aromatic wood chips on top of your fire instead of using them as the main firewood.
  • Store your aromatic woods in a dry place to preserve their natural oils and scents, ensuring they’re ready to enrich your fire pit experience at any time.
Fact - Hickory wood burns longer and hotter, making it ideal for extended gatherings.

By selecting the right aromatic wood, you can turn a simple fire into a sensory experience that your guests won’t soon forget. Whether you prefer the sweet scent of cedar, the comforting aroma of pine, or the robust smell of hickory, incorporating these woods into your fire pit gatherings will undoubtedly elevate the atmosphere.

For more detailed guidance on selecting and using firewood, check out our tips on choosing the right firewood and how to build a wood fire.

Choosing the Right Wood

Selecting the right wood for your fire pit involves more than just picking based on scent. Understanding the characteristics of different woods can help you make an informed decision that enhances your outdoor fire pit experience. Wood density, scent intensity, availability, and environmental impact play critical roles in this selection process.

Wood Density and Burn Duration: Denser woods like oak burn slowly and produce a steady heat, making them excellent for a fire that lasts throughout the evening. While aromatic woods such as cedar and pine are less dense, they burn faster but offer captivating scents. Blending denser woods with aromatic ones can provide the best of both worlds — a long-lasting fire with delightful fragrances.

Important - Consider wood density and scent when selecting firewood to balance burn duration and aroma.

Scent Intensity and Personal Preference: The strength of the wood’s aroma can greatly affect the atmosphere. While hickory’s robust scent might be perfect for some, others may find it overpowering. Consider the preferences of your guests and the type of gathering when choosing wood. Mixing woods can also help in moderating the scent to cater to diverse preferences.

Availability and Environmental Impact: Local availability of wood can influence your choice. Opting for locally sourced wood not only supports local businesses but also reduces the carbon footprint associated with transportation. Furthermore, ensuring the wood is responsibly harvested helps in conserving our forests. For those conscious about their environmental impact, looking into the source of the wood becomes as important as the wood’s burning characteristics.

Flow Chart - Selecting Firewood Process

Practical Tips:

  • Combine different types of wood to balance burn duration and scent.
  • Use aromatic wood chips for a controlled scent without overpowering.
  • Explore local markets or suppliers for the best quality and environmentally sustainable options.

Considering these factors ensures that your fire pit not only serves as a source of warmth but also as a centerpiece for gathering, offering both comfort and a sensory experience. For more insights into firewood selection, visit our expert tips on choosing the right-sized fire pit which indirectly influences the amount and type of wood you’ll need.

Enhancing Aroma Experience

Creating a memorable sensory experience around your fire pit goes beyond choosing the right wood. It’s about crafting an atmosphere that awakens the senses and makes every moment by the fire unforgettable. By introducing a variety of scents through innovative methods, the aroma around your fire pit can become as captivating as the flames themselves.

The Art of Wood Blending

One of the most effective ways to customize the aroma around your fire pit is by mixing different types of wood. Combining hardwoods like oak or maple with aromatic softwoods such as cedar or pine creates a layered scent profile that is both complex and pleasing. This method not only allows for a lasting burn due to the density of hardwoods but also envelops your space in rich, varied fragrances.

For a unique twist, experiment with fruit woods like apple or cherry, which produce a sweet, mild scent that complements the stronger aromas of cedar or hickory. This combination works exceptionally well for gatherings that extend into meal times, enhancing the flavor of any food cooked over the flames.

Pro Tip - Consider combining herbs with your wood blend for an enhanced aroma.

Incorporating Herbs and Oils

Adding herbs to your fire pit is a simple yet effective way to infuse the air with a fresh, aromatic twist. Hardy herbs such as rosemary, sage, and lavender not only withstand the heat but also release a delightful fragrance that can repel bugs while soothing the senses. Simply scatter a handful of fresh or dried herbs over the coals or wrap them in foil and place them among the wood.

Essential oils offer another avenue for scent enhancement. Soak a few pieces of wood in water mixed with a few drops of your chosen oil—lavender for relaxation, citronella to keep mosquitoes at bay, or eucalyptus for a refreshing atmosphere. Let the wood dry completely before adding it to the fire to release the infused scent gently as it burns.

Preserving Aromatic Properties

Storing your aromatic woods and herbs properly is vital to maintaining their scent potency. Keep wood dry and sheltered in a well-ventilated area to prevent moisture from diminishing its natural oils. Using a firewood rack ensures air circulation and keeps wood off the ground, reducing the risk of rot and pest infestation.

When it comes to herbs, drying and sealing them in airtight containers will preserve their essential oils, ready to release their full aroma when you next light your fire pit. Positioning these containers in a cool, dry place away from direct sunlight helps in retaining their quality.

By incorporating these strategies, you invite an unparalleled depth of warmth and welcomeness into your outdoor gatherings. The aroma becomes more than just a backdrop; it transforms into an active participant, enhancing every moment spent around the fire pit. With these tips, your fire pit will be remembered not just for the warmth and light it provides but for the tantalizing scents that linger in the memories of your guests.

Final Thoughts

In this guide, we’ve explored how choosing the right aromatic woods like Cedar, and Hickory can greatly enhance your fire pit experience by adding warmth and a delightful fragrance to your outdoor gatherings. Opting for the correct wood based on its burn duration, scent intensity, and availability is pivotal in creating the perfect ambiance. Moreover, experimenting with wood blends and natural additives such as herbs and essential oils can further elevate the sensory experience around your fire pit.

Key Takeaways - How to Choose Aromatic Woods for Your Fire Pit

We encourage you to explore and try different aromatic woods along with various additives to discover what works best for you. Whether it’s the comforting smell of cedar, the welcoming aroma of pine, or the robust scent of hickory, each wood has unique properties that can make your outdoor moments unforgettable. Adding fruit woods or soaking woods in essential oils are just a few ways to personalize your fire pit gatherings.

At S&S Fire Pits, we take pride in crafting high-quality, unique fire pits that are perfect for enhancing these experiences. Our fire pits, made from corten solid USA steel, ensuring longevity and durability for those memorable nights under the stars. Explore our range of products and find the perfect addition to your outdoor living space here.

Remember, the key to a memorable fire pit experience lies in experimentation and personal preference. By selecting the right wood and incorporating different scents, you can create an inviting atmosphere that your guests will love. So, gather around your S&S Fire Pit, ignite those aromatic woods, and enjoy the magical ambiance it brings to your outdoor space.

Posted on

What Features Make a Fire Pit Unique

A fire pit does more than just provide warmth; it becomes the heart of any outdoor space, transforming how we gather and experience the outdoors. At S&S Fire Pits, we understand that it’s the unique features and quality that set our products apart and make your outdoor living space truly your own.

In this blog post, we’ll explore the design features, functional advantages, and lifestyle impacts that define a unique fire pit. Let’s dive into what makes a fire pit not just a piece of outdoor furniture, but a central part of your home’s personality and style.

Unique Fire Pit Design Features

When selecting a fire pit, its design features significantly impact your outdoor living area’s aesthetic appeal and functionality. The choice of materials, as well as the shape and size of the fire pit, plus the extent of customization available, distinguish a common fire pit from a statement piece that captivates and delights.

Choosing the Right Material

The selection between steel and stone as the primary material for your fire pit is not just about durability but also about setting the tone for your outdoor space. Steel fire pits offer a modern, sleek look with the added advantage of custom shapes and sizes. Their ability to withstand the elements and maintain their integrity over time makes them a popular choice for those looking for longevity and minimal upkeep. On the other hand, stone fire pits exude a timeless, natural aesthetic that blends seamlessly with outdoor environments, giving a more rustic feel.

The Impact of Shape and Size

The shape and size of your fire pit play a crucial role in how it integrates with your outdoor space. Larger, circular fire pits can become the focal point of gatherings, inviting people to circle around and connect. Smaller, rectangular options can add a touch of sophistication and fit snugly in more compact areas. The key is to ensure the fire pit’s shape and size complement your outdoor furniture arrangement, enhancing the overall flow and usability of the space.

The Value of Customization

Customization allows homeowners to match their fire pit to their unique taste and outdoor living requirements. Custom features can range from intricate designs cut into steel, specific dimensions to fit a predetermined space, or even integrating cooking functionality for a multipurpose outdoor feature. The ability to tailor a fire pit not only ensures it meets your practical needs but also reflects your personal style, making it a true extension of your home.

Pro Tip - Consider incorporating elements from your home’s interior design to the outdoor fire pit area to create a seamless transition between indoors and outdoors.

Practical Tips:

  • Evaluate your outdoor space to decide on the best material that suits its style and your maintenance preferences.
  • Consider the typical number of guests and the layout of your outdoor furniture when choosing the size and shape.
  • Explore customization options to enhance functionality or integrate personal design elements.

The design features of your fire pit profoundly influence the ambiance and utility of your outdoor spaces. Whether you prioritize durability, style, or a blend of both, paying close attention to material choices, size, shape, and customization opportunities can transform your fire pit from a mere warmth source to an outdoor lifestyle enhancer. For those interested in exploring designs and customization options, viewing our collection can provide inspiration and guidance on choosing the perfect fire pit.

Functional Fire Pit Benefits

When selecting a fire pit, focusing solely on aesthetics might lead you to overlook the practical benefits that enhance user experience and safety. Understanding how adjustable flame controls, built-in safety features, and materials designed for weather resistance and durability not only extend the lifespan of your fire pit but also amplify its usability and enjoyment.

Emphasizing Safety Features

Safety cannot be an afterthought when it involves open flames. Features like fire pit spark screens are essential for containing embers and preventing accidental fires. Screens come in various styles, offering protection without compromising the fire pit’s design. Equally important are stands and bases that elevate your fire pit, safeguarding the surface underneath from heat damage. These elements are mandatory for maintaining a secure environment around the fire pit, ensuring peace of mind while enjoying your outdoor sanctuary.

Fact - Safety features like spark screens and stands are crucial for preventing accidental fires and heat damage.

Weather Resistance and Durability

Selecting materials that can withstand the elements drastically impacts the longevity of your fire pit. Materials like stainless steel resist rust and corrosion, maintaining their appearance and functionality over time. In contrast, stone and concrete fire pits offer unparalleled durability, withstanding extreme temperatures and weather conditions. Investing in a fire pit made from high-quality, weather-resistant materials means enjoying your outdoor living space year after year, without worrying about wear and tear.

Practical Tips:

  • Opt for a fire pit with adjustable flame controls to adapt to various settings.
  • Prioritize safety features like spark screens and proper stands to protect your family and property.
  • Choose durable, weather-resistant materials to ensure your fire pit’s longevity.

By focusing on these functional advantages, your fire pit becomes more than just a source of warmth. It evolves into a versatile, safe, and enduring highlight of your outdoor sanctuary. For those interested in optimizing their fire pit’s utility and safety, exploring outdoor fire safety tips can provide additional insights and best practices.

Enhancing Outdoor Spaces

A fire pit significantly elevates the utility and grace of outdoor living spaces, blending seamlessly with activities throughout the year and providing a central point for gathering. But the aesthetic and lifestyle impact goes beyond mere practicality. Identifying ways to ensure your fire pit complements and enhances your home’s architecture and outdoor design can transform an ordinary backyard into a sublime retreat.

Important - A well-chosen fire pit acts as both a warmth provider and a piece of art, reflecting your personal taste and complementing your home’s architectural style.

Why Design Matters

The design of a fire pit should never be an afterthought. It holds the power to influence the atmosphere and mood of outdoor spaces profoundly. A well-chosen fire pit acts not just as a warmth provider, but as a piece of art that reflects your personal taste and complements your home’s architectural style. Modern homes might lean towards sleek, geometric designs in materials that echo the home’s contemporary ethos, whereas a traditional property could be better suited to classic fire pit shapes in natural stone or rustic metal. The right design can make your outdoor space more inviting and visually appealing.

Harmonizing with Home Architecture

The coherence between your fire pit and home architecture is paramount. A mismatched fire pit can disrupt the visual flow and feel of your space. To achieve harmony, consider the lines and materials of your home and aim to reflect these elements in your fire pit choice. For homes with a lot of wooden features, choosing a fire pit with warm, rustic elements can create a cohesive look. Conversely, a home with a minimalist or industrial vibe would pair well with a sleek, stainless steel fire pit. The key is to view your fire pit as an integral component of your outdoor design, rather than an isolated feature.

Actionable Tips:

  • Survey your space: Before choosing a fire pit, evaluate your existing outdoor and architectural elements to ensure cohesion.
  • Customization is key: Opt for custom design elements when possible to perfectly match your fire pit with your home’s design language.
  • Consider the vibe: Beyond just matching style, think about the ambiance you want to create. A fire pit can act as a central hub for relaxation, entertainment, or both.
  • Maintenance matters: Select materials that not only complement your home’s aesthetics but are also practical for your lifestyle and local weather conditions.

Ultimately, a fire pit should enhance the beauty and functionality of your outdoor living space, creating a seamless extension of your home’s style. By carefully selecting a fire pit that marries well with your home’s architecture and the intended use of your outdoor space, you will elevate the enjoyment and aesthetics of your home. For insights on materials that suit different architectural styles, consider exploring options for contemporary fire pit designs or classic stone options, balancing innovation with tradition to find the perfect fit for your space.

Final Thoughts

As we’ve explored, the journey to finding a unique fire pit that not only warms your outdoor space but also enhances its beauty is grounded in the consideration of specific features. The material, shape, and size of the fire pit, alongside customization options, define its uniqueness. Quality design and functional benefits such as adjustable flame controls, safety features, and weather resistance contribute significantly to the overall enjoyment and longevity of your fire pit.

Key Takeaways - What Features Make a Fire Pit Unique

Choosing the right fire pit for your space is vital. It should complement your home’s architecture and outdoor design, creating a harmonious and inviting atmosphere. At S&S Fire Pits, we specialize in handcrafted, solid steel fire pits that promise durability, style, and a lifetime of memories. Our fire pits are not only practical but are crafted to be timeless centerpieces for your outdoor gatherings.

Investing in a high-quality fire pit from S&S Fire Pits means choosing an American-made product guaranteed to never rust through or fail. By prioritizing superior materials like USA-made corten steel and offering a range of sizes and designs, we ensure your fire pit becomes an integral part of your outdoor living space for years to come.

We encourage you to consider the long-term joy and functionality a carefully chosen fire pit can bring to your home. Whether you’re looking for a piece to gather around with friends and family or a stylish accessory to complete your outdoor décor, investing in quality design and features is key. Let your fire pit be more than just a source of heat; let it reflect your style, enhance your outdoor living, and create a gathering spot for storytelling, laughter, and warmth.

Posted on

How to Use Cooking Grates for Fire Pit Grilling

We at S&S Fire Pits believe that a fire pit is not just for warmth and ambiance; it’s also a versatile cooking companion.

Grilling over an open flame adds a unique flavor to your dishes and offers an enjoyable outdoor experience. This post will guide you through selecting the perfect cooking grate, mastering grilling techniques, and exploring delicious recipes. Let’s turn your fire pit into the heart of memorable outdoor meals.

Selecting Your Cooking Grate

When transforming your fire pit into a grilling sensation, the choice of a cooking grate plays a pivotal role. This selection can influence everything from the taste of your food to the ease of your cooking experience. Let’s dive into how to make the best choice suited for your fire pit.

Firstly, matching the size and shape of your cooking grate with your fire pit is essential for optimal heat distribution and safety. A misfit can lead to uneven cooking or even accidents. Measure your fire pit accurately before making a purchase. If your fire pit is not a standard size, consider opting for a custom-sized cooking grate, which some manufacturers offer.

When it comes to materials, the debate often boils down to cast iron versus stainless steel. Each has its champions and its place. Steel grates retain heat exceptionally well, making them perfect for searing meats to perfection. However, they require more maintenance to prevent rust. On the other hand, stainless steel grates are easier to clean and resistant to rust, but they may not hold and distribute heat as evenly as cast iron. Your choice should align with your priorities: flavor or convenience.

Adjustability and safety are not to be overlooked. An adjustable grate lets you control the distance between your food and the flame, allowing for more precise cooking control. Look for grates with safety features like secure fastenings and handles that remain cool to the touch, enhancing both your cooking flexibility and safety.

Here are a few concise tips to keep in mind:

  • Measure your fire pit’s dimensions before shopping.
  • Choose Steel for flavor, stainless steel for convenience.
  • Opt for adjustable height grates for better heat control.

For practical insights on enhancing your grilling experience with the right accessories, consider exploring our comprehensive fire pit cooking guide. Not only will this guide assist in grate selection, but it also offers valuable tips on maintenance and safety.

In conclusion, selecting the right cooking grate for your fire pit grilling adventures boils down to understanding your cooking style, prioritizing safety and convenience, and perfectly matching the grate to your fire pit’s dimensions. With the right grate in hand, the fire pit will soon become your favorite kitchen appliance under the stars.

Fire Pit Grilling Mastery

Mastering fire pit grilling requires attention to preparation, temperature control, and safety. By focusing on these aspects, you’ll elevate your grilling game and ensure your outdoor cooking experiences are both safe and enjoyable.

Preparing Your Fire Pit and Grate

Before firing up the grill, preparation is key. Ensure your fire pit is clean from previous use, free of ash and debris, which can affect taste and heat distribution. Select hardwoods like oak or hickory for a consistent, hot burn; softwoods can smoke excessively and impart an undesirable taste. When positioning your grate, make sure it sits evenly over the pit to avoid uneven cooking surfaces.

Pro Tip - Before grilling, clean your fire pit thoroughly to ensure better taste and efficient heat distribution.

Controlling the Temperature

Temperature control is central to fire pit grilling success. Begin by building your fire early, allowing it to burn down to a bed of hot coals. This provides a consistent and manageable heat source. Using a grill thermometer can help monitor the temperature closely, but understanding how to adjust the heat by raising or lowering the grate, or by spreading or condensing coals, is indispensable. For those new to fire pit cooking, maintaining a medium heat (about 350°F to 450°F) is a good starting point.

  • Start with a strong fire and let it burn to coals for even heat.
  • Use hardwoods for better flavor and heat.
  • Adjust grate height or coal placement to control the temperature.

Safety Tips for Cooking Over an Open Flame

Safety should never be an afterthought when grilling over an open fire. Wear protective gear such as gloves and long-handled tools to avoid burns. Keep a fire extinguisher or bucket of water nearby in case of emergency. Never leave the fire unattended, especially with children or pets around. Also, be mindful of the wind direction; smoke and sparks can create hazards if not managed properly.

  • Keep a fire extinguisher within easy reach.
  • Wear protective gear and use long-handled tools.
  • Monitor wind direction to control smoke and embers.
Fact - Hardwoods like oak or hickory provide a consistent, hot burn ideal for fire pit grilling.

For a deeper dive into creating the perfect grilling environment, including selecting the right tools and understanding fire dynamics, explore our guide on optimal heat distribution. This resource is invaluable for those seeking to enhance their outdoor cooking techniques and safety measures.

By adhering to these best practices, you’ll not only improve the taste and quality of your grilled meals but also create a safer and more enjoyable cooking environment. Whether you’re a seasoned griller or new to the fire pit cooking scene, these tips will set you up for success under the stars.

Grilling Beyond Basics

After mastering the art and safety of fire pit grilling, it’s time to explore beyond the basics and dive into creative recipes that promise to delight your taste buds. Spark your culinary creativity with meat and vegetable dishes that stand out and discover the world of unique desserts you can grill. Don’t overlook the magic of seasonings and marinades; they can transform simple ingredients into extraordinary meals.

Elevating Meats and Vegetables

The key to unforgettable grilled meats and vegetables lies in the preparation. Marinate your meats for at least a few hours, preferably overnight, to infuse depth of flavor. For vegetables, simplicity often reigns supreme. A light brush of olive oil, salt, and pepper can enhance the natural flavors, allowing them to shine.

Experiment with combinations like chicken skewers with bell peppers and onions or grilled eggplant slices topped with a sprinkle of feta cheese. Not only do these combinations offer a spectrum of flavors, but they also bring a colorful presentation to your plate. For a twist, try grilling avocado halves; the heat makes them even creamier, perfect for a unique side dish or a base for grilled avocado and shrimp salad.

Desserts on the Grill

Grilling isn’t just for savory meals; it’s also a gateway to innovative desserts. Grilled peaches with a dollop of vanilla ice cream and a drizzle of honey make for a simple, yet profoundly satisfying dessert. Pineapple slices caramelized over the flames serve as a tropical treat or a complementary side to ice cream and cakes. For something adventurous, wrap bananas with chocolate chunks and marshmallows in foil, and grill them until melted for a gooey, irresistibly sweet concoction.

Seasonings and Marinades

The right seasoning and marinade can elevate your grilled dishes from good to gourmet. Experiment with herbs and spices that complement the natural flavors of your ingredients. For meats, consider robust marinades featuring ingredients like soy sauce, garlic, and fresh herbs, which not only tenderize the meat but also pack it with flavor. For fish, a simple herb, and citrus marinade can accentuate its freshness.

Remember, the longer you marinate, the more pronounced the flavors will be. However, avoid over-marinating, especially with acidic components, to prevent the texture from becoming mushy.

Quick Tips:

  • Marinate meats overnight for maximum flavor.
  • Keep it simple with vegetables; sometimes, oil, salt, and pepper are all you need.
  • Experiment with different cuisines’ seasonings for a global twist.
  • Wrap desserts in foil to contain all the gooey goodness.

Ready to go further? Dive into smoking meats for those ready to bring a new layer of flavor to their fire pit grilling adventures.

Exploring creative recipes and mastering the art of seasonings and marinades can turn your fire pit into a culinary hub, where each meal becomes an experience. Whether you’re grilling for a casual family dinner or a special gathering, the possibilities are endless.

Wrapping Up

In this guide, we’ve explored how to harness the full potential of your fire pit for grilling, from selecting the right cooking grates to mastering the art of open-flame cooking. We highlighted the importance of matching your fire pit with the perfect cooking grate to ensure optimal heat distribution and safety. We delved into the nuances of preparation and temperature control, ensuring your grilling experience is not just enjoyable but also safe and efficient.

Key Takeaways - How to Use Cooking Grates for Fire Pit Grilling

Experimentation is the soul of cooking, more so when it involves fire pit grilling. The unique flavor imparted by an open flame is unmatched and worth exploring. Whether you’re searing steaks to perfection, roasting vegetables, or even grilling desserts, the opportunities to experiment and discover new favorite dishes are endless.

However, it’s paramount to keep safety at the forefront of all your fire pit cooking adventures. Always ensure your fire pit is well-maintained, never leave the fire unattended, and keep safety tools within reach. Proper preparation and temperature management aren’t just about achieving the perfect cook on your food but also about ensuring a safe environment for everyone around.

We at S&S Fire Pits are passionate about not just creating high-quality, durable fire pits but also about enhancing your outdoor living and cooking experiences. Our handcrafted, solid steel fire pits, complete with cooking accessories, are designed to be the centerpiece of your backyard gatherings, offering both warmth and culinary delights.

So, fire up your pit, grab your grates, and let the flavors come alive under the stars. With the right tools, a bit of practice, and a dash of creativity, your fire pit will quickly become your favorite outdoor cooking appliance. And remember, the best dishes are those shared with friends and family around a glowing fire.

Posted on

How to Master Fire Pit Lighting Techniques

We at S&S Fire Pits believe in the power of gathering around a warm, inviting flame. Mastering fire pit lighting techniques is essential for creating memorable outdoor moments.

In this blog post, we’ll guide you through choosing the right fuel, preparing your fire pit area, and lighting your fire pit safely. Let us help you enhance your outdoor experience with confidence and ease.

Choosing Your Fire Pit Fuel

Selecting the perfect fuel for your fire pit is more than just a matter of preference; it directly impacts the ease of use, maintenance, and the overall ambiance of your outdoor gathering space. Let’s explore the essentials to ensure your fire pit sessions are both enjoyable and efficient.

Wood – The Classic Choice:
Wood is the heart and soul of traditional fire pit experiences. Not only does it provide a crackling sound and a mesmerizing flame, but it also offers versatility in terms of the aromatic scents depending on the wood type. Hardwoods like oak, hickory, and ash burn longer and hotter, making them ideal for fire pits. Softwoods, while easier to ignite, tend to burn faster and should be used sparingly as starter material or for shorter fire sessions. Remember, using seasoned wood minimizes smoke and prevents the buildup of creosote that can hinder your fire pit’s performance.

Gas – Modern Ease and Control:
For those looking for a cleaner and more controlled burning option, natural gas and propane fire pits are unbeatable. They eliminate the need for constant refueling and the mess associated with wood ashes. With the flip of a switch, you can have instant flames and an easily adjustable fire intensity. This convenience, however, comes at the cost of missing out on the traditional fire pit feel, including the wood-burning scent and sound.

Practical Tips:

  • Always ensure your chosen fuel is suitable for your specific fire pit model.
  • For wood-burning pits, maintain good kiln dried firewood for longer burn and almost no smoke.
  • Consider the availability and cost of natural gas or propane in your area before investing in a gas fire pit.
  • Explore eco-friendly fuels for an environmentally conscious choice that doesn’t sacrifice the joy of a warm fire.

Selecting the right fuel for your fire pit sets the stage for countless memorable nights. Whether you cherish the traditional crackle of wood, the convenience of gas, or the green credentials of eco-friendly alternatives, make your choice with both practicality and preference in mind. For more on the benefits of wood and gas fire pits, check out our detailed exploration wood and gas fire pits benefits.

By considering these key factors, you’re well on your way to becoming a master of fire pit lighting, ready to ignite not just flames, but lasting memories.

Fact - Hardwoods like oak, hickory, and ash burn longer and hotter, making them ideal for fire pits.
Pro Tip - Always ensure your chosen fuel is suitable for your specific fire pit model.

Preparing Your Fire Pit Area

Preparing your fire pit area with safety and efficiency in mind is a step you cannot afford to overlook. Proper setup ensures not only the longevity of your fire pit but also the safety of everyone around it. Here’s how you can do it right.

Clearing the Space

First off, select a level surface for your fire pit that’s at least 10 feet away from any structures, trees, or flammable materials. This distance is minimum; more is always better. Clear away any debris, dry leaves, or anything that can catch fire. For those with wood decks, investing in a fireproof mat underneath your pit is wise to prevent heat damage.

Gathering Tools and Materials

Having all your tools and materials at hand before you start is key to a smooth experience. You’ll need:

  • A lighter or matches
  • Fire starter, if available
  • Kindling
  • Seasoned firewood or your chosen fuel
  • A bucket of water or a garden hose nearby, for emergencies

These essentials streamline the process of starting your fire, allowing you to focus on enjoying the experience rather than scrambling for supplies after the fact.

Safety Gear and Precautions

Never underestimate the importance of safety gear. Gloves protect your hands from burns and splinters, while safety glasses shield your eyes from sparks. If you’re going to be moving large logs or working close to the flames, these are non-negotiables.

It’s also essential to have a plan for extinguishing your fire pit. A bucket of sand, water, or a fire extinguisher should always be within arm’s reach. Better safe than sorry.

Practical Tips

  • Check the wind direction before you light your fire. Avoid lighting your pit on excessively windy days as it can blow sparks and embers toward flammable materials.
  • Inform everyone in your household about the fire pit rules. This is especially important with children or pets around.
  • For more detailed safety tips, read our guide on fire pit safety.
Important - Safety should always be your first priority when preparing and enjoying your fire pit area.

By taking these steps to prepare your fire pit area, you’re not just ensuring a safer environment; you’re setting the stage for countless enjoyable nights by the fire.

Lighting Fire Pits Correctly

For the ultimate outdoor experience, mastering the art of lighting your fire pit correctly is essential. Whether you’re gathered around a traditional wood-burning fire pit or enjoying the convenience of a gas fire pit, the right lighting techniques can make all the difference. Here, we’ll share practical advice on how to effectively light different types of fire pits and maintain a consistent flame.

Mastering Traditional Wood Burning Fire Pits

Lighting a wood-burning fire pit is an art in itself, combining tradition with a touch of skill. Begin by gathering your materials: seasoned hardwood, tinder, kindling, and a lighter or matches. The key here is preparation and layering.

  1. Start by placing tinder at the bottom of your fire pit. Options like dry leaves, pine needles, or newspaper work well.
  2. Add kindling in a criss-cross pattern or a pyramid atop the tinder. This allows for better airflow, which is critical for ignition.
  3. Light the tinder in several places to spread the flame evenly. As the kindling catches fire, carefully add more until you have a strong flame.
  4. Gradually add your larger logs to the fire, positioning them to allow air to circulate. This will ensure a steady, hot flame perfect for those cozy nights outdoors.
Flow Chart - Steps for Lighting a Wood-Burning Fire Pit

Remember, keeping your fire going requires periodic maintenance. Add logs as needed but avoid overloading to prevent smothering your fire.

Gas Fire Pits: Safety and Lighting

Gas fire pits offer convenience and ease of use unmatched by traditional wood-burning pits. Safety, however, is paramount. Always check connections for leaks by applying a soapy water solution along the gas line and connections. If bubbles form when you turn the gas on, there is a leak, and you should not light the pit until it’s fixed.

For lighting:

  1. Open the gas valve on your fire pit.
  2. Use a long lighter or electronic ignition to light the pit while standing to the side to avoid any flare-up.
  3. Once lit, adjust the gas flow to achieve the desired flame height and warmth.
Quote - The beauty of a gas fire pit lies in its control. - Anon.

The beauty of a gas fire pit lies in its control. You can easily adjust the flame to suit your needs, whether you’re looking for ambiance or warmth.

Tips for Maintaining a Consistent Flame

  • Ventilation is key. Whether it’s a wood-burning or gas fire pit, ensuring proper airflow is essential for a consistent flame.
  • Fuel quality matters. For wood-burning pits, use seasoned hardwood. For gas fire pits, ensure your propane tank is full and the gas line unobstructed.
  • Regular cleaning. Remove ash and debris from wood-burning fire pits to improve air circulation. For gas fire pits, ensure burners are clean for optimal performance.

By following these practical steps, you will enjoy a beautiful, safe flame in your backyard sanctuary. Every fire pit requires attention to detail, from preparation to lighting and maintenance. Embrace these tasks as part of the ritual of fire pit enjoyment, enhancing the overall experience for you and your guests. Whether opting for the rustic charm of a wood fire or the modern convenience of a gas pit, correctly lighting and maintaining your fire pit is the cornerstone of memorable outdoor gatherings.

For more detailed safety tips, especially for wood fire pits, explore our guide on managing a fire.

Wrapping Up

Mastering fire pit lighting techniques is an essential skill for enhancing your outdoor living space. We at S&S Fire Pits have guided you through selecting the right fuel, preparing your fire pit area, and safely lighting your fire pit. The journey doesn’t end here; it’s just beginning. Safety and preparation are paramount, ensuring a hassle-free, enjoyable experience around your fire pit.

Key Takeaways - How to Master Fire Pit Lighting Techniques

Remember, whether opting for the crackling ambiance of wood or the convenience of gas, the correct approach to lighting and maintenance can dramatically enhance the quality of your gatherings. The importance of using seasoned wood, ensuring proper gas connections, and regular cleaning cannot be overstated. These elements are critical for maintaining a consistent and safe flame.

We encourage you to experiment within the safe parameters set out in this guide. Each fire pit session is an opportunity to refine your techniques and create more memorable moments. Whether you’re looking to enjoy a quiet evening under the stars or hosting a lively gathering with friends, the warmth and ambiance of a well-maintained fire pit can make all the difference.

Your fire pit is more than just a source of warmth; it’s a centerpiece for connection and outdoor enjoyment. With S&S Fire Pits’ handcrafted, solid steel fire pits, quality and durability are guaranteed, ensuring countless nights of enjoyment. Explore our range of fire pits and accessories to find the perfect centerpiece for your outdoor space. Remember, the right preparation, safety practices, and a bit of patience are all you need to master the art of fire pit lighting. Go ahead, light up your backyard and create unforgettable outdoor experiences.

Posted on

Fire Pit Marshmallow Roast: All You Need to Know

Here at S&S Fire Pits, we’re passionate about making your outdoor gatherings unforgettable and safe. An outdoor marshmallow roast is a quintessential experience that brings joy and warmth to any backyard gathering.

This blog post is your guide to executing a flawless event, from selecting the right equipment to mastering the art of marshmallow roasting. Let’s get your fire pit ready for a night of fun, laughter, and delicious treats.

Selecting Your Marshmallow Roast Gear

An unforgettable marshmallow roast starts with choosing the right equipment. The foundation of your setup is a high-quality fire pit. Opt for a fire pit that offers even heating; this is essential for perfectly roasted marshmallows. A consistent temperature across the pit ensures that whether you’re roasting one or ten marshmallows, each comes out golden brown and deliciously melted. Our guide on choosing the right fire pit offers insights into identifying models designed for uniform heat distribution.

Moving on, the importance of safe and effective roasting sticks cannot be overstated. The best roasting sticks are those that keep you a safe distance from the flames while providing precise control. Look for sticks that are at least 30 inches long to maintain a comfortable distance from the heat. Stainless steel sticks with a non-slip handle are ideal for their durability and ease of use. For families, consider purchasing roasting sticks with color-coded handles to avoid mix-ups and ensure everyone gets in on the fun safely.

Pro Tip - Before your marshmallow roast, practice setting up and igniting your fire pit to ensure a smooth and safe experience.

In addition to a fire pit and roasting sticks, consider these additional tools to enhance your marshmallow roast experience:

  • A fire pit grill grate for those who want to expand their menu beyond marshmallows.
  • Heat-resistant gloves for safe adjustment of logs or equipment near the fire.
  • A fire pit snuffer to safely extinguish the fire once your gathering concludes. Safety should always be a priority, and a proper snuffer can help prevent accidents.

Marshmallow roasting is more than just a fun activity; it’s an art form that requires the right tools. By investing in high-quality equipment, you can transform a simple backyard gathering into a memorable event that your friends and family will talk about for years to come.

For further information on enhancing your outdoor living space, our comprehensive insights into outdoor party planning can provide you with actionable tips and ideas to take your gatherings to the next level.

Preparing Your Fire Pit

Getting your fire pit ready for an outdoor marshmallow roast involves more than just lighting a fire. It demands attention to safety details that ensure a pleasant experience for everyone involved. Following a safe setup, maintenance, and extinguishing process protects not only the participants but also the environment around your fire pit space.

Before lighting your fire, clear away any debris or flammable materials from around the pit area. This includes dry leaves, twigs, and any yard waste that could accidentally catch fire. It’s critical to have a clear, safe zone of at least 10 feet in all directions from your fire pit.

When it comes to building your fire, start with smaller kindling and gradually add larger pieces of wood once the fire is established. This method helps to control the size and intensity of the fire, creating ideal conditions for roasting marshmallows. Remember, a mega-fire isn’t what you’re after for roasting marshmallows; a medium, manageable fire offers the best heat.

As your evening progresses, keep a bucket of water, sand, or a fire extinguisher nearby as a precautionary measure. You never know when you’ll need to put out an unexpected flare-up or end the night’s festivities abruptly.

To extinguish your fire, do so gradually by spreading the ashes over a larger surface area and then slowly drenching them with water. Ensure that all embers are fully extinguished by touching them with the back of your hand from a safe distance. If any area feels warm, it needs more water.

Important - Maintain a clear zone of at least 10 feet around the fire pit for safety.

Following these steps will help maintain a safe environment:

  • Clear the area around the fire pit to prevent unintended fires.
  • Build the fire slowly, starting with kindling to manage its size.
  • Keep extinguishing materials ready in case of emergencies.
  • Properly extinguish the fire by spreading out embers and thoroughly soaking them.
Fact - A medium, manageable fire is ideal for roasting marshmallows.

For more detailed insights into fire safety practices, consider reading fire pit safety tips.

This guide layouts the foundation for a responsible and enjoyable outdoor marshmallow roast. By prioritizing safety and proper fire management, your event can go off without a hitch, leaving you free to focus on the fun and bonding moments that come with gathering around a warm, glowing fire.

Perfecting Marshmallow Roasting

Roasting marshmallows is both an art and a science. To achieve those golden-brown, perfectly melted treasures, there’s more to consider than just sticking a marshmallow on a skewer and holding it over fire. Here’s how to ensure your marshmallows come out just right, plus some creative ideas and tasty recipes to elevate your roasting experience.

Finding the Heat Sweet Spot

The key to perfection lies in finding the heat sweet spot. Unlike popular belief, flames are not your friend in this scenario. What you’re aiming for are the glowing embers that provide a consistent, even heat without the danger of scorching your marshmallow. Generally, this means letting your fire simmer down to a point where flames are minimal and the embers are bright orange. This allows for a slow roast, giving you that desired crispy exterior and gooey interior without burning.

Here’s a practical tip: if you’re using a fire pit, aim to roast your marshmallows over the edges where the heat is more manageable, and you have better control over the distance.

Creative Roasting Techniques

Gone are the days of just sticking marshmallows on a stick. For those looking to add a twist to their roasting technique, consider using a rotisserie method. By continuously turning your marshmallow, you ensure an even roast all around. Another technique is the patience method, where you hold the marshmallow just outside the sweet spot of heat, allowing it to warm slowly until it’s perfectly golden.

For a truly unique experience, try the double roast: after your marshmallow is roasted to your liking, carefully remove the outer layer, and roast the inner part again for a double dose of crispy, gooey goodness.

Flow Chart - Creative Roasting Techniques

Fun Recipes to Explore

Once you’ve mastered the art of roasting, it’s time to take your marshmallows beyond the traditional s’more. Here are some delicious ideas to get you started:

  • Marshmallow and Chocolate Bananas: Slice a banana down the middle (leave the peel on), insert chocolate chips and roasted marshmallows, wrap in foil, and place near the coals for a melty treat.
  • Sweet and Savory Skewers: Alternate marshmallows with pieces of fruit (like strawberries or pineapples) on your skewer, roasting until the marshmallows are golden. The combination of savory fruit and sweet marshmallow is irresistible.
  • Marshmallow Dip: Melt roasted marshmallows into a warm, creamy dip. Serve with graham crackers, cookies, or fruit slices for dipping. It’s a communal dish that’s sure to be a hit.

Roasting marshmallows is just the beginning. With the right techniques and a bit of creativity, there’s no end to the delicious recipes and fun you can have around your fire pit. Remember, the perfect marshmallow roast is about more than just the food—it’s about creating lasting memories with friends and family. So grab your skewers, get that fire going, and enjoy the sweet taste of outdoor fun.

For those eager to dive deeper into the world of campfire cooking, our guides on cooking over a campfire provide valuable tips and ideas to expand your outdoor culinary skills.

Wrapping Up

A successful marshmallow roast is about preparation, safety, and creativity. We at S&S Fire Pits have shared our expertise to help you elevate your outdoor experience, spotlighting how quality equipment, fire management, and innovative roasting techniques come together to create magical moments around the fire.

Key Takeaways - Outdoor Marshmallow Roast: All You Need to Know

Safety should always be your top concern. Our tips on fire pit preparation and extinguishing practices are designed to keep you, your loved ones, and your surroundings safe. Remember to clear the area, build the fire slowly, and always have extinguishing materials on hand.

We encourage you to explore creative roasting ideas that go beyond the traditional marshmallow on a stick. Whether it’s trying new recipes or experimenting with different roasting techniques, there’s a whole world of deliciousness waiting to be discovered. These experiences not only enhance the flavor of your treats but also the memories made around the fire.

At S&S Fire Pits, we’re committed to providing you with not just a fire pit, but a centerpiece for these memorable gatherings. Our handcrafted, solid steel fire pits are built to last and designed for moments just like these. From the perfect marshmallow roast to an entire evening of backyard fun, our fire pits are where your best memories begin.

Check out our range of fire pits and accessories to find the perfect match for your next outdoor event. With our selection of high-quality fire pits, you’re sure to find one that suits your style and needs. Remember, the best gatherings are those that leave you warm, inside and out.

Here’s to many more nights under the stars, filled with laughter, great company, and perfectly roasted marshmallows.

Posted on

DIY Firewood Storage: Practical Tips

At S&S Fire Pits, we understand the importance of efficient firewood storage for enhancing your outdoor experiences. Proper storage not only keeps your wood dry but also ready for those spontaneous gatherings around the fire pit.

In this guide, we offer practical advice on how to design, build, and maintain your own firewood storage, ensuring your fuel is in the best condition for creating memorable moments. Join us as we explore simple yet effective strategies for DIY enthusiasts.
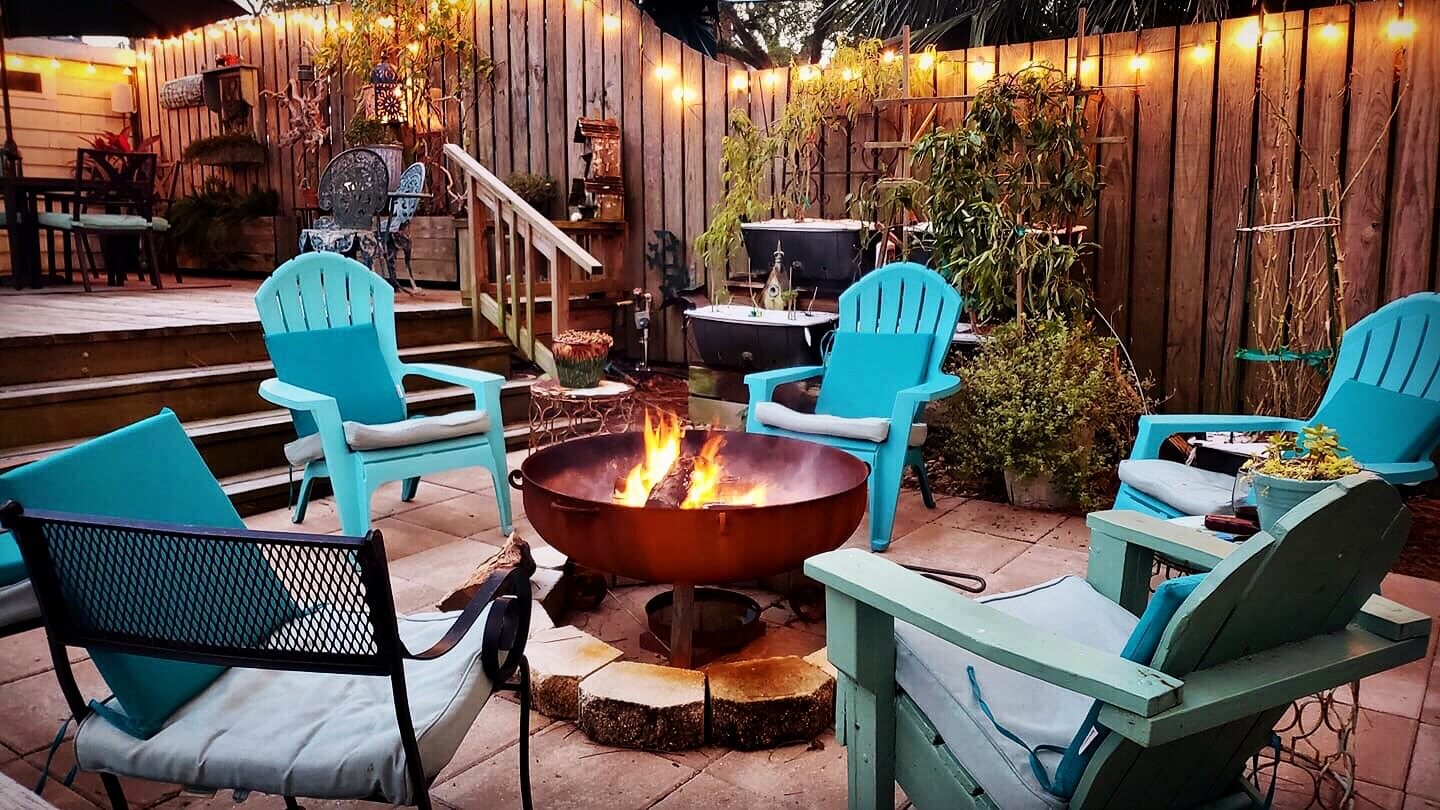
Choosing Firewood Storage Location

When setting up a firewood storage solution, pinpointing the perfect spot is not just about convenience. It’s crucial for wood preservation, easy access, and safety. The ultimate goal is to have wood that burns efficiently, providing warmth and ambiance without hassles. Here’s what matters most:

Easy Access is Key: You want your firewood close enough to your home or fire pit for easy retrieval, especially during chilly evenings. However, too close, and you risk pests entering your dwelling. A sweet spot exists about 20 to 30 feet away from your home. This distance strikes a balance between convenience and safety, keeping pests at bay while ensuring your wood is easily accessible.

Pro Tip - Avoid storing firewood too close to your home to prevent pests from entering.

Ventilation Can’t Be Overstated: Fresh air circulation is paramount for preventing mold and promoting proper seasoning of your firewood. Choose an area with good airflow. Avoid tightly enclosed spaces or the leeward side of buildings where moisture can trap. Instead, consider an open or semi-open space where air can move freely around your woodpile.

Shielded from the Elements: While complete outdoor exposure can hinder proper wood seasoning, a little protection goes a long way. Opt for a location with a natural shield against rain and snow, like under the eave of a building or beneath a canopy of trees. However, ensure the spot still benefits from sunlight and breeze to aid in drying the wood.

Consider these additional tips for optimal placement:

  • Observe your property during different weather conditions to identify areas that stay dry and receive ample sunlight.
  • If using a storage structure, position it to take advantage of prevailing winds for increased air circulation.
  • Elevate your woodpile off the ground on a pallet or rack, like the ones we offer at S&S Fire Pits, to avoid moisture from the ground and improve airflow.
  • Make periodic adjustments based on seasonal changes; what works in summer might not be ideal in winter.
Important - Proper air circulation and shielding from elements are crucial for firewood preservation.

By carefully selecting where you store your firewood, you’ll not only extend its usable life but also ensure it’s ready when you need it, burning cleanly and efficiently every time. Always remember, the key to a great fire starts long before the match is struck—it begins with how and where you store your wood.

Designing Your Firewood Storage

When it comes to creating your own firewood storage, selecting the right materials, planning for the right size and capacity, and building for durability are vital to ensure your wood stays dry, accessible, and ready to use. Here are some actionable insights and recommendations to guide you through the process.

Selecting the Right Materials

The longevity of your firewood storage hinges significantly on the materials you choose. Pressure-treated wood stands out for its resistance to rot and pests, making it an excellent choice for the frame and base. For a more budget-friendly option, pallets can be repurposed as a solid foundation, ensuring your woodpile is elevated off the ground. When considering roofing materials, corrugated metal offers durability and excellent protection from the elements, ensuring your wood stays dry.

Fact - Pressure-treated wood is a top choice for firewood storage due to its resistance to rot and pests.

Planning for Size and Capacity

Understanding your wood consumption habits is essential in determining the size of your storage. A general rule is to build a storage that can hold at least a season’s worth of wood. For an average household, this could range from 3 to 5 cords of wood. Creating a storage solution that is too small leads to frequent restocking, while too large a storage could take up unnecessary space and resources.

Build your storage with future needs in mind. If you anticipate using your fire pit more frequently in the coming years or if you plan to use wood as a primary heating source in your home, consider scaling up your storage capacity accordingly.

Tips for Enhancing Durability

  1. Elevate the base: Keeping your wood off the ground not only prevents moisture absorption but also deters pests. Using concrete blocks or metal stands can provide a sturdy and durable foundation.
  2. Protect against the elements: Applying a wood preservative or sealant to all wooden components of your storage can extend its life. Consider adding a tarp cover during the wet season for additional protection, ensuring it’s designed for breathability to prevent mold growth.
  3. Ensure proper air flow: Design your storage to allow air to circulate freely through the woodpile. This means not packing the wood too tightly and including spaces between the rows of wood. Proper ventilation speeds up the drying process and keeps the wood in optimal burning condition.
Flow Chart - Enhancing Firewood Storage Durability

Building a firewood storage might seem like a straightforward project, but these considerations ensure that your effort results in a practical, durable, and efficient storage solution. By selecting the right materials, right-sizing your storage, and focusing on durability-enhancing techniques, your firewood will be well-protected, seasoned, and ready to fuel your fire pit gatherings.

For further reading on maintaining your firewood, check out our how to season firewood guide.

Building and Upkeeping Firewood Storage

Creating a functional firewood storage space requires a strategic approach right from the assembly to its maintenance. Diving into the specifics not only guarantees the longevity of your storage solution but also ensures your firewood remains in the best condition for use. Let’s explore the essential steps and tips for assembling your firewood storage and keeping it in top-notch condition.

Step-by-Step Assembly Guidance

Building your firewood storage starts with a solid plan and the right tools. First and foremost, gather all necessary materials, including pressure-treated lumber for the frame, corrugated metal for the roof, and hardware for assembly. Precision in measuring and cutting materials is key to creating a stable structure. Follow these steps for a smooth assembly process:

  • Layout: Mark your ground where the storage will sit. Ensure the area is level; this may require some minor excavation or the addition of gravel.
  • Foundation: If elevation is needed, place concrete blocks at each corner. This prevents direct contact with the ground, reducing moisture wicking.
  • Frame Construction: Assemble the frame using pressure-treated lumber. Secure corners and joints with high-quality exterior screws for durability.
  • Roof Installation: Attach corrugated metal sheets to the top of the frame for waterproofing. Ensure a slight overhang to direct water away from the woodpile.
  • Cross Ventilation: Integrate spaces between boards and ensure gaps in the storage design for air to circulate freely.

Remember, the goal is to build a structure that withstands the elements and keeps firewood dry and accessible. Paying attention to details during assembly pays off in the utility and durability of your firewood storage.

Maintaining Your Firewood Storage for Longevity

Routine maintenance ensures your firewood storage remains effective and extends its lifespan. Seasonal checks and minor adjustments can prevent larger issues down the line:

  • Inspect and Repair: Regularly examine your storage for signs of wear, such as loose screws or rotting wood, and make necessary repairs promptly.
  • Preserve Wood: Apply a wood preservative or sealant to the storage annually to protect against rot and insect damage.
  • Tarp Cover: In wet seasons, cover your woodpile with a breathable tarp to protect it from rain and snow. Secure the tarp to allow for airflow and prevent mold.
  • Pest Control: Keep the area around your firewood storage tidy and free of debris to discourage pests. Consider natural repellents or a professional pest control service if necessary.

Seasonal Preparation and Pest Control

To keep your firewood dry and ready for use year-round, seasonal preparation is essential. Before the wet or cold seasons set in, ensure your woodpile is covered and raised off the ground. This not only prevents moisture but also makes it less attractive to pests. Control measures might include elevating your woodpile further off the ground or applying natural deterrents around the storage area.

In summary, building and maintaining a firewood storage structure is not just about creating a place to stack wood. It’s about ensuring the quality and readiness of the wood for when those chilly nights call for a cozy fire. With these practical tips on assembly and maintenance, your firewood storage will serve you well, supporting countless hours of enjoyment around your fire pit.

For more hands-on advice on maintaining outdoor spaces, visit landscape maintenance tips.

Final Thoughts

We’ve walked through the essential steps to design, build, and maintain effective firewood storage. Here’s a brief recap of the key points to ensure your firewood is always ready for those special moments around the fire.

Key Takeaways - DIY Firewood Storage: Practical Tips
  • Location is vital: Choose a spot that balances convenience with the need for dry, well-seasoned wood.
  • Materials matter: Use durable, moisture-resistant materials like pressure-treated wood and corrugated metal.
  • Size and capacity: Build according to your needs, considering both current and future wood consumption.
  • Ventilation and protection: Ensure your design allows for air circulation and is shielded from the elements.
  • Routine maintenance: Regular checks and upkeep are necessary to prolong the life of your firewood storage.

Building your own firewood storage is not just a project; it’s a step towards self-sufficiency and the satisfaction of preparing for those warm, memorable gatherings. It’s about taking control of your outdoor living space and making it truly yours.

We at S&S Fire Pits encourage you to dive into this project with enthusiasm. Not only is it practical, but it also compliments the experience of using one of our handcrafted, solid steel fire pits, guaranteed for life and designed to bring people together.

We’d love to hear about your DIY adventures, successful builds, and any personal tips you’ve discovered along the way. Sharing your experiences can help inspire others to embark on their own projects, fostering a community of outdoor enthusiasts who take pride in their creations.

Let’s keep the spirit of outdoor enjoyment alive, ensuring our gatherings are lit with perfectly seasoned wood from storages built with our own hands. Here’s to many more nights under the stars, by the fire, surrounded by friends and family.

Posted on

Entertaining Kids Around Fire [Guide]

Gathering around a fire pit can create unforgettable family memories. We at S&S Fire Pits are passionate about helping you make those moments as enjoyable and safe as possible.

This guide is designed to offer practical advice and fun activities that ensure the whole family, especially the kids, have a great time around the fire pit.

Keeping Kids Safe Around Fire Pits

Ensuring the safety of children around fire pits requires prioritizing supervision, instilling fire safety knowledge, and arranging safe seating. Families can enjoy their time together around the fire pit with peace of mind by adhering to practical measures.

Consistent Supervision Is Essential: Never leave children unattended near a fire pit, even for a moment. Adults must always be present to monitor the fire and the children’s activities. Supervision prevents accidents and allows for immediate reaction if a risky situation arises.

Educate Kids on Fire Safety: It’s paramount to teach children about the dangers associated with fire. Explain the basics of fire safety in a way that’s easy to understand. Topics should include keeping a safe distance from the fire, not throwing objects into the fire, and the importance of adult supervision. Starting this education early puts kids on the right path to respecting fire as they grow. For more insights on teaching fire safety, consider exploring fire pit safety tips.

Establish Safe Seating Arrangements: Designate seating that’s far enough from the fire pit to prevent accidents but close enough to enjoy the warmth. Avoid flammable materials for seating like plastic chairs, and ensure stability to prevent tipping. Arranging seats in a semi-circle with a clear boundary can help keep everyone at a safe distance.

By integrating these practices, families can foster a safe and enjoyable environment around the fire pit. Remember, the goal is not only to prevent accidents but also to create a responsible mindset towards fire safety among kids. This proactive approach ensures that gatherings around the fire pit remain cherished and safe experiences for everyone involved.

Engaging Fire Pit Activities

Bringing families together around a fire pit opens up a world of opportunities for both fun and learning. These activities not only keep kids entertained but also teach them valuable lessons about nature, science, and the universe. Here’s how to make the most out of your time around the fire.

Turning Marshmallows into Memories: One of the simplest and most beloved activities is roasting marshmallows. This classic pastime is more than just a treat; it’s an exercise in patience and following directions. Kids learn about heat distribution and the science of caramelization—the process that turns the marshmallow golden brown. Elevate the experience by encouraging kids to share stories or sing songs while they roast. It’s a perfect way to bond and create lasting memories.

Important - Roasting marshmallows is not only fun but also a valuable lesson in patience and science for kids.

Nature and Fire Science Demystified: A fire pit gathering is an excellent chance to teach children about the natural world and the principles of fire. Explain how fire needs oxygen, heat, and fuel to burn, illustrating the combustion triangle. You can discuss different types of wood and why some burn hotter and longer than others. It’s also a great opportunity to teach about the responsibility that comes with using fire, including the importance of extinguishing it properly. For detailed guidance on building and managing fires safely, exploring resources like campfire safety tips can be incredibly useful.

Fact - Fire requires oxygen, heat, and fuel to burn, illustrating the combustion triangle.

Stargazing and Constellation Identification: After the sun sets, the night sky offers a fantastic natural canvas to learn about stars, planets, and constellations. Download a stargazing app or bring a constellation map to identify various celestial bodies. This activity can spark conversations about astronomy, mythology, and navigation. It’s an engaging way to introduce children to the vastness of space and our place within it.

By integrating these activities into your fire pit gatherings, kids learn valuable lessons in a relaxed and enjoyable setting. Each of these activities encourages creativity, curiosity, and critical thinking, setting the stage for a lifelong love of learning and exploration. Keep the focus on safety, and ensure that every fire pit experience is both enriching and enjoyable for the whole family.

Fun Crafts and Games

When the fire pit becomes the heart of your evening, blending interactive games and crafts into the mix not only keeps children engaged but also fosters a rich learning environment. Moving beyond mere entertainment, these activities can cultivate creativity, teamwork, and an appreciation for the natural world. Here’s a glance at some hands-on fun that can elevate any fire pit gathering.

Spark Creativity with Shadow Puppetry: With just a flashlight and their hands, children can create an entire world against the backdrop of your fire pit’s glow. Encourage them to tell stories through their shadow creations, stimulating their imagination and narrative skills. This simple yet profound activity can transform an ordinary night into a mesmerizing tale.

Flow Chart - Stimulating Imagination Through Shadow Puppetry

Natural Bingo Brings Learning Alive: Create bingo cards featuring common natural elements found in your backyard or camping site, such as leaves, rocks, and insects. This game not only entertains but educates children on their immediate surroundings. It’s an excellent way to encourage exploration and attention to detail, proving that learning can be a fun treasure hunt.

DIY S’mores Kits Spark Culinary Interest: Allowing children to build their s’mores kits from a variety of chocolates, marshmallows, and biscuits not only caters to their culinary curiosity but also teaches them about different flavors and textures. It’s a delicious lesson in creativity and decision-making. Plus, it adds a personalized twist to a classic fire pit snack.

Incorporating these activities into your fire pit evenings not only ensures entertainment but also enriches the experience with valuable learning opportunities. Here are a few quick tips to maximize enjoyment and safety:

  • Preparation is Key: Gather all necessary materials for games and crafts before lighting the fire to ensure a smooth transition into activities.
  • Safety First: Always supervise children during activities, especially when they are near the fire or handling food.
  • Encourage Participation: Invite kids to suggest their own game rules or craft ideas. This boosts their confidence and makes the activities more engaging.

By blending fun, education, and creativity around the fire pit, you’re not just passing time; you’re building memories and skills that last a lifetime. For more ideas on engaging family activities, explore family fun ideas.

Final Thoughts

In closing, the essence of gathering around a fire pit extends far beyond merely basking in its warmth. It’s about nurturing a safe, creative, and educational enclave for our families, especially the little ones. At S&S Fire Pits, our goal has always been not just to provide high-quality, durable fire pits but also to enrich your family time with safety, joy, and learning.

Key Takeaways - Entertaining Kids Around Fire [Guide]

Safety and supervision stand as our top priorities. Ensuring a secure environment means parents can relax and children can explore their curiosity without risk. Every family gathering around an S&S Fire Pits is an opportunity for knowledge sharing and creating priceless memories, set against the backdrop of the gentle crackle of fire.

We encourage diving into creative and educational activities that spark not just the flames but imaginations as well. From the simple joy of making s’mores to the adventurous tales spun under the starlit sky, these moments are the building blocks of lifelong learning and memory formation.

Let’s cherish these gatherings as opportunities for growth, laughter, and discovery. With every fire pit lit, we’re not just lighting up a dark evening but enlightening young minds, strengthening familial bonds, and fostering a profound respect and understanding of nature’s elemental force. So, let the flames rise, let the laughter echo, and let the learning continue around the fire pit.

Here’s to more enriching family time gathered around the warmth of a fire pit, under the canvas of the night sky. Remember, every ember tells a story and every spark can ignite curiosity. Let those fires burn bright with safety, knowledge, and creativity as their fuel.

Posted on

Backyard S’mores Ideas: All You Need to Know

Gathering around a fire pit to roast s’mores is an experience that combines fun, flavors, and unforgettable memories. At S&S Fire Pits, we believe that having the right setup and recipes can transform your backyard into the perfect s’mores-making haven. In this blog post, we’ll guide you through everything from selecting the ideal fire pit to exploring creative s’more recipes and essential safety tips. Join us as we make every s’mores night special and safe.

Selecting the Ideal Fire Pit

Finding the perfect fire pit is essential for creating a memorable backyard s’mores experience. It’s not just about aesthetics; functionality, safety, and quality play pivotal roles in ensuring your gatherings are both enjoyable and safe. Understanding these elements will undoubtedly enhance your s’mores making process, turning your backyard into a delightful haven for friends and family.

Key Factors in Fire Pit Selection

When it comes to choosing a fire pit, size, material, and design are paramount. A sizable fire pit ensures there’s enough room for multiple people to roast marshmallows simultaneously, making the experience more inclusive and fun. Material-wise, opting for durable metals like steel can withstand the elements and provide years of enjoyment. The design should facilitate easy access to the fire for cooking while incorporating safety features like a stable base and spark screen.

Important - Choose a fire pit that is large enough, made of durable material, and has a safety-conscious design.

The High-Quality Fire Pit Difference

Investing in a high-quality fire pit brings several benefits. First, it ensures longevity. You don’t want to replace your fire pit every few years. Secondly, better materials mean better heat distribution, essential for perfectly roasted marshmallows. Lastly, safety cannot be overstated. High-quality fire pits are designed with safety in mind, reducing the risk of accidents during your backyard gatherings.

Enhancing the S’mores Experience

A top-notch fire pit does more than just burn wood; it’s the centerpiece of your outdoor space, around which memories are made. The warmth of the fire, the glow of the embers, and the joy of cooking over an open flame can transform a simple activity like making s’mores into an event everyone looks forward to. Additionally, some fire pits come with accessories that can make the s’mores experience even more enjoyable. From adjustable grills for controlled cooking to special roasting sticks, these extras can greatly enhance your evening.

Practical Tips for Your S’mores Night

  • Always have a bucket of water or a fire extinguisher nearby for safety.
  • Use hardwood for a longer-lasting, more consistent fire.
  • Experiment with different s’mores recipes to keep the experience fresh and exciting.
  • Consider seating arrangements that allow everyone to access the fire pit comfortably.
Pro Tip - Experiment with various s'mores recipes and consider various seating arrangements for optimal enjoyment.

For those looking to dive even deeper into making their backyard the ultimate s’mores paradise, exploring additional resources can offer more insights. Reading up on choosing the perfect fire pit and safety tips can provide valuable information that ensures your gatherings are both delightful and secure.

In summary, selecting the right fire pit is about balancing aesthetics, functionality, and safety. A high-quality fire pit not only elevates the s’mores making process but also transforms your backyard into a cozy gathering spot for making lasting memories. By keeping these tips in mind, you’re well on your way to hosting unforgettable s’mores nights that your friends and family will cherish.

Elevating S’mores Recipes

Taking s’mores from classic to extraordinary requires a bit of creativity and willingness to experiment with new flavors. Everyone knows the traditional s’more recipe – graham crackers, a piece of chocolate, and a marshmallow toasted to perfection. While there’s no denying this combination is delicious, there are countless ways to introduce new tastes and cater to different dietary needs, ensuring everyone around your fire pit can indulge in this beloved treat.

Unique Ingredients for a Flavor Twist

Why settle for the ordinary when you can make your s’mores truly unforgettable? Let’s talk about incorporating unique ingredients. Dark chocolate with sea salt, white chocolate, or even artisanal chocolates infused with chili or lavender can drastically change the flavor profile of your s’mores. For the adventurous, adding a slice of bacon or a dollop of peanut butter can introduce a savory element that pairs surprisingly well with the sweetness of the marshmallow.
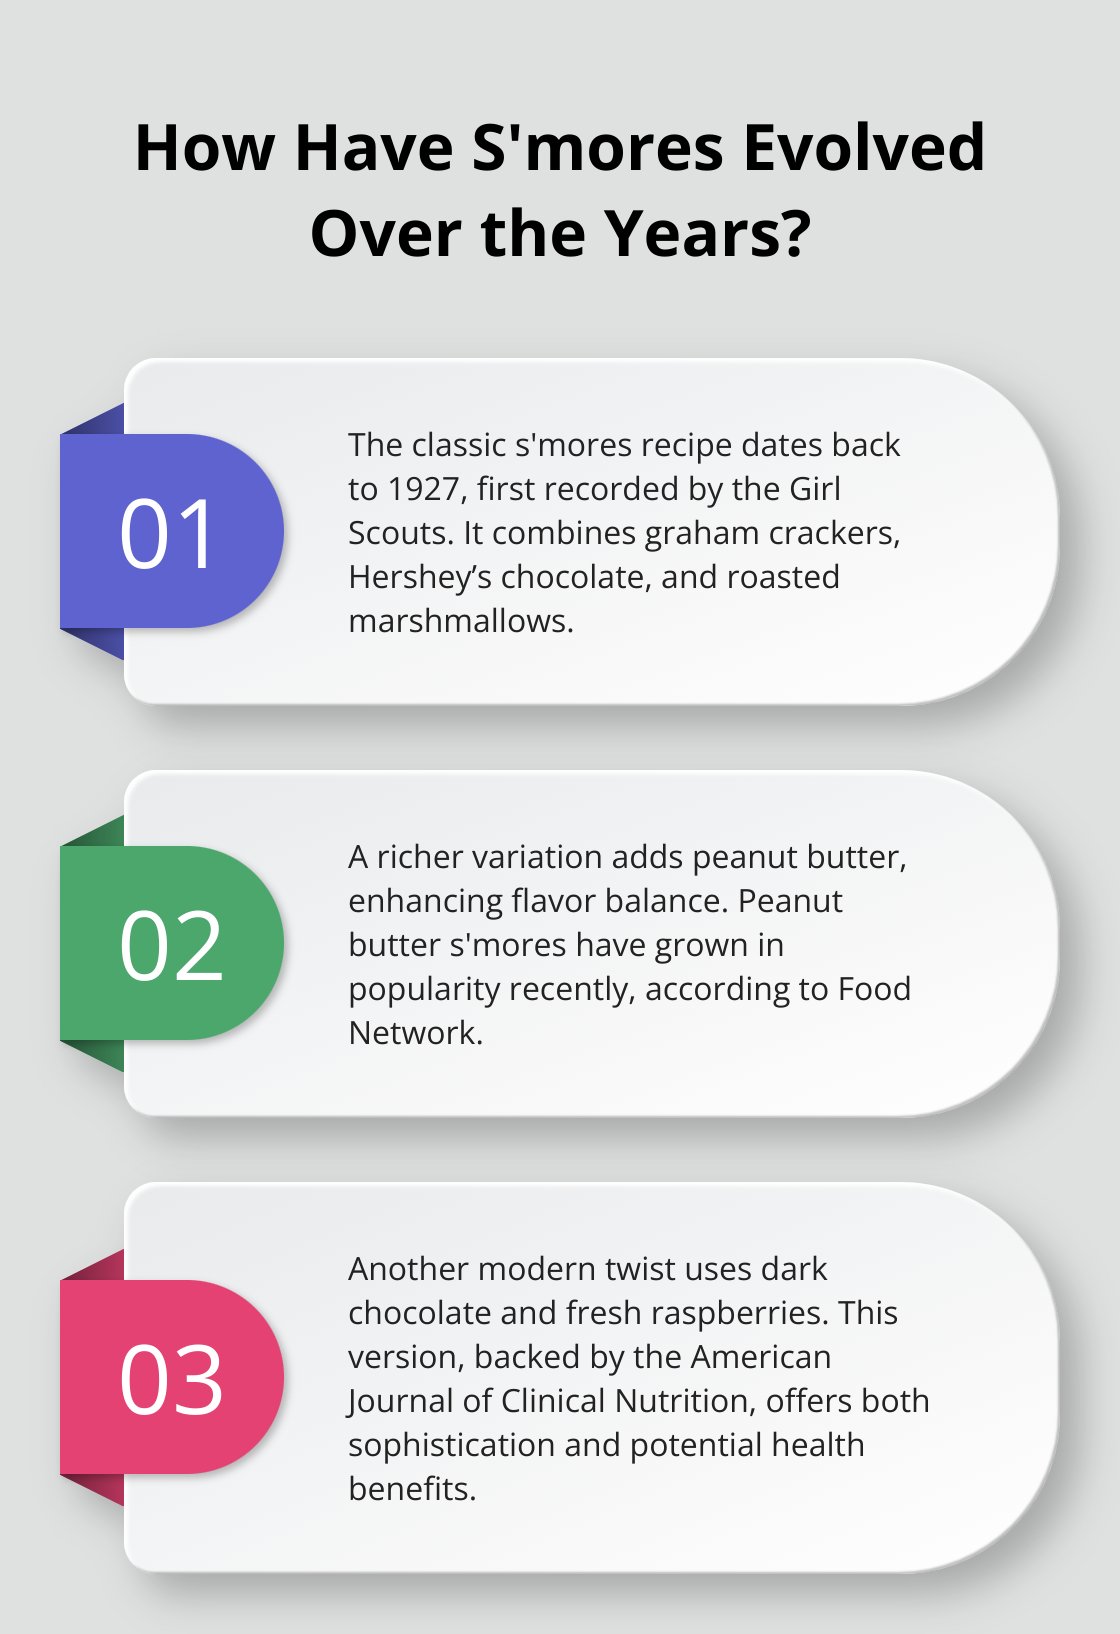
Fruit is another excellent way to add a fresh twist. Thin slices of strawberry or banana nestled between the chocolate and marshmallow not only add flavor but also a bit of nutrition. Jams and spreads can also take your s’mores to the next level; imagine spreading a layer of raspberry jam on the graham cracker before adding the remaining ingredients. The possibilities are truly endless.

Fact - Adding a slice of bacon to your s'more introduces a savory element that pairs well with the sweetness of the marshmallow.

Embracing Inclusivity with Vegan and Gluten-Free Options

Ensuring everyone can enjoy s’mores means thinking about dietary restrictions. Vegan marshmallows and chocolate are readily available and taste just as good as their traditional counterparts. Gluten-free graham crackers are also an option, ensuring those with gluten sensitivities or celiac disease don’t miss out on the fun.

Crowd-Pleasing Combinations

Finding the perfect mix of ingredients that satisfies everyone’s taste can be challenging, but with a little creativity, you can come up with combinations that are sure to be a hit. Here are a few ideas:

  • Salted Caramel and Chocolate: Use a piece of milk chocolate and a drizzle of salted caramel sauce between the graham crackers.
  • Peanut Butter Banana: Spread peanut butter on the graham cracker, add a piece of chocolate, and some slices of banana before topping with a marshmallow.

  • Berry Delight: Spread cream cheese on one graham cracker and a layer of mixed berry jam on the other. Add dark chocolate and a toasted marshmallow for a creamy, tangy treat.

These suggestions are just the beginning. Encouraging guests to mix and match their s’mores with a variety of ingredients can turn the dessert course into an engaging activity for everyone. Plus, it provides an opportunity to discover new favorite flavor combinations.

For more inspiration on cooking over fire, check our collection of campfire cooking tips.

Keeping these tips in mind will not only make your next s’mores night more inclusive but also more memorable. Whether adhering to dietary restrictions or simply seeking to add a spark of creativity to the classic s’more, there’s no limit to the combinations you can create. So, grab your ingredients, gather around the fire pit, and embrace the joy of experimenting with s’mores.

Ensuring S’mores Night Safety

When the night falls and the fire pit becomes the heart of your backyard, ensuring everyone’s safety is paramount. A fun and memorable s’mores night relies not only on delicious recipes and a cozy setup but also on practicing safe fire pit usage and being vigilant about the well-being of all guests, especially children and pets. Below are tried-and-true practices to make sure your gathering remains joyous and accident-free.

Mindful Fire Pit Usage

The allure of a crackling fire should never overshadow the importance of cautious handling and awareness. Always start your fire pit according to manufacturer guidelines and never leave it unattended. Embers can remain hot long after the flames die down, posing a risk if not correctly managed. Keeping a safe distance between the fire pit and any flammable materials is essential. We recommend a minimum of 10 feet to prevent unintended fires. Additionally, equip your fire pit area with a fire extinguisher or a bucket of water for immediate response to any accidents.

Child and Pet Safety

Children and pets are naturally curious, so extra measures are needed to protect them. Establish a clear boundary around the fire pit and make it known that it’s an adults-only zone unless under direct supervision. Tools for roasting marshmallows should have long handles, allowing for a safer distance from the flames. After the s’mores have been enjoyed, ensure all fire tools are kept out of reach from young hands and paws.

After-Care: Ensuring Tomorrow’s Safety Today

Once the stories have been shared and the last marshmallow toasted, properly extinguishing your fire pit is crucial for safety. Coals can stay hot enough to reignite for up to 24 hours. Stirring ashes and dousing them with water, followed by a check for any remaining heat, can prevent any overnight surprises. Regular cleaning and maintenance of your fire pit not only extend its lifespan but also keep it safe for use. Remove ash and debris to prevent clogging and inspect for any signs of wear and tear that could impact its function.

Flow Chart - Safety Steps for a S'mores Night

Adhering to these practices will help ensure that your backyard s’mores nights are remembered for the right reasons. For more detailed guides on fire pit maintenance and safety tips, exploring resources like fire pit maintenance tips and safety protocols for open fires can provide extra peace of mind and valuable knowledge.

By keeping safety at the forefront of your planning, you create an environment where fun and security go hand-in-hand, allowing for many more nights of s’mores, laughter, and cherished memories.

Wrapping Up

Creating an unforgettable backyard s’mores experience enriched with laughter, delicious treats, and warm memories under the stars is what many of us yearn for. It begins with choosing the right fire pit, experimenting with new recipes, and adhering to essential safety practices. We’ve walked through the journey of selecting a top-notch fire pit, enhancing your s’more recipes, and ensuring a safe environment for you, your family, and friends.

Key Takeaways - Backyard S'mores Ideas: All You Need to Know

At S&S Fire Pits, we pride ourselves on crafting high-quality, durable, and beautiful fire pits that stand as the centerpiece of countless memorable evenings. Our handcrafted, solid steel fire pits are not just about function; they embody style, longevity, and the joy of outdoor living. Designed with you in mind, they come equipped with unique features that ensure your backyard gatherings are both delightful and safe. Discover our range, from the expansive 37″ hemisphere to elegantly designed elliptical fire pits, each promising an experience worth cherishing. Find the perfect addition to your backyard at S&S Fire Pits.

We encourage you to dive into the world of creative s’more making. From the classic recipe to innovative culinary creations catering to various dietary needs, the possibilities are endless. Try incorporating new ingredients like artisanal chocolates, fruit slices, or even savory options for a twist on the traditional s’more. Embracing creativity will not only satisfy your taste buds but also make each gathering uniquely memorable.

Safety is paramount, and we’ve outlined practices to ensure your s’mores night is enjoyable without compromises. From mindful fire pit usage to protecting the little ones and pets, these measures are vital for making every evening secure.

In sum, marrying the art of choosing the right fire pit with the adventure of culinary experimentation, all while upholding safety, creates the perfect blend for an extraordinary backyard s’mores experience. Whether it’s a calm evening under the stars or a lively gathering with loved ones, let S&S Fire Pits be a part of your journey towards creating lasting memories around the warmth and glow of a fire pit.

Embrace the joy of outdoor living, experiment with your s’mores recipes, and treasure the moments spent around the fire pit. Here’s to many unforgettable nights filled with joy, laughter, and delicious treats.

Posted on

Fire Pit Pizza Oven Explained

At S&S Fire Pits, we’re always exploring innovative ways to enhance your outdoor living experience. One exciting trend that combines the warmth of a fire pit with the joy of cooking is the fire pit pizza oven. This combination offers a unique blend of culinary delight and cozy ambiance right in your backyard.

In this post, we will guide you through understanding these versatile fixtures, their benefits, and share some practical tips on how to make the most out of your fire pit pizza oven.

Fire Pit Pizza Ovens Demystified

Merging the utility of an outdoor fireplace with the culinary versatility of a pizza oven, fire pit pizza ovens are revolutionizing backyard gatherings. These units redefine outdoor cooking by marrying the coziness of a fire pit with the ability to cook delicious, wood-fired pizzas. However, their benefits extend far beyond just pizzas; these ovens are adept at baking, roasting, and smoking a variety of dishes, offering an all-encompassing outdoor culinary experience.

Important - Fire pit pizza ovens combine the warmth of a fire pit with the culinary capabilities of a pizza oven, enhancing outdoor gatherings.

Design and Materials: Built to Last Outdoors

Unlike traditional ovens, fire pit pizza ovens are designed with durability and outdoor functionality in mind. Most models are crafted from heavy-duty materials such as cast iron or high-grade stainless steel, which not only withstands the elements but also retains and radiates heat efficiently. The construction often involves thick insulation and a dome shape, akin to classic wood-fired ovens, to ensure even heat distribution and optimal cooking temperatures.

The standout feature of a fire pit pizza oven is its dual functionality. The base serves as a fire pit, where you can enjoy the warmth and ambiance of a crackling fire. Above it, the oven compartment, with its stone cooking surface, provides the perfect condition for baking pizzas to perfection. This design not only makes the fire pit pizza oven a versatile cooking appliance but also a focal point in any outdoor space.

Practical Tips for Getting Started

  • Preparation is Key: Before igniting the fire, ensure your firewood is dry and the right size. Hardwoods like oak or maple are ideal for their long-lasting burn and high heat output. Avoid resinous woods like pine that can affect flavor and produce excessive smoke.
  • Heating the Oven: Achieving the right temperature is essential. It may take between 30 to 90 minutes to reach the optimal cooking heat, depending on your model and the wood used. Monitoring the temperature is easier with an oven thermometer, a valuable tool for any fire pit pizza oven owner.
Fact - Hardwoods like oak or maple are preferred for their long-lasting burn and high heat output in fire pit pizza ovens.
  • Cooking Beyond Pizza: While pizzas are a natural fit for these ovens, don’t stop there. Experiment with baking bread, roasting vegetables, or even smoking meats. The smoke from the wood adds a delightful flavor that can’t be replicated in a standard kitchen oven.
  • Maintenance for Longevity: After use, cleaning the oven and fire pit is crucial for its durability. Wait for the oven to cool down, then remove ash and food residues. Regular maintenance ensures your fire pit pizza oven is always ready for your next outdoor gathering.

For those looking to dive deeper into the art of cooking with fire, our guides on cooking over a fire pit offer detailed insights and practical advice.

Fire pit pizza ovens stand at the intersection of tradition and innovation, making them an exceptional addition to any outdoor space. Not only do they offer the satisfaction of preparing meals over an open flame, but they also enhance the ambiance of outdoor gatherings, making every meal an event to remember. With the right preparation and care, a fire pit pizza oven can provide years of enjoyment, making it a worthwhile investment for any outdoor enthusiast.

Why Opt for Fire Pit Pizza Ovens?

Adding a fire pit pizza oven to your outdoor space can profoundly change how you entertain, cook, and enjoy your backyard throughout the year. This transformative appliance opens up new opportunities for culinary exploration, enhances the flavor of traditional dishes, and stands as a beacon of warmth and comfort, no matter the season.

Unlocking New Entertainment Horizons
Think of your outdoor space as a stage, and the fire pit pizza oven as the star performer. This setup becomes a natural gathering point, where guests can watch as their food cooks, bask in the warmth of the fire, and enjoy the aromatic ambiance that only wood-fired cooking can provide. The interactive nature of cooking with a fire pit pizza oven makes every dining experience memorable and engaging. For gatherings, it’s not just about feeding your guests; it’s about involving them in a culinary adventure.

Pro Tip - For an unforgettable experience, involve your guests in the cooking process by allowing them to choose their toppings.

Elevating Cooking to New Heights
The real magic lies in the distinctive taste that only a wood-fired pizza oven can impart. The combination of high heat and smoke from the burning wood infuses pizzas, roasted meats, and even vegetables with a complex, smoky flavor that’s impossible to replicate in a regular kitchen oven. Beyond taste, the efficiency of cooking with a fire pit pizza oven is unparalleled. Reaching temperatures far higher than conventional ovens, they can cook pizzas in just 90 seconds, ensuring a crispy crust and perfectly melted cheese every time. This efficiency means less time waiting and more time enjoying your meal.

Designed for All Seasons
One of the standout features of a fire pit pizza oven is its ability to offer year-round enjoyment. During the warmer months, it’s the heart of outdoor gatherings. When the weather turns cool, it provides a reason to bundle up and head outside, transforming a chilly evening into a cozy and inviting atmosphere. The radiant heat from the fire pit keeps your guests comfortable, while the oven turns out deliciously warm dishes perfect for fall and winter feasting. Its versatility ensures that your outdoor space isn’t just a summer destination but a year-round haven.

For practical guidance on high-heat cooking and wood selection, check our detailed advice on cooking over a fire pit. These insights will help you make the most out of your fire pit pizza oven, enhancing each cooking experience with proper preparation and technique.

By choosing a fire pit pizza oven, you’re not just adding a cooking appliance to your backyard. You’re embracing a lifestyle change that transforms your outdoor space into a vibrant culinary studio, a warm gathering place, and a source of endless year-round enjoyment. With thoughtful use and care, this versatile addition can elevate your home entertainment and dining to levels you’ve never imagined.

Fire Pit Pizza Oven Usage

Getting the best out of your fire pit pizza oven combines the right heat, cooking techniques, and consistent maintenance. Mastering these elements ensures every pizza has the perfect crust, toppings are flawlessly cooked, and your oven remains safe and functional for years to come.

Maximizing Heat Efficiency

The secret to a perfectly cooked pizza starts with the right temperature. Preheating your fire pit pizza oven to an ideal 700°F to 800°F is non-negotiable. This heat level mimics traditional wood-fired pizza ovens, ensuring a crispy crust while keeping toppings juicy and cooked to perfection. But achieving and maintaining this heat level requires precision.

  • Use the best wood: Hardwoods, such as oak, maple, and beech, offer a clean, intense heat suitable for pizza cooking. Avoid woods like pine, as their resin can impart off-flavors and excessive smoke.
  • Preheat effectively: Depending on the size and insulation of your oven, preheating could take anywhere from 30 minutes to over an hour. Watching your oven’s thermometer closely will prevent under or overcooking.
  • Manage flames: Even after your pizza is in, managing the flame is key. A small, lively flame should be maintained on one side of the oven to ensure even cooking and that golden crust.

For details on wood selection and fire management, reviewing our guide on cooking over a fire pit may provide valuable insight.

Flow Chart - Maximizing Heat Efficiency for Fire Pit Pizza Oven

Perfecting Cooking Techniques

Once your oven is heated, attention turns to the pizza itself. Thickness of crust, choice of toppings, and placement in the oven all play critical roles in the final outcome.

  • Oven placement: The hottest part of your oven will be right above the fire. For a crispy bottom and perfectly melted cheese, place your pizza on the opposite side first, rotating halfway through cooking to ensure even cooking.
  • Thin is in: For the best results, stick to a thin crust. Thick crusts can lead to an undercooked base or burnt toppings as they require longer cooking times incompatible with the direct, intense heat of a fire pit pizza oven.

Maintenance Matters

Post-cooking care is as important as the preparation and cooking phases. Proper maintenance ensures safety while extending the lifespan of your fire pit pizza oven.

  • Cleaning is key: After use and once fully cooled, ash and food residues should be carefully removed. A brass brush works best for tackling the cooking surface without damaging it.
  • Cover up: Protect your oven from the elements with a waterproof cover, especially if you’re not planning to use it for an extended period. Rust and corrosion are the enemies of outdoor cooking equipment.
  • Regular checks: Inspect your oven regularly for cracks, wear, and other signs of damage. Early detection can prevent most issues from becoming serious problems.

By focusing on these practical tips for heat management, cooking techniques, and maintenance, you can make the most of your fire pit pizza oven. Enjoy not just the delicious pizzas but also the warmth and ambiance it brings to your outdoor gatherings. Proceeding with these recommendations will ensure your outdoor culinary pursuits are always successful and your fire pit pizza oven remains a central feature of your backyard for years.

Final Thoughts

In exploring the realm of fire pit pizza ovens, we’ve uncovered a dynamic world that presents an exceptional blend of culinary exploration and outdoor comfort. These versatile tools not only cater to the pizza aficionado’s quest for the perfect crust but also open the door to an array of cooking possibilities. Whether it’s baking bread under the stars or roasting vegetables with the crackling sound of wood in the background, fire pit pizza ovens transform every meal into an event.

Key Takeaways - Fire Pit Pizza Oven Explained

Versatility stands as a cornerstone of the fire pit pizza oven experience. Beyond just pizzas, these ovens are capable of delivering incredible flavors across a wide range of dishes, thanks to the unique combination of high heat and wood smoke. It’s this adaptability that ensures your outdoor cooking adventures never grow stale, offering something new and exciting with each use.

But the joy derived from a fire pit pizza oven isn’t just about the food. It’s about the ambiance and connection it fosters. Gathering friends and family around a warm fire, sharing stories, and enjoying food cooked together under the open sky creates moments that are simply irreplaceable. This communal aspect, paired with the delicious outcomes, underscores the importance of integrating such a multifaceted appliance into your outdoor living space.

Embracing a fire pit pizza oven means going beyond conventional cooking methods. It invites you to step outside, engage with nature, and revel in the delights of flame-cooked meals. With the right care and maintenance, this could very well become the centerpiece of countless cherished gatherings and culinary triumphs.

As we wrap up, consider the value that a fire pit pizza oven can bring to your life—not just in terms of delicious meals but also in creating a warm, inviting outdoor space. At S&S Fire Pits, we understand the significance of quality, durability, and craftsmanship in enhancing your outdoor experience. From handcrafted fire pits to innovative cooking accessories, we’re dedicated to helping you make the most of your outdoor cooking endeavors.

Incorporating a fire pit pizza oven into your backyard is more than just an upgrade to your cooking arsenal; it’s an investment in a lifestyle of joy, warmth, and gastronomic exploration. Let’s make every meal and gathering unforgettable.

Posted on

Ways to Use Your Fire Pit in the Summer

During summer nights, we often want to spend time outdoors, but lack a good way to do so. In a word that is so dominated by screens on our phones, computers and TVs, spending quality time around a fire pit is a nice return to simple living, free of distractions. Not only do outdoor fireplaces and fire pits provide warmth at night, but they can also act as a very design-driven centerpiece in your patio or backyard area.

With days getting longer and warmer as summer approaches, we have all the more reason to spend our free time outdoors. However, once the sun sets, it might be less tempting to stick around in your backyard. This is why it makes sense to install an outdoor fire pit this summer. This neat, unique hardscape feature will surely make your outdoor celebrations, family gatherings, and barbecues the talk of the neighborhood! Read below for a few ways to use your fire pit this summer – or why to get one if you have yet to take the plunge!

Free People Roasting Marshmallow Stock Photo

Fire Pits are a Great Way to Style Your Patio

Outdoor fireplaces can be built to match the design language of your home. From metal to stone they come in a wide variety of styles both modern and more traditional. A high quality fire pit can definitely set the tone for the rest of your back yard or patio set up, and many enthusiasts end up investing in higher quality outdoor furniture once they realize how much time they are spending outside.

With a natural stone veneer surrounding the fire pit, you have no cause for concern since the sparks and smoke will be contained within the fire pit area. Also, having natural stone surrounding this part of your backyard is a great way to make your backyard unique as well as enjoyable.

Although you might need to adapt your backyard a little bit by constructing a path made of pavers or slabs, all the effort and investment will be worth it in the end. Furthermore, you can decorate your backyard with the fire pit taking center stage. You can further embellish a path leading to the fire pit with sculptures, stones, garden gnomes, or flowers. These additions will transform your regular backyard into an organic oasis where you can socialize, party, or contemplate on your own in the evenings.

With a fire pit in place, you can organize all kinds of gatherings that will leave a lasting impression on your family, friends, and neighbors this summer. If you do not have the time to take care of plants and flowers, a fire pit will be a true statement piece that will make your backyard stand out effortlessly.

Fire Pits are Easy to Install

Fire pits are relatively inexpensive and easy to install compared to some of the more complex backyard staples such as pools, trampolines, or playgrounds. Not only are outdoor fire pits affordable, but they can definitely contribute additional value to your home and can be a great selling point for those looking to put their house on the market in the near future. Fire pits are available at nearly every price point, from simple fire bowls to custom stone or iron, you can find a fire pit for any budget.

Fire Pits are Great for Gatherings

A fire pit creates a focal point for your outdoor gathering. Some might say that it is simply in our genes to gather around a fire. Solidify your position as the go-to host for the neighborhood barbecue with a centerpiece that doubles as a conversation piece.

Aside from cooking, you can use your fire pit as a gathering spot all year round. You can make desert-themed parties in the summer, Halloween parties in the fall, and family gatherings in the winter as well. Not to mention a huge bonfire makes any birthday party an event to remember. Furthermore, you will probably be inclined to spend more time in your backyard. A fire pit can also serve as a setting for stargazing with your family or friends.

Fire Pits Come in a Variety of Fuel Options

The most popular fuel option for fire pits are wood, natural gas, and propane. If you’re looking for a more natural experience and you have more space, wood is a great option, but be aware that it is more work to find firewood, chop it and light a wood fire. Natural gas and propane have the benefits of being ready to go at the flick of a switch. They also require less space and are usually more safe than a wood fire pit. The main difference is that a natural gas pit cannot be moved and pulls from your home’s supply of natural gas. A propane powered fire pit can be moved, but you also have to deal with a clunky propane tank which is not always the most stylish option.

Fire pits that use gas are also reasonably easy to maintain. You do not have to worry about running out of wood. Furthermore, fire pits that are lit up with propane reduce mess, ashes, and other debris. They are also easy to start, eliminating the need to stack and replenish wood or coal to maintain the fire. It is not only supplies and low maintenance that might lead you to opt for a gas-powered fire pit. These kinds of fire pits are also safer because they do not emit sparks, which is crucial in dry summer months when the grass and foliage dries and becomes flammable.

Fire Pits Can Serve as Outdoor Kitchens and Dining Rooms

Unlike other nice landscape features that you can add to your backyard, such as fountains, fire pits can also be very practical. Aside from the usual marshmallow roasting, you can extend the functionality of the fire pit by placing a grill grate or a rotisserie over the flames. Thanks to this makeshift stove, you will be able to grill as many sausages, steaks, or fish as you want. You will no longer have to clean and air out your indoor kitchen, which can be really hard, especially in the summer. Also, you can place a table and chairs in the vicinity of the fire pit and thus make an outdoor dining room. This will transform your regular evening meals or barbecues into cozy, exciting, fire-lit events under the stars.

Extend your Interior Decorative Style your Fire Pit Area

Fire pits are so much more than just a stone or metal barbecue. They are made in all shapes and sizes, which means you can construct them to fit your aesthetic preferences. If you are traditional when it comes to design, you can install a rustic, bowl-shaped pit surrounded by natural rocks and stones. In contrast, if your personal taste gravitates toward minimalistic, modern lines and structures, your fire pit can reflect this, as well. Flat, smooth paving with a simplistic stone or marble ledge surrounding the fire pit makes for a perfect chill-out zone for your family and friends to make use of in the summer.

All in all, if you decide to install an outdoor fire pit this summer, you can use this opportunity to showcase your style and aesthetic affinities tastefully and practically.

Posted on

6 Tips to Get the Most Out of a Fire Pit in the Winter

An outdoor fire pit is often considered a summertime luxury. Winter is knocking at our doors, and it will not be long before we take out the winter jackets from the bottom of our drawers and the back of our closets. But before any that happens, we need to make sure that our houses are warm for the upcoming winter. Some people have the tremendous benefit of owning a yard or patio, and, contrary to what some people may think, yards too can be a cozy spot to spend time in even during the coldest season. All of this is provided you have a fire pit, of course. Need some tips on how to stay warm and cozy in your backyard this winter? Starting with the more practical and ending with some fun, here are some useful winter fire pit ideas that will give you the chance to try a different kind of recreation this holiday season.

  1. Use a lid or cover on your fire pit to keep it clear from snow

This is an important step, maybe the most important step, to enjoying a fire outside during the winter. Similar to your grill, you want to keep some type of cover over the main part of your fire pit to prevent snow from collecting inside. A wet base can make it more difficult to start a fire. If you unfortunately left the cover off or have not purchased one yet and there is already snow inside, shovel out as much as you can.

As an alternative, if it is a light and portable fire pit, consider moving it to a covered area, whether under an awning or on your porch (as long as it has cooled down and the embers are no longer active, of course).

  1. Keep your firewood dry or give your gas fire pit a quick once-over

Like we mentioned above, wet can make starting a fire difficult. It is not impossible, but you will end up with more smoke and less flame. Store your firewood in a dry place throughout the winter for quick and easy fire starting. Also, make sure your kindling is dry.

Ensuring the wood is dry will yield warmer, faster results because it increases the surface area and allows room for more oxygen to get to the fire. Additionally, softwoods (wood from coniferous trees such as pines, spruces and firs) typically generate the most heat. Softwoods are also easier to start a fire with.
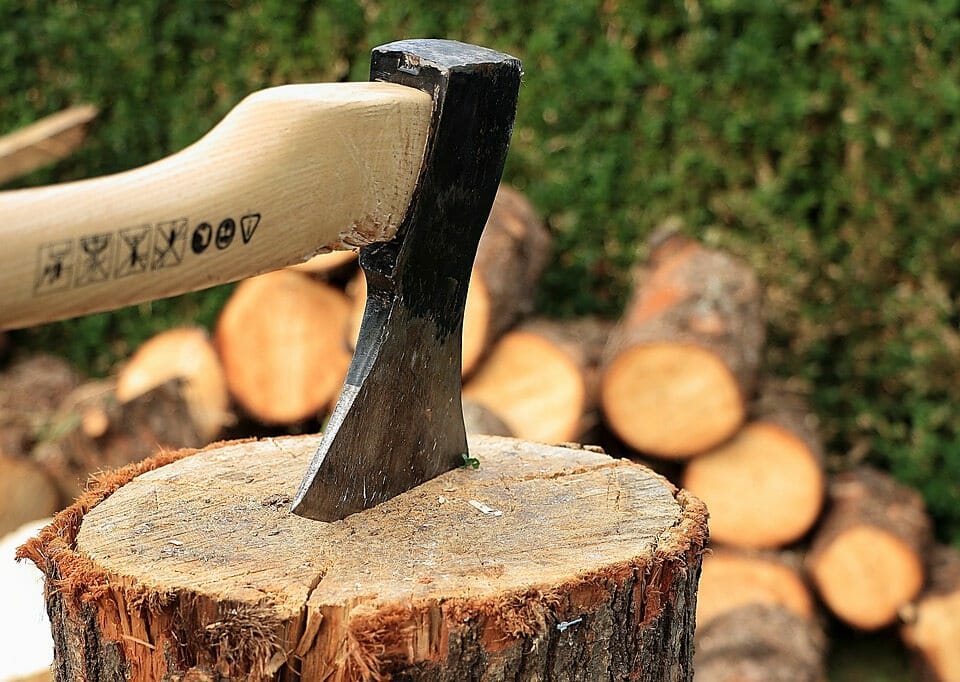
For a gas fire pit, just give the unit a once-over to make sure nothing is leaking or caked with snow that would prevent it from working properly and safely.

  1. Dig a path to your fire pit

After snowfall, it might be delightful to build a fire to stand around as you build igloos, have snowball fights, and sled the day away. Create a clear path to your fire pit to keep your guests a little warmer than standing in knee-high snow. You can do this when you go to check on the fire pit and set up the scene. For a more festive area, put that snow to good use and build an open igloo around the fire pit for a fun twist to the experience.

Make it even easier to find your way to the fire pit by adding lighting along the patio or pathway. There are many solar lantern options available or string lights in nearby shrubs or trees to create a magical glow in the backyard.

  1. Make sure seating is dry and bring out some blankets

Clear off the seating area of snow if you already have chairs, benches, or other seats around your fire pit. If you can bring already clean chairs over to the area, that might be better as they will not  be as cold and wet. Another festive idea is to use large tree stumps as seats. If you do not mind the cold, you can get creative and build seating made of snow!

Do not forget the blankets. It can help keep guests warm as they take a reprieve near the fire. Store the blankets in a large, plastic tub to keep them from getting wet.

  1. Sit back and enjoy

The fire is built, the family has bundled up, and the fun is being had in the snow. While you are around the fire, bring out the s’more supplies and some hot coffee and cocoa. A fire pit just is not complete without drinks like hot chocolate or Bailey’s and coffee! Prepare thermoses or use insulated cups to keep drinks warm. Just add roasted marshmallows and you are set!

  1. Throw a Party

More bodies mean more heat and warmth, so the more, the merrier when it comes to keeping warm! Having an outdoor fire pit is the perfect way to extend the living space especially for giving guests an extra area to go and relax during parties and other indoor gatherings.

Start a roaring fire in the backyard and make sure to light the pathway to the fire pit well! Create zones for guests to grab hot chocolate, cozy blankets and a roasting marshmallow/s’mores station.

Beat the winter blues by cooking some great foods over the fire reminiscent of summer nights. You can do s’mores, hotdogs, foil meals, sweet potatoes, and any camping food to help get out of a winter slump. A fire pit cooking grill, grate, or tripod is a great accessory to pull out of the shed to do this. Do not forget to keep a warm beverage nearby while cooking.

Wood grates are also another great option to maximize the amount of heat in a pit. These are steel grates that are placed in the bottom of a fire pit to lift the wood up a little and allow more room for oxygen and air circulation.


Fire pits do not need to be limited to use in the summertime, the cozy glow of a warm fire can easily be enjoyed year-round, including winter.

Whether you are gathering with friends around a roaring fire in the yard or quietly enjoying an evening around a small fire after the kids go to bed, the frosty winter night can be an outdoor escape if you want it to be, just take a look at all of these great ideas above to make your space extra cozy

Posted on

Accessories for your Fire Pit: Part 3

Some items you will need for your fire pit are flat out necessary, such as those discussed in Part 1 of this series, which are products used for safety and are not negotiable. In Part 2, we have also written about non-safety items that you need to have in order to operate your fire pit. However, some accessories, while not integral to running your fire pit, are designed just to make your life a lot easier. They are not absolutely necessary, and you can manage without them, but they will make your fire pit experience go a lot smoother and it will be much more enjoyable and carefree. In this part of the series, we will talk about all those bonus accessories that are nice to have as extras as a fire pit owner.


1. High-Quality Fireglass or Firerock

For a propane or natural gas fire pit, you will want some good quality fireglass or rock to line your fire pit. Many propane fire pits often come with low-quality fire pit beads in the traditional clear color. This may or may not be the look you want, but in many cases, if the fire pit is not from a reputable vendor, the glass beads can include broken pieces with sharp edges that can cut you when you move it with bare hands (another place for your new fire pit gloves to come in handy).

Additionally, many propane or natural gas fire pits come with lava rock as an alternative to fireglass. While lava rock performs well as a low-cost retainer and distributor of heat, it too might not be the style you are going for in your backyard gas fire pit, depending on your taste. While lava rock does do a good job at what it is intended for, it is not the most interesting to look at and does not stand out at night, lacking the shimmer and color options of the wide variety of fireglass choices on the market today.

If you are planning to build a propane or natural gas fire pit or have one already installed, or even if you just want to try out a new decorative scheme or backyard ambience with your current fire pit media, look for quality tempered fireglass that will not crack or shatter and will hold up to constant heat exposure and weather.

Check with your local outdoor or fire pit specially store to discuss what type, size, and color fireglass you are looking for and explore your options before you buy. The fireglass market is huge and you want to get a good understanding of what is out there. If you want something truly unique and special, consider trying out one of our custom steel gas log sets. This gives the rustic and cozy appearance of using natural wood to fuel your fire pit, without the effort of actually acquiring wood and building a fire each time.

2. Seating for your Fire Pit Area

If you are looking for seating that can be brought out and put away each time you have a gathering around the fire pit, folding chairs are an excellent option. Everyday metal folding chairs will do, but for something a little more comfortable and sturdy (and designed for the outdoors already), another choice to opt for is a set of nice camping chairs. These come in a range of options from basic to more luxurious with extra bells and whistles, such as cup holders, pockets, and extra padding, so you can cater your seating to any type of style or gathering. Best of all, when you are done, you simply fold everything up and put it away in a canvas or nylon bag that comes with it for easy storage.

Of course, if you prefer something more permanent that you do not have to set up each time and have a dedicated place in your yard for it, there are lots of gorgeous and affordable patio sets on the market for every taste and style.

3. Natural Mosquito Repellents

If you live in a buggy area, the great thing about owning a fire pit is that it can be its own method to ward off pesky biting pests during an evening spent outdoors. You could try burning pinyon (or piñion) firewood. Flying insects of all kinds, especially mosquitoes, do not like the smell it gives off when burned and stay away. It is somewhat localized to the U.S. Southwest, but you can search for it though online and specialty retailers, and it will really do the trick.

Additionally, the smoke from burning sage or rosemary will help keep mosquitoes away, as well. Be sure that you do not use the dry ground up stuff found in your pantry – it has to be fresh sage or rosemary. Buy either herb in bunches at your local supermarket and throw a little on the fire throughout the entire time you are outside.

If you do not feel like keeping fresh herbs on hand to keep mosquitoes at bay during your next fire pit burn, there are also other burn-in products available that are specially made for this purpose that you can keep on hand for when you need it. These products are usually made from recycled wood or other burnable material that has been treated with citronella, citrus, geranium, thyme, peppermint, cinnamon, rosemary and/or lemongrass, which are all things mosquitoes are not fond of.

4. Firewood Carrier

Once you have split and stacked your firewood, you will need something to keep the number of trips to the woodpile to a minimum. A good waxed canvas firewood carrier can help you carry more logs comfortably and keep you clean in the process from not having to carry a stack in your arms.

5. Propane Tank Stand

If you have a gas fire pit and its propane tank is not stored inside the fire pit unit itself, a stand can be a very useful tool for keeping it upright and out of the way while in use, in storage, or in transit. Further, if your propane tank is regularly left out in the elements, a tank stand will keep rust rings from forming on your wood or concrete patio. It is a very small investment for a lot of payoff. Rust rings can be a real pain to get off stone or cement once they have formed.

6. Fire Pit Heat Deflector

It is no secret propane and natural gas fire pits do not give off quite as much heat as their wood-burning counterparts, so being able to channel that heat exactly where you want it makes your gas fire pit that much more functional and useful. This is where a fire pit heat deflector comes in handy.

A fire pit heat deflector is essentially a square or round heat shield, positioned above your fire pit to vector heat outward where you want it, thus having it disappear vertically where it does the least good for everyone nearby. Additionally, if you are using your gas fire pit under an overhead covered structure, such as a gazebo or a pergola, a heat deflector will minimize the long-term effects of regular heat exposure on those structures. If you have a longer, rectangular shaped gas fire pit, multiple heat deflectors can be used side by side to cover the entire burner pan.


Posted on

Accessories for your Fire Pit: Part 2

What good is having a fire pit if you can’t use it to its full potential? That is where all the fun accessories come in! In our last post in this series, we focused on items that are absolute must-haves and non-negotiable for operating your fire pit safely and being prepared for any scenario. In part 2 of this series, we will discuss the various items you need that will make your home fire pit experience easier and will ensure everything runs smoothly. Read on to learn more about the accessories you need to use your fire pit effectively.


1. Pair of Fire Pit Tongs

This one likely does not need a lot of explanation, but having a good set of solid fire pit tongs can be a big help when moving firewood around or to your fire pit safely, especially when you are trying to add wood to a specific spot in a hot fire. Tongs can help you do all of that with less risk to yourself or your clothing, and as you know by now, safety is paramount when it comes to fire pit use. There are a lot of cheap flimsy options out there, so do your homework. Check out a pair at your local fire pit/fireplace specialty store and actually pick them up and handle them, or go with a trustworthy, well-made option like our handcrafted fire pit log tongs.

2. Fire Pit Poker

This is another pretty common fire pit tool. Having a poker on hand is great for repositioning wood already in the fire pit. If you are adding wood and trying to avoid having your stack collapse under the weight of what is being added, being able to safely move wood around to a better location without getting too close to the heat source is a must. However, the main problem with traditional pokers, like the ones used in fireplaces, is their length. Most fireplaces are not particularly deep, and the need for a long poker just is not there.

Wood-burning fire pits, on the other hand, are getting larger and larger as demand grows, and the need for longer pokers to get good there, while maintaining some distance, is growing with it. When shopping for a fire pit poker, try to pick up the longest option you can find. Most fire pit pokers generally come in the 25 to 45 in. range. If you are able, shoot for a poker that has a combination of length and light weight to minimize fatigue when moving wood around your fire pit while still allowing you to keep your distance. A solid but lightweight option is our fire poker with ball. It is even stylish, with a lovely decorative touch!

3. Heat-Resistant Gloves

On occasion, you may need to move your portable fire pit a few inches over for one reason or another while it is in use, or you might need to handle the spark screen when adding firewood. Like most people, you probably do not enjoy burning your hands, so it is a good idea to keep at least one heat-resistant glove in your pocket or nearby and handy when using your fire pit. Having a pair of gloves is quite nice, especially when you need to lend one to someone who is helping you out with maintaining the fire or cooking over it.

Like most accessories on this list, there is a range of options you can choose from. Splurging for the pricier gloves may seem like overkill, but the confidence you gain knowing you will not get burned when you use them to touch something hot will be well worth it. There are some slightly cheaper options out there, but just make sure you are getting what you pay for and that they are properly rated for the temperatures you will be handling.

4. Homemade Fire Starters

Save your newspaper for your wood-burning fire pit, just like you would for a fireplace! It is a cheap and easily accessible for starter and does a pretty good job getting the kindling started. Once your initial firewood stack is ready, just loosely ball up a couple of pages of newspaper and stuff them into pockets of space at the base of the stack. Light when you are ready – it is as simple as that.

Another cheap and very effective tool in getting fire pit fires started is using toilet paper rolls stuffed with dryer lint. Dryer lint lights very easily and burns quickly, lighting the paper in the roll, which lights your kindling and so forth. You can probably get creative with other types of fire starters you can find around the house, but always make sure you use a material that is safe to burn and will not cause any toxic fumes or other hazardous situations.

Of course there is nothing like cheap or free for effective fire pit accessories, but sometimes it makes more sense to spend a little more and save some time with a purchased product. There are a number of commercially available fire starter products on the market if you do not want to bother with the suggestions above. Most are made from cedar or fatwood shavings and some sort of wax binder.

5. Lighter or Fire Steel

You know that cheap disposable plastic utility or barbecue lighter that you keep hanging around in the junk drawer in your kitchen? The one you have to try to light several times before it produces a flame and whose spark blows out in the slightest of breezes? Believe it or not, there are better options out there for lighting your fire. If you are not using a windproof butane or electric arc lighter to light your fire pit, you are missing out on making your life a whole lot easier. When they work as they were designed to, they can’t be beaten for performance. Electric arc lighters are easy to operate, do not need too be refilled with gas, and are cool to look at, but be warned that if you have a dog or are considering getting one, they typically do not like the high-pitch sound arc lighters can make and may start barking in response. In this case, you may want to opt for a windproof butane lighter instead.

If you are a little more traditional, a fire steel or ferro rod, is a solid choice as you will not need to fill it with butane or charge its battery – it always works out of the box.

6. Firewood Ash Bucket

When cleaning out your wood-burning fire pit the day after a burn or removing hot ash from the fire pit during or after a fire, having a solid firewood ash bucket on hand is a definitive must-have. Whatever the situation, an ash bucket is a safe, clean, and durable option designed for storing your ash until disposal or use for other purposes.

It is important to choose a durable option. Look for features such as a double bottom to avoid burn through and galvanize iron which means it will be more resistant to rust while handling whatever heat is thrown at it. You will also need something to scoop the ash with. Try our handcrafted ash shovels, which are made from recycled 55 gallon drums. The curve of the handle follows the curve of our pits making it easy to scoop out your ashes.

Posted on

Cooking Over a Fire Pit

One of the best benefits of owning a fire pit is that you can cook on it outside. Instead of having a separate grill for food, you can recreate those campfire memories in your own backyard. There is something really spectacular about cooking over a fire that makes you feel connected to nature, while being incredibly comforting and cozy, with the sounds of crackling embers and delicious smells rising up around you. Cooking over a fire pit is actually a lot easier than many people think. If you would like to learn how to get started, read on for more. 

Grilled Meat on Charcoal Grill

What Fuel to Choose 

If you want to experiment with smokey flavors when cooking in a fire pit, you may use wood, charcoal, or a combination of both. Charcoal has the advantages of being relatively easy to light and burning at a high temperature. It is ideal for beginners or foods that have already been marinated or seasoned. Charcoal will not give your dish with a strong smokey flavor, so the flavors will not be overpowered. If you want to enjoy sitting around the joyful blaze of a wood fire after you cook with charcoal, simply toss some logs on the hot coals after you are done. 

Wood is a more traditional fire pit material that is rather straightforward to light as long as you choose the right wood and know how to set it up. The most dependable options for a steady fire seem to be the teepee or log cabin methods. To build your fire, start with tinder, work your way up to kindling, and then lay down the firewood. 

Small, quarter-inch thick dry sticks, straw, pine needles, or bark can all be used as tinder. We do not recommend using leaves or paper, since they can quickly produce fly ash, which can start a fire outside of your fire pit or cause burns. Sticks or twigs that are somewhat larger should be used as kindling. If you’re using charcoal, this would be a good time to light it. 

After your kindling, add some logs of a reasonable size. A dry, seasoned hardwood is the preferred choice. Oak and other similar hardwoods will burn strong and cleanly. Green woods and softwoods should be avoided, as they will spoil your meals. Softwoods, like as pine, may emit an unpleasant toxic resin that will ruin the taste of your food, while green wood will sputter too much. 


How to Set Up 

The location of your fire pit is critical for having a safe fire cooking experience. Make sure the fire is not under an overhang or overhanging foliage, on a flammable surface, such as a wood deck, or surrounded by plants if it is in the ground. After you’ve safely placed your fire pit, you will need a fire pit grill to cook on. These come in a number of styles and sizes, but they are really just a cooking grill that stands over a fire. To make cooking over hot coals easier, some of them include adjustable heights and angles. A different kind of grill will sit above your fire. 

Next, you will need something to cook with! You should stock your outdoor cooking set up with some basic barbecuing utensils, including a pair of tongs, a spatula, and a grill brush. Make sure these utensils have lengthy handles so you do not have to worry about scorching your fingers while you are cooking. 

Digital and surface thermometers are useful instruments to keep on hand, particularly if you are a newbie. A surface thermometer can tell you how hot your grill is, and an instant read digital thermometer can tell you if your meat is cooked properly. A lid is also a handy item to have on hand for your fire pit grilling activities, since it expands your cooking options. You can use indirect heat to grill bigger chunks of meat and make baked dishes if you use a cover to keep the heat in. 

Make sure you set up you fire pit in such a way that you can avoid cooking directly over the flames, using too much heat, or letting your food cook over too much smoke. Creating a two-zone system is the simplest approach to achieve this. The fire will burn down logs into embers on one side of the fire pit, and then the embers can be pushed to the other side, where you may cook over and around them. If you use this method, your food will not be burned by the flames, and if your embers start to die, you have plenty more you can quickly add from the fire zone. 


Heat Management 

To manage the heat you are cooking over, you will likely require some experience, but it is not difficult to master. It is best to begin with cooking smaller chunks of meat if you are just learning how to cook over a flame. Starting with one-inch chunks will help you understand how to how things cook on a grill and how to moderate the smoke levels of your meal. 

There are the two basic ways to manage how much heat your food is cooking over. Be aware of how close your food is to the embers and how many embers there are. If the fire is too hot, you may either shift the embers away from the food or move the food away from the embers and closer to the grill’s borders. You can also vary the angle or elevate the cooking surface on certain fire pit grills. 

If your food isn’t getting enough heat, simply reverse the process. More hot embers should be placed under the meal, or the food should be moved closer to the embers by moving it to a more central position on the grill or by moving the grill itself. To obtain the desired amount of smokiness, follow the same steps. 


Cooking with Direct Vs. Indirect Heat 

Starting with the slowest-cooking foods ensures that everything is ready at the same time. Keep in mind that thicker cuts of meat will need to rest for a few minutes after being pulled from the grill, and that they will continue to cook for a few more minutes after being removed. This means you’ll want to remove them from the grill just before they’re done, or else they will be overdone. A thermometer is a great tool for nailing down the proper time and temperatures. 

Smaller slices of meat and cuts that don’t need to be cooked all the way through, such as steaks, can be cooked over direct heat from the coals or embers. It is perfect for getting a nice sear or cooking small portions of meat, like kebabs. Hot dogs, hamburgers, and similar foods can also be cooked over direct heat. 

Larger cuts, like roasts, will sear and char on the outside before cooking on the inside. Therefore, they will benefit from indirect heat. You’ll need a lid for this procedure. Place the meat around the embers rather than right over them, then cover the fire pit with the lid. This will trap the heat, and the hot air and smoke convection will slowly cook your food through without scorching the outside and leaving the inside uncooked. A surface thermometer is a useful tool for monitoring the temperature beneath the lid.

Posted on

Patio Ideas for Small Spaces

You absolutely do not need a grand, sweeping backyard to create an enjoyable and stylish outdoor living space. In fact, some of the most cozy and creative designs have been created as a result of the need to save on space. Whether you live in an apartment with small balcony or have a small patio or yard in a crowded neighborhood, there are tons of options for making your outdoor living space just as comfortable and stylish as if you had all the room in the world. Read on for our tips on how to make the most out of your small outdoor space. 

Wine Glasses on table Near Pillows

Built-In Bench 

If you are a homeowner and have the option to make modifications to your home, you should consider creating some built-in furniture for your outdoor space. Not only will a built-in piece last longer than other furniture, it will save space too. You could create a custom stone or concrete bench that is flush with the side of your house, or you could build a wood seat that fits perfectly between two columns if you have a covered space. With a custom piece you also do not have to worry about finding the right fit, and you can be sure you get the most out of the space you have as possible. 

Hidden Storage 

Storage for various items that are not always in use is a great way to maximize space. Pillows, throws, and entertainment items can all be easily stashed away somewhere that won’t take up room inside your home, which is a good idea in any climate. This is even better if you can reuse space that would go to waste or be unused otherwise. A bench or ottoman with a lifting top and storage capacity are great multi-use options, as is a crawl space built under your deck. 

Multipurpose Furniture 

Similar to furniture that doubles as storage, other multipurpose items can be of great use in a tight space. Even in larger outdoor living spaces, flexible furniture can make your patio a lot more versatile for any type of gathering you want to host. Other ideas include a sturdy coffee table that can double as extra seating, flat stools that can be side tables when you have fewer guests but need more surface areas, or large, weatherproof throw pillows that can be placed on the ground and used as floor cushions. 

Outdoor Rug 

A colorful rug is a great way to add a touch of pizzazz to a cozier patio and can help a small space feel more intentional. The right size rug can outline the borders of your space, which is helpful if you have a smaller footprint. Be sure to choose a rug made with materials for outdoors that will hold up better to the elements. 

Faux Grass 

Another good option for covering the ground of your outdoor space is faux grass. This is an especially good choice for urban environments or balconies. You may not have the space for a real backyard, but fake grass can add some ambiance and color to your outside area, without all the upkeep that comes with a real lawn. If you want your grass to look more real, make sure to lay it across an entire defined area. 

Micro Garden 

Contrary to popular belief, you do not actually need a huge amount of space, or even a yard, to create a garden outside of your home. If you have a balcony or another type of outdoor living space without ground access, you can satisfy your green thumb with a container garden. This means you will grow everything in various containers or pots. This actually affords you a lot of flexibility in design and style, as well as in moving things around and rearranging. You can use your pots as fun accent pieces to tie your color scheme together or create a jungle feel with hanging potters and vines. A great space-saving idea is to create a vertical garden with leveled shelving to house your plants in a more compact way. With a little research, you will find there are many types of flowers and edibles plants that grow well in confined spaces. 

Outdoor Drapery 

Particularly if you live in an apartment building with multiple units with balconies or your home is in very close proximity to your neighbors, you may be interested in a bit more privacy in your outdoor space during the nice season when everyone wants to be outside at home. While a wall or other more permanent barrier may feel a little claustrophobic and may not even be allowed if you rent, curtains are great way to create a little distance between you and your neighbors, while still maintaining an airy, light feel. Outdoor curtains can have the added benefit of providing some shade for sun protection. If your patio is uncovered and if there is nothing to hang drapes from, you can easily craft a simple wooden frame for this purpose. 

Fire Pit Table 

A fire pit is the ultimate in outdoor living luxury, but you may think you do not have room for one in your tiny outdoor living space. A fire pit table could be the solution to your problems. You can easily get a separate, storable tabletop to cover the fire pit while it is not in use, so you can use it for outdoor dining or game night. As the night wears on, you can remove the cover to generate some warmth with the fire and roast some marshmallows. 

Grill Grate for Fire Pit 

One of the most coveted uses for patio spaces is for outdoor cooking. However, if you have a very small patio space, you may not want to take up precious space with a bulky grill. If you already have a fire pit for your patio, whether it is portable, built-in, or a table pit as mentioned above, you can actually turn this item into your cooking station without adding an extra piece of furniture. Simply add a removable grate for grilling, and you have instantly saved a sizable amount of space for other kinds of furniture. 

Use Your Overhead Space 

You may be able to eke out more space on your small patio if you just look up. Whereas a shade device like a standing or table umbrella might take up floor space or be in the way at head-height with people passing back and forth, a shade sail can be just as effective without occupying valuable square footage on the ground. A shade sail can be affixed to your house and another nearby sturdy object. This also allows you to play with the height and angle of the sail to create a more open feel for your space. The same goes for lighting. If you do not have lighting fixtures already wired to the outside of your home, you may opt for floor lamps for evening hang outs. A better, low-cost and easy-install option is to hang strings of fairy lights. 


If you have a more confined outdoor living space, you may need to account for every square foot you have available. However, as we have shown, there are plenty of easy ways to make your small patio feel roomy and inviting.

Posted on

Fire Rings Versus Fire Pits – What Is The Difference?

Fire Rings Versus Fire Pits – What Is The Difference?

Some of the best memories that you will create with family and friends are made around a fire. You do not need to rough it at a campground or deal with the hassle of lighting a fire in your fireplace to enjoy the warmth and the inviting glow of a fire.

At S&S Fire Pits, our customers often ask us about the differences between a fire pit and a fire ring. While these two options are similar in several ways, a fire pit is a superior option for many people. Before making your final selection, you should get familiar with the advantages of a pit.

Backyard Aesthetics

For many folks, the best place to relax around a fire is in the backyard, but the placement possibilities for these two options in your yard will vary. A fire pit ring sits directly on top of the ground. Often, homeowners will invest in expensive masonry work to surround the ring. The ring becomes a permanent, immobile fixture in the yard. Because it is a primary gathering space, it often takes up a considerable amount of the yard space throughout the year.

A fire pit, on the other hand, sits in a slightly elevated position. All of our pits at S&S Fire Pits are handcrafted using solid steel. They are available in a range of styles, so you can easily find one that elevates your yard’s ambiance. Because they sit on top of the ground, they are mobile.

This means that you can place your pit off to the side when it is not in use. While they will be a focal point in your space while in use, you are not committed to having a permanent fixture. You can even use a snuffer to cover the top of the fire pit when it is not in use. By doing so, you can turn your fire pit into a table or a place potted plants on top of it.

Longevity Of A Fire Ring

Because a ring sits directly on the ground, it is prone to rusting and related deterioration. This directly affects the life of your ring. With a relatively short lifespan compared to a solid steel fire pit, you can enjoy greater overall value from the pit.

In fact, all of our solid steel fire pits have a lifetime guarantee. As the steel becomes weathered and aged, it will not deteriorate. These effects actually make the fire pits look more rustic and beautiful over time.

A Variety of Uses

The fact that a fire ring sits on the ground and is a permanent fixture can limit how you use it. While you could cook over a ring, you will need to bend down considerably. You may even need to sit on your knees or squat as you cook.

On the other hand, a fire pit may sit more than 18 inches above the ground. The raised position of a fire pit makes it much more convenient and comfortable to use as a cooking surface.

Once you select a location for your fire pit ring, you are locked into that location permanently.

A fire pit, on the other hand, can be moved into the front yard for a block party or even taken to a campground or another location. The mobility of a fire pit dramatically increases how frequently you can enjoy using it.

The Matter of Safety

Depending on the type of ring that is in a yard, it can have several potential safety hazards that are not a concern with a fire pit. The ring’s lowered stance directly on top of the ground can create a tripping hazard.

Because the ring cannot be moved, this hazard remains in place throughout the year. In addition, some types of fire rings are less capable of fully containing the fire. It may be easier for a small campfire to turn into a bonfire and to potentially cause property damage. Logs rolling out of the ring may also be a concern.

A fire pit, on the other hand, has a bowl-like shape. This shape and the pit’s position over the ground effectively prevent the fire’s size from growing out of control. The rounded shape of the pit also prevents logs from rolling out of the fire. If you invest in a snuffer for your fire pit, you can quickly and easily put your fire out when you are ready to head indoors.

Cleaning and Maintenance Chores

You will need to remove the ash and other debris from both of these fire features regularly. Once the debris has had ample time to cool down, you will need to shovel it out of the ring. Given the ring’s low placement directly on top of the ground, this can be rather grueling. Also, any nicks in the material should be sealed as soon as possible. These nicks can quickly lead to irreparable damage to the ring.

While a fire pit also needs to be cleaned out thoroughly, this process is generally easier to do. All of the ashes and debris are contained within the bowl. Most fire pits are only a few feet wide in diameter.

They are large enough to meet all of your needs for warmth, cooking and entertaining, but both their dimensions and their elevation above the ground make them easier to clean. In some cases, it may also be easier to remove debris from a fire pit because it can be moved to a more convenient location for cleaning.

How to Choose a Fire Pit

While you may have started your search looking for a custom fire pit ring for sale, you can see that a solid steel fire pit is a better overall option when all important factors are reviewed carefully. Now that you have narrowed down the possibilities to a pit, your next step is to select the perfect one for your home.

Some fire rings can cost several thousand dollars, so you may appreciate the affordability of a fire pit. All of our fire pits are handcrafted using solid steel, and they have a lifetime guarantee.

We also offer short-term financing so that you can more conveniently pay for the fire pit that is a perfect fit for your space.

After you establish your budget, you are ready to narrow down the options by size. Our fire pits range from 30 inches to 42 inches. Several dozen styles are available with variations to the bowl shape, the base and the overall decorative look.

Both the hemisphere and the elliptical bowls are available on a flanged base or a three-leg base. With dozens of styles to explore, you can likely find a superior alternative to a custom fire pit ring for sale.

Before you finalize your purchase, remember to order all of the accessories that will elevate your experience with your new fire pit. Some of these items are a snuffer, a cooking grate, a spark screen and a firewood rack.

At S&S Fire Pits, we are passionate about helping our customers enjoy the full outdoor living experience with the ability to gather around a fire pit to cook, relax and stay warm.

You could plan to purchase a new fire ring every few years, or you could invest in a fire pit that has been handcrafted to last a lifetime. Take time to explore the many styles of quality fire pits available on our website.

We are always happy to answer questions so that you can make a selection that brings you pure enjoyment in the years ahead.

Posted on

Charcoal Grill vs Wood-Burning Fire Pit: Which Cooking Accessory Is Right for Me?

Nothing compares to the smokey, char-grilled flavor of food cooked over an open flame. From steaks and pork chips to chicken and ribs, an open flame will naturally seal the outside of meats while locking in its juices in the process. This means the outside of your meat will have a crispy or semi-crispy texture, yet the inside will remain juicy and delicious.

There are different accessories with which you can cook food over an open flame, however, the two most popular of which include charcoal grills and fire pits. Using either of these accessories, you can cook delicious meats and vegetables over an open flame. But charcoal grills aren’t the same as fire pits, and it’s important to understand the differences between them when choosing a cooking accessory for your outdoor living space.

Aesthetics

In terms of appearance, fire pits are the clear winner. While charcoal grills are available in a dozens of styles, most lack the attention to detail and overall aesthetics of high-quality fire pits, such as those offered here at S&S Fire Pits. If you’re trying to design an attractive outdoor living space, there’s no substitution for a high-quality fire pit. Along with its practical purposes — cooking, creating warmth, relation, etc. — it will add a unique visual element to your outdoor living space that compliments or even enhances the decor.

Health

Cooking over a wood-burning fire pit could be better for your health than cooking over a charcoal grill. According to an article published by Men’sHealth, charcoal fires release high concentrations of carcinogenic compounds known as polycyclic aromatic hydrocarbons (PAHs). When you cook meat over a charcoal grill, the fat from the meat will melt and drip down onto the charcoal, causing the charcoal to release smoke. Unfortunately, this smoke is typically high in PAHs, which according to Men’sHealth, could pose health risks.

Cooking over a wood-burning fire pit, however, minimizes harmful emissions such as this. You can use a fire pit to cook meats, vegetables and even some fruits without worrying about exposing yourself to high concentrations of PAHs or other harmful compounds. Firewood has a different composition than charcoal, consisting entirely of natural, untreated wood.

Heat

Both a charcoal grill and a wood-burning fire pit can warm your outdoor living space during the cold late fall and winter months. Fire pits, however, generally offer a superior level of heat when compared to grills. This is because grills — whether gas or charcoal — are used primarily for cooking, whereas fire pits are designed for a variety of purposes, including cooking as well as producing heat. With its open design, a wood-burning fire pit will produce a substantial amount of warmth that’s felt throughout your outdoor living space.

Maintenance

Charcoal grills and wood-burning fire pits require similar maintenance. After using either of these accessories, for example, you’ll need to shovel and dispose of ash (wait until it’s cool, of course). It’s also recommended that you can your charcoal grill or wood-burning fire pit with soap and water on a regular basis — but that’s about it! Neither a charcoal grill nor fire pit is a “maintenance-free” accessory. Assuming you dispose of the ash and clean it regularly, though, these accessories can last for years or even generations.

Portability

Wood-burning fire pits are usually more portable and charcoal grills. They feature a compact design, allowing you to easily transport them to different areas of your outdoor living space or property. In comparison, most charcoal grills are large, heavy and difficult to move. Even if a charcoal grill has wheels affixed to the bottom, you may struggle to roll it across your property, especially if the ground is bumpy or uneven. To move a fire pit, all you have to do it list and carry it to your desired location. You can even transport your fire pit in a vehicle if you want to go camping or host a barbecue at a local public park. This isn’t possible with most charcoal grills.

Cooking

You can cook delicious foods using a charcoal grill or a wood-burning fire pit. Many backyard chefs will agree, however, that fire pits are superior in their ability to create mouthwatering dishes. The problem with charcoal grills is that they use charcoal, which unfortunately doesn’t offer the same delicious flavor or aroma as a wood-burning flame. Regardless of what type of food you’re cooking, it will have better flavor if you cooked it over a wood-burning flame instead of charcoal.

The results are clear: A fire pit is a smarter choice than a charcoal grill that offers greater utility. Fire pits are more stylish, better for your health, create more heat, are easier to maintain, easier to transport and better for cooking than grills.

If you have any questions regarding how an S&S Fire Pit can enhance your outdoor living space; We can help.  https://ssfirepits.com/contact/


Posted on

7 Tips to Follow When Smoking Meat

Nothing compares to the rich, savory flavor of smoked meat. While grilling over a bed coals is always an option, smoking creates a unique flavor while helping to preserve foods in the process. It’s been used by countless cultures throughout history, and in that time little has changed regarding the general concept. Smoking exposes meat to smoke — typically created from wood — that seeps into the protein to make it even more delicious. If you’re planning to smoke meat, though, you’ll want to follow these seven tips to achieve the best results.

#1) Choose the Right Type of Meat

Some meats are better suited for smoking than others. Generally speaking, ribs, pork chops, steak and fish are all great choices. You can even choose some of the tougher cuts, as smoking breaks down the protein to make it more tender. Because of its large size, though, many inexperienced backyard chefs have trouble smoking beef brisket.

#2) Place Coals to the Side

Unlike grilling, you shouldn’t place your meat directly over the coals when smoking it. Rather, you should place all your coals to one side of your grill, fire pit or smoker. Doing so allows you to place the meat on the other side so that it cooks more slowly. Depending on the type of meat that you are smoking, as well as its size and other factors, it may take anywhere from two to four hours to smoke. With the coals stacked on a single side, your meat will slowly smoke over this time.

#3) Place a Water-Filled Pan on Opposite Side

After placing coals to one side of your grill, add a water-filled tin or aluminum pan to the opposite side. This is arguably one of the most important steps to smoking meat, as water promotes the formation of smoke while also promoting a long, slow burn.  Without a pan of water, your coals will burn hot and fast, resulting in poorly smoked meat. To prevent this from happening, add a couple inches of water to a tin or aluminum pan and place it on the side of your grill opposite to where you placed the coals.

#4) Choose the Right Wood Chips

While smoking requires coals, you’ll need to add wood chips as well. The coals are responsible for producing the heat, but it’s the wood chips that produce the smoke. As the coals heat the wood chips, it releases smoke that rises up and leeches into the protein-rich meat. But contrary to what some people believe, not all wood chips are made equal. Different varieties have different effects when used for smoking.

Some of the top wood chips for smoking meat include the following:

  • Hickory
  • Oak
  • Maple
  • Walnut

Although there are many other types of wood chips available, you can’t go wrong with any of the four listed above. Hickory, oak, maple and walnut create a delectable flavor that compliments most meats.

#5) Soak Wood Chips

The golden rule of smoking meat is to soak the wood chips before adding them to your grill, smoker or fire pit. When dry, wood chips will burn hotter and faster than coal. As a result, you may discover that your wood chips have burned down in just a half-hour, resulting in little or no smoke. You can keep your wood chips burning for hours by soaking them in water. Simply fill a large pan, dish or bowl with water, and submerge your wood chips inside it for about an hour. After an hour has passed, remove the wood chips and place them directly over the coals. Some people use a separate container to store their wood chips when smoking meat, but this isn’t necessary. Assuming you soaked them for at least an hour, you can place them directly over the coals.

#6) Add Coals Periodically

Because it takes anywhere from two to four hours, on average, to smoke meat, you’ll need to add coals periodically. A good rule of thumb is to add coals about every hour or hour and a half. You should keep a hot bed of white coals burning at all times. If they go out, there won’t be enough heat to effectively cook and smoke your meat.

#7) Don’t Open It

An all-too-common mistake made by backyard chefs when smoking meat is constantly opening the grill, smoker or fire pit. Some chefs open it as frequently as every 15 minutes to see how their meat is cooking. While mostly harmless, each time you open your grill, smoker or fire pit, it releases some of the smoke (and heat). As a result, meats take longer to cook, and they don’t have the same rich flavor that’s commonly associated with smoking. Leave the top on your smoking accessories, and only remove it when you are adding new coals.

If you have any questions regarding how an S&S Fire Pit can enhance your outdoor living space; We can help.  https://ssfirepits.com/contact/

Posted on

How to Prevent Flare-Ups When Grilling

Flare-ups are a common problem when grilling food, especially meats. Whether it’s beef, pork, lamb, chicken or fish, meat has a tendency to flare up when grilled. When this occurs, the red-hot coals turn into a tall flame, essentially charring the meat. While a single, small flare-up shouldn’t hurt your food, consistent flare ups can burn the exterior while also making it dry and less juicy. So, how can you can prevent flare-ups when grilling?

Choose Lean Meats

Normally, flare-ups are triggered by excess animal fat dripping down onto the hot coals. When the fat reaches the hot coals, it ignites; thus, causing a tall but short-lived flame known as a flare-up. You can often prevent flare-ups, however, by choosing lean meats. If you’re making hamburgers, for instance, choose ground beef that’s 90% lean and 10% fat. Or if you’re grilling steaks, stick with lean cuts like filet mignon and sirloin instead of a New York strip or ribeye.

Cut Back on the Oil

In addition to choosing lean meats, you can also reduce the risk of flare-ups when grilling by using less oil. Cooking oil is often applied either to the meat being grilled or the grill itself. When applied to the meat, it helps the seasoning stick while also creating a non-stick surface. When applied to the grill grate, it further prevents the meat from sticking. Unfortunately, however, oil has a similar effect as animal fat when exposed to hot coals. As the oil drips down onto the coals, it triggers a flare-up. This doesn’t necessarily mean that you have to stop using oil when grilling. Rather, try using less oil.

When it comes to oiling a grill grate or meat, follow the “less is more” approach. Use a brush to apply a small, thin layer of oil on the surface of your grill grate or meat. As long as there’s no excess oil that’s dripping, it shouldn’t cause a flare-up.

Trim the Fat

A third tip for preventing flare-ups is to trim fat from your meat before grilling it. Even if you choose lean cuts, it probably still has some fat — and that’s okay. Rather than allowing this fat to burn on the grill — and cause a flareup — consider trimming it. Using a sharp knife and cutting board, slice away the excess fat.

Open the Lid

Should you grill with the lid open or closed? Grilling with the lid closed creates more heat, whereas grilling with the lid open creates less heat. The latter, also known as “grill roasting,” reduces the risk of flare-ups by exposing your food to lower temperatures and less direct heat. With that said, however, grilling with the lid open doesn’t cook food as thoroughly and evenly as grilling with the lid closed, so you really need to consider what you are grilling. As long as it’s not too thick and doesn’t require significant heat, an open-lid grill should suffice.

Clean Your Grill

Don’t underestimate the importance of cleaning your grill, either before or after every use. Failure to clean your grill will result in the accumulation of fat and oil drippings, which can flare up the next time you use it. Additionally, it contributes to rust and corrosion by holding moisture. These problems are easily prevented by using a wire brush and paper towels to clean this debris. So, try to get into the habit of cleaning your grill before or every after use. Even if you only use it to grill a couple burgers, you should still clean it to prevent flare-ups and protect against rusting.

Grill Away from the Wind

Another contributing factor to flare-ups when grilling is wind. Going back to the basics of firemaking 101, wind intensifies flames by fueling it with oxygen. As wind pushes through the flame, the additional oxygen causes it to flare up. While you can’t necessarily control mother nature, you can choose an area to grill that’s protected from the wind. Before lighting your grill, find an area with a wind break. Grilling on your front porch instead of back — or vise-versa — is another idea that can protect your grill from the wind.

Don’t Extinguish with Water!

If a flare-up occurs when you are grilling, don’t attempt to extinguish it with water. Conventional wisdom may lead you to believe that spraying the grill with a water bottle with extinguish the flare-up. Like a grease fire in the kitchen, however, water is ineffective for this purpose. Furthermore, spraying your grill may cause wet ash to reach your food. If you notice your grill flaring up, open the lid and wait for it to burn out. Because flare-ups are caused by excess fat or oil, they usually burn out after just a few seconds.

If you have any questions regarding how an S&S Fire Pit can enhance your outdoor living space; We can help.  https://ssfirepits.com/contact/

Posted on

How to Stack Charcoal (the Right Way)

flame-933074_960_720Cooking with charcoal is generally preferred over wood for several reasons: it produces more heat, burns for longer, and it’s readily available.   Yet, you still can’t beat wood for flavor and wood will always be our number one choice.

But whether you’re cooking on a grill or fire pit, you’ll need to stack your charcoal in the correct manner to achieve these results. Some people assume that it’s best to lay a flat and even “layer” of charcoal, but this isn’t necessarily true. To learn more about charcoal and how to create the perfect stack for grilling, keep reading.

The Pyramid Stack

There are several ways to stack charcoal, though one of the most effective is the pyramid stack. This lives up to its namesake by mimicking the appearance of a pyramid. By creating this shape, air can flow through the charcoal more easily, intensifying the heat and overall cooking power. The pyramid stack also minimizes smoke, which is another reason why it’s preferred.

Some grills come with a special charcoal stacker that you can use to create a pyramid (or near pyramid) shape. Dump your charcoal into the stacker, light the bottom, and you’re good to go! However, you don’t need this or any other item to create a pyramid stack. Regardless of the type and shape of your charcoal, you should be able to arrange it in the shape of a pyramid.

Light It

With your charcoal stacked in a pyramid shape, it’s time to light it. Strike your match and carefully hold it in the center of the stack, under the pyramid. Assuming the charcoal is dry, it should light with little effort. Lightly blowing on the match — just enough to encourage airflow — can also help it ignite.

If it’s not lighting, try lighting a piece of newspaper and then sticking the newspaper in the charcoal stack. Alternatively, you can use a long “grill lighter,” which are designed specifically for this purpose. Once you get the bottom of your charcoal pyramid lit, the rest should ignite. You can then sit back and wait as your charcoal heats up.

Hopefully, this gives you a better understanding of how to stack charcoal for grilling. The key thing to remember is that you should create a pyramid shape for your charcoal when lighting it.

If you have any questions regarding how an S&S Fire Pit can enhance your outdoor living space; We can help.  https://ssfirepits.com/contact/

Posted on

5 Common Grilling Myths Debunked or Not?

Rib Eyes Cooking03There’s nothing that compares the delicious flavor or grilled food. Whether it’s a steak, hamburger, hot dog or practically any other food, there’s something about grilling that makes it taste better. However, there’s a lot of misinformation out there about grilling, some of which we’re going to debunk.

#1) Grilling Leaves Food Dry

One all-too-common myth is that grilling leaves food dry. When done incorrectly, it can certainly release the internal juices of pork, steaks and beef patties. However, there are ways to prevent this from happening, such as charring the outside at a high temperature or wrapping the meat in aluminum foil.

#2) Gas Grills are Better than Charcoal

On the contrary, most chefs will agree that grilled food cooked over charcoal tastes better than its gas-grilled counterpart. This is because charcoal has a unique smokey flavor that’s not achieved through gas grills. The only advantage of cooking food over a gas grill is the even distribution of heat, though you can achieve the same effects with a charcoal grill by properly stacking and igniting your charcoal prior to cooking.

#3) You Should Flip Steaks Only Once

A third myth that many people seem to believe is that you should only flip steaks once when grilling them. Some people believe that flipping steaks and other meat too many times causes the juices to release. Assuming you cook it properly and don’t pierce the meat beforehand, though, this shouldn’t happen. Flipping meat multiple times actually allows for a more even and thorough cooking, preventing certain areas from being under-cooked and/or overcooked.

#4) Should You Let Steaks ‘Sit’ Before Grilling

Do you let your steaks sit on the counter until they reach room temperature before grilling? It’s a common assumption that doing so helps them cook faster. After all, conventional wisdom should lead you to believe that a steak at room temperature will cook faster than a cold steak. With that said, allowing your steaks to sit before cooking does only one real benefit and that is it keeps the internal part of the steak from being cold.  If you like thick cut steaks rare or medium rare, which is preferred, You don’t want a nice sear with a cold inside.

#5) Salt Makes Grilled Steaks Tough

Too much of anything is bad for grilled steaks, and salt is no exception. But a small amount of salt, pepper and your preferred seasoning can vastly improve the flavor of a grilled steak while also helping you achieve a charred outside.  We say the only spices you need if stranded are salt, pepper and cayenne.

If you have any questions regarding how an S&S Fire Pit can enhance your outdoor living space; We can help.  https://ssfirepits.com/contact/

Posted on

Should I Grill with Charcoal or Hardwood?

abstract-219735_960_720If you plan on cooking food over fire, you’ll need some type of fuel. The most common fuel sources used for this purpose include hardwood and charcoal. While you can use both to cook everything from hamburgers and hot dogs to smores and vegetables we prefer real hardwood when it makes sense, but there are some stark differences between the two that you should be aware of. So, should you grill with charcoal or real hardwood?

Smoke

One of the biggest difference between charcoal and wood — when used for cooking — is the amount of smoke produced. Because wood contains more moisture than its charcoal counterpart, it naturally produces more smoke when burning. Some people actually prefer the rich smokey flavor of charcoal-grilled food, but others prefer the more traditional flavor of smoke-grilled food.

Heat

With an average energy value of 29 MJ/kg, charcoal tends to burn hotter than wood. So, if you want to cook food in the shortest amount of time possible, it’s best to stick with charcoal. With that said, insufficient airflow and/or the absence of flames may cause inefficient heat transfer; thus, making cooking difficult. You can overcome this problem by ensuring your coals are exposed to air (grills and fire pits often have vents that you can open and close).

Transport

While there are certain exceptions, charcoal is usually easier to transport than wood. If you’re going camping with some friends, you may want to carry charcoal for this reason. Of course, you can always scavenge native firewood at your campsite, but bringing charcoal ensures you have the necessary fuel supply for cooking, but once again we like the real wood when feasible.

Cost

There’s also the issue of cost. Natural, locally sourced firewood is typically free, whereas charcoal often costs up to $10 per bag.

The bottom line is that there’s no clear winner in the battle between wood and charcoal. Wood burns more slowly while releasing a distinct smokey flavor, but charcoal cooks food more quickly and easier to transport. Think about when and how you’ll be cooking and choose the fuel that’s best suited for the job.

If you have any questions regarding how an S&S Fire Pit can enhance your outdoor living space; We can help.  https://ssfirepits.com/contact/

Posted on

How to Grill a Pork Tenderloin

pork-tenderloin-74328_960_720Pork tenderloin is a juicy, delicious meal that’s surprisingly easy to make. However, there’s a wrong way and a right way to grill a pork tenderloin. Unfortunately, many home chefs approach it the wrong way, resulting in dryness while reducing its flavorful taste. If you’re struggling to grill the perfect pork tenderloin, keep reading for some helpful tips.

Preparing Your Grill

Pork tenderloin is best grilled at low heat, so you need to prepare your grill or fire pit accordingly. Rather than stacking a hot pile of coals in the center, consider placing a thinner layer of coals on the bottom-most rack. This creates more space between the coals and the pork tenderloin, allowing it to cook more slowly and at a lower heat. Alternatively, you can use wood chips, which typically produce less heat than coal.

Preparing Your Pork Tenderloin

To prepare your pork tenderloin for grilling, you’ll need to either season or marinate it. A marinade consisting of olive oil, salt, ground black pepper, garlic and oregano is an excellent combination. Combine the aforementioned ingredients in a bowl, place it in a sealed plastic bag, and add your pork. Allow it to soak for at least two hours, after which the pork should be ready to grill.

Because of its natural juiciness, though, pork tenderloin really doesn’t need much help in terms of seasoning. If you don’t want to mess with a marinade, you can sprinkle some salt and pepper on it.

After marinating and/or seasoning your pork tenderloin, you should wrap it in aluminum foil. This works to keep the juices locked into the tenderloin, preventing it from becoming dry.

Grilling Your Pork Tenderloin

Now it’s time to grill your pork tenderloin. Assuming the coals are mostly white, go ahead and place the pork (wrapped in aluminum foil) on the center of the rack. The time it takes to grill pork tenderloin varies depending on the heat of your grill and the size of the pork. With that said, a good rule of thumb is to grill it for roughly 12-14 minutes, flipping it once halfway through.

When your pork tenderloin is finished grilling, use a meat thermometer to check the temperature, which should read at least 140 degrees Fahrenheit. As long as the internal temperature reaches this amount, it’s good to go! However, you should let the pork tenderloin sit for 10 minutes so the juices will settle.

If you have any questions regarding how an S&S Fire Pit can enhance your outdoor living space; We can help.  https://ssfirepits.com/contact/

Posted on

What’s the Best Wood for Smoking Meat?

IMG_8065There’s nothing that compares to the flavor of smoked meat. Whether it’s beef, pork, chicken or fish, smoking adds a unique and downright delicious flavor that’s simply not achieved through other cooking methods. However, it’s important to choose the right wood when smoking meat, as this will affect its flavor and overall quality.

Hickory

One of the best all-around woods for smoking meats is hickory. It creates a medium-to-heavy sweet flavor with a hint of bacon. Hickory wood is great for smoking pork, ham and beef, although it’s perfectly fine to use it for other meats as well, assuming you want a sweet flavor. Hickory is inexpensive and easy to find, making it the “go to” choice for many backyard chefs. Of course, there are other woods to consider when smoking meats, so don’t limit yourself to only using hickory.

Oak

Hickory might be the most popular wood for smoking meat, but oak is a close second. A good rule of thumb is to use heavy woods like oak and hickory for heavy meats like beef and pork, while lighter woods should be used for smoking lighter meats like chicken and fish. Oak offers a similar flavor as its hickory counterpart, adding a touch of sweetness to your meat.

Maple

We can’t talk about woods to smoke meat without mentioning maple. Classified as a lighter wood, it offers a milder and more subtle flavor than its heavy wood counterpart.

Walnut

Walnut creates a strong, heavy smoking flavor. For this reason, many people prefer using it when mixed with lighter woods like maple. Walnut is great for any type of red meat, but you should follow the rule “less is more,” using a small amount of walnut when smoking meat.

Regardless of which wood you choose when smoking meat, make sure it’s dry. If it contains too much moisture, it will burn slowly and produce more soot, which can negatively impact the flavor of your meat. The bottom line is that you should allow your wood to dry out before using it to smoke meat. If the wood is store-bought, it’s probably already dry. But if you harvested it by hand, there’s a good chance that it contains a high moisture content, in which case you’ll have to dry it.

If you have any questions regarding how an S&S Fire Pit can enhance your outdoor living space; We can help.  https://ssfirepits.com/contact/

Posted on

How to Prevent Your Firewood from Rotting

axe-1705787_960_720With prices upwards of $100 to $200 for a full cord (depending on where you live), firewood isn’t cheap. If you burn it on a regular basis — for warmth, fire pits, campfires, cooking, etc — you can spend quite a fortune. But even cutting and harvesting your own firewood is no easy task, which is why it’s important to protect your firewood from rotting.

Whether you buy it or harvest it yourself, it’s frustrating when you discover a pile of rotten firewood. It doesn’t burn as well (if at all), and it’s likely harboring colonies of insects and pests.

The 4 Elements Needed for Rot

In order for wood to rot, it needs four things: moisture, wood, oxygen and warmth. Being that moisture, oxygen and warmth are all around us, it’s easy to see why rot is such a problem. There’s practically no way to prevent natural, unprocessed wood from the rotting. Thankfully, though, there are a few steps you can take to slow down the process and prolong the life of your firewood.

Store it Off the Ground

One of the most common mistakes made when storing firewood is placing it directly on the ground. Why is this a problem? Well, there’s lots of moisture sitting in the soil. And when you place firewood directly on the ground, some of that moisture seeps up and into the wood. Furthermore, storing firewood directly on the ground increases the risk of termites, which can be equally as destructive.

How do you keep firewood off the ground? There are several solutions, one of which is to build a square-shaped perimeter using some pressure-treated 4×4 lumber. Another idea is to place a wooden pallet underneath your firewood stack. As long as it’s not sitting directly on the ground, it shouldn’t absorb moisture from the soil.

Increase Airflow

You can also prolong the life of your firewood and discourage rotting by storing it in a well-ventilated area. If you have a shed, for instance, crack a window so air doesn’t become stagnant. The increased airflow helps to dry firewood, protecting it from rot.

Cover it with a Tarp

In addition to storing it off the ground and in a ventilated area, cover your firewood with a tarp. Something as simple as a cheap fiberglass tarp can make a world of difference in prolonging the life of your firewood.

If you have any questions regarding how an S&S Fire Pit can enhance your outdoor living space; We can help.  https://ssfirepits.com/contact/

Posted on

Grilling Tips: How to Tell When Steaks are Done

steak-1076665_960_7202Ask any professional chef and he or she will agree: the most important part of grilling a steak is ensuring it’s not overcooked. When cooked too long, steaks become tough and dry, making them less appealing than their juicy counterparts. This is why many steak connoisseurs prefer their meat cooked medium-rare, which has a warm red center throughout.

Unfortunately, though, knowing when a grilled steak is done isn’t always easy. You can always cut into the center with a knife to inspect the color. The problem in doing so is that it releases the juices. And if your steak isn’t cooked all the way, you’ll have to place it the cut-up meat back on the grill, further drying it out.

The OK Sign Test

One of the oldest home methods for checking to see if a grilled steak is done involves making the “OK” sign with your fingers. Go ahead and touch your index finger with your thumb. Using your other hand, press down on the area between your index finger thumb (where you made the OK sign). Take notice of how soft this part of your hand is, and compare it to your steak. If you want a rare steak, it should feel exactly like this. If you want a medium-rare steak, it should feel just bit firmer. And for a medium steak, it should feel even more firm.

The Face Test

Another method to tell when your steak is done is to compare its tenderness to that of your face. A medium-rate steak should have the tenderness of your cheeks, while a medium steak should like your chin. And a medium-well steak should like your forehead. Of course, this is just a rule of thumb, and this isn’t the most accurate method.

Thermometer

The most accurate way to tell when a steak is done cooking is to use a meat thermometer. Yes, you’ll have to pierce the steak, which releases some of its juices. But this is by far the most accurate way to tell when your steak is done cooking. Rare steaks should be roughly 125-130 degrees; medium-rare steaks should be 135-140 degrees; medium steaks should be 145-150 degrees; medium-well steaks should be 155-160 degrees; and well-done steaks should be 165+ degrees. You really can’t go wrong with using a meat thermometer.

If you have any questions regarding how an S&S Fire Pit can enhance your outdoor living space; We can help.  https://ssfirepits.com/contact/

Posted on

5 Tips for Grilling the Perfect Kebabs

shish-kebab-417994_960_720Kebabs were just meant for grilling. Whether it’s steak, chicken, shrimp, scallops, veggies or a combination of all the above, you can cook some mouthwatering kebabs using a fire pit or grill.

Coat Grill Grate in Oil

It’s a good idea to get into the habit of coating your grill grate with oil before cooking on it, especially when cooking kebabs. If you don’t, some of the food may stick, making it difficult to cook properly. Using a brush, gently apply a high-heat cooking oil, such as vegetable or canola oil, to the grill grate. Once coated, you can then add your kebabs.

Soak Wooden Skewers in Water

If you’ve ever grilled kebabs using wooden skewers, you probably know how difficult this can be. Wood isn’t exactly fireproof, so placing wooden skewers on a hot grill may cause them to burn and char. Thankfully, there’s a simple solution to prevent this: soak your skewers in either water or marinade sauce for 30-45 minutes. The moisture should prevent them from burning while your food cooks.

Separate Meat and Veggies

Another all-too-common problem faced by home chefs when grilling kebabs is cooking everything evenly. Filet medallions, for instance, will take longer to cook than most veggies. To overcome this hurdle, try separating your food on different skewers. Maybe you can place chicken on one skewer, steak on another, and your veggies on a third. Once the veggies are cooked, remove the skewer and allow the meat to cook for a few more minutes or as needed. This ensures your food is cooked evenly and without some pieces being more done than others.

Cut Consistent Sizes

It’s nearly impossible to cut your meat and veggies all the same size, but you should strive to keep them a similar shape and size at the very least. If one medallion is twice the size of another medallion, it will take longer to cook. Maintaining consistent sizes with your kebabs, however, promotes thorough and even cooking.

Season Beforehand

Well-seasoned meat and veggies can make a world of difference in the quality of your kebabs. But it’s next-to-impossible to season all of your food if it’s already on a skewer. This is why it’s a better to season your food before placing it on skewers. In fact, you can place your meat and veggies in a couple dishes (don’t mix the two), followed by coating them in your preferred seasoning. Shake them around a bit and you’re good to go!

If you have any questions regarding how an S&S Fire Pit can enhance your outdoor living space; We can help.  https://ssfirepits.com/contact/

Posted on

How to Smoke Meats Like a Professional Chef

barbecue-820010_960_720You’ve seen all of the professional chefs doing it on TV, and now you want to take a shot at smoking meats? There’s no denying the fact that smoked meats have a delicious flavor and super-tender texture that simply can’t be achieved through traditional cooking techniques like grilling or baking. The Native Americans smoked meats centuries ago to preserve their food. But the good news is that any amateur home chef can smoke delicious meats with little effort.

Do I Need a Special Smoker?

Absolutely not! There are dozens of “smokers” available for sale, many of serve their intended purpose just fine. But the truth is that you can smoke meats using a traditional grill or fire pit just as easily. So, save your money and stick with your existing grill or fire pit.

Smoking vs Grilling

Before we reveal the steps to smoking meats, let’s first discuss the differences between it and grilling. While both smoking and grilling are used to cook meats (and other food for that matter), there are a few key differences between the two. Grilling, for instance, typically involves high heat and short cook times, whereas smoking involves low heat and longer cook times. Because of this, smoking requires some type of enclosure that prevents the smoke from escaping.

How to Smoke Using a Grill or Fire Pit

There’s no single “right” way to smoke meats, so feel free to experiment with your own techniques. With that said, it’s usually a good idea to begin by stacking your charcoal off to one side of the grill or fire pit, and then placing a drip pan on the opposite side. Now go ahead and light the coals (don’t use lighter fluid, FYI). Once the coals are nice and hot, pour 1 cup of water into the pan. This reduces the heat, allowing the meats to smoke rather than grill.

Next, place your meats on the side of the grill grate covering the water-filled pan, at which point you can close the grill or use a lid for your fire pit. If there’s a vent, open is just slightly to allow air to flow through the grill/fire pit. Depending on the temperature of the fire and how much meat you are smoking, you can expect it to take several hours at minimum. A good way to tell when your meat has finished smoking, however, is to try and pull it off the bone. Good smoked meat should literally fall off the bone.

If you have any questions regarding how an S&S Fire Pit can enhance your outdoor living space; We can help.  https://ssfirepits.com/contact/